2009 CHEVROLET IMPALA rear view mirror
[x] Cancel search: rear view mirrorPage 1 of 406

Seats and Restraint System............................. 1-1
Head Restraints
......................................... 1-2
Front Seats
............................................... 1-4
Rear Seats
..............................................1-10
Safety Belts
.............................................1-13
Child Restraints
.......................................1-34
Airbag System
.........................................1-57
Restraint System Check
............................1-73
Features and Controls..................................... 2-1
Keys
........................................................ 2-3
Doors and Locks
....................................... 2-9
Windows
.................................................2-14
Theft-Deterrent Systems
............................2-16
Starting and Operating Your Vehicle
...........2-19
Mirrors
....................................................2-32
OnStar
®System
......................................2-33
Universal Home Remote System
................2-36
Storage Areas
.........................................2-43
Sunroof
..................................................2-44
Instrument Panel............................................. 3-1
Instrument Panel Overview
.......................... 3-4
Climate Controls
......................................3-20
Warning Lights, Gages, and Indicators
........3-24Driver Information Center (DIC)
..................3-42
Audio System(s)
.......................................3-63
Driving Your Vehicle....................................... 4-1
Your Driving, the Road, and the Vehicle
....... 4-2
Towing
...................................................4-26
Service and Appearance Care.......................... 5-1
Service
..................................................... 5-3
Fuel
......................................................... 5-5
Checking Things Under the Hood
...............5-12
Headlamp Aiming
.....................................5-45
Bulb Replacement
....................................5-45
Windshield Wiper Blade Replacement
.........5-51
Tires
......................................................5-53
Appearance Care
.....................................5-89
Vehicle Identi�cation
.................................5-96
Electrical System
......................................5-96
Capacities and Speci�cations
...................5-101
Maintenance Schedule..................................... 6-1
Maintenance Schedule
................................ 6-2
Customer Assistance Information.................... 7-1
Customer Assistance and Information
........... 7-2
Reporting Safety Defects
...........................7-16
Vehicle Data Recording and Privacy
...........7-18
Index................................................................ 1
2009 Chevrolet Impala Owner ManualM
Page 79 of 406

Keys...............................................................2-3
Remote Keyless Entry (RKE) System................2-4
Remote Keyless Entry (RKE) System
Operation...................................................2-5
Remote Vehicle Start......................................2-7
Doors and Locks.............................................2-9
Door Locks....................................................2-9
Power Door Locks........................................2-10
Delayed Locking...........................................2-10
Automatic Door Lock.....................................2-10
Programmable Automatic Door Unlock.............2-11
Rear Door Security Locks..............................2-11
Lockout Protection........................................2-12
Trunk..........................................................2-12
Windows........................................................2-14
Power Windows............................................2-15
Sun Visors...................................................2-16
Theft-Deterrent Systems..................................2-16
Content Theft-Deterrent.................................2-16
PASS-Key
®III+ Electronic Immobilizer.............2-17
PASS-Key®III+ Electronic Immobilizer
Operation.................................................2-18Starting and Operating Your Vehicle................2-19
New Vehicle Break-In....................................2-19
Ignition Positions..........................................2-20
Retained Accessory Power (RAP)...................2-21
Starting the Engine.......................................2-21
Engine Coolant Heater..................................2-22
Active Fuel Management™ (5.3L V8 Engine). . . .2-23
Automatic Transmission Operation...................2-24
Parking Brake..............................................2-26
Shifting Into Park..........................................2-27
Shifting Out of Park......................................2-29
Parking Over Things That Burn.......................2-30
Engine Exhaust............................................2-30
Running the Vehicle While Parked..................2-31
Mirrors...........................................................2-32
Manual Rearview Mirror.................................2-32
Automatic Dimming Rearview Mirror................2-32
Outside Power Mirrors...................................2-32
Outside Convex Mirror...................................2-33
Outside Heated Mirrors..................................2-33
OnStar®System.............................................2-33
Section 2 Features and Controls
2-1
Page 110 of 406
Mirrors
Manual Rearview Mirror
Hold the inside rearview mirror in the center to move it
for a clearer view behind your vehicle. Adjust the
mirror to avoid glare from the headlamps behind you.
Pull the lever, located at the bottom of the mirror
for nighttime use. Return the lever to its original position
for the day position.
If the vehicle has map lamps, press the buttons located
at the bottom of the mirror to turn them on or off.
Vehicles with OnStar
®have three additional control
buttons located at the bottom of the mirror. See
your dealer/retailer for more information about OnStar
®
and how to subscribe to it. SeeOnStar®System on
page 2-33for more information about the services
OnStar
®provides.
Automatic Dimming Rearview Mirror
The vehicle may have an automatic dimming rearview
mirror with the OnStar®System.
Press the button located below the mirror, on the far
left, for up to three seconds to turn the dimming feature
off and on.There are two map lamps located on the bottom of the
mirror. Press the button next to each lamp to turn it
on and off.
There are also OnStar
®buttons located at the bottom of
the mirror. See your dealer/retailer for more information
about OnStar
®and how to subscribe to it. See
OnStar®System on page 2-33for more information
about the service OnStar®provides.
Outside Power Mirrors
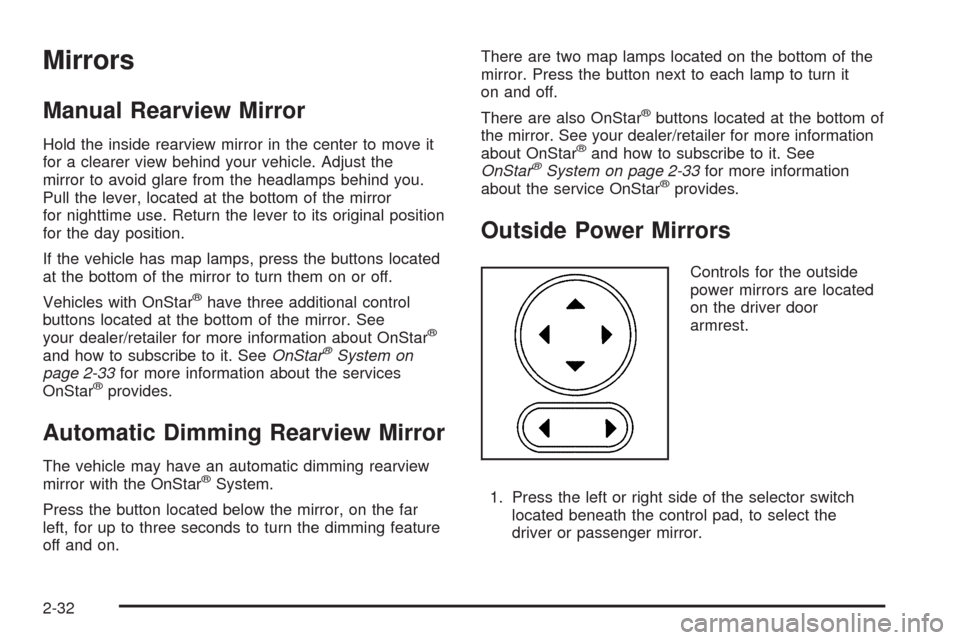
Controls for the outside
power mirrors are located
on the driver door
armrest.
1. Press the left or right side of the selector switch
located beneath the control pad, to select the
driver or passenger mirror.
2-32
Page 111 of 406
2. Press one of the four buttons located on the control
pad to move the mirror to the desired direction.
3. Adjust each outside mirror so that a little of the
vehicle and the area behind it can be seen.
Keep the selector switch in the center position when not
adjusting either outside mirror.
Outside Convex Mirror
{CAUTION:
A convex mirror can make things (like other
vehicles) look farther away than they really are. If
you cut too sharply into the right lane, you could hit
a vehicle on the right. Check the inside mirror or
glance over your shoulder before changing lanes.
The passenger side mirror is convex shaped. A convex
mirror’s surface is curved so more can be seen from
the driver seat.
Outside Heated Mirrors
For vehicles with heated mirrors:
=(Rear Window Defogger):Press to heat the
outside rearview mirrors. See “Rear Window Defogger”
underClimate Control System on page 3-20for more
information.
OnStar®System
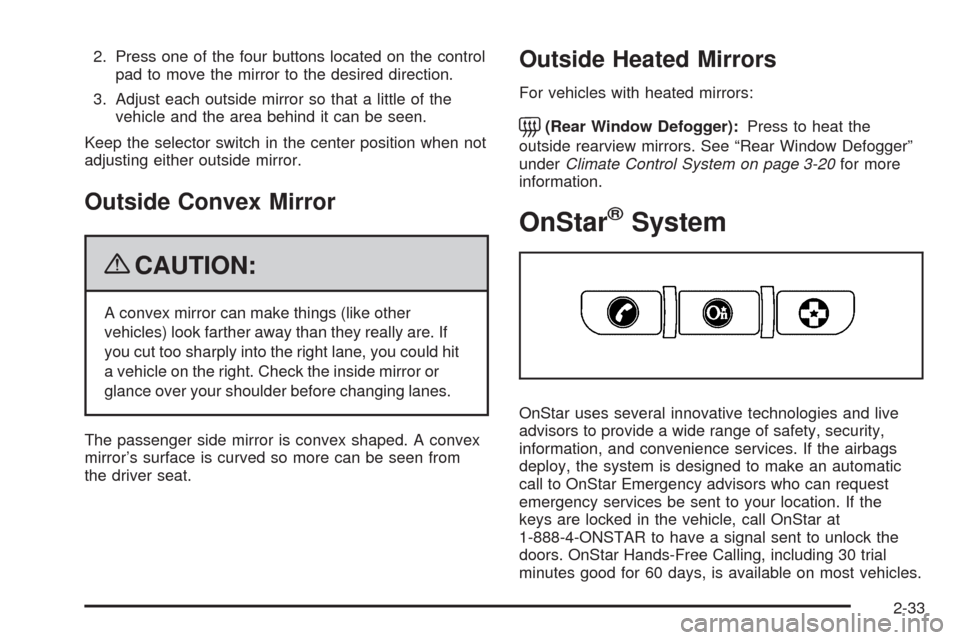
OnStar uses several innovative technologies and live
advisors to provide a wide range of safety, security,
information, and convenience services. If the airbags
deploy, the system is designed to make an automatic
call to OnStar Emergency advisors who can request
emergency services be sent to your location. If the
keys are locked in the vehicle, call OnStar at
1-888-4-ONSTAR to have a signal sent to unlock the
doors. OnStar Hands-Free Calling, including 30 trial
minutes good for 60 days, is available on most vehicles.
2-33
Page 121 of 406
Storage Areas
Glove Box
Lift up on the glove box lever to open it.
Cupholders
Cupholders may be built into the front center console,
front portion of the front center seat, and rear armrest of
the vehicle.
Sunglasses Storage Compartment
A storage compartment for sunglasses may be located
above the rearview mirror. Push on cover to open
the compartment.
Center Console Storage
For vehicles with a front center console storage area,
open it by pulling up on the latch located in the front of
the console lid.
Rear Storage Area
For vehicles with a split folding rear seat, there are two
storage areas underneath. Pull the tab(s) located by
the passenger side safety belt buckle and the driver side
rear seat to access the storage areas. SeeSplit
Folding Rear Seat on page 1-10for more information.
Rear Seat Armrest
For vehicles with a rear seat armrest, pull the tab on the
armrest forward to access it.
Convenience Net
Use the convenience net, located in the rear, to store
small loads as far forward as possible. The net
should not be used to store heavy loads.
2-43
Page 137 of 406
Instrument Panel Brightness
D(Instrument Panel Brightness):The knob with
this symbol on it is located next to the exterior lamps
control to the left of the steering wheel. Push the knob
in all the way until it extends out and then turn the
knob clockwise or counterclockwise to brighten or
dim the lights. Push the knob back in when �nished.
Courtesy Lamps
When a door is opened, the courtesy lamps
automatically come on. They make it easy for you
to enter and leave your vehicle. You can also manually
turn these lamps on by fully turning the instrument panel
brightness control clockwise.
The reading lamps, located on the rearview mirror,
can be turned on or off independent of the automatic
courtesy lamps, when the doors are closed.
Dome Lamp
The dome lamp comes on when a door is opened.
This lamp can also be turned on by turning the
instrument panel brightness control clockwise.
Entry Lighting
For vehicles with courtesy lamps, they come on and
stay on for a set time whenever the unlock symbol
is pressed on the Remote Keyless Entry (RKE)
transmitter, if the vehicle has one.
If a door is opened, the lamps stay on while it is open
and then turn off automatically about 20 seconds after
the door is closed. If the unlock symbol is pressed and
no door is opened, the lamps turn off after about
20 seconds.
Entry lighting includes a feature called theater dimming.
With theater dimming, the lamps do not turn off at
the end of the delay time. Instead, they slowly dim and
then go out. The delay time is canceled if the ignition
key is turned to ON/RUN or the power door lock switch
is pressed. The lamps will dim right away.
When the ignition is on, illuminated entry is inactive,
which means the courtesy lamps will not come on unless
a door is opened.
3-15
Page 139 of 406

Reading Lamps
The vehicle has reading lamps that also act as the
dome lamp. Press the button to turn them on and off.
Mirror Reading Lamps
The vehicle has reading lamps on the rearview mirror.
Push the button to turn the reading lamps on and off.
Electric Power Management
The vehicle has Electric Power Management (EPM) that
estimates the battery’s temperature and state of charge.
It then adjusts the voltage for best performance and
extended life of the battery.
When the battery’s state of charge is low, the voltage
is raised slightly to quickly bring the charge back up.
When the state of charge is high, the voltage is lowered
slightly to prevent overcharging. If the vehicle has a
voltmeter gage or a voltage display on the Driver
Information Center (DIC), you may see the voltage
move up or down. This is normal. If there is a problem,
an alert will be displayed.The battery can be discharged at idle if the electrical
loads are very high. This is true for all vehicles.
This is because the generator (alternator) may not
be spinning fast enough at idle to produce all the
power that is needed for very high electrical loads.
A high electrical load occurs when several of the
following are on, such as: headlamps, high beams,
fog lamps, rear window defogger, climate control fan at
high speed, heated seats, engine cooling fans, trailer
loads, and loads plugged into accessory power outlets.
EPM works to prevent excessive discharge of the
battery. It does this by balancing the generator’s output
and the vehicle’s electrical needs. It can increase
engine idle speed to generate more power, whenever
needed. It can temporarily reduce the power demands
of some accessories.
Normally, these actions occur in steps or levels, without
being noticeable. In rare cases at the highest levels of
corrective action, this action may be noticeable to the
driver. If so, a Driver Information Center (DIC) message
might be displayed, such as BATTERY SAVER ACTIVE,
BATTERY VOLTAGE LOW, or LOW BATTERY. If this
message is displayed, it is recommended that the driver
reduce the electrical loads as much as possible. SeeDIC
Warnings and Messages on page 3-49.
3-17
Page 144 of 406
Using these settings together for long periods of time
may cause the air inside the vehicle to become too dry.
To prevent this from happening, after the air inside
the vehicle has cooled, turn the recirculation mode off.
The air conditioning system removes moisture from
the air, so a small amount of water may drip under
the vehicle while idling or after turning off the engine.
This is normal.
:(Outside Air):Press to turn on outside air.
An indicator light comes on to show that it is on.
Outside air will circulate throughout the vehicle.
?(Recirculation):Press to turn on the recirculation
mode. An indicator light comes on to show that it is on.
This mode helps to quickly heat or cool the air inside the
vehicle once the temperature inside the vehicle is equal
to or better than the outside temperature. It can be used
to prevent outside air and odors from entering the vehicle.
The recirculation mode is not available in outside air,
�oor, defog or defrost modes. If the button is selected
while in these modes, the indicator �ashes three times.
Rear Window Defogger
The rear window defogger uses a warming grid to
remove fog from the rear window.
<(Rear Window Defogger):The rear window
defogger turns off automatically after it has been
activated for 10 minutes. It can be turned off manually,
by pressing the button again or by turning the ignition
to the LOCK/OFF position. The rear window defogger
can be turned on again for additional window clearing.
The length of defogger operation will increase if the
vehicle is being driven.
For vehicles with heated outside rearview mirrors, the
mirrors heat to help clear fog or frost from the surface
of the mirror when the rear window defog button is
pressed. SeeOutside Power Mirrors on page 2-32.
Do not drive the vehicle until all the windows are clear.
Notice:Do not use anything sharp on the inside
of the rear window. If you do, you could cut or
damage the warming grid, and the repairs would
not be covered by the vehicle warranty. Do not attach
a temporary vehicle license, tape, a decal or anything
similar to the defogger grid.
3-22