2009 CHEVROLET HHR towing
[x] Cancel search: towingPage 1 of 450

Seats and Restraint System............................. 1-1
Front Seats
............................................... 1-2
Rear Seats
..............................................1-10
Safety Belts
.............................................1-13
Child Restraints
.......................................1-32
Airbag System
.........................................1-58
Restraint System Check
............................1-79
Features and Controls..................................... 2-1
Keys
........................................................ 2-3
Doors and Locks
....................................... 2-9
Windows
.................................................2-16
Theft-Deterrent Systems
............................2-18
Starting and Operating Your Vehicle
...........2-22
Mirrors
....................................................2-39
Object Detection Systems
..........................2-44
OnStar
®System
......................................2-47
Storage Areas
.........................................2-51
Sunroof
..................................................2-56
Instrument Panel............................................. 3-1
Instrument Panel Overview
.......................... 3-4
Climate Controls
......................................3-21
Warning Lights, Gages, and Indicators
........3-26
Driver Information Center (DIC)
..................3-48
Audio System(s)
.......................................3-61Driving Your Vehicle....................................... 4-1
Your Driving, the Road, and the Vehicle
....... 4-2
Towing
...................................................4-31
Service and Appearance Care.......................... 5-1
Service
..................................................... 5-3
Fuel
......................................................... 5-5
Checking Things Under the Hood
...............5-12
Headlamp Aiming
.....................................5-44
Bulb Replacement
....................................5-47
Windshield Wiper Blade Replacement
.........5-52
Tires
......................................................5-53
Appearance Care
.....................................5-99
Vehicle Identi�cation
...............................5-107
Electrical System
....................................5-108
Capacities and Speci�cations
...................5-114
Maintenance Schedule..................................... 6-1
Maintenance Schedule
................................ 6-2
Customer Assistance Information.................... 7-1
Customer Assistance and Information
........... 7-2
Reporting Safety Defects
...........................7-16
Vehicle Data Recording and Privacy
...........7-18
Index................................................................ 1
2009 Chevrolet HHR Owner ManualM
Page 75 of 450
Additional Factors Affecting System
Operation
Safety belts help keep the passenger in position on the
seat during vehicle maneuvers and braking, which helps
the passenger sensing system maintain the passenger
airbag status. See “Safety Belts” and “Child Restraints” in
the Index for additional information about the importance
of proper restraint use.
A thick layer of additional material, such as a blanket or
cushion, or aftermarket equipment such as seat covers,
seat heaters, and seat massagers can affect how well the
passenger sensing system operates. We recommend
that you not use seat covers or other aftermarket
equipment except when approved by GM for your speci�c
vehicle. SeeAdding Equipment to Your Airbag-Equipped
Vehicle on page 1-78for more information about
modi�cations that can affect how the system operates.
A wet seat can affect the performance of the passenger
sensing system. Here is how:
The passenger sensing system may turn off the
passenger airbag when liquid is soaked into the seat.
If this happens, the off indicator will be lit, and the
airbag readiness light on the instrument panel will
also be lit.
Liquid pooled on the seat that has not soaked in
may make it more likely that the passenger sensing
system will enable (turn on) the passenger airbag
while a child restraint or child occupant is on the seat.
If the passenger airbag is turned on, the on indicator
will be lit.
If the passenger seat gets wet, dry the seat immediately.
If the airbag readiness light is lit, do not install a child
restraint or allow anyone to occupy the seat. SeeAirbag
Readiness Light on page 3-30for important safety
information.
The on indicator may be lit if an object, such as a
briefcase, handbag, grocery bag, laptop or other
electronic device, is put on an unoccupied seat. If this
is not desired, remove the object from the seat.
{CAUTION:
Stowing of articles under the passenger seat or
between the passenger seat cushion and seatback
may interfere with the proper operation of the
passenger sensing system.
1-71
Page 81 of 450
Additional Factors Affecting System
Operation
Safety belts help keep the passenger in position on the
seat during vehicle maneuvers and braking, which helps
the passenger sensing system maintain the passenger
airbag status. See “Safety Belts” and “Child Restraints” in
the Index for additional information about the importance
of proper restraint use.
A thick layer of additional material, such as a blanket or
cushion, or aftermarket equipment such as seat covers,
seat heaters, and seat massagers can affect how well the
passenger sensing system operates. We recommend
that you not use seat covers or other aftermarket
equipment except when approved by GM for your speci�c
vehicle. SeeAdding Equipment to Your Airbag-Equipped
Vehicle on page 1-78for more information about
modi�cations that can affect how the system operates.
{CAUTION:
Stowing of articles under the passenger seat or
between the passenger seat cushion and seatback
may interfere with the proper operation of the
passenger sensing system.
Servicing Your Airbag-Equipped
Vehicle
Airbags affect how the vehicle should be serviced. There
are parts of the airbag system in several places around
the vehicle. Your dealer/retailer and the service manual
have information about servicing the vehicle and the
airbag system. To purchase a service manual, see
Service Publications Ordering Information on page 7-17.
{CAUTION:
For up to 10 seconds after the ignition is turned off
and the battery is disconnected, an airbag can still
in�ate during improper service. You can be injured
if you are close to an airbag when it in�ates. Avoid
yellow connectors. They are probably part of the
airbag system. Be sure to follow proper service
procedures, and make sure the person performing
work for you is quali�ed to do so.
1-77
Page 106 of 450
To program the new key:
1. Verify that the new key has a
1stamped on it.
2. Insert the already programmed key in the ignition
and start the engine. If the engine will not start,
see your dealer/retailer for service.
3. After the engine has started, turn the key to
LOCK/OFF, and remove the key.
4. Insert the key to be programmed and turn it to the
ON/RUN position within �ve seconds of the original
key being turned to the LOCK/OFF position.
The security light will turn off once the key has
been programmed.
5. Repeat Steps 1 through 4 if additional keys are to
be programmed.
If you are ever driving and the security light comes on
and stays on, you may be able to restart your engine if
you turn it off. Your PASS-Key
®III+ system, however,
is not working properly and must be serviced by your
dealer/retailer. Your vehicle is not protected by the
PASS-Key
®III+ system at this time.
If you lose or damage your PASS-Key
®III+ key,
see your dealer/retailer or a locksmith who can
service PASS-Key
®III+ to have a new key made.
Do not leave the key or device that disarms or
deactivates the theft deterrent system in the vehicle.
Starting and Operating Your
Vehicle
New Vehicle Break-In
Notice:The vehicle does not need an elaborate
break-in. But it will perform better in the long run if
you follow these guidelines:
Do not drive at any one constant speed, fast or
slow, for the �rst 500 miles (805 km). Do not
make full-throttle starts. Avoid downshifting to
brake or slow the vehicle.
Avoid making hard stops for the �rst 200 miles
(322 km) or so. During this time the new brake
linings are not yet broken in. Hard stops with new
linings can mean premature wear and earlier
replacement. Follow this breaking-in guideline
every time you get new brake linings.
Do not tow a trailer during break-in. SeeTowing a
Trailer (Automatic Transmission) on page 4-34
orTowing a Trailer (Manual Transmission) on
page 4-41for the trailer towing capabilities of
your vehicle and more information.
Following break-in, engine speed and load can be
gradually increased.
2-22
Page 112 of 450
Automatic Transmission Operation
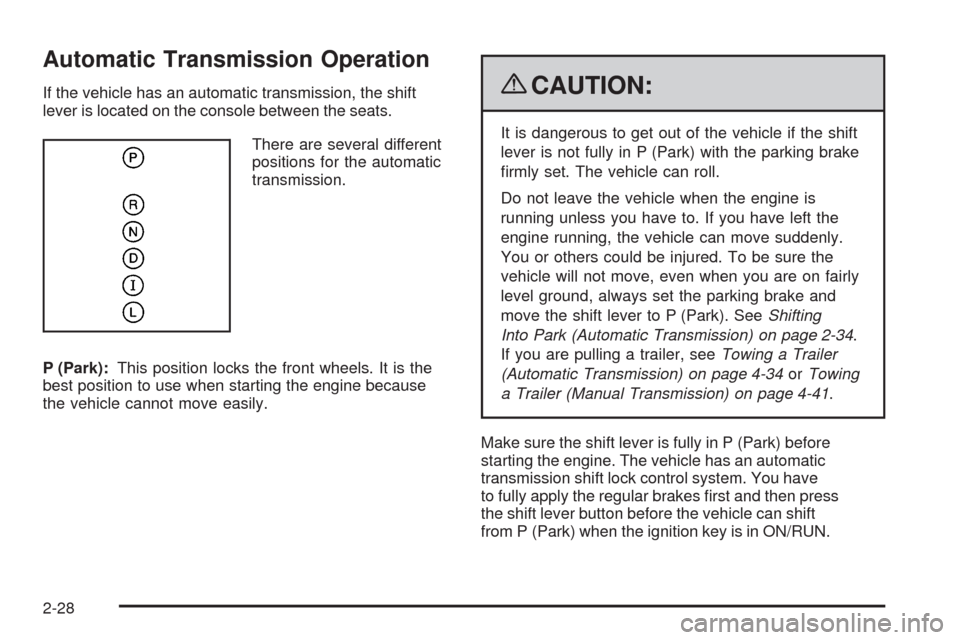
If the vehicle has an automatic transmission, the shift
lever is located on the console between the seats.
There are several different
positions for the automatic
transmission.
P (Park):This position locks the front wheels. It is the
best position to use when starting the engine because
the vehicle cannot move easily.{CAUTION:
It is dangerous to get out of the vehicle if the shift
lever is not fully in P (Park) with the parking brake
�rmly set. The vehicle can roll.
Do not leave the vehicle when the engine is
running unless you have to. If you have left the
engine running, the vehicle can move suddenly.
You or others could be injured. To be sure the
vehicle will not move, even when you are on fairly
level ground, always set the parking brake and
move the shift lever to P (Park). SeeShifting
Into Park (Automatic Transmission) on page 2-34.
If you are pulling a trailer, seeTowing a Trailer
(Automatic Transmission) on page 4-34orTowing
a Trailer (Manual Transmission) on page 4-41.
Make sure the shift lever is fully in P (Park) before
starting the engine. The vehicle has an automatic
transmission shift lock control system. You have
to fully apply the regular brakes �rst and then press
the shift lever button before the vehicle can shift
from P (Park) when the ignition key is in ON/RUN.
2-28
Page 114 of 450
Downshifting the transmission in slippery road conditions
could result in skidding, see “Skidding” underLoss of
Control on page 4-16.
I (Intermediate):This position is also used for normal
driving. However, it reduces vehicle speed without
using the brakes for slight downgrades where the vehicle
would otherwise accelerate due to steepness of grade.
If constant upshifting or downshifting occurs while
driving up steep hills, this position can be used to
prevent repetitive types of shifts. You might choose
I (Intermediate) instead of D (Drive) when driving on hilly,
winding roads and when towing a trailer, so that there is
less shifting between gears.
PERFORMANCE SHIFTING:If the vehicle has this
feature, it can detect a change in driving patterns
while in the Intermediate position. If you make an
aggressive driving maneuver, the vehicle’s transmission
automatically shifts to the lowest possible gear to
maximize vehicle performance. The vehicle will
automatically return to normal operation when you
return to normal driving patterns.
L (Low):This position reduces vehicle speed more than
I (Intermediate) without actually using the brakes. You
can use it on very steep hills, or in deep snow or mud. If
the shift lever is put in L (Low), the transmission will not
shift into L (Low) until the vehicle is going slowly enough.Notice:Spinning the tires or holding the vehicle in
one place on a hill using only the accelerator pedal
may damage the transmission. The repair will not be
covered by the vehicle warranty. If you are stuck, do
not spin the tires. When stopping on a hill, use the
brakes to hold the vehicle in place.
Manual Transmission Operation
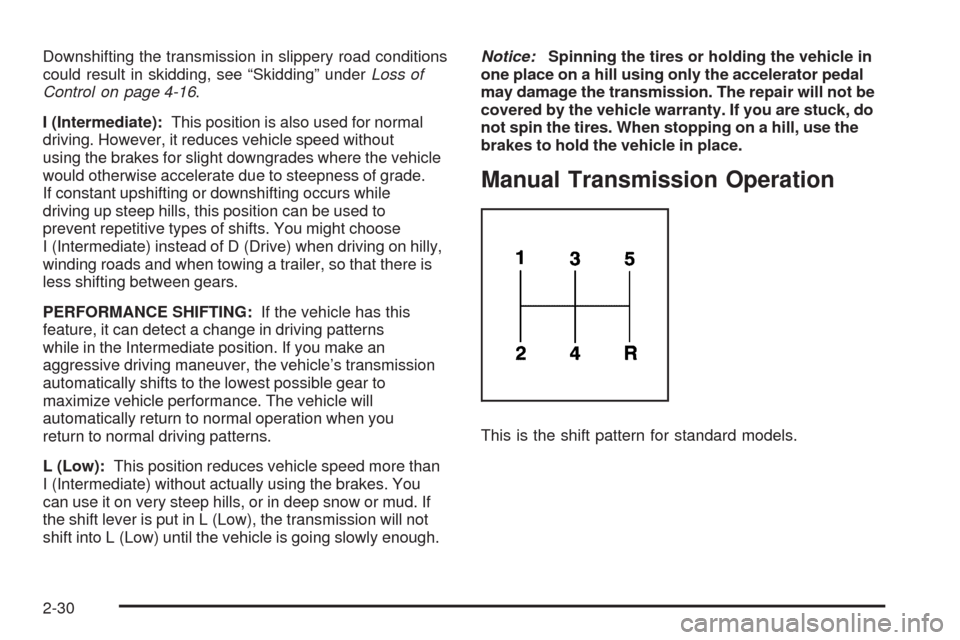
This is the shift pattern for standard models.
2-30
Page 118 of 450
Shifting Into Park (Automatic
Transmission)
{CAUTION:
It can be dangerous to get out of the vehicle if the
shift lever is not fully in P (Park) with the parking
brake �rmly set. The vehicle can roll. If you have left
the engine running, the vehicle can move suddenly.
You or others could be injured. To be sure the
vehicle will not move, even when you are on fairly
level ground, use the steps that follow. If you are
pulling a trailer, seeTowing a Trailer (Automatic
Transmission) on page 4-34orTowing a Trailer
(Manual Transmission) on page 4-41.
To shift into P (Park):
1. Hold the brake pedal down and set the parking
brake. SeeParking Brake on page 2-33for more
information.
2. Move the shift lever into P (Park) by holding in the
button on the shift lever and pushing the lever all
the way toward the front of the vehicle.
3. Turn the ignition key to LOCK/OFF.
Leaving the Vehicle With the Engine
Running (Automatic Transmission)
{CAUTION:
It can be dangerous to leave the vehicle with the
engine running. The vehicle could move suddenly
if the shift lever is not fully in P (Park) with the
parking brake �rmly set. And, if you leave the
vehicle with the engine running, it could overheat
and even catch �re. You or others could be
injured. Do not leave the vehicle with the engine
running.
If you have to leave an automatic transmission vehicle
with the engine running, be sure the vehicle is in
P (Park) and the parking brake is �rmly set before you
leave it. After you have moved the shift lever into
P (Park), hold the brake pedal down. Then, see if you
can move the shift lever away from P (Park) without �rst
pushing the button. If you can, it means that the shift
lever was not fully locked into P (Park).
2-34
Page 120 of 450
If the vehicle has an uncharged battery or a battery with
low voltage, try charging or jump starting the battery.
SeeJump Starting on page 5-39for more information.
To shift out of P (Park):
1. Apply the brake pedal.
2. Then press the shift lever button.
3. Move the shift lever to the desired position.
If you still are unable to shift out of P (Park):
1. Fully release the shift lever button.
2. While holding down the brake pedal, press the shift
lever button again.
3. Move the shift lever to the desired position.
If you still cannot move the shift lever from P (Park),
consult your dealer/retailer or a professional towing
service.Parking the Vehicle
(Manual Transmission)
Before leaving the vehicle, fully press the clutch pedal
down, move the shift lever into R (Reverse), and �rmly
apply the parking brake. Once the shift lever has been
placed in R (Reverse) with the clutch pedal pressed
down, the ignition key can be turned to LOCK/OFF, then
remove the key and release the clutch pedal. SeeManual
Transmission Operation on page 2-30.
Parking Over Things That Burn
{CAUTION:
Things that can burn could touch hot exhaust
parts under the vehicle and ignite. Do not park
over papers, leaves, dry grass, or other things that
can burn.
2-36