2009 CHEVROLET EXPRESS CARGO VAN AUX
[x] Cancel search: AUXPage 116 of 408

Mirrors
Manual Rearview Mirror
Hold the inside rearview mirror in the center to move it for
a clearer view behind your vehicle. Adjust the mirror to
avoid glare from the headlamps behind. Push the tab
forward for daytime use and pull it for nighttime use.
If you have a cargo van without the rear door glass, the
vehicle may not have an inside rearview mirror.
Outside Manual Mirrors
Adjust the mirrors by pressing the mirror up and down
and left and right so you can see a little of the side of your
vehicle, and have a clear view of objects behind you.
The mirrors can be manually folded in or out.
On the lower portion of each mirror is an auxiliary
convex mirror. A convex mirror’s surface is curved so
you can see more from the driver seat. The auxiliary
convex mirrors can be adjusted manually by pressing
the mirror.
Outside Towing Mirrors
Vehicles with towing
mirrors can be adjusted
manually for a clear view of
the objects behind you.
On the lower portion of each mirror there is an auxiliary
convex mirror that can be adjusted manually to
provide an extended field of view.
The mirrors can be manually folded in or out.
2-32
Page 117 of 408
Outside Power Mirrors
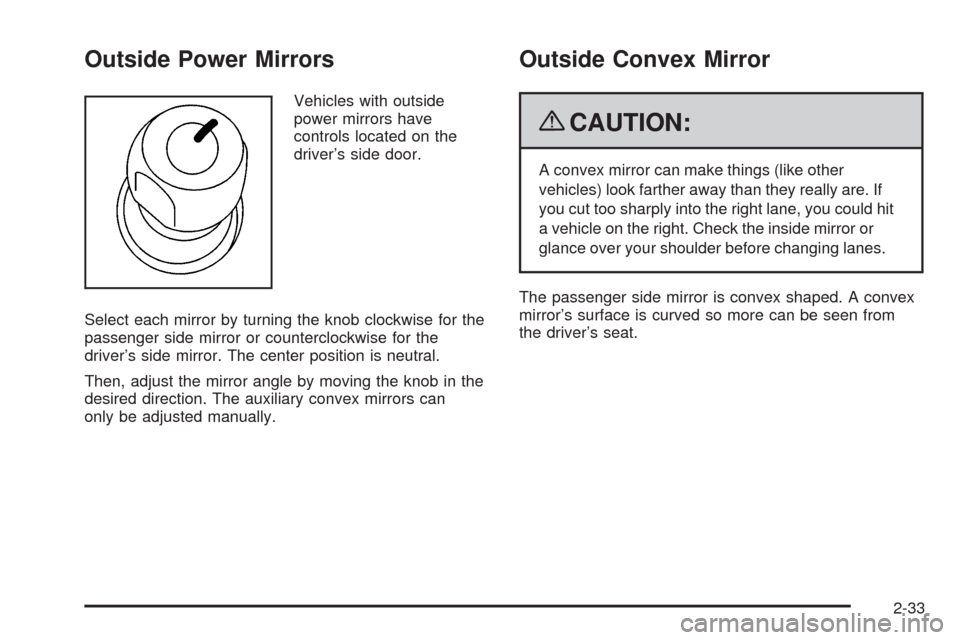
Vehicles with outside
power mirrors have
controls located on the
driver’s side door.
Select each mirror by turning the knob clockwise for the
passenger side mirror or counterclockwise for the
driver’s side mirror. The center position is neutral.
Then, adjust the mirror angle by moving the knob in the
desired direction. The auxiliary convex mirrors can
only be adjusted manually.
Outside Convex Mirror
{CAUTION:
A convex mirror can make things (like other
vehicles) look farther away than they really are. If
you cut too sharply into the right lane, you could hit
a vehicle on the right. Check the inside mirror or
glance over your shoulder before changing lanes.
The passenger side mirror is convex shaped. A convex
mirror’s surface is curved so more can be seen from
the driver’s seat.
2-33
Page 136 of 408
Accessory Power Outlet(s)
The accessory power outlets can be used to connect
auxiliary electrical equipment, such as a cellular phone.
The vehicle may have two accessory power outlets
located on the instrument panel.
To use the accessory power outlet lift the cover. The
spring cap cover closes by itself when the outlet is empty.
Certain power accessory plugs may not be compatible
to the accessory power outlet and could result in
blown vehicle or adapter fuses. If you experience
a problem, see your dealer/retailer for additional
information on the accessory power plugs.
Notice:Adding any electrical equipment to the
vehicle can damage it or keep other components
from working as they should. The repairs would
not be covered by the vehicle warranty. Do not use
equipment exceeding maximum amperage rating of
20 amperes. Check with your dealer/retailer before
adding electrical equipment.
When adding electrical equipment, be sure to follow
the proper installation instructions included with the
equipment.
Notice:Improper use of the power outlet can cause
damage not covered by the warranty. Do not hang
any type of accessory or accessory bracket from the
plug because the power outlets are designed for
accessory power plugs only.
Ashtray(s) and Cigarette Lighter
If your vehicle has this feature it is located in the center
console or on the instrument panel. Pull up on the
ashtray door to open it if it is in the console or pull
the door open it if it is on the instrument panel.
Notice:If papers, pins, or other �ammable items
are put in the ashtray, hot cigarettes or other
smoking materials could ignite them and possibly
damage the vehicle. Never put �ammable items
in the ashtray.
To remove the ashtray, pull it out from the console
or from the slide out door. To reinstall the ashtray,
slide it back to the original position.
To use the cigarette lighter, if the vehicle has one, push
it in all the way, and let go. When it is ready for use,
it will pop back out by itself.
Do not use the lighter to plug in accessory devices.
Use the power outlets provided.
Notice:Holding a cigarette lighter in while it is
heating does not let the lighter back away from
the heating element when it is hot. Damage from
overheating can occur to the lighter or heating
element, or a fuse could be blown. Do not hold
a cigarette lighter in while it is heating.
3-18
Page 139 of 408
Outlet Adjustment
Use the outlets located near the center and on the sides
of the instrument panel to change the direction of airflow.
Operation Tips
•Clear away any ice, snow or leaves from the air
inlets at the base of the windshield that may
block the flow of air into your vehicle.
•Use of non-GM approved hood deflectors may
adversely affect the performance of the system.
•Keep the path under the front seats clear of objects
to help circulate the air inside of your vehicle more
effectively.
Rear Heating System
For vehicles with a rear heating system, it lets you
adjust the amount of air flowing into the rear of the
vehicle, from the front-seating area. This feature works
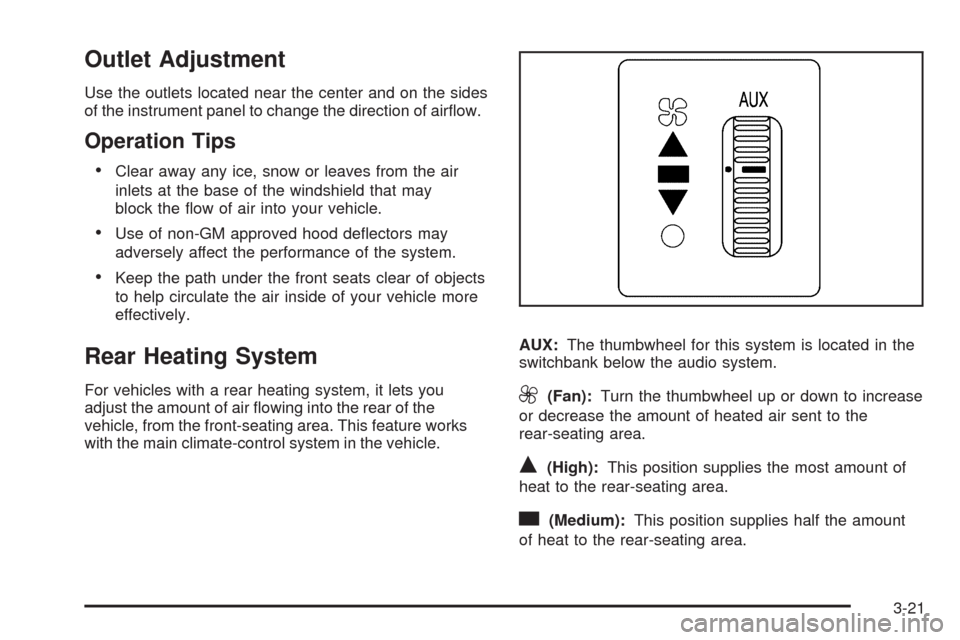
with the main climate-control system in the vehicle.AUX:The thumbwheel for this system is located in the
switchbank below the audio system.9(Fan):Turn the thumbwheel up or down to increase
or decrease the amount of heated air sent to the
rear-seating area.
Q(High):This position supplies the most amount of
heat to the rear-seating area.
c(Medium):This position supplies half the amount
of heat to the rear-seating area.
3-21
Page 140 of 408
R(Low):This position supplies the least amount of
heat to the rear-seating area.
9(Off):Turns the rear heating system off.
Rear Air Conditioning and Heating
System
For vehicles with a rear heating and air-conditioning
system, it maintains the temperature, fan speed and air
delivery for the rear-seat passengers only. It also works
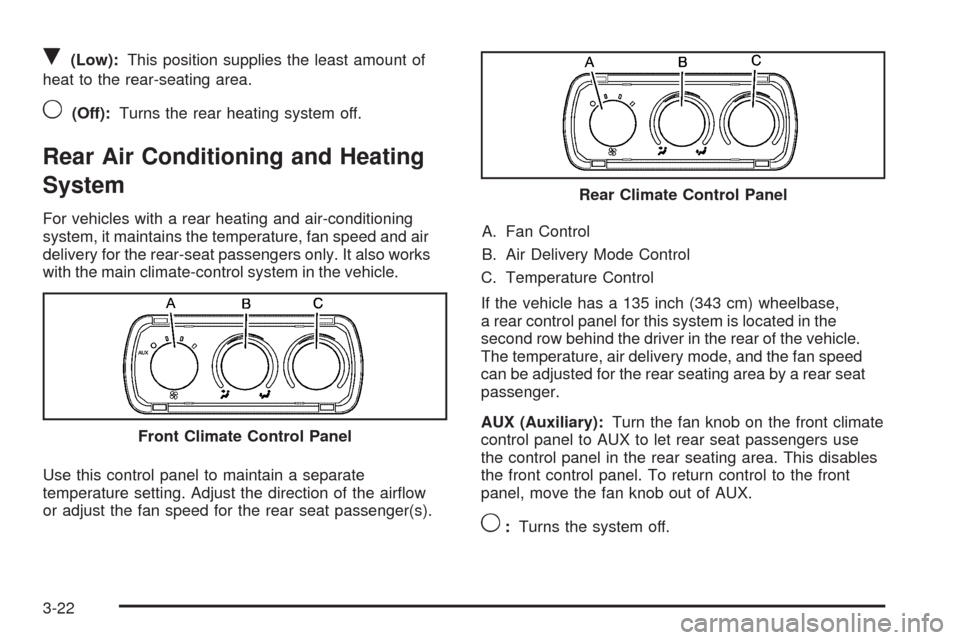
with the main climate-control system in the vehicle.
Use this control panel to maintain a separate
temperature setting. Adjust the direction of the airflow
or adjust the fan speed for the rear seat passenger(s).A. Fan Control
B. Air Delivery Mode Control
C. Temperature Control
If the vehicle has a 135 inch (343 cm) wheelbase,
a rear control panel for this system is located in the
second row behind the driver in the rear of the vehicle.
The temperature, air delivery mode, and the fan speed
can be adjusted for the rear seating area by a rear seat
passenger.
AUX (Auxiliary):Turn the fan knob on the front climate
control panel to AUX to let rear seat passengers use
the control panel in the rear seating area. This disables
the front control panel. To return control to the front
panel, move the fan knob out of AUX.
9:Turns the system off. Front Climate Control Panel
Rear Climate Control Panel
3-22
Page 193 of 408
To use random on the Base Radio with Single CD
player, do the following:
•Press the RDM button to play tracks from a CD in
random order. The random icon displays. Press
again to turn off random play. The random icon
disappears from the display.
To use random on an Uplevel Radio with a Single CD
player, do the following:
1. Press the CD/AUX button, insert a disc partway into
the slot of the CD player. A RDM label displays.
2. To play the tracks in random order, press the
pushbutton positioned under the RDM label
until Random Current Disc displays. Press the
pushbutton again to turn off random play.
To use random on a Radio with a Six-Disc CD player,
do the following:
1. Press the CD/AUX button, press and hold
^.
A beep sounds and Load All Discs displays.
Insert one or more discs partway into the slot
of the CD player.
2. To play tracks from all CDs loaded in random order,
press the pushbutton positioned under the RDM
label until Randomize All Discs displays. Press the
same pushbutton again to turn off random play.RPT (Repeat (Base Radio with CD):With the repeat
setting, one track can be repeated. To repeat the
track you are listening to, press and release the RPT
button. An arrow symbol displays. Press RPT again
to turn off repeat play.
4(Information) (Base Radio with CD):Press to
switch the display between the track number, elapsed
time of the track, and the time. When the ignition is
off, press to display the time.
BAND:Press to listen to the radio when a CD is
playing. The CD remains inside the radio for future
listening.
CD/AUX (CD/Auxiliary):Press to play a CD when
listening to the radio. The CD icon and a message
showing the disc and/or track number displays when
a CD is in the player. Press again and the system
automatically searches for an auxiliary input device, such
as a portable audio player. If a portable audio player is
not connected, “No Input Device Found” may display.
3-75
Page 194 of 408
Playing an MP3 CD-R or CD-RW Disc
The radio with a Single CD player or a Six-Disc CD
player has the capability of playing an MP3 CD-R or
CD-RW disc. For more information on how to play
an MP3 CD-R or CD-RW disc, see “Using an MP3”
in the index.
CD Messages
REMOVE/CHECK DISC:Radios with a Single CD
player or radios with a Six-Disc player displays
CHECK DISC and/or ejects the CD if an error occurs.
ERR (Error):If this message displays and/or the
CD comes out, it could be for one of the following
reasons:
•It is very hot. When the temperature returns to
normal, the CD should play.
•You are driving on a very rough road. When the
road becomes smoother, the CD should play.
•The CD is dirty, scratched, wet, or upside down.
•The air is very humid. If so, wait about an hour and
try again.
•There could have been a problem while burning the
CD-R or CD-RW.
•The label could be caught in the CD player.
NO:This message displays if the EJECT or CD/AUX
buttons are pressed and a CD has not been inserted into
the player.
If the CD is not playing correctly, for any other reason,
try a known good CD.
If any error occurs repeatedly or if an error cannot
be corrected, contact your dealer/retailer. If the radio
displays an error message, write it down and provide it
to your dealer/retailer while reporting the problem.
3-76
Page 195 of 408
Using the Auxiliary Input Jack
Your radio system has an auxiliary input jack located on
the lower right side of the faceplate. This is not an audio
output; do not plug the headphone set into the front
auxiliary input jack. An external audio device such as an
iPod, laptop computer, MP3 player, CD changer, etc. can
be connected to the auxiliary input jack for use as another
source for audio listening.
Drivers are encouraged to set up any auxiliary device
while the vehicle is in P (Park). SeeDefensive Driving on
page 4-2for more information on driver distraction.
To use a portable audio player, connect a 3.5 mm
(1/8 inch) cable to the radio’s front auxiliary input jack.
When a device is connected, press the radio CD/AUX
button to begin playing audio from the device over
the vehicle speakers.
O(Power/Volume):Turn clockwise or
counterclockwise to increase or decrease the volume
of the portable player. You might need to do additional
volume adjustments from the portable device if the
volume is not loud or soft enough.
BAND:Press to listen to the radio while a portable
audio device is playing. The portable audio device
continues playing, so you might want to stop it or
turn it off.CD/AUX (CD/Auxiliary):Press to play a CD while
a portable audio device is playing. Press again and
the system begins playing audio from the connected
portable audio player. If a portable audio player is
not connected, the message No Aux Input Device
displays.
Using an MP3
MP3 CD-R or CD-RW Disc
The radio plays MP3 files that were recorded on a
CD-R or CD-RW disc. The files can be recorded with
the following fixed bit rates: 32 kbps, 40 kbps, 56 kbps,
64 kbps, 80 kbps, 96 kbps, 112 kbps, 128 kbps,
160 kbps, 192 kbps, 224 kbps, 256 kbps, and 320 kbps
or a variable bit rate. Song title, artist name, and album
are available for display by the radio when recorded using
ID3 tags version 1 and 2.
Compressed Audio
The radio also plays discs that contain both
uncompressed CD audio (.CDA files) and MP3 files.
By default the radio shows the MP3 label on the left side
of the screen but plays both file formats in the order
in which they were recorded to the disc.
3-77