Page 243 of 408
The seven-wire harness connector contains the following
trailer circuits:
•Light Green: Back-up Lamps (10A fuse)**
•White: Ground
•Dark Blue: Trailer Brake Signal
•Dark Green: Right Rear Stop and Turn Signal*
•Red/Black Stripe: Battery Feed (30A Fuse)
•Brown: Trailer Park Lamp Supply Voltage
(15A fuse)**
•Yellow: Left Rear Stop and Turn Signal *The four-wire harness (without connector) contains the
following circuits:
•Black: Ground
•Red/White: Battery Feed
•Dark Blue: Trailer Brake Signal
•Light Blue: CHMSL/Stoplamp Supply Voltage
* If the vehicle is a cutaway with trailer provisions, a
15 amp fuse will be shared for both left/stop trailer turn
and right/stop trailer turn signals. However, the cutaway
lighting connector will have a 10 amp fuse for each
signal.
** If the vehicle is a cutaway with trailer provisions,
a 15 amp fuse will be shared for trailer park lamps and
cutaway rear lighting connector park lamps. Also, a
10 amp fuse will be shared for trailer back-up lamps
and cutaway rear lighting connector back-up lamps.
4-41
Page 255 of 408
{CAUTION:
Fuel can spray out on you if you open the fuel cap
too quickly. If you spill fuel and then something
ignites it, you could be badly burned. This spray
can happen if the tank is nearly full, and is more
likely in hot weather. Open the fuel cap slowly and
wait for any hiss noise to stop. Then unscrew the
cap all the way.
Be careful not to spill fuel. Do not top off or overfill the
tank and wait a few seconds after you have finished
pumping before removing the nozzle. Clean fuel from
painted surfaces as soon as possible. SeeWashing
Your Vehicle on page 5-100.
When replacing the fuel cap, turn it clockwise until it
clicks. Make sure the cap is fully installed. The diagnostic
system can determine if the fuel cap has been left off or
improperly installed. This would allow fuel to evaporate
into the atmosphere. SeeMalfunction Indicator Lamp
on page 3-34.
{CAUTION:
If a fire starts while you are refueling, do not
remove the nozzle. Shut off the flow of fuel by
shutting off the pump or by notifying the station
attendant. Leave the area immediately.
Notice:If you need a new fuel cap, be sure to get
the right type. Your dealer/retailer can get one
for you. If you get the wrong type, it may not �t
properly. This may cause the malfunction indicator
lamp to light and may damage the fuel tank and
emissions system. SeeMalfunction Indicator Lamp
on page 3-34.
5-11
Page 264 of 408
Engine Air Cleaner/Filter
If your vehicle has the DURAMAX Diesel engine, see
the DURAMAX Diesel manual for more information.
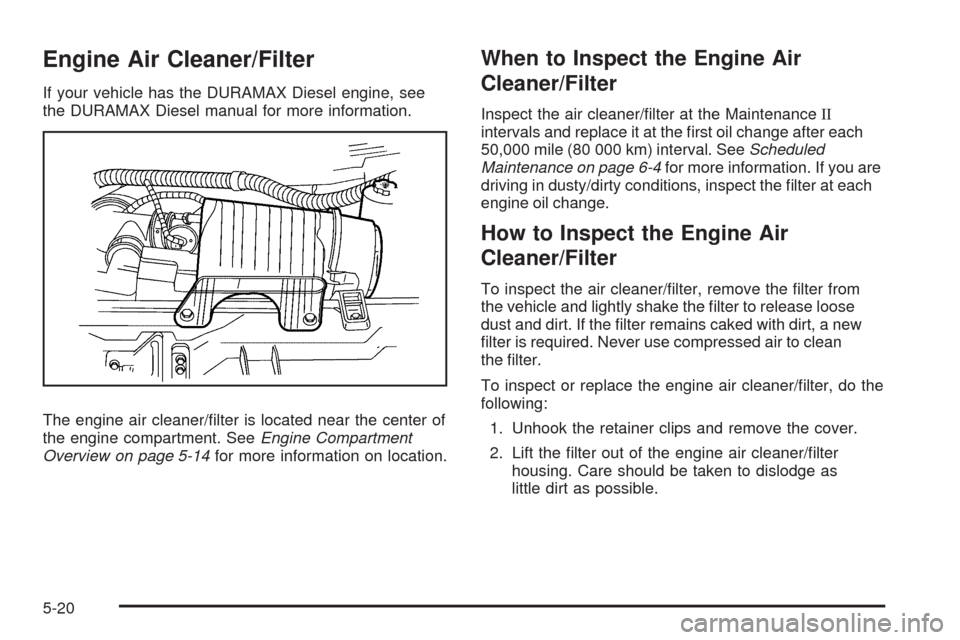
The engine air cleaner/filter is located near the center of
the engine compartment. SeeEngine Compartment
Overview on page 5-14for more information on location.
When to Inspect the Engine Air
Cleaner/Filter
Inspect the air cleaner/filter at the MaintenanceII
intervals and replace it at the first oil change after each
50,000 mile (80 000 km) interval. SeeScheduled
Maintenance on page 6-4for more information. If you are
driving in dusty/dirty conditions, inspect the filter at each
engine oil change.
How to Inspect the Engine Air
Cleaner/Filter
To inspect the air cleaner/filter, remove the filter from
the vehicle and lightly shake the filter to release loose
dust and dirt. If the filter remains caked with dirt, a new
filter is required. Never use compressed air to clean
the filter.
To inspect or replace the engine air cleaner/filter, do the
following:
1. Unhook the retainer clips and remove the cover.
2. Lift the filter out of the engine air cleaner/filter
housing. Care should be taken to dislodge as
little dirt as possible.
5-20
Page 282 of 408
Brake Wear
This vehicle has disc brakes. Disc brake pads have
built-in wear indicators that make a high-pitched warning
sound when the brake pads are worn and new pads
are needed. The sound can come and go or be heard
all the time the vehicle is moving, except when applying
the brake pedal firmly.
{CAUTION:
The brake wear warning sound means that soon
the brakes will not work well. That could lead to an
accident. When the brake wear warning sound is
heard, have the vehicle serviced.
Notice:Continuing to drive with worn-out brake
pads could result in costly brake repair.Some driving conditions or climates can cause a brake
squeal when the brakes are first applied or lightly
applied. This does not mean something is wrong
with the brakes.
Properly torqued wheel nuts are necessary to help
prevent brake pulsation. When tires are rotated, inspect
brake pads for wear and evenly tighten wheel nuts
in the proper sequence to torque specifications
inCapacities and Specifications on page 5-111.
Brake linings should always be replaced as complete
axle sets.Brake Pedal Travel
See your dealer/retailer if the brake pedal does not
return to normal height, or if there is a rapid increase in
pedal travel. This could be a sign that brake service
might be required.
Brake Adjustment
Every brake stop, the brakes adjust for wear.
5-38
Page 285 of 408
Notice:If you leave the radio or other accessories
on during the jump starting procedure, they could
be damaged. The repairs would not be covered by
the warranty. Always turn off the radio and other
accessories when jump starting the vehicle.
3. Turn off the ignition on both vehicles. Unplug
unnecessary accessories plugged into the cigarette
lighter or the accessory power outlet. Turn off
the radio and all lamps that are not needed.
This will avoid sparks and help save both
batteries. And it could save the radio!
4. Open the hoods and locate the positive (+) and
negative (−) terminal locations of the other vehicle.
Your vehicle has a remote positive (+) jump
starting terminal and a remote negative (−) jump
starting terminal. You should always use these
remote terminals instead of the terminals on the
battery.The remote positive (+) terminal is located
behind a red plastic cover near the engine accessory
drive bracket on the driver’s side of the engine
compartment, below the alternator. To uncover
the remote positive (+) terminal, open the red
plastic cover.
The remote negative (−) terminal is located on
the engine drive bracket on all V8 engines and is
marked GND (Ground).
On V6 engines the remote negative (−) terminal is
located on a tab attached to the engine accessory
drive bracket and is marked GND (Ground).
5-41
Page 286 of 408
{CAUTION:
Using a match near a battery can cause battery
gas to explode. People have been hurt doing this,
and some have been blinded. Use a flashlight if
you need more light.
Be sure the battery has enough water. You do not
need to add water to the battery installed in your
new vehicle. But if a battery has filler caps, be
sure the right amount of fluid is there. If it is low,
add water to take care of that first. If you do not,
explosive gas could be present.
Battery fluid contains acid that can burn you.
Do not get it on you. If you accidentally get it in
your eyes or on your skin, flush the place with
water and get medical help immediately.
{CAUTION:
Fans or other moving engine parts can injure you
badly. Keep your hands away from moving parts
once the engine is running.
5. Check that the jumper cables do not have loose
or missing insulation. If they do, you could get a
shock. The vehicles could be damaged too.
Before you connect the cables, here are some
basic things you should know. Positive (+) will go
to positive (+) or to a remote positive (+) terminal
if the vehicle has one. Negative (−) will go to a
heavy, unpainted metal engine part or to a remote
negative (−) terminal if the vehicle has one.
Do not connect positive (+) to negative (−)oryou
will get a short that would damage the battery
and maybe other parts too. And do not connect the
negative (−) cable to the negative (−) terminal on
the dead battery because this can cause sparks.
5-42
Page 295 of 408
Center High-Mounted
Stoplamp (CHMSL)
The Center High-Mounted Stoplamp (CHMSL) is located
above the rear doors at the center of the vehicle.
To replace a bulb:
1. Remove the two screws from the CHMSL assembly.
2. Remove the CHMSL assembly.
3. Turn the bulb counterclockwise one quarter turn to
remove it from the socket.
4. Turn the bulb clockwise one quarter turn to install it
in the socket.
5. Reinstall the CHMSL assembly and two screws.
Do not block or damage the CHMSL when items
are loaded on the roof of the vehicle.
Taillamps
To replace one of these bulbs:
1. Remove the two
inboard nuts from the
inside of the taillamp
assembly.
2. Pull the taillamp assembly straight back to clear the
studs.
3. Slide the taillamp assembly slightly upward to
release the lower clip.
4. Remove the three nuts on the taillamp assembly.
5. Remove the taillamp assembly from the vehicle.
5-51
Page 296 of 408
6. Remove the bulb socket by squeezing the
tab on the side of the socket while turning it
counterclockwise.
7. Turn the bulb counterclockwise to remove it.
8. Turn the bulb clockwise to install it in the socket.
9. Reinstall the bulb socket by squeezing the tab while
turning it clockwise.
10. Reinstall the taillamp assembly and three nuts on
the vehicle.
11. Slide the taillamp slightly downward to reengage
the lower clip.12. Push the taillamp straight forward to reengage
the studs.
13. Reinstall the two inboard nuts from the inside of the
taillamp assembly.
Replacement Bulbs
Exterior Lamp Bulb Number
Back-up, Rear Parking,
Stoplamp, and Turn Signal Lamp3157
Center High Mounted
Stop Lamp (CHMSL)912
Front Parking and Turn
Signal Lamp3157KX
Front Sidemarker Lamp 194
Headlamps
Composite High-Beam
Headlamp9005
Composite Low-Beam
Headlamp9006GS
Sealed Beam Headlamp H6054
For replacement bulbs not listed here, contact your
dealer/retailer.
5-52