2009 CHEVROLET EXPRESS CARGO VAN clock
[x] Cancel search: clockPage 117 of 408

Outside Power Mirrors
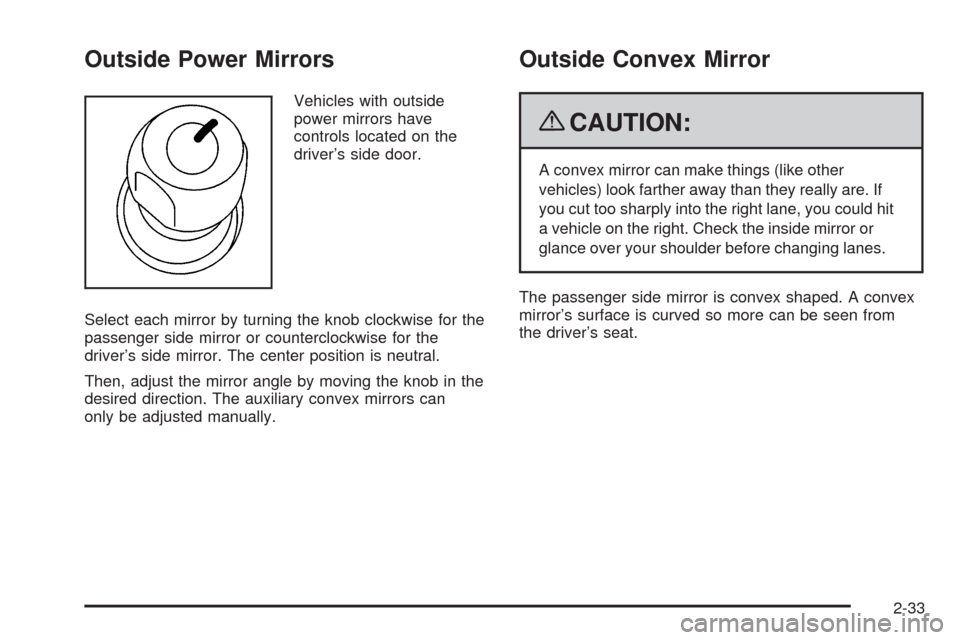
Vehicles with outside
power mirrors have
controls located on the
driver’s side door.
Select each mirror by turning the knob clockwise for the
passenger side mirror or counterclockwise for the
driver’s side mirror. The center position is neutral.
Then, adjust the mirror angle by moving the knob in the
desired direction. The auxiliary convex mirrors can
only be adjusted manually.
Outside Convex Mirror
{CAUTION:
A convex mirror can make things (like other
vehicles) look farther away than they really are. If
you cut too sharply into the right lane, you could hit
a vehicle on the right. Check the inside mirror or
glance over your shoulder before changing lanes.
The passenger side mirror is convex shaped. A convex
mirror’s surface is curved so more can be seen from
the driver’s seat.
2-33
Page 120 of 408

Cruise Control Light......................................3-39
Highbeam On Light.......................................3-39
Tow/Haul Mode Light....................................3-40
Fuel Gage...................................................3-40
Driver Information Center (DIC).......................3-41
DIC Operation and Displays...........................3-41
DIC Compass..............................................3-46
DIC Warnings and Messages.........................3-48
DIC Vehicle Customization.............................3-57Audio System(s).............................................3-63
Setting the Clock..........................................3-64
Radio(s)......................................................3-67
Using an MP3..............................................3-77
Theft-Deterrent Feature..................................3-82
Audio Steering Wheel Controls.......................3-83
Radio Reception...........................................3-84
Fixed Mast Antenna......................................3-84
Section 3 Instrument Panel
3-2
Page 133 of 408

Automatic Headlamp System
When it is dark enough outside and the headlamp
switch is in AUTO, the automatic headlamp system turns
on the headlamps, along with the taillamps, sidemarker,
parking lamps, roof marker lamps, and the instrument
panel lights. The radio lights will also be dim.
To turn off the automatic headlamp system, turn the
exterior lamps switch to the off position and then release.
For vehicles first sold in Canada, the transmission must
be in the P (Park) position, before the automatic
headlamp system can be turned off.
The vehicle has a light sensor located on the top of
the instrument panel. Do not cover the sensor or
the system will come on whenever the ignition is on.
The system may also turn on the headlamps when
driving through a parking garage or tunnel.
There is a delay in the transition between the daytime
and nighttime operation of the Daytime Running Lamps
(DRL) and the automatic headlamp systems so that
driving under bridges or bright overhead street lights does
not affect the system. The DRL and automatic headlamp
system is only affected when the light sensor sees a
change in lighting lasting longer than the delay.If the vehicle is started in a dark garage, the automatic
headlamp system comes on immediately. Once the
vehicle leaves the garage, it takes approximately
30 seconds for the automatic headlamp system to
change to DRL if it is light outside. During that delay,
the instrument panel cluster may not be as bright
as usual. Make sure the instrument panel brightness
control is in the full bright position. SeeInstrument
Panel Brightness on page 3-15.
Instrument Panel Brightness
The knob for this feature is located next to the exterior
lamps control.
D(Instrument Panel Lights):Push knob to extend
and then turn clockwise or counterclockwise to brighten
or dim the instrument panel lights and the radio display.
This only works if the headlamps or parking lamps are on.
To turn on the dome lamps, with the vehicle doors
closed, turn the knob all the way clockwise.
3-15
Page 134 of 408

Dome Lamps
The dome lamps come on when any door is opened.
They turn off after all the doors are closed.
The dome lamps can also be turned on by turning
the instrument panel brightness knob, located on the
instrument panel to the left of the steering column,
clockwise to the farthest position. In this position, the
dome lamps remain on whether a door is opened or
closed.
Dome Lamp Override
The dome lamp override button is located next to the
exterior lamps control.
The dome lamp override sets the dome lamps to remain
off or come on automatically when a door is opened.
E(Dome Lamp Override):Press the button in
and the dome lamps remain off when a door is opened.
Press the button again to return it to the extended
position so that the dome lamps come on when a
door is opened.
Entry/Exit Lighting
The vehicle has an illuminated entry/exit feature.
The dome lamps come on if the dome override button is
in the out position, when a door is opened or the key
is removed from the ignition.
Reading Lamps
For vehicles with reading lamps, press the button
located next to each lamp to turn it on or off.
The vehicle may also have reading lamps in other
locations. The lamps cannot be adjusted.
3-16
Page 137 of 408

Climate Controls
Climate Control System
The heating, cooling, and ventilation for the vehicle can
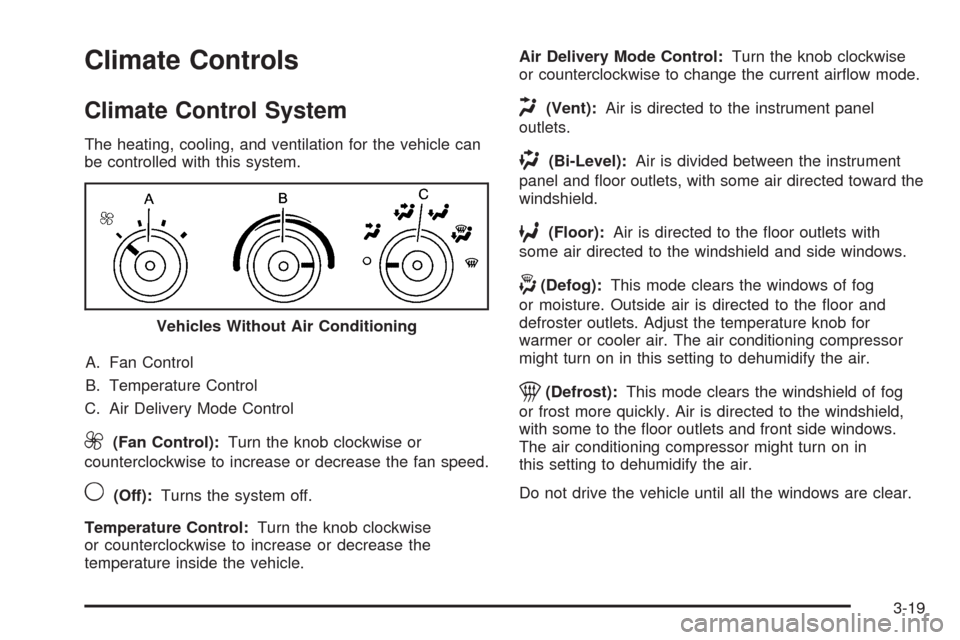
be controlled with this system.
A. Fan Control
B. Temperature Control
C. Air Delivery Mode Control
9(Fan Control):Turn the knob clockwise or
counterclockwise to increase or decrease the fan speed.
9(Off):Turns the system off.
Temperature Control:Turn the knob clockwise
or counterclockwise to increase or decrease the
temperature inside the vehicle.Air Delivery Mode Control:Turn the knob clockwise
or counterclockwise to change the current airflow mode.
H(Vent):Air is directed to the instrument panel
outlets.
)(Bi-Level):Air is divided between the instrument
panel and floor outlets, with some air directed toward the
windshield.
6(Floor):Air is directed to the floor outlets with
some air directed to the windshield and side windows.
-(Defog):This mode clears the windows of fog
or moisture. Outside air is directed to the floor and
defroster outlets. Adjust the temperature knob for
warmer or cooler air. The air conditioning compressor
might turn on in this setting to dehumidify the air.
1(Defrost):This mode clears the windshield of fog
or frost more quickly. Air is directed to the windshield,
with some to the floor outlets and front side windows.
The air conditioning compressor might turn on in
this setting to dehumidify the air.
Do not drive the vehicle until all the windows are clear. Vehicles Without Air Conditioning
3-19
Page 141 of 408

9(Fan Control):Turn clockwise or counterclockwise
to increase or decrease the fan speed in the
rear-seating area.
Temperature Control:Turn clockwise or
counterclockwise to increase or decrease the
temperature in the rear-seating area.
The air-conditioning system on the main climate control
panel must be turned on to direct cooled air to the
rear of the vehicle. If it is not on, then the temperature
in the rear of the vehicle remains at cabin temperature.
Air Delivery Mode Control:Turn clockwise or
counterclockwise to change the direction of the airflow
in the rear seating area.
To change the current mode, select one of the following:
H(Vent):Air is directed to the upper outlets, with
some directed to the floor outlets.
2(Floor):Air is directed to the floor outlets.
Be sure to keep the area under the front seats clear of
any objects so that the air inside of the vehicle can
circulate effectively.
For information on how to use the main climate control
system, seeClimate Control System on page 3-19.
For information on ventilation, seeOutlet Adjustment
on page 3-21.
Warning Lights, Gages, and
Indicators
Warning lights and gages can signal that something is
wrong before it becomes serious enough to cause an
expensive repair or replacement. Paying attention to
the warning lights and gages could prevent injury.
Warning lights come on when there may be or is a
problem with one of the vehicle’s functions. Some
warning lights come on briefly when the engine is
started to indicate they are working.
Gages can indicate when there may be or is a problem
with one of the vehicle’s functions. Often gages and
warning lights work together to indicate a problem with
the vehicle.
When one of the warning lights comes on and stays on
while driving, or when one of the gages shows there may
be a problem, check the section that explains what to do.
Follow this manual’s advice. Waiting to do repairs can be
costly and even dangerous.
3-23
Page 182 of 408

To minimize taking your eyes off the road while driving,
do the following while the vehicle is parked:
•Become familiar with the operation and controls of
the audio system.
•Set up the tone, speaker adjustments, and preset
radio stations.
For more information, seeDefensive Driving on
page 4-2.
Notice:Contact your dealer/retailer before adding
any equipment.
Adding audio or communication equipment could
interfere with the operation of the vehicle’s engine,
radio, or other systems, and could damage them.
Follow federal rules covering mobile radio and
telephone equipment.
Notice:The chime signals related to safety belts,
parking brake, and other functions of your vehicle
operate through the radio/entertainment system.
If that equipment is replaced or additional equipment
is added to your vehicle, the chimes may not work.
Make sure that replacement or additional equipment
is compatible with your vehicle before installing it.
SeeAccessories and Modifications on page 5-3.
The vehicle has Retained Accessory Power (RAP).
With RAP, the audio system can be played even after
the ignition is turned off. SeeRetained Accessory Power
(RAP) on page 2-20for more information.
Setting the Clock
AM/FM Radio with Optional CD Player
If your vehicle has an AM/FM radio with an optional CD
player, it has a
Hbutton for setting the time. With these
types of radios, the clock can be set with either the radio
turned on or off.
Set the time by following these steps:
1. Press
Huntil the hour begins flashing on display.
Press this button a second time and the minutes
begin flashing on display.
Press
Ha third time and the 12HR or 24HR time
format begins flashing.
2. While either the hour or the minutes are flashing,
turn the
fknob, located on the upper right side of
the radio, clockwise or counterclockwise to increase
or decrease the time. While the 12HR or 24HR time
format is flashing, turn the
fknob clockwise or
counterclockwise to select the default time settings.
3. Press
Hagain until the clock display stops flashing
to set the currently displayed time; otherwise, the
flashing stops after five seconds and the current
time displayed is automatically set.
3-64
Page 186 of 408

Radio Data System (RDS)
The Radio may have a Radio Data System (RDS).
The RDS feature is available for use only on FM stations
that broadcast RDS information. This system relies upon
receiving specific information from these stations and
only works when the information is available. While the
radio is tuned to an FM-RDS station, the station name or
call letters displays. In rare cases, a radio station could
broadcast incorrect information that causes the radio
features to work improperly. If this happens, contact the
radio station.
Playing the Radio
O
(Power/Volume):Press to turn the system on
and off.
Turn clockwise or counterclockwise to increase or
decrease the volume.
When the radio is turned on, it plays at the volume level
that was last set. The volume can be adjusted using
this knob.
4(Information) (AM-FM Radio and Radio with CD
(Base)):Press to switch the display between the radio
station frequency and the time. While the ignition is
off, press to display the time.
4(Information) (MP3 and RDS Features):Press to
display additional text information related to the current
FM-RDS station or MP3 song. A choice of additional
information such as: Channel, Song, Artist, and
CAT (category) can display. Continue pressing to
highlight the desired label, or press the pushbutton
positioned under any one of the labels and the
information about that label displays.
When information is not available, No Info displays.
H(Clock) (AM-FM Radio and Radio with CD (Base)):
The radio has a clock button for setting the time.
With this type of radio, the clock can be set with either
the radio turned on or off. SeeSetting the Clock on
page 3-64for more information.
3-68