2009 CHEVROLET EQUINOX mirror
[x] Cancel search: mirrorPage 1 of 442

Seats and Restraint System............................. 1-1
Front Seats
............................................... 1-2
Rear Seats
..............................................1-10
Safety Belts
.............................................1-12
Child Restraints
.......................................1-32
Airbag System
.........................................1-58
Restraint System Check
............................1-74
Features and Controls..................................... 2-1
Keys
........................................................ 2-3
Doors and Locks
......................................2-10
Windows
.................................................2-14
Theft-Deterrent Systems
............................2-16
Starting and Operating Your Vehicle
...........2-19
Mirrors
....................................................2-36
OnStar
®System
......................................2-37
Storage Areas
.........................................2-41
Sunroof
..................................................2-47
Instrument Panel............................................. 3-1
Instrument Panel Overview
.......................... 3-4
Climate Controls
......................................3-18
Warning Lights, Gages, and Indicators
........3-23
Driver Information Center (DIC)
..................3-42
Audio System(s)
.......................................3-64Driving Your Vehicle....................................... 4-1
Your Driving, the Road, and the Vehicle
....... 4-2
Towing
...................................................4-26
Service and Appearance Care.......................... 5-1
Service
..................................................... 5-3
Fuel
......................................................... 5-5
Checking Things Under the Hood
...............5-10
All-Wheel Drive
........................................5-42
Headlamp Aiming
.....................................5-44
Bulb Replacement
....................................5-45
Windshield Wiper Blade Replacement
.........5-51
Tires
......................................................5-52
Appearance Care
.....................................5-88
Vehicle Identi�cation
.................................5-96
Electrical System
......................................5-97
Capacities and Speci�cations
...................5-104
Maintenance Schedule..................................... 6-1
Maintenance Schedule
................................ 6-2
Customer Assistance Information.................... 7-1
Customer Assistance and Information
........... 7-2
Reporting Safety Defects
...........................7-14
Vehicle Data Recording and Privacy
...........7-16
Index................................................................ 1
2009 Chevrolet Equinox Owner ManualM
Page 81 of 442
Keys...............................................................2-3
Remote Keyless Entry (RKE) System................2-4
Remote Keyless Entry (RKE) System
Operation...................................................2-5
Remote Vehicle Start......................................2-7
Doors and Locks............................................2-10
Door Locks..................................................2-10
Power Door Locks........................................2-10
Delayed Locking...........................................2-10
Programmable Automatic Door Locks..............2-11
Rear Door Security Locks..............................2-11
Lockout Protection........................................2-12
Liftgate........................................................2-12
Windows........................................................2-14
Power Windows............................................2-15
Sun Visors...................................................2-16
Theft-Deterrent Systems..................................2-16
Content Theft-Deterrent.................................2-17
PASS-Key
®III+ Electronic Immobilizer.............2-17
PASS-Key®III+ Electronic Immobilizer
Operation.................................................2-18Starting and Operating Your Vehicle................2-19
New Vehicle Break-In....................................2-19
Ignition Positions..........................................2-20
Retained Accessory Power (RAP)...................2-21
Starting the Engine.......................................2-21
Engine Coolant Heater..................................2-23
Automatic Transmission Operation
(3.4L V6 with 5-Speed)..............................2-24
Automatic Transmission Operation
(3.6L V6 with 6-Speed)..............................2-27
Parking Brake..............................................2-31
Shifting Into Park..........................................2-32
Shifting Out of Park......................................2-33
Parking Over Things That Burn.......................2-34
Engine Exhaust............................................2-34
Running the Vehicle While Parked..................2-35
Mirrors...........................................................2-36
Manual Rearview Mirror.................................2-36
Automatic Dimming Rearview Mirror................2-36
Outside Power Mirrors...................................2-36
Outside Convex Mirrors.................................2-37
Section 2 Features and Controls
2-1
Page 96 of 442
Express-Down Window
The driver’s window switch has an express-down
feature that allows the window to be lowered without
holding the switch. Press the switch part way, and
the driver’s window opens a small amount. Press the
switch down all the way, release it, and the window goes
down automatically.
To stop the window while it is lowering, press and
release the switch.
Window Lockout
o
(Window Lockout):Your vehicle has a lockout
feature to prevent rear seat passengers from operating
the windows. Press the lockout button, located with
the power window switches, to turn the feature on and
off. The switch has a light that comes on when the
switch is active.
Sun Visors
To block out glare, swing the sun visor down. You can
also detach the driver’s sun visor from the center mount
and slide it along the rod from side-to-side for greater
coverage.
Visor Vanity Mirrors
Your vehicle has covered visor vanity mirrors on both
the driver’s and passenger’s side.
Theft-Deterrent Systems
Vehicle theft is big business, especially in some cities.
This vehicle has theft-deterrent features, however,
they do not make it impossible to steal.
2-16
Page 116 of 442
Mirrors
Manual Rearview Mirror
Hold the inside rearview mirror in the center to move it
for a clearer view behind your vehicle.
Adjust the mirror to reduce the glare of headlamps from
behind you. Push the tab forward for daytime use and
pull it for nighttime use.
Vehicles with OnStar
®have three control buttons
located at the bottom of the mirror. SeeOnStar®System
on page 2-37for more information.
Automatic Dimming Rearview Mirror
Hold the inside rearview mirror in the center to move
it for a clearer view of behind your vehicle.
Adjust the mirror to reduce the glare of headlamps from
behind you. Press AUTO or
(located in the lower
center of the mirror to turn automatic dimming on or off.
The indicator light comes on when this feature is on.
For vehicles with OnStar
®, press theOlocated on the
lower part of the mirror, for up to six seconds to turn
automatic dimming on or off.
Vehicles with OnStar
®have control buttons located at
the bottom of the mirror. SeeOnStar®System on
page 2-37for more information.
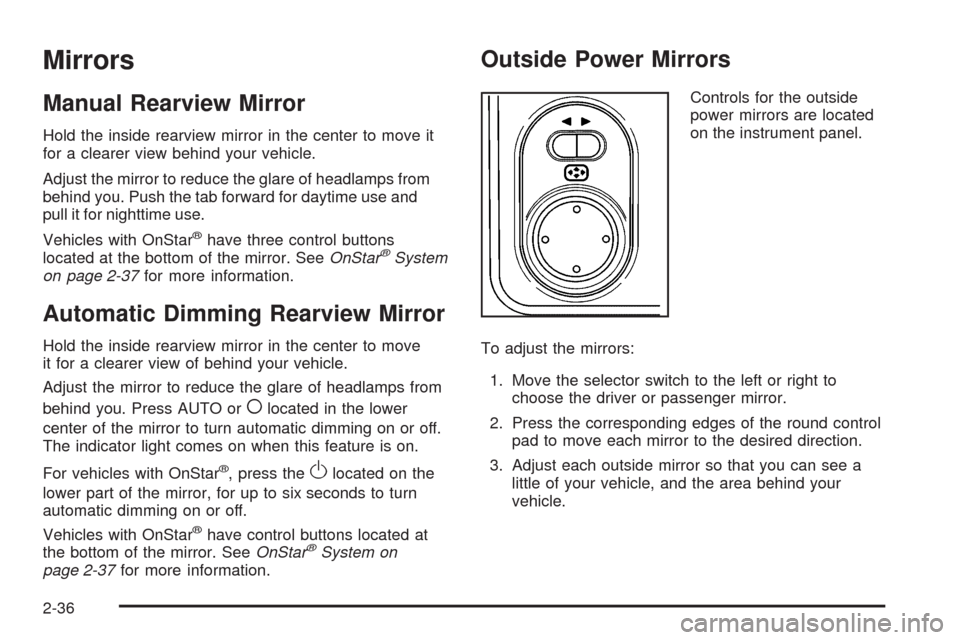
Outside Power Mirrors
Controls for the outside
power mirrors are located
on the instrument panel.
To adjust the mirrors:
1. Move the selector switch to the left or right to
choose the driver or passenger mirror.
2. Press the corresponding edges of the round control
pad to move each mirror to the desired direction.
3. Adjust each outside mirror so that you can see a
little of your vehicle, and the area behind your
vehicle.
2-36
Page 117 of 442
Outside Convex Mirrors
{CAUTION:
A convex mirror can make things (like other
vehicles) look farther away than they really are.
If you cut too sharply into the right lane, you could
hit a vehicle on the right. Check the inside mirror
or glance over your shoulder before changing
lanes.
The passenger side mirror is convex shaped. A convex
mirror’s surface is curved so more can be seen from
the driver’s seat.
OnStar®System
OnStar uses several innovative technologies and live
advisors to provide a wide range of safety, security,
information, and convenience services. If the airbags
deploy, the system is designed to make an automatic
call to OnStar Emergency advisors who can request
emergency services be sent to your location. If the keys
are locked in the vehicle, call OnStar at 1-888-4-ONSTAR
to have a signal sent to unlock the doors. OnStar
Hands-Free Calling, including 30 trial minutes good
for 60 days, is available on most vehicles. OnStar
Turn-by-Turn Navigation service, with one trial route, is
available on most vehicles. Press the OnStar button to
have an OnStar advisor contact Roadside Service.
2-37
Page 127 of 442
Convenience Net
Use the convenience net, located in the rear, to store
small loads as far forward as possible. The net should
not be used to store heavy loads.
Cargo Tie Downs
Four cargo tie-downs are located in the rear
compartment of the vehicle. The tie-downs can
be used to secure small loads.
Sunroof
If the vehicle is equipped with a sunroof, the controls
to operate it are located on the headliner above the
rearview mirror. The ignition must be in RUN/ON or
ACC/ACCESSORY, or Retained Accessory Power (RAP)
must be active, to operate the sunroof. SeeRetained
Accessory Power (RAP) on page 2-21for more
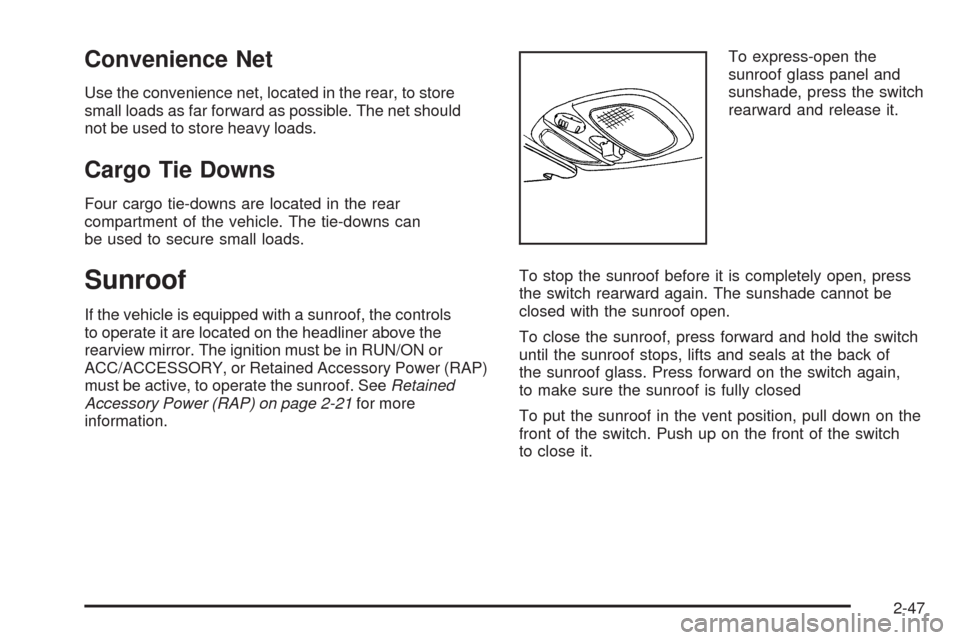
information.To express-open the
sunroof glass panel and
sunshade, press the switch
rearward and release it.
To stop the sunroof before it is completely open, press
the switch rearward again. The sunshade cannot be
closed with the sunroof open.
To close the sunroof, press forward and hold the switch
until the sunroof stops, lifts and seals at the back of
the sunroof glass. Press forward on the switch again,
to make sure the sunroof is fully closed
To put the sunroof in the vent position, pull down on the
front of the switch. Push up on the front of the switch
to close it.
2-47
Page 133 of 442
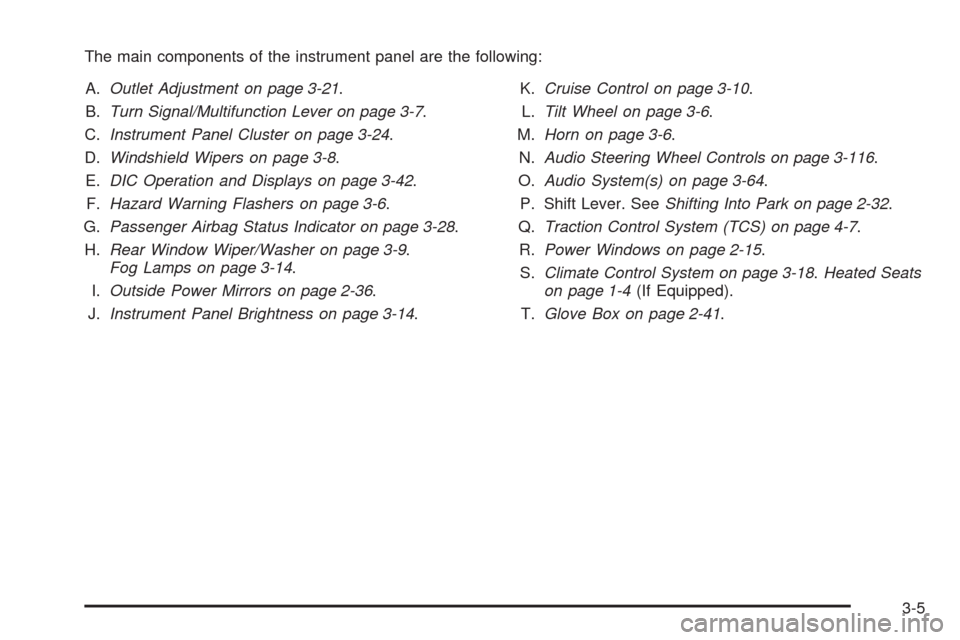
The main components of the instrument panel are the following:
A.Outlet Adjustment on page 3-21.
B.Turn Signal/Multifunction Lever on page 3-7.
C.Instrument Panel Cluster on page 3-24.
D.Windshield Wipers on page 3-8.
E.DIC Operation and Displays on page 3-42.
F.Hazard Warning Flashers on page 3-6.
G.Passenger Airbag Status Indicator on page 3-28.
H.Rear Window Wiper/Washer on page 3-9.
Fog Lamps on page 3-14.
I.Outside Power Mirrors on page 2-36.
J.Instrument Panel Brightness on page 3-14.K.Cruise Control on page 3-10.
L.Tilt Wheel on page 3-6.
M.Horn on page 3-6.
N.Audio Steering Wheel Controls on page 3-116.
O.Audio System(s) on page 3-64.
P. Shift Lever. SeeShifting Into Park on page 2-32.
Q.Traction Control System (TCS) on page 4-7.
R.Power Windows on page 2-15.
S.Climate Control System on page 3-18.Heated Seats
on page 1-4(If Equipped).
T.Glove Box on page 2-41.
3-5
Page 143 of 442
Dome Lamp
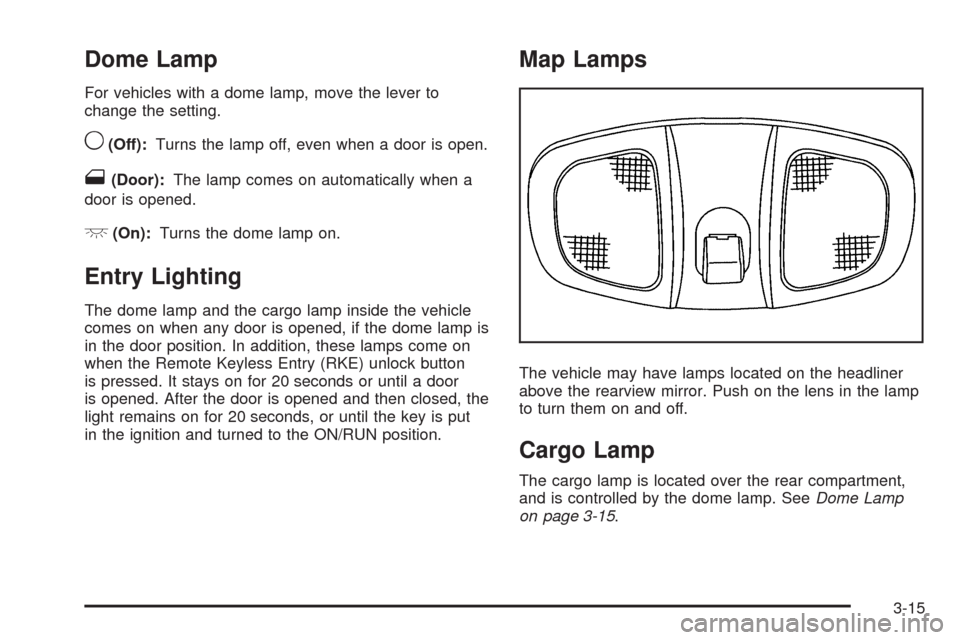
For vehicles with a dome lamp, move the lever to
change the setting.
9(Off):Turns the lamp off, even when a door is open.
1(Door):The lamp comes on automatically when a
door is opened.
+(On):Turns the dome lamp on.
Entry Lighting
The dome lamp and the cargo lamp inside the vehicle
comes on when any door is opened, if the dome lamp is
in the door position. In addition, these lamps come on
when the Remote Keyless Entry (RKE) unlock button
is pressed. It stays on for 20 seconds or until a door
is opened. After the door is opened and then closed, the
light remains on for 20 seconds, or until the key is put
in the ignition and turned to the ON/RUN position.
Map Lamps
The vehicle may have lamps located on the headliner
above the rearview mirror. Push on the lens in the lamp
to turn them on and off.
Cargo Lamp
The cargo lamp is located over the rear compartment,
and is controlled by the dome lamp. SeeDome Lamp
on page 3-15.
3-15