Page 28 of 428

Shoulder Belt Height Adjuster
The vehicle has a shoulder belt height adjuster for the
driver and right front passenger seating positions.
Adjust the height so that the shoulder portion of the belt
is centered on the shoulder. The belt should be away
from the face and neck, but not falling off the shoulder.
Improper shoulder belt height adjustment could
reduce the effectiveness of the safety belt in a crash.
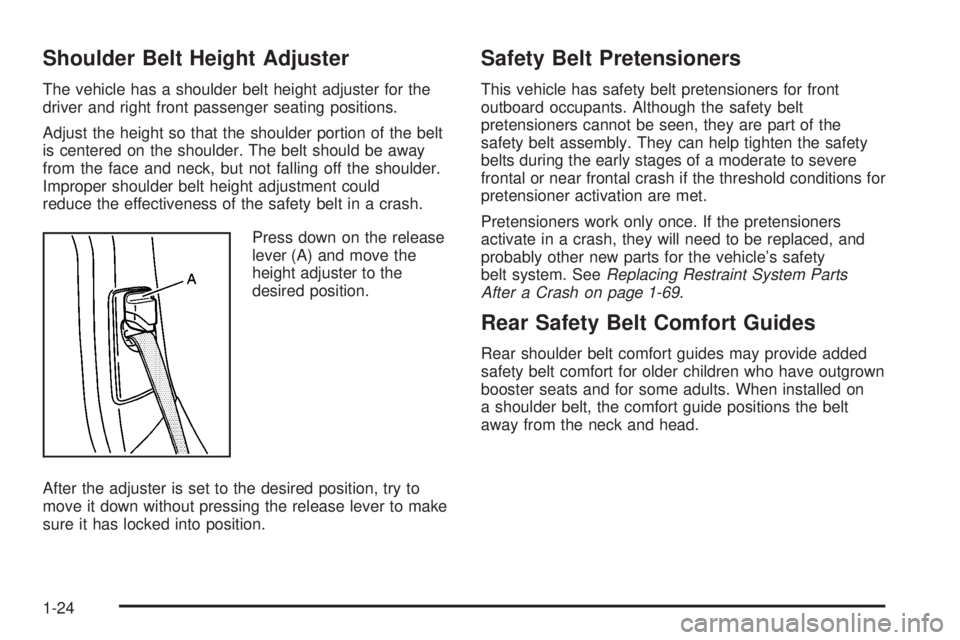
Press down on the release
lever (A) and move the
height adjuster to the
desired position.
After the adjuster is set to the desired position, try to
move it down without pressing the release lever to make
sure it has locked into position.
Safety Belt Pretensioners
This vehicle has safety belt pretensioners for front
outboard occupants. Although the safety belt
pretensioners cannot be seen, they are part of the
safety belt assembly. They can help tighten the safety
belts during the early stages of a moderate to severe
frontal or near frontal crash if the threshold conditions for
pretensioner activation are met.
Pretensioners work only once. If the pretensioners
activate in a crash, they will need to be replaced, and
probably other new parts for the vehicle’s safety
belt system. SeeReplacing Restraint System Parts
After a Crash on page 1-69.
Rear Safety Belt Comfort Guides
Rear shoulder belt comfort guides may provide added
safety belt comfort for older children who have outgrown
booster seats and for some adults. When installed on
a shoulder belt, the comfort guide positions the belt
away from the neck and head.
1-24
Page 129 of 428
Telescoping Column
If the vehicle has a telescoping column on the steering
wheel it adjusts the distance of the steering wheel
to the driver without having to move the driver’s seat.
The lever that makes this
adjustment is located on
the left side of the steering
column and behind the tilt
lever, if the vehicle has this
feature.
To adjust the steering wheel, pull the steering wheel
column lever down and push or pull the steering wheel
to a comfortable position. Then pull the lever up to
lock the wheel in place.
Do not drive the vehicle unless the telescoping column
is locked.
Turn Signal/Multifunction Lever
The lever on the left side of the steering column
includes the following:
G: Turn and Lane Change Signals
2: Headlamp High/Low-Beam Changer
N: Windshield Wipers
LQ: Windshield Washer
Flash-to-Pass.
For information on the headlamps, seeExterior Lamps
on page 3-13.
Information for these features is on the pages following.
3-7
Page 150 of 428

Rear Window Defogger
The rear window defogger uses a warming grid to
remove fog or frost from the rear window. The rear
window defogger will only work when the engine
is running.
=(Rear Window Defogger):Press to turn the rear
window defogger on and off. Be sure to clear as much
snow from the rear window as possible.
The rear window defogger turns off about 20 minutes
after the button is pressed. If turned on again, the
defogger only runs for about 20 minutes before turning
off. The defogger can also be turned off by turning
off the engine.
The heated outside rearview mirrors, help to clear fog or
frost from the surface of the mirror when the rear window
defog button is pressed.
Do not drive the vehicle until all the windows are clear.
Notice:Do not use a razor blade or sharp object to
clear the inside rear window. Do not adhere anything
to the defogger grid lines in the rear glass. These
actions may damage the rear defogger. Repairs
would not be covered by your warranty.
((Heated Seats):Press to turn the driver or
passenger heated seats on and off. SeeHeated
Seats on page 1-3for additional information.
Sensors
The solar sensor on the vehicle monitors the solar heat
and the air inside of the vehicle. This information is used
to maintain the selected temperature by initiating needed
adjustments to the temperature, the fan speed, and the
air delivery system. The system may also supply cooler
air to the side of the vehicle facing the sun. The
recirculation mode will also be activated, as necessary.
Do not cover the solar sensor located in the center of the
instrument panel, near the windshield, or the system will
not work properly.
Outlet Adjustment
Use the thumbwheels located between the center
outlets to open and close the outlets. Move the lever
in the center of each air outlet to adjust the direction
of the air�ow.
3-28
Page 317 of 428
The vehicle should be:
Placed so the headlamps are 25 ft. (7.6 m) from a
light colored wall.
On a perfectly level surface which is level all the
way to the wall.
Be placed so it is at a right angle to the wall.
Clear of any snow, ice or mud on it.
Be fully assembled, with the tires properly in�ated
and all other work stopped while headlamp aiming
is being done.
Be normally loaded with a full tank of fuel, with the
spare tire in its proper location, and one person or
160 lbs (75 kg) on the driver seat.
Headlamp aiming is done with the vehicle’s low-beam
headlamps. The high-beam headlamps will be correctly
aimed if the low-beam headlamps are aimed properly.
Locate the vertical headlamp aiming screws under
the hood near the headlamps.The adjustment screw can be turned with a 6 mm
male hex.
5-47