2009 BMW Z4 SDRIVE30I ECO mode
[x] Cancel search: ECO modePage 8 of 248
Notes
6
Installation and operation of non-BMW
approved accessories such as alarms, radios,
amplifiers, radar detector
s, wheels, suspension
components, brake dust shields, telephones,
including operation of any mobile phone from
within the vehicle without using an externally
mounted antenna, or transceiver equipment, for
instance, CBs, walkie-talkies, ham radio or sim-
ilar accessories, may ca use extensive damage
to the vehicle, compromise its safety, interfere
with the vehicle's electrical system or affect the
validity of the BMW Limi ted Warranty. See your
BMW center for additional information.<
Maintenance, replacement, or repair of
the emission control devices and sys-
tems may be performe d by any automotive
repair establishment or individual using any cer-
tified automotive part.<
California Proposition 65 warning
California law requires us to issue the following
warning:
Engine exhaust and a wide variety of
automobile components and parts,
including components foun d in the interior fur-
nishings in a vehicle, co ntain or emit chemicals
known to the State of California to cause cancer
and birth defects and reproductive harm. In
addition, certain fluids co ntained in vehicles and
certain products of component wear contain or
emit chemicals known to the State of California
to cause cancer and birth defects or other
reproductive harm.
Battery posts, terminal s and related accesso-
ries contain lead and lead compounds. Wash
your hands after handling.
Used engine oil contains chemicals that have
caused cancer in labora tory animals. Always
protect your skin by washing thoroughly with
soap and water. <
Service and warranty
We recommend that you read this publication
thoroughly.
Your BMW is covered by the following
warranties:
> New Vehicle Limited Warranty
> Rust Perforation Limited Warranty
> Federal Emissions System Defect Warranty
> Federal Emissions Performance Warranty
> California Emission Control System Limited
Warranty
Detailed information abou t these warranties is
listed in the Service and Warranty Information
Booklet for US models or in the Warranty and
Service Guide Booklet for Canadian models.
Page 36 of 248
Opening and closing
34
Arming and disarming
When you lock or unlock the vehicle, either with
the remote control or at the door lock, the alarm
system is armed or disarmed at the same time.
You can open the lugga ge compartment lid
using the button of the remote control even
if the alarm system is armed, refer to page 30.
The lid is locked and monitored again as soon
as it is closed.
Panic mode*
You can trigger the alar m system if you find
yourself in a dangerous situation:
Press the button for at least three seconds.
To switch off the alarm: press any button.
Switching off an alarm
> Unlock the car with the remote control, refer
to page 29.
> Insert the remote contro l all the way into the
ignition lock.
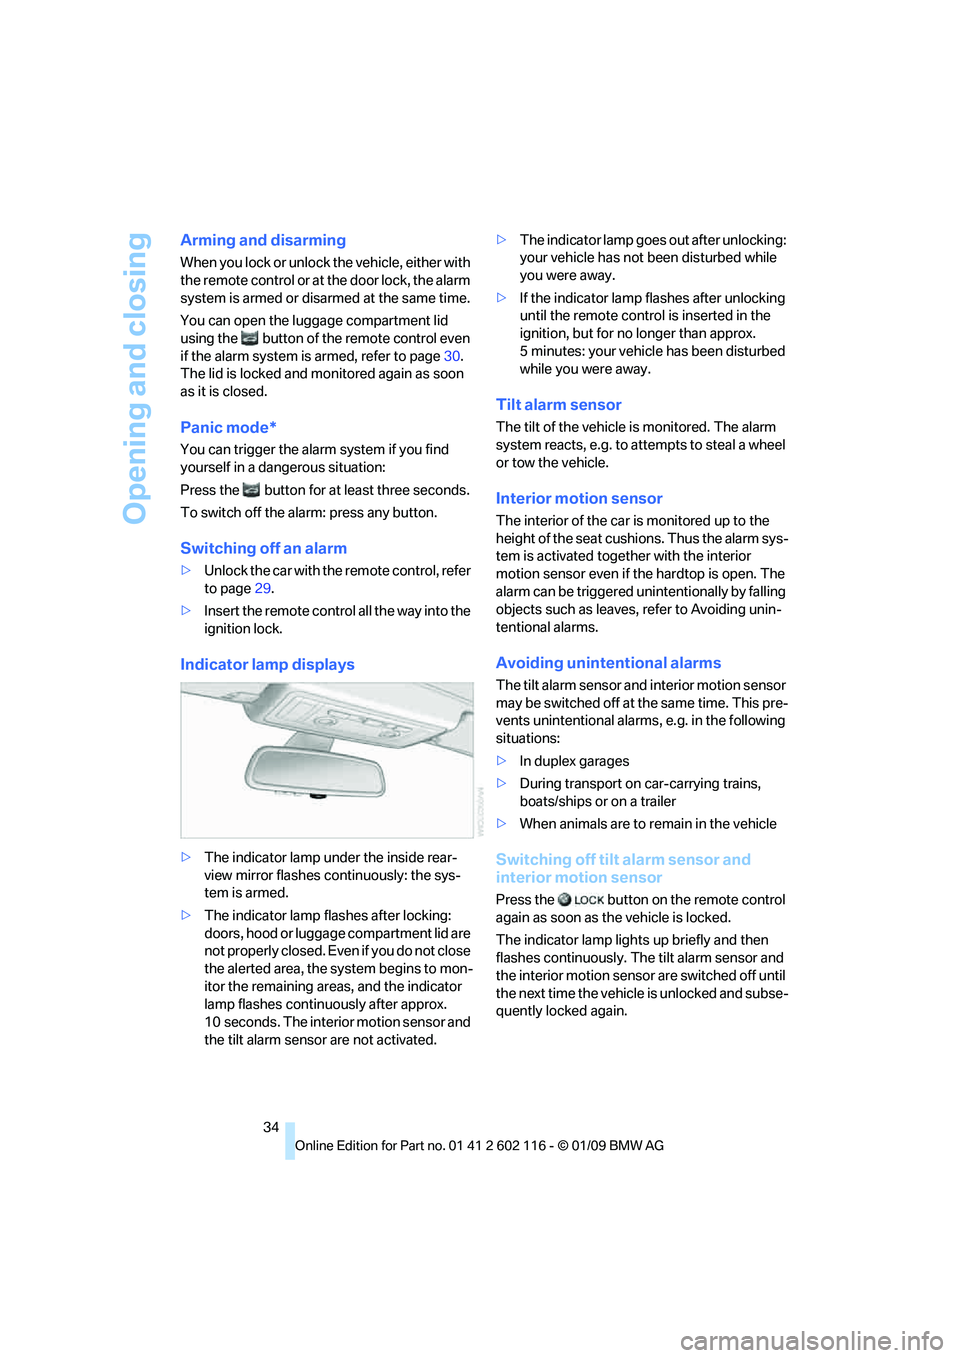
Indicator lamp displays
> The indicator lamp under the inside rear-
view mirror flashes continuously: the sys-
tem is armed.
> The indicator lamp flashes after locking:
doors, hood or luggage compartment lid are
not properly closed. Even if you do not close
the alerted area, the sy stem begins to mon-
itor the remaining area s, and the indicator
lamp flashes continuously after approx.
10 seconds. The interior motion sensor and
the tilt alarm sensor are not activated. >
The indicator lamp goes out after unlocking:
your vehicle has not been disturbed while
you were away.
> If the indicator lamp flashes after unlocking
until the remote control is inserted in the
ignition, but for no longer than approx.
5 minutes: your vehicle has been disturbed
while you were away.
Tilt alarm sensor
The tilt of the vehicle is monitored. The alarm
system reacts, e.g. to attempts to steal a wheel
or tow the vehicle.
Interior motion sensor
The interior of the car is monitored up to the
height of the seat cushions. Thus the alarm sys-
tem is activated togeth er with the interior
motion sensor even if the hardtop is open. The
alarm can be triggered unintentionally by falling
objects such as leaves, refer to Avoiding unin-
tentional alarms.
Avoiding unintentional alarms
The tilt alarm sensor and interior motion sensor
may be switched off at the same time. This pre-
vents unintentional alarms, e.g. in the following
situations:
> In duplex garages
> During transport on car-carrying trains,
boats/ships or on a trailer
> When animals are to remain in the vehicle
Switching off tilt alarm sensor and
interior motion sensor
Press the button on the remote control
again as soon as the vehicle is locked.
The indicator lamp light s up briefly and then
flashes continuously. The tilt alarm sensor and
the interior motion sensor are switched off until
the next time the vehicle is unlocked and subse-
quently locked again.
Page 56 of 248
Driving
54
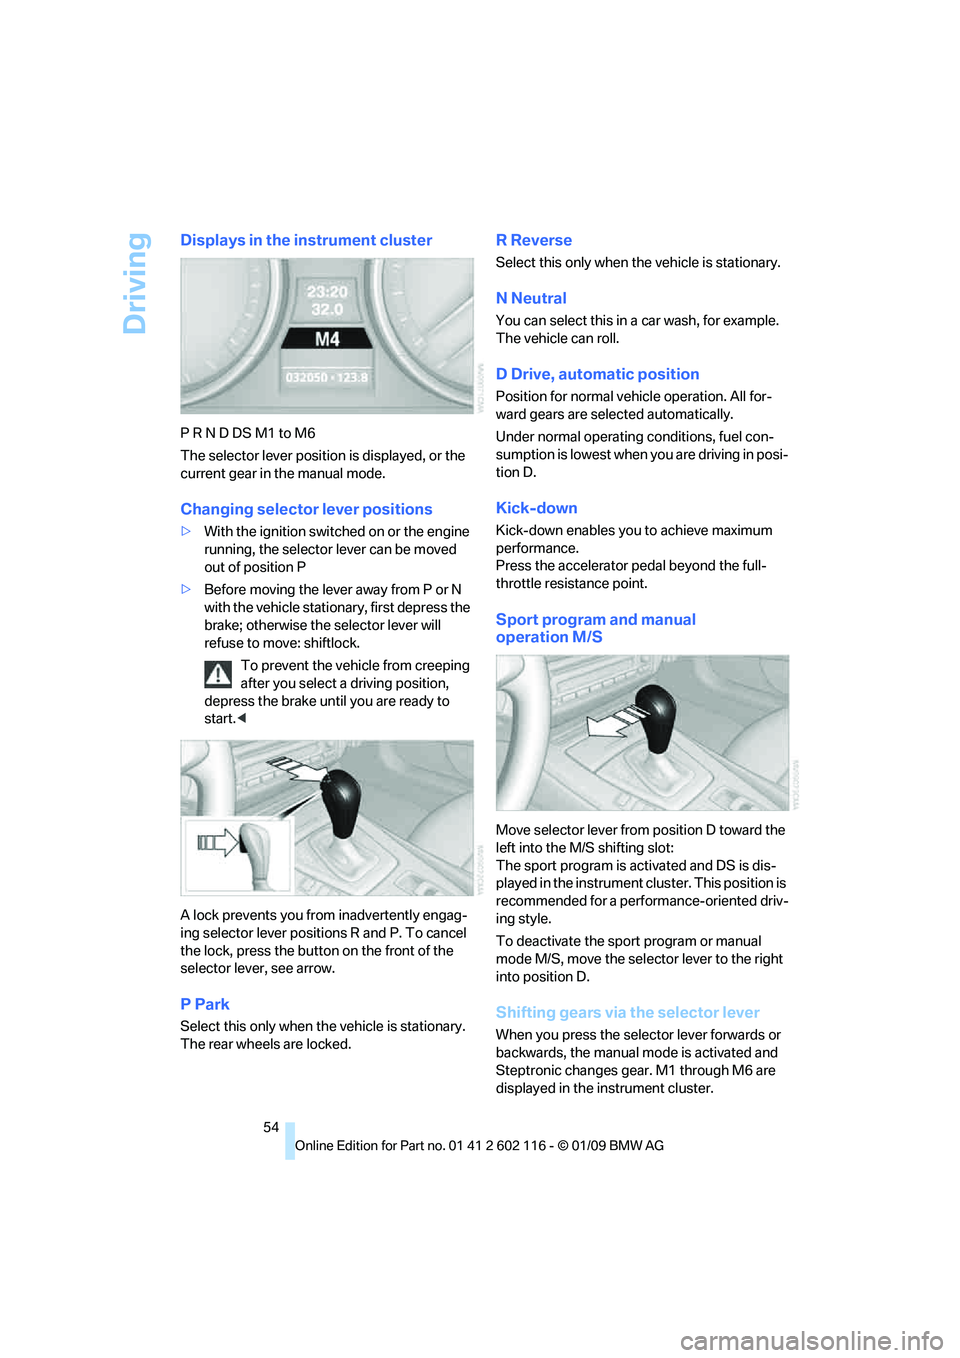
Displays in the instrument cluster
P R N D DS M1 to M6
The selector lever position is displayed, or the
current gear in the manual mode.
Changing selector lever positions
>With the ignition switched on or the engine
running, the selector lever can be moved
out of position P
> Before moving the lever away from P or N
with the vehicle stationary, first depress the
brake; otherwise the selector lever will
refuse to move: shiftlock.
To prevent the vehicle from creeping
after you select a driving position,
depress the brake until you are ready to
start. <
A lock prevents you from inadvertently engag-
ing selector lever positions R and P. To cancel
the lock, press the butto n on the front of the
selector lever, see arrow.
P Park
Select this only when th e vehicle is stationary.
The rear wheels are locked.
R Reverse
Select this only when th e vehicle is stationary.
N Neutral
You can select this in a car wash, for example.
The vehicle can roll.
D Drive, automatic position
Position for normal vehicle operation. All for-
ward gears are selected automatically.
Under normal operating conditions, fuel con-
sumption is lowest when you are driving in posi-
tion D.
Kick-down
Kick-down enables you to achieve maximum
performance.
Press the accelerator pedal beyond the full-
throttle resistance point.
Sport program and manual
operation M/S
Move selector lever from position D toward the
left into the M/S shifting slot:
The sport program is activated and DS is dis-
played in the instrument cl uster. This position is
recommended for a performance-oriented driv-
ing style.
To deactivate the spor t program or manual
mode M/S, move the sele ctor lever to the right
into position D.
Shifting gears via the selector lever
When you press the select or lever forwards or
backwards, the manual mode is activated and
Steptronic changes gear. M1 through M6 are
displayed in the instrument cluster.
Page 59 of 248
Controls
57Reference
At a glance
Driving tips
Communications
Navigation
Entertainment
Mobility
R Reverse
Select this only when the vehicle is stationary.
N Neutral
You can select this in a car wash, for example.
The vehicle can roll.
N remains engaged after the engine is
switched off if you leave the remote con-
trol in the ignition lock. Use this function in an
automatic car wash, for ex ample. P is automati-
cally engaged after approx. 30 minutes. <
D drive mode
In drive mode, all forward gears are shifted auto-
matically.
Kick-down
To accelerate rapidly, e.g. when passing, press
the accelerator down past the resistance point.
This provides maximum acceleration.
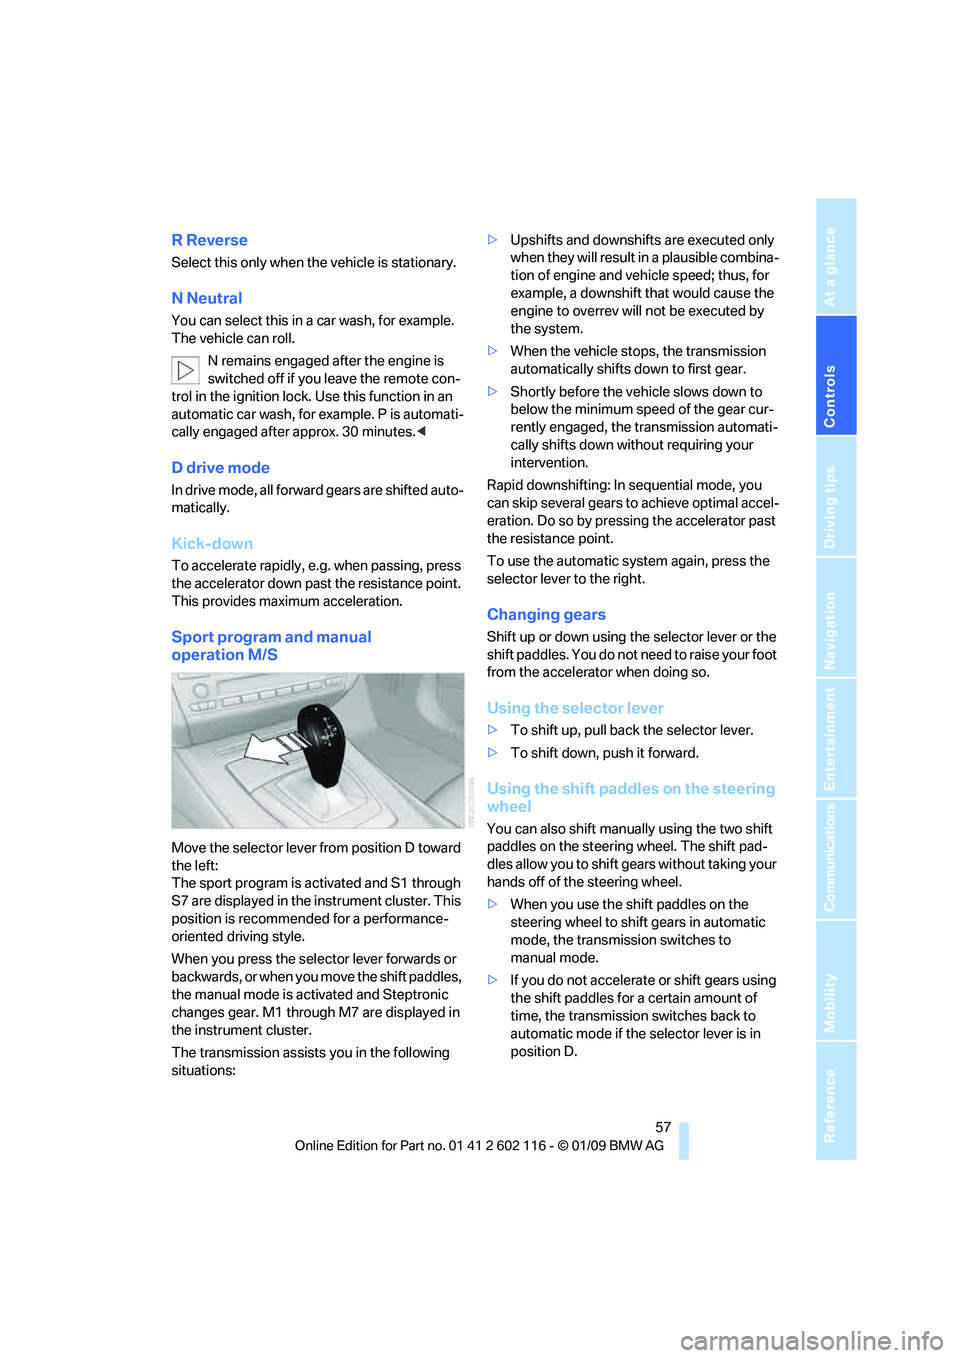
Sport program and manual
operation M/S
Move the selector lever from position D toward
the left:
The sport program is activated and S1 through
S7 are displayed in the instrument cluster. This
position is recommend ed for a performance-
oriented driving style.
When you press the selector lever forwards or
b a c k w a r d s , o r w h e n y o u m o v e t h e s h i f t p a d d l e s ,
the manual mode is ac tivated and Steptronic
changes gear. M1 through M7 are displayed in
the instrument cluster.
The transmission assists you in the following
situations: >
Upshifts and downshifts are executed only
when they will result in a plausible combina-
tion of engine and vehicle speed; thus, for
example, a downshift that would cause the
engine to overrev will not be executed by
the system.
> When the vehicle stops, the transmission
automatically shifts down to first gear.
> Shortly before the ve hicle slows down to
below the minimum speed of the gear cur-
rently engaged, the transmission automati-
cally shifts down without requiring your
intervention.
Rapid downshifting: In sequential mode, you
can skip several gears to achieve optimal accel-
eration. Do so by pressi ng the accelerator past
the resistance point.
To use the automatic system again, press the
selector lever to the right.
Changing gears
Shift up or down using th e selector lever or the
shift paddles. You do not ne ed to raise your foot
from the accelerator when doing so.
Using the selector lever
> To shift up, pull back the selector lever.
> To shift down, push it forward.
Using the shift paddles on the steering
wheel
You can also shift manually using the two shift
paddles on the steering wheel. The shift pad-
dles allow you to shift ge ars without taking your
hands off of the steering wheel.
> When you use the shift paddles on the
steering wheel to shift gears in automatic
mode, the transmission switches to
manual mode.
> If you do not accelerate or shift gears using
the shift paddles for a certain amount of
time, the transmission switches back to
automatic mode if the selector lever is in
position D.
Page 96 of 248
Climate
94
Rear window defroster
The defroster switches off auto-
matically after a certain time or
when the hardtop is opened.
Temperature
To increase the temperature, turn
the rotary switch clockwise
towards red.
For a lower temperature, turn the
rotary switch counterc lockwise towards blue.
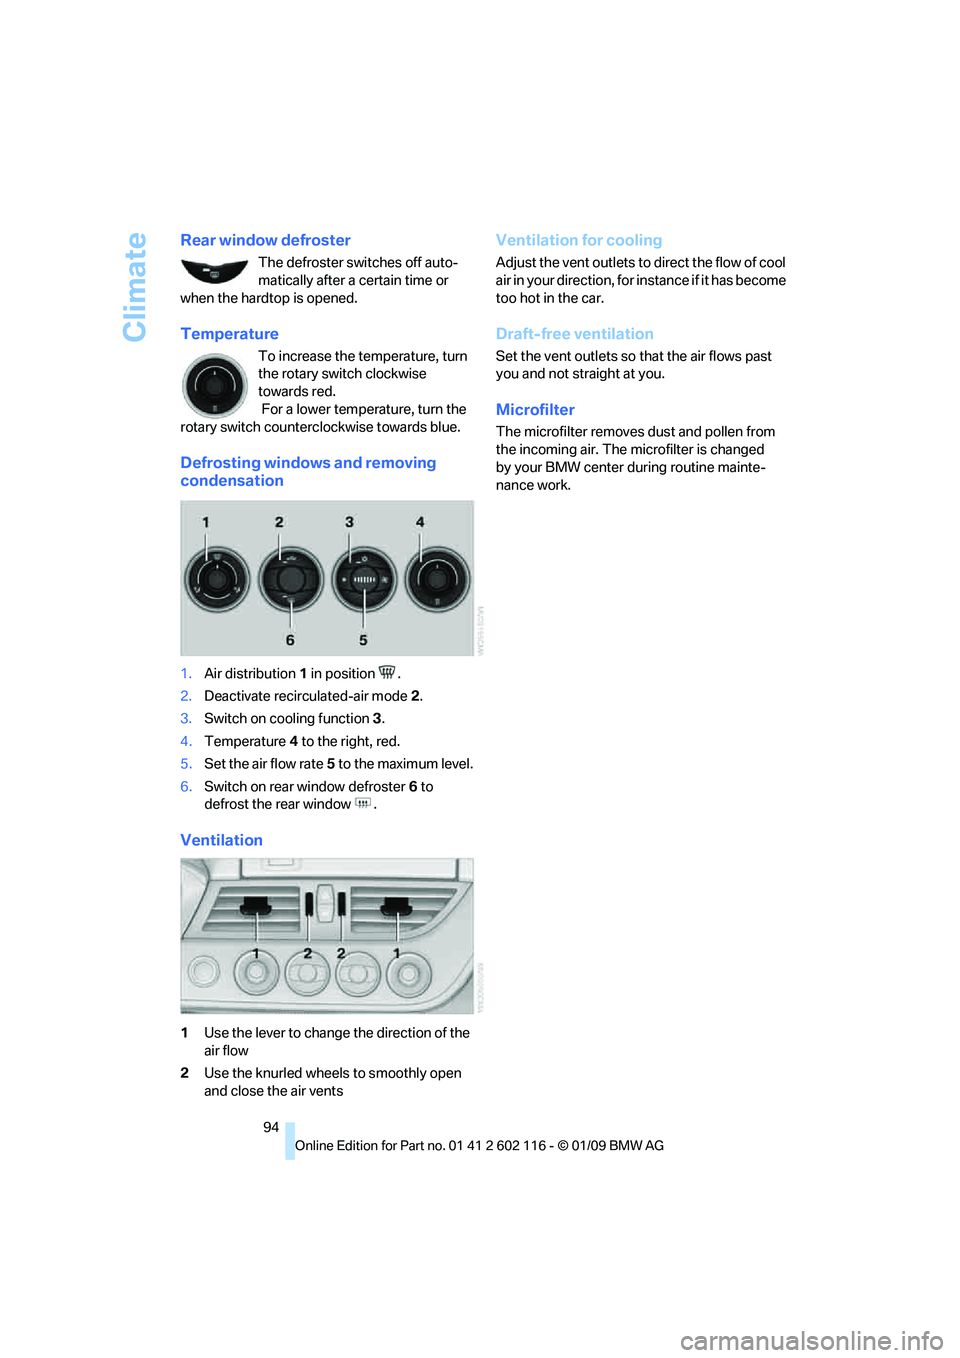
Defrosting windows and removing
condensation
1.Air distribution 1 in position .
2. Deactivate recirc ulated-air mode 2.
3. Switch on cooling function 3.
4. Temperature 4 to the right, red.
5. Set the air flow rate 5 to the maximum level.
6. Switch on rear window defroster 6 to
defrost the rear window .
Ventilation
1 Use the lever to change the direction of the
air flow
2 Use the knurled wheels to smoothly open
and close the air vents
Ventilation for cooling
Adjust the vent outlets to direct the flow of cool
air in your direction, for instance if it has become
too hot in the car.
Draft-free ventilation
Set the vent outlets so that the air flows past
you and not straight at you.
Microfilter
The microfilter removes dust and pollen from
the incoming air. The microfilter is changed
by your BMW center during routine mainte-
nance work.
Page 99 of 248
Controls
97Reference
At a glance
Driving tips
Communications
Navigation
Entertainment
Mobility
This function can be switched on
using the right button under the
following conditions:
> Up to 15 minutes after the engine has been
switched off
> Radio readiness is switched on.
> While the engine is at operating
temperature
> As long as battery voltage is sufficient
> At an outside temperature below
777/25 6
The middle LED is lit when the function is on.
Automatic recirculated-air control
AUC/recirculated-air mode
Switch on the desired operating
mode by pressing this button
repeatedly:
> LED off: outside air flows in continuously.
> Left-hand LED on, AUC mode: a sensor
detects pollutants in th e outside air. If nec-
essary, the system blocks the supply of out-
side air and recirculates the inside air. As
soon as the concentration of pollutants in
the outside air has decreased sufficiently,
the system automatically switches back to
outside air supply.
> Right-hand LED on, recirculated-air mode:
the supply of outside air is permanently
shut off. The system then recirculates the
air currently within the vehicle.
If condensation starts to form on the
inside window surfaces during operation
in the recirculated-air mode, you should switch
it off while also increasing the air flow rate as
required.
The recirculated-air mode should not be used
over an extended period of time, otherwise the
air quality inside the ca r will deteriorate contin-
uously. <
Defrosting windows and removing
condensation
Quickly removes ice and conden-
sation from the windshield and
front side windows.
Switch on the cooling function as well.
Rear window defroster
The defroster switches off auto-
matically after a certain time or
when the hardtop is opened.
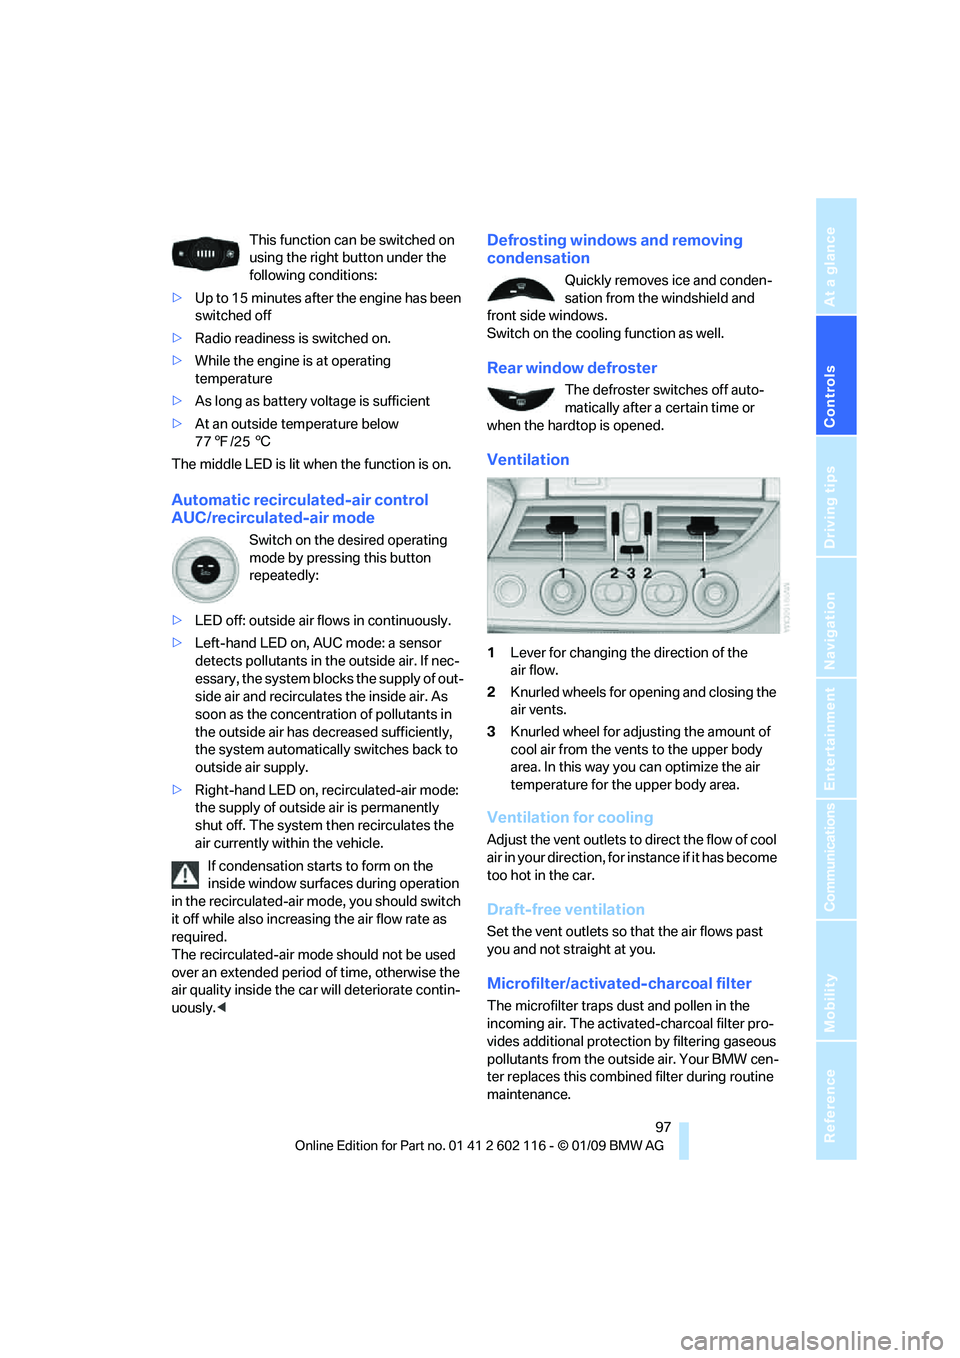
Ventilation
1 Lever for changing the direction of the
air flow.
2 Knurled wheels for opening and closing the
air vents.
3 Knurled wheel for adju sting the amount of
cool air from the vents to the upper body
area. In this way you can optimize the air
temperature for the upper body area.
Ventilation for cooling
Adjust the vent outlets to direct the flow of cool
air in your direction, for instance if it has become
too hot in the car.
Draft-free ventilation
Set the vent outlets so that the air flows past
you and not straight at you.
Microfilter/activated-charcoal filter
The microfilter traps dust and pollen in the
incoming air. The activated-charcoal filter pro-
vides additional protection by filtering gaseous
pollutants from the outs ide air. Your BMW cen-
ter replaces this combined filter during routine
maintenance.
Page 112 of 248
Things to remember when driving
110
Things to remember when driving
Break-in period
Moving parts need breaking-in time to adjust to
each other. Please follow the instructions below
in order to achieve the optimal service life and
economy of operation for your vehicle.
Engine and differential
Always obey all official speed limits.
Up to 1,200 miles/2,000 km
Drive at varying engine and road speeds, but do
not exceed an engine speed of 4,500 rpm or a
road speed of 100 mph/160 km/h.
Do not drive with full-throttle operation, and do
not use the transmission 's kick-down mode or
Launch Control.
After driving 1,200 miles/2,000 km
Engine and vehicle speeds can be gradually
increased.
Tires
Due to technical factors associated with their
manufacture, tires do no t achieve their full trac-
tion potential until afte r an initial break-in
period. Therefore, drive cautiously during the
first 200 miles/300 km.
Brake system
Brakes require an initial break-in period of
approx. 300 miles/500 km to achieve optimized
contact and wear patterns between brake pads
and rotors. Drive cautiously during this break-in
period.
Clutch
The function of the clut ch reaches its optimal
level only after a distan ce driven of approx.
300 miles/500 km. During this break-in period,
engage the clutch gently.
Following part replacement
The same break-in procedures should be
observed if any of the components mentioned
above have to be renewe d in the course of the
vehicle's operating life.
Saving fuel
The fuel consumption of your vehicle depends
on several factors. You can lower fuel consump-
tion and the environmental impact by taking
certain measures, adjusting your driving style
and having the vehicle serviced regularly.
Remove any unneeded cargo
Additional weight incr eases fuel consumption.
Remove any mounted parts after you
have finished using them
Remove additional mirrors and the luggage rack
when they are no longer in use. Mounted parts
affect the vehicle's aerodynamics and increase
fuel consumption.
Close both windows
An open glass roof or window causes higher air
resistance and thus increases fuel con-
sumption.
Check tire inflation pressure regularly
Check the tire inflation pr essure at least twice a
month and before embarking on a long journey,
and correct it if necessary.
Low tire inflation pressure causes higher rolling
resistance and thus increases fuel consumption
and tire wear.
Set off immediately
Do not let the engine wa rm up while the car is
still standing, but set off immediately at moder-
ate engine speed. This is the fastest way for the
cold engine to reach its operating temperature.
Page 167 of 248
165
Entertainment
Reference
At a glance
Controls
Driving tips
Communications
Navigation
Mobility
> Bluetooth is activated in the vehicle, refer to
page 166, and on the mobile phone.
> Certain presettings ma y be necessary on
some mobile phones: e.g. using the follow-
ing menu items:
> Bluetooth switched on
> Connection must be allowed without
requiring further confirmation
> Reconnection
> Depending on the mobile phone type, the
power-saving mode setting, for example,
may result in a paired mobile phone not
being detected by the vehicle.
> For pairing purposes, define any 4 to 16-
digit number as a Bluetooth passkey,
e.g. 123. A long and complex number offers
the best protection against unauthorized
access. This Bluetooth passkey is no longer
required after pairing has been successful.
> The ignition is switched on.
Pair the mobile phone with the vehicle
only when the car is stationary, to avoid
endangering the car's occupants and other
road users by be ing distracted.<
Switching on the ignition
1.Insert the remote contro l all the way into the
ignition lock.
2. Switch on the ignition without operating the
brake or clutch or pressing the start/stop
button.
Preparation via iDrive
iDrive, for operating principle refer to page 16.
3. "Telephone"
4. "Bluetooth" 5.
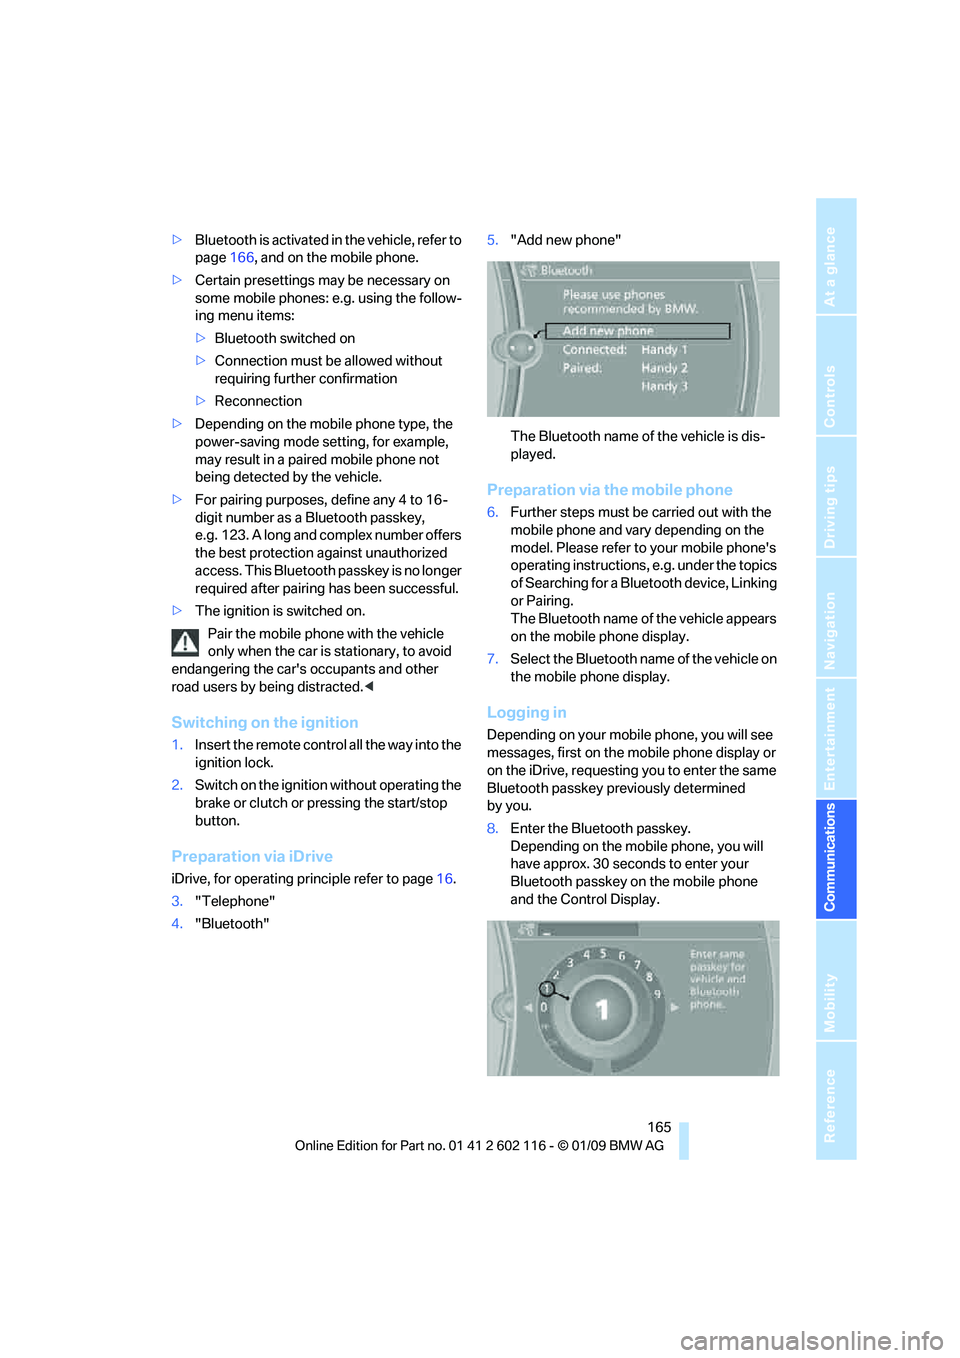
"Add new phone"
The Bluetooth name of the vehicle is dis-
played.
Preparation via the mobile phone
6.Further steps must be carried out with the
mobile phone and vary depending on the
model. Please refer to your mobile phone's
operating instructions, e.g. under the topics
of Searching for a Bluetooth device, Linking
or Pairing.
The Bluetooth name of the vehicle appears
on the mobile phone display.
7. Select the Bluetooth na me of the vehicle on
the mobile phone display.
Logging in
Depending on your mob ile phone, you will see
messages, first on the mobile phone display or
on the iDrive, requesting you to enter the same
Bluetooth passkey previously determined
by you.
8. Enter the Bluetooth passkey.
Depending on the mobile phone, you will
have approx. 30 seco nds to enter your
Bluetooth passkey on the mobile phone
and the Control Display.