2009 BMW X6 XDRIVE Handle
[x] Cancel search: HandlePage 31 of 317

Controls
29Reference
At a glance
Driving tips
Communications
Navigation
Entertainment
Mobility
>Language on Control Display, refer to
page 90
> 12h/24h clock format, refer to page 89
> Date format, refer to page 89
> Lighting settings:
>Triple turn signal activation, refer to
page 73
> Welcome lamps, refer to page 110
> Pathway lighting, refer to page 111
> Daytime driving lamps
*, refer to
page 111
> PDC Park Distance Control
*: optical warn-
ing, refer to page 92
> Rear view camera
*:
> Selecting functions, refer to page 93
> Type of display, refer to page 95
> Head-Up Display
*: selection, brightness
and position of display, refer to page 107
> Automatic climate control: AUTO program
and intensity, cooling function, and auto-
matic recirculated air control/recirculated
air mode, temperature, air distribution, tem-
perature in the upper body region, refer to
text starting on page 115
> Programmable memory buttons: selecting
stored functions, refer to page 21
> Positions of driver's seat, outside mirrors,
and steering wheel
*, refer to page 50
> Adaptive Drive
*: selected chassis and sus-
pension tuning, refer to page 99
> Audio sources: volume and tone settings,
refer to page 175
> Radio:
>Display of stored stations, refer to
page 178
> Switching RDS Radio Data System on/
off
*, refer to page 181
> Phone: volume setting, refer to
pages 226,232
Central locking system
The concept
The central locking system functions when the
driver's door is closed.
The system simultaneously engages and
releases the locks on the following:
> Doors
> Liftgate
> Fuel filler door
Operating from outside
>via the remote control
> via the door lock
> with comfort access
* via the door handles
The interior lamps and the courtesy lamps
* are
also switched on and off with the remote con-
trol. The alarm system
is armed/disarmed at the
same time.
You can find more detailed information on the
alarm system
on page 38.
Operating from inside
Via the button for centra l locking, refer to
page 32. The fuel filler door is not locked.
In an accident of sufficient severity, the central
locking system automati cally unlocks the vehi-
cle. In addition, the hazard warning flashers and
interior lamps come on.
Opening and closing:
Using remote control
Persons or animals left unattended in a
parked vehicle can lock the doors from
the inside. Always take along the remote control
when leaving the vehicle so that the vehicle can
then be opened from the outside. <
Page 35 of 317
Controls
33Reference
At a glance
Driving tips
Communications
Navigation
Entertainment
Mobility
>"Lock after driving"
The central locking system automati-
cally locks the vehicle as soon as you
start to drive.
8. Press the controller.
The setting is selected.
The setting is stored for the remote control cur-
rently in use.
Unlocking and opening
> Either unlock the door s together with the
button for the central locking system and
then pull the door handle above the armrest
or
> pull on the door handle of each door twice:
the first time unlocks the door, the second
time opens it.
Locking
> Use the central locking button to lock all of
the doors simultaneously, or
> press down the lock button of a door.
To prevent you from being locked out, the
open driver's door cannot be locked using
the lock button.
Persons or animals left unattended in a
parked vehicle can lock the doors from
the inside. Always take along the remote control
when leaving the vehicle so that the vehicle can
then be opened from the outside. <
Doors
Automatic soft closing*
To close the doors, merely push them gently.
The closing process will then be carried out
automatically.
Make sure that the closing path of the
doors is clear; otherwise injuries may
result. <
BMW X5: liftgate
During opening, the liftgate pivots back
and up. Ensure that adequate clearance is
available before opening. <
Opening from inside
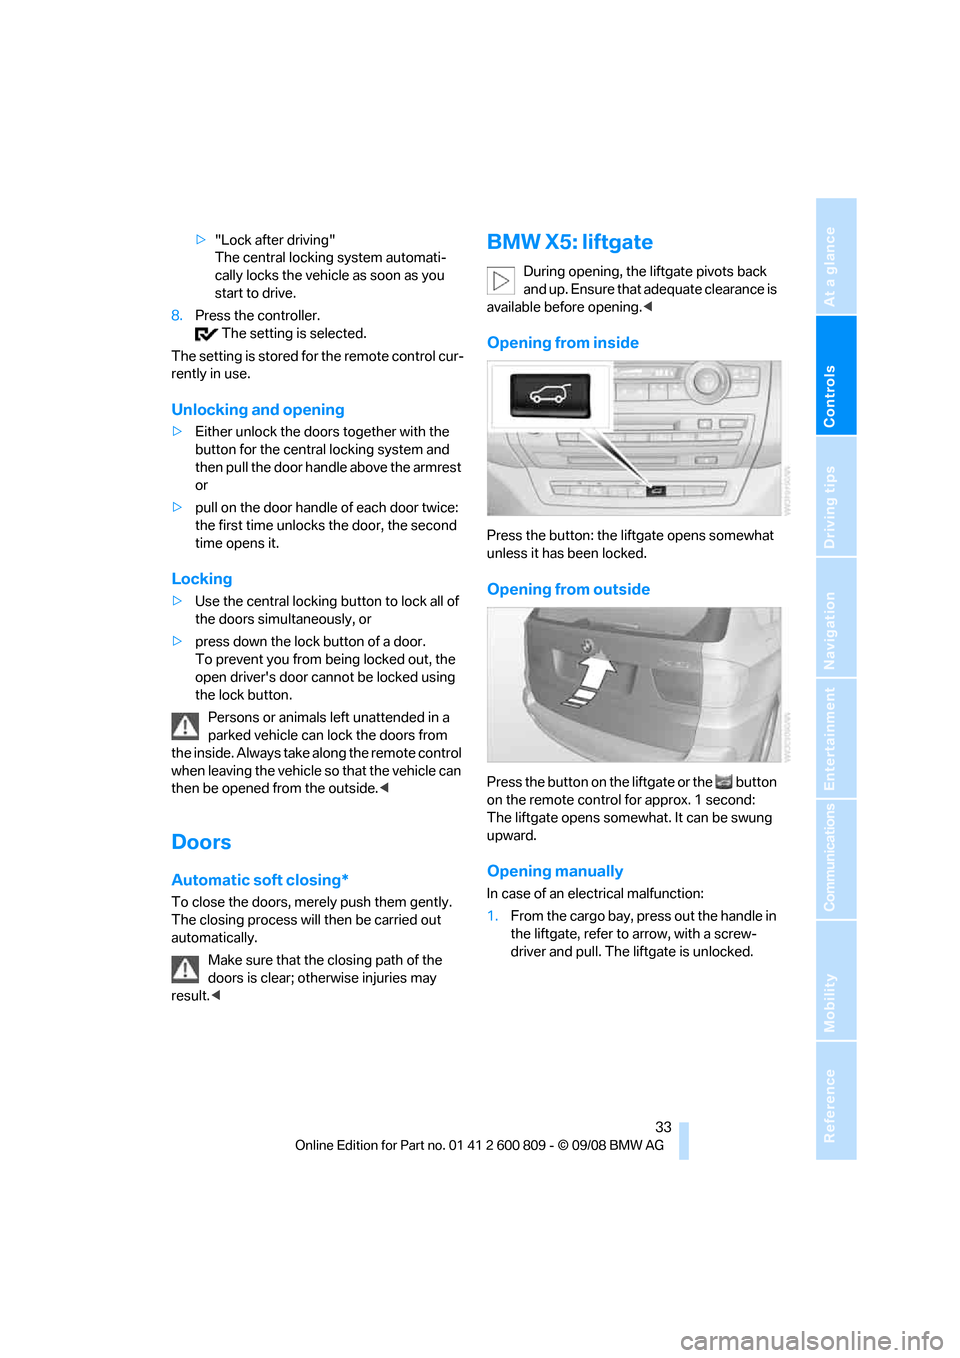
Press the button: the liftgate opens somewhat
unless it has been locked.
Opening from outside
Press the button on the liftgate or the button
on the remote control for approx. 1 second:
The liftgate opens somewhat. It can be swung
upward.
Opening manually
In case of an electrical malfunction:
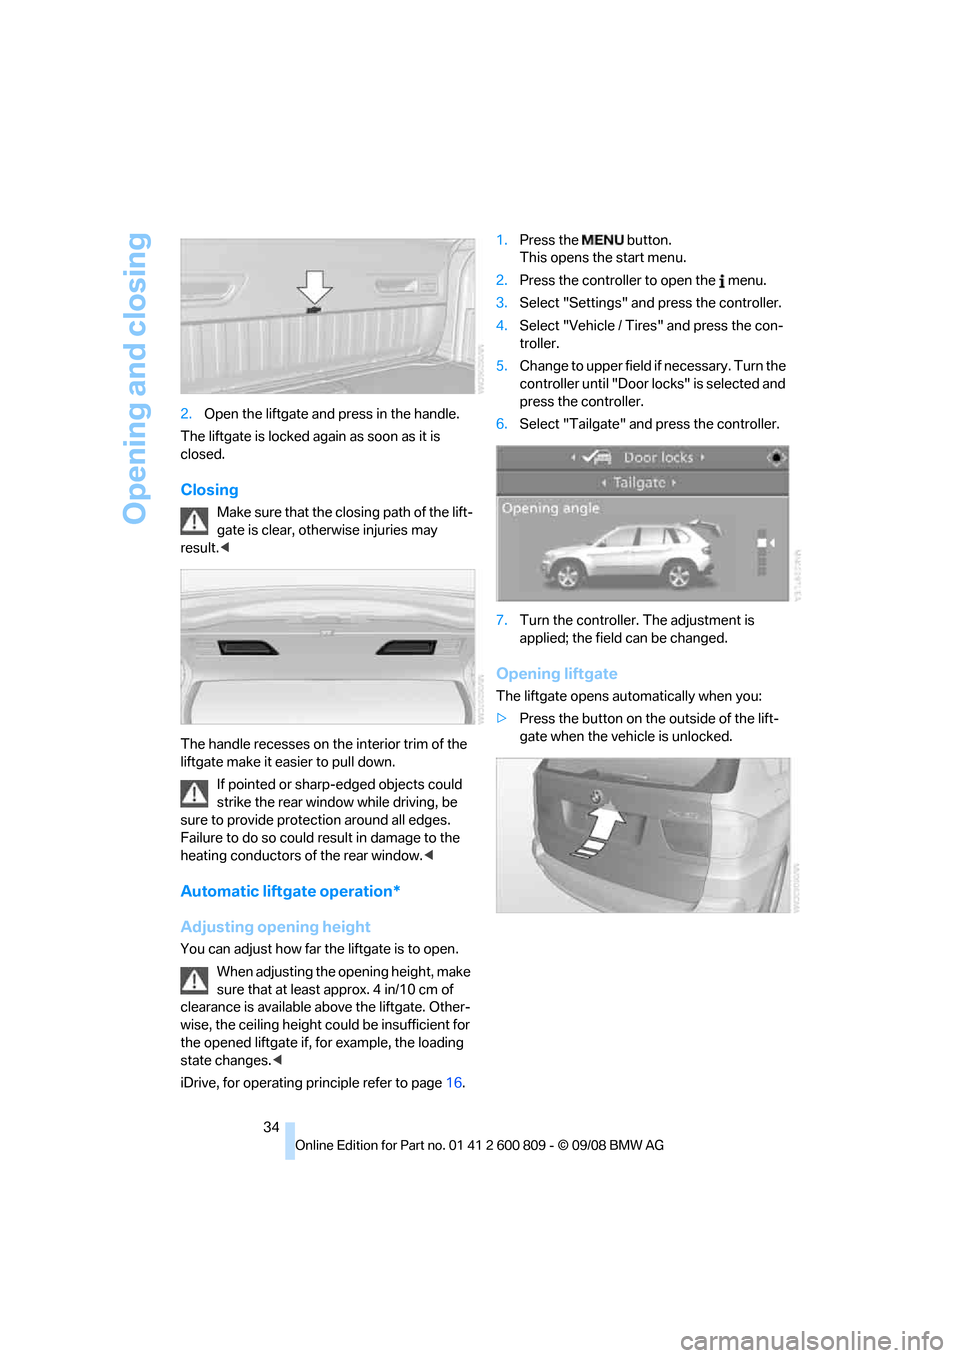
1. From the cargo bay, pr ess out the handle in
the liftgate, refer to arrow, with a screw-
driver and pull. The liftgate is unlocked.
Page 36 of 317
Opening and closing
34
2.
Open the liftgate and press in the handle.
The liftgate is locked again as soon as it is
closed.
Closing
Make sure that the closing path of the lift-
gate is clear, othe rwise injuries may
result. <
The handle recesses on the interior trim of the
liftgate make it easier to pull down. If pointed or sharp-edged objects could
strike the rear window while driving, be
sure to provide protection around all edges.
Failure to do so could re sult in damage to the
heating conductors of the rear window. <
Automatic liftgate operation*
Adjusting opening height
You can adjust how far the liftgate is to open.
When adjusting the opening height, make
sure that at least approx. 4 in/10 cm of
clearance is available above the liftgate. Other-
wise, the ceiling height could be insufficient for
the opened liftgate if, for example, the loading
state changes. <
iDrive, for operating pr inciple refer to page16. 1.
Press the button.
This opens the start menu.
2. Press the controller to open the menu.
3. Select "Settings" an d press the controller.
4. Select "Vehicle / Tire s" and press the con-
troller.
5. Change to upper field if necessary. Turn the
controller until "Door locks" is selected and
press the controller.
6. Select "Tailgate" and press the controller.
7. Turn the controller. The adjustment is
applied; the fiel d can be changed.
Opening liftgate
The liftgate opens automatically when you:
>Press the button on the outside of the lift-
gate when the vehi cle is unlocked.
Page 39 of 317
Controls
37Reference
At a glance
Driving tips
Communications
Navigation
Entertainment
Mobility
3.Open the liftgate and press the cover back
into place.
The liftgate is locked again as soon as it is
closed.
Closing
Make sure that the closing path of the lift-
gate is clear, otherwise injuries may
result. <
The handle recesses on the interior trim of the
liftgate make it easier to pull down. If pointed or sharp- edged objects could
strike the rear window while driving, be
sure to provide protecti on around all edges.
Failure to do so could re sult in damage to the
heating conductors of the rear window.<
Automatic liftgate operation*
Adjusting opening height
You can adjust how far the liftgate is to open.
When adjusting the opening height, make
sure that at least approx. 4 in/10 cm of
clearance is available ab ove the liftgate. Other-
wise, the ceiling height co uld be insufficient for
the opened liftgate if, for example, the loading
state changes. <
iDrive, for operating principle refer to page 16.
1. Press the button.
This opens the start menu.
2. Press the controller to open the menu.
3. Select "Settings" and press the controller.
4. Select "Vehicle / Tire s" and press the con-
troller. 5.
Change to upper field if necessary. Turn the
controller until "Door locks" is selected and
press the controller.
6. Select "Tailgate" and press the controller.
7. Turn the controller. The adjustment is
applied; the field can be changed.
Opening liftgate
The liftgate opens automatically when you:
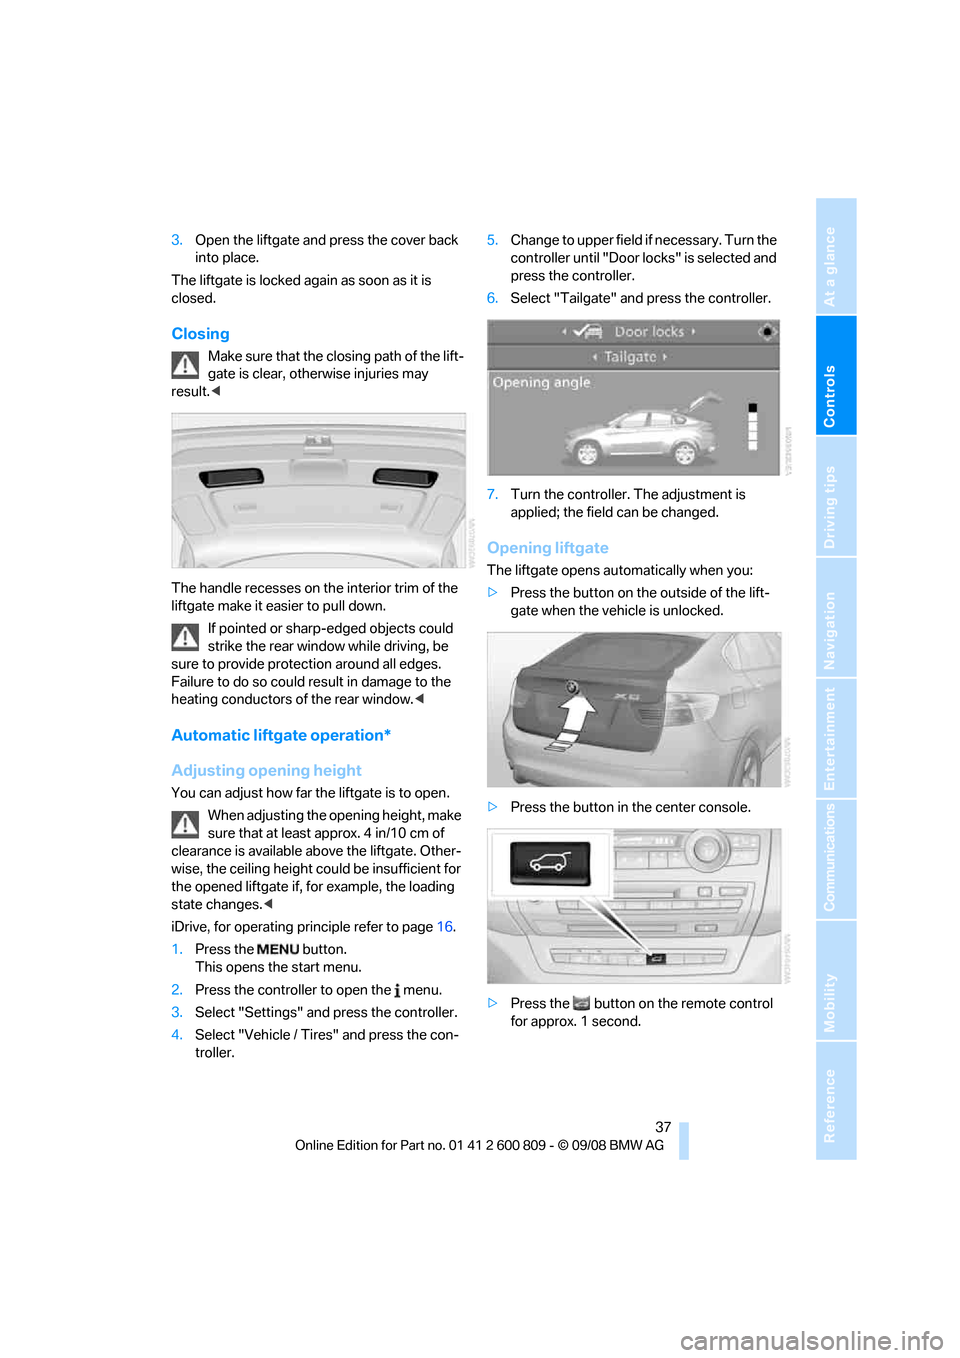
>Press the button on the outside of the lift-
gate when the vehicle is unlocked.
> Press the button in the center console.
> Press the button on the remote control
for approx. 1 second.
Page 42 of 317

Opening and closing
40
>
The engine can only be started if the vehicle
detects that the remote control is located in
the vehicle.
Comparison with ordinary remote
control
You can control the functions mentioned previ-
ously with the comfort access or by pressing
the buttons on the remote control. Therefore,
please familiarize yourself with the information
on opening and closing beginning on page 28
beforehand.
The special features when using comfort
access are described in the following.
Should a short delay occur when opening
or closing the windows or the glass sun-
roof
*/panorama glass sunroof*, the system
checks whether a remote control is located in
the vehicle. Please repeat opening or closing if
necessary. <
Releasing
Completely grasp a door handle, arrow 1.
This corresponds to pressing the button.
Locking
Touch the area highlighted in the picture,
arrow 2, with your finger for approx. 1 second.
This corresponds to pressing the but-
ton.
Please make sure that all electronic sys-
tems/consumers are sw itched off before
locking to save the battery. <
Comfort closing
Hold a finger or the back of a hand on the sur-
face, arrow2.
The windows and the glass sunroof
*/panorama
glass sunroof
* are closed.
Watch during the closing process to be
sure that no one is injured. Removing the
hand from the door handle immediately stops
the closing process. <
Opening liftgate
Press the button on the liftgate.
This corresponds to pr essing the button.
If a remote control acci dentally left in the
cargo bay is detected in the locked vehi-
cle after the liftgate is closed, then the liftgate
opens again. The hazard warning flashers flash
and a signal
* sounds. <
Switching on radio readiness
By briefly pressing the Start/Stop button, you
switch on the radio readiness, refer to page 65.
When doing so, do not depress the brake
pedal, otherwise the engine will start.<
Starting engine
You can start the engine or switch on the igni-
tion if a remote control is located in the interior
of the vehicle. It need not be inserted in the igni-
tion lock, refer to page 65.
As long as no remote co ntrol is detected in the
vehicle, it is only possible to restart the engine
within approx. 10 seconds after it is switched off
if no door has been opened.
Switching off engine
> Remote control not in ignition lock:
After switching off the engine, the transmis-
sion is automatically switched into trans-
mission position P.
> Remote control in ignition lock:
If transmission position N is engaged, the
transmission remains in this position after
the engine is switched off.
Page 56 of 317
Adjusting
54
Access to 3rd row seats*
Pull the lever and fold the seat forward.The handle recess on th e interior trim of
the door pillar makes climbing in easier. <
When folding back the 2nd row seats,
make sure that the footwell under the
2nd row seats is clear. Otherwise persons in the
3rd row seats could be injured or objects dam-
aged.<
Warning lamp for 2nd row seats:
Lights up when the 2nd row seats are
not locked. A message also appears
on the Control Display.
3rd row seats*
The 3rd row seats are divided and offer space
for two persons.
Folding up backrest
Before folding the seats up, remove the roll-up
cover, refer to page 130, and if need be, slide
the 2nd row seats slightly forward.
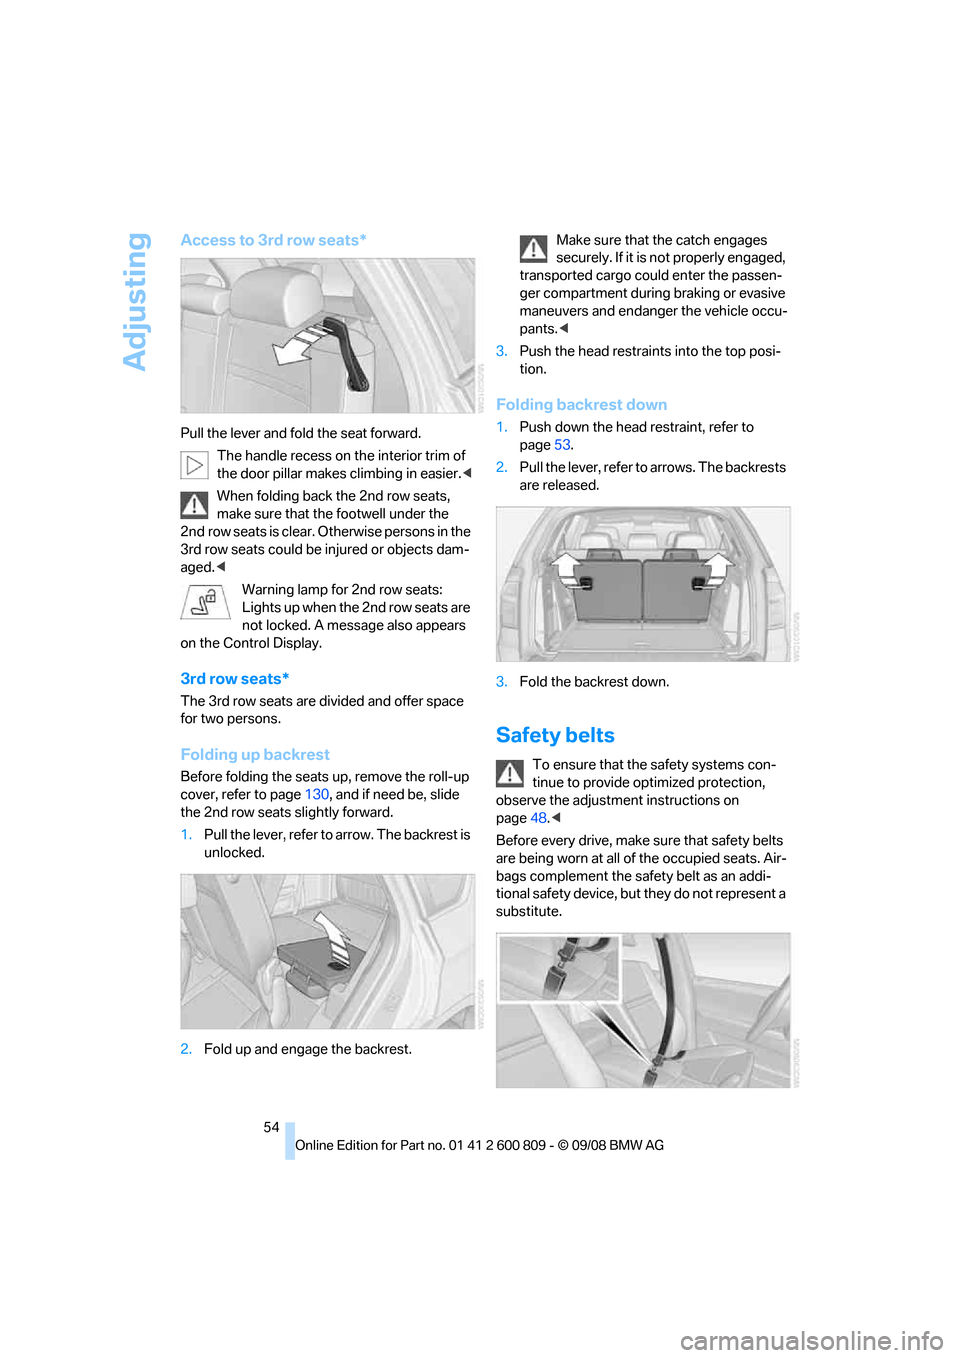
1. Pull the lever, refer to arrow. The backrest is
unlocked.
2. Fold up and engage the backrest. Make sure that the catch engages
securely. If it is no
t properly engaged,
transported cargo could enter the passen-
ger compartment during braking or evasive
maneuvers and endanger the vehicle occu-
pants. <
3. Push the head restraints into the top posi-
tion.
Folding backrest down
1.Push down the head restraint, refer to
page 53.
2. Pull the lever, refer to arrows. The backrests
are released.
3. Fold the backrest down.
Safety belts
To ensure that the safety systems con-
tinue to provide optimized protection,
observe the adjustment instructions on
page 48.<
Before every drive, make sure that safety belts
are being worn at all of the occupied seats. Air-
bags complement the safety belt as an addi-
tional safety device, but they do not represent a
substitute.
Page 115 of 317
Controls
113Reference
At a glance
Driving tips
Communications
Navigation
Entertainment
Mobility
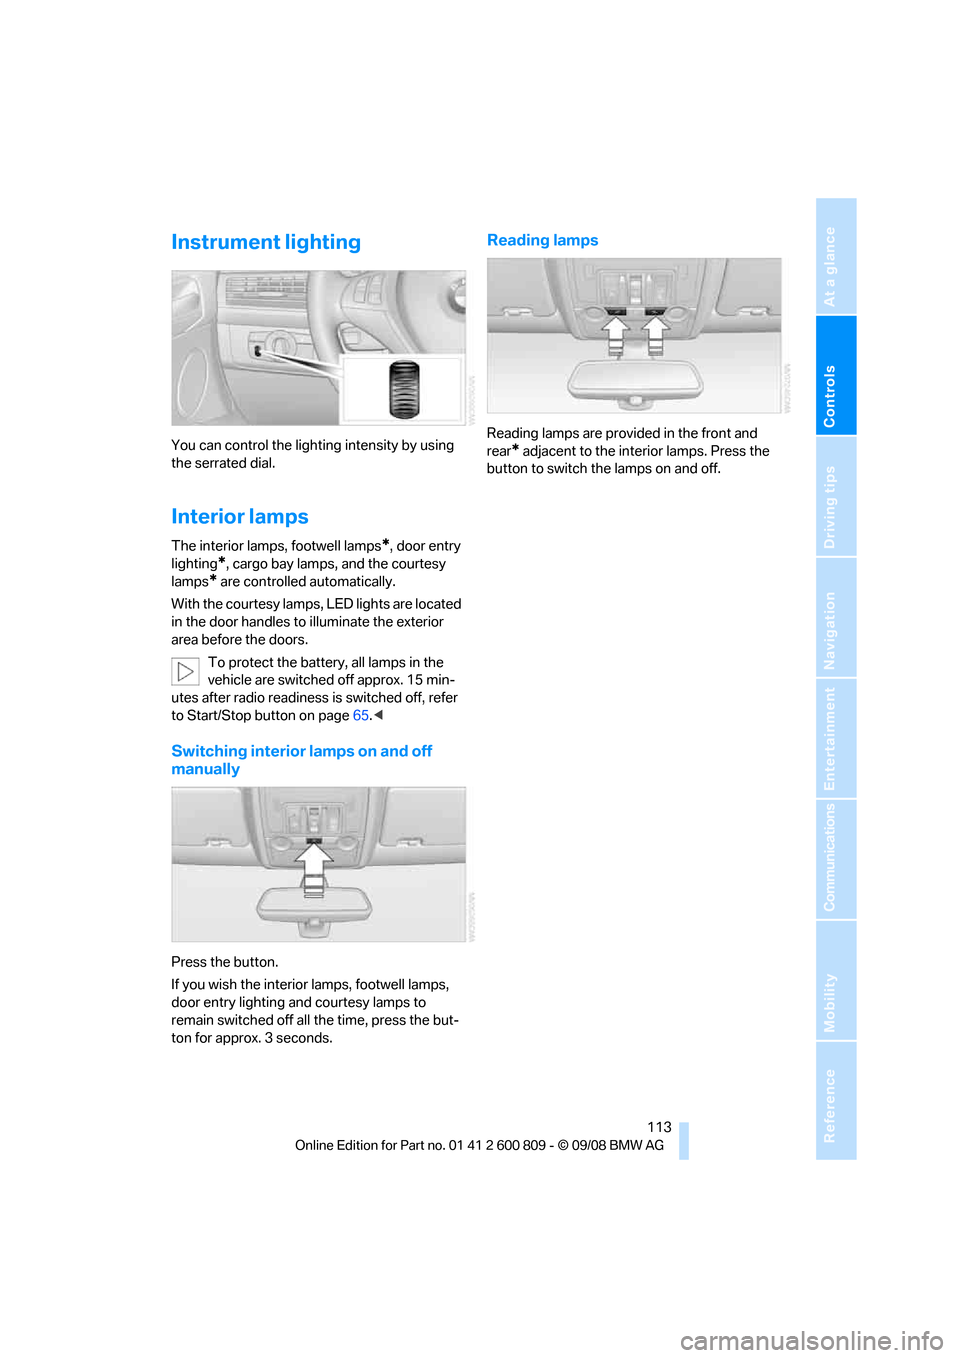
Instrument lighting
You can control the lighting intensity by using
the serrated dial.
Interior lamps
The interior lamps, footwell lamps*, door entry
lighting
*, cargo bay lamps, and the courtesy
lamps
* are controlled automatically.
With the courtesy lamps, LED lights are located
in the door handles to illuminate the exterior
area before the doors.
To protect the battery, all lamps in the
vehicle are switched off approx. 15 min-
utes after radio readiness is switched off, refer
to Start/Stop button on page 65.<
Switching interior lamps on and off
manually
Press the button.
If you wish the interior lamps, footwell lamps,
door entry lighting and courtesy lamps to
remain switched off all the time, press the but-
ton for approx. 3 seconds.
Reading lamps
Reading lamps are provided in the front and
rear
* adjacent to the inte rior lamps. Press the
button to switch the lamps on and off.
Page 117 of 317

Controls
115Reference
At a glance
Driving tips
Communications
Navigation
Entertainment
Mobility
Automatic climate control with 2-zone control
1Seat heating and ventilation, driver's
side 56
2 Temperature, left side of passenger
compartment
3 AUTO program
4 Temperature, right side of passenger
compartment
5 Maximum cooling
6 Seat heating
and ventilation,
front passenger side 56
7 Manual air distribution, front passenger side
8 Switching cooling function on and off
manually 9
AUC Automatic recirculated-air control/
recirculated-air mode
10 Manual air volume, sw itching off automatic
climate control, residual heat
11 Rear window defroster
12 Defrosting windows and removing
condensation
13 Air grill for interior temperature sensor –
please keep clear and unobstructed
14 Manual air distribution, driver's side
The current setting for manual air distribution
is displayed on the Control Display.
A congenial climate
The AUTO program offers the optimum air dis-
tribution and air volume for virtually all condi-
tions, refer to AUTO pr ogram below. Now you
only need to select an interior temperature
pleasant to you.
The following sections contain more detailed
information on the available setting options.
Most settings are stored for the remote control
currently in use, also re fer to Personal Profile
settings on page 28.
AUTO program
The AUTO program handles the
adjustment of air volume and air
distribution to the windshield and
side windows, in the direction of
the upper body and in the footwell.
It also adapts your inst ructions for the tempera-
ture to outside influenc es throughout the year. The cooling is switched
on automatically with
the AUTO program. At the same time, a con-
densation sensor controls the program in such
a way that window condensation is prevented
as much as possible.
Intensity of AUTO program
You can adjust the intensity of the AUTO pro-
gram by repeatedly pr essing the AUTO button.
The respective current setting is displayed
when the button on the display of the automatic
climate control is pressed.
You can also adjust the intensity of the AUTO
program via iDrive.
iDrive, for operating pr inciple refer to page16.
1. Press the button.
This opens the start menu.
2. Move the controller to the left to open "Cli-
mate".