2009 BMW X6 XDRIVE mirror
[x] Cancel search: mirrorPage 76 of 317
Driving
74
Washer/wiper system
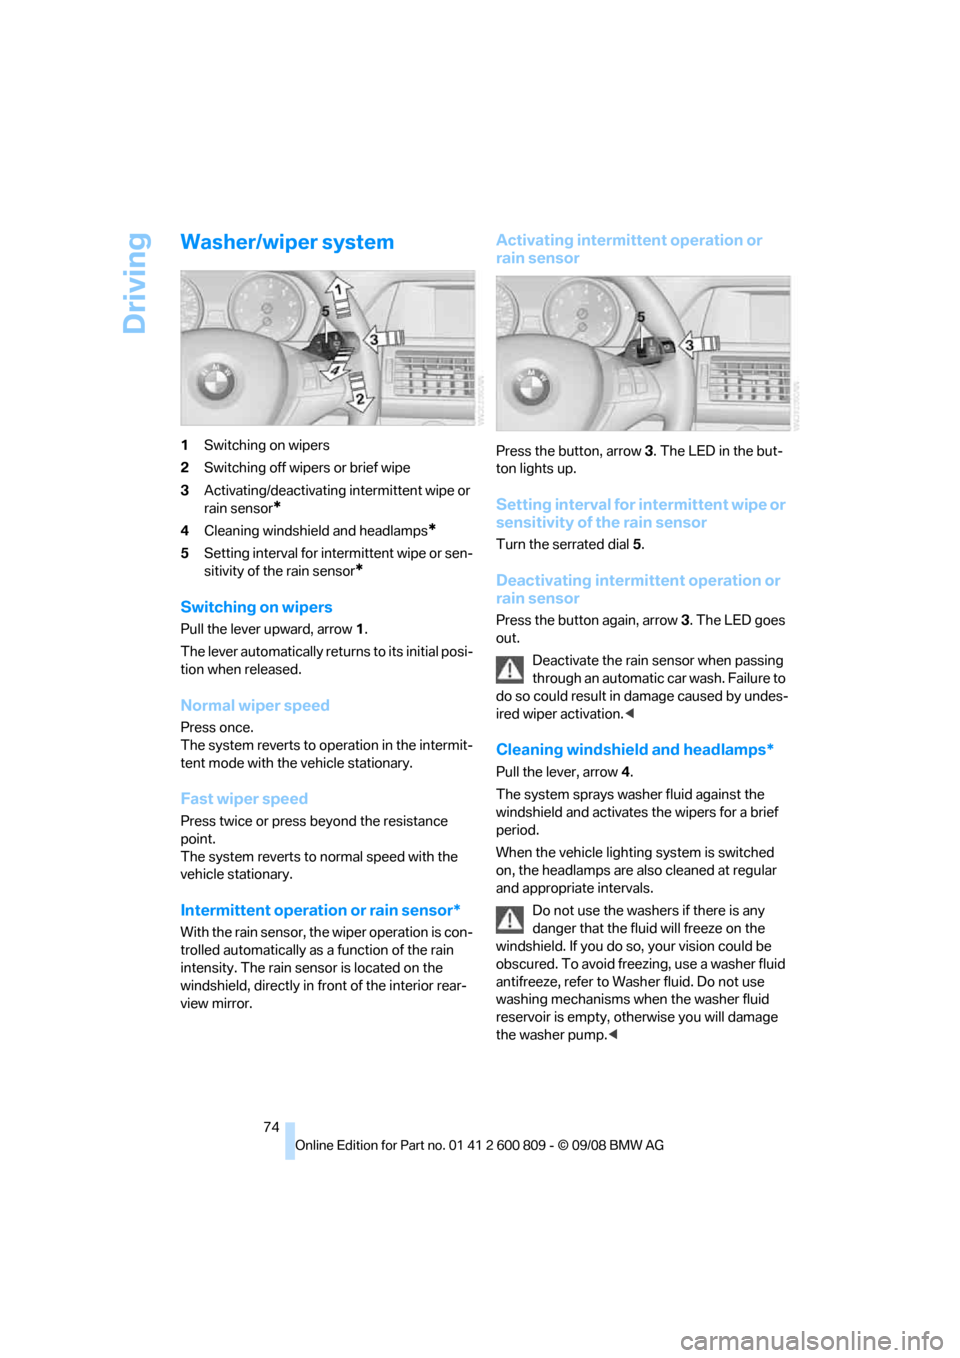
1Switching on wipers
2 Switching off wipers or brief wipe
3 Activating/deactivating intermittent wipe or
rain sensor
*
4Cleaning windshield and headlamps*
5Setting interval for inte rmittent wipe or sen-
sitivity of the rain sensor
*
Switching on wipers
Pull the lever upward, arrow 1.
The lever automatically retu rns to its initial posi-
tion when released.
Normal wiper speed
Press once.
The system reverts to op eration in the intermit-
tent mode with the vehicle stationary.
Fast wiper speed
Press twice or press beyond the resistance
point.
The system reverts to normal speed with the
vehicle stationary.
Intermittent operation or rain sensor*
With the rain sensor, th e wiper operation is con-
trolled automatically as a function of the rain
intensity. The rain sensor is located on the
windshield, directly in fr ont of the interior rear-
view mirror.
Activating intermittent operation or
rain sensor
Press the button, arrow 3. The LED in the but-
ton lights up.
Setting interval for intermittent wipe or
sensitivity of the rain sensor
Turn the serrated dial 5.
Deactivating intermittent operation or
rain sensor
Press the button again, arrow 3. The LED goes
out.
Deactivate the rain sensor when passing
through an automatic car wash. Failure to
do so could result in damage caused by undes-
ired wiper activation. <
Cleaning windshield and headlamps*
Pull the lever, arrow4.
The system sprays washer fluid against the
windshield and ac tivates the wipers for a brief
period.
When the vehicle lighting system is switched
on, the headlamps are also cleaned at regular
and appropriate intervals.
Do not use the washers if there is any
danger that the fluid will freeze on the
windshield. If you do so, your vision could be
obscured. To avoid freezing, use a washer fluid
antifreeze, refer to Wash er fluid. Do not use
washing mechanisms when the washer fluid
reservoir is empty, ot herwise you will damage
the washer pump.<
Page 108 of 317
Technology for comfort, convenience and safety
106
the upholstery in the center of the steering
wheel, on the instrument cluster, the doors, and
the roof pillars as well as
the sides of the head-
liner. Do not attempt to remove or dismantle the
steering wheel. Do not touch the individual
components immediately after the system has
been triggered, because there is a danger of
burns.
In the event of malfunctions, deactivation, or
triggering of the airbag restraint system, have
the testing, repair, remova l, and disposal of air-
bag generators executed only by a BMW Sports
Activity Vehicle Center or a workshop that
works according to BMW repair procedures
with correspondingly trained personnel and has
the required explosives licenses. Otherwise
unprofessional attempts to service the system
could lead to failure in an emergency or undes-
ired airbag triggering, either of which could
result in personal injury. <
Warnings and information on the airbags is also
provided on the sun visors.
Automatic deactivation of front
passenger airbags
The occupation of the seat is detected by eval-
uating the impression on the occupied seat sur-
face of the front passeng er seat. The front and
side airbags on the front passenger side are
activated or deactivated accordingly by the sys-
tem.
The current status of the front passenger
airbag, i.e. deactivated or activated, is
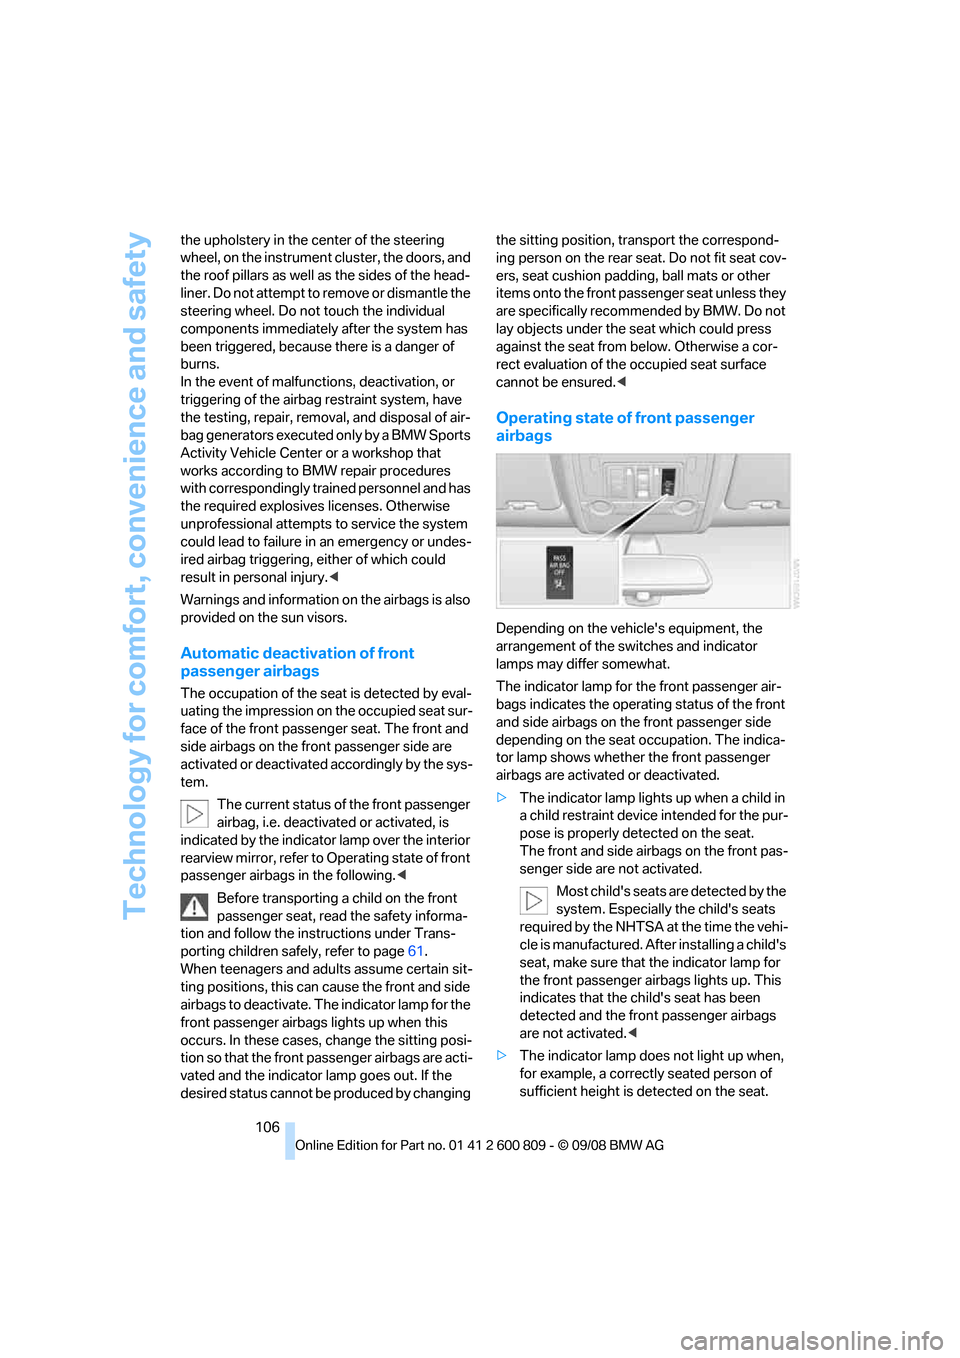
indicated by the indicator lamp over the interior
rearview mirror, refer to Operating state of front
passenger airbags in the following. <
Before transporting a child on the front
passenger seat, read the safety informa-
tion and follow the inst ructions under Trans-
porting children safely, refer to page 61.
When teenagers and adults assume certain sit-
ting positions, this can cause the front and side
airbags to deactivate. The indicator lamp for the
front passenger airbags lights up when this
occurs. In these cases, change the sitting posi-
tion so that the front passenger airbags are acti-
vated and the indicator la mp goes out. If the
desired status cannot be produced by changing the sitting position, transport the correspond-
ing person on the rear se
at. Do not fit seat cov-
ers, seat cushion padding, ball mats or other
items onto the front passenger seat unless they
are specifically recomme nded by BMW. Do not
lay objects under the seat which could press
against the seat from below. Otherwise a cor-
rect evaluation of the occupied seat surface
cannot be ensured. <
Operating state of front passenger
airbags
Depending on the vehicle's equipment, the
arrangement of the switches and indicator
lamps may differ somewhat.
The indicator lamp for the front passenger air-
bags indicates the operating status of the front
and side airbags on the front passenger side
depending on the seat occupation. The indica-
tor lamp shows whether the front passenger
airbags are activated or deactivated.
> The indicator lamp light s up when a child in
a child restraint device intended for the pur-
pose is properly detected on the seat.
The front and side airbags on the front pas-
senger side are not activated.
Most child's seats are detected by the
system. Especially the child's seats
required by the NHTSA at the time the vehi-
cle is manufactured. Af ter installing a child's
seat, make sure that the indicator lamp for
the front passenger airbags lights up. This
indicates that the child's seat has been
detected and the front passenger airbags
are not activated. <
> The indicator lamp does not light up when,
for example, a correctly seated person of
sufficient height is detected on the seat.
Page 140 of 317

Things to remember when driving
138
Things to remember when driving
Break-in period
Moving parts need breaking-in time to adjust to
each other. To ensure that your vehicle contin-
ues to provide optimized economy of operation
throughout an extended service life, we request
that you devote careful attention to the follow-
ing section.
Engine and differential
Always obey all official speed limits.
Up to 1,200 miles/2,000 km
Drive at changing engine and vehicle speeds,
however do not exceed:
> Gasoline engine
4,500 rpm or 100 mph/160 km/h
> Diesel engine
3,500 rpm or 90 mph/150 km/h
Avoid full-throttle operation and use of the
transmission's kick-down mode during these
initial miles.
From 1,200 miles/2,000 km
The engine and vehicle speed can gradually be
increased.
Tires
Due to technical factors associated with their
manufacture, tires do no t achieve their full trac-
tion potential until afte r an initial break-in
period. Therefore, drive reservedly during the
first 200 miles/300 km.
Brake system
Brakes require an initial break-in period of
approx. 300 miles/500 km to achieve optimized
contact and wear patterns between brake pads
and rotors. Drive in a reserved manner during
this break-in period.
Following part replacement
Observe the break-in instructions again if com-
ponents mentioned above must be replaced
after subsequent driving operation.
Saving fuel
The fuel consumption of your vehicle depends
on various factors. Through a few simple steps,
your driving style, and regular maintenance, you
can have a positive influence on your fuel con-
sumption and environmental impact.
Removing unnecessary cargo
Additional weight incr eases fuel consumption.
Removing add-on parts after use
Remove unneeded auxiliary mirrors, roof or rear
luggage racks after use. Add-on parts attached
to the vehicle impede the aerodynamics and
increase the fuel consumption.
Closing windows and glass sunroof*/
panorama glass sunroof*
An open glass sunroof/panorama glass sunroof
or open windows likewise increase the drag
coefficient and therefore the fuel consumption.
Checking tire in flation pressures
regularly
Check and correct the tire inflation pressure as
needed at least twice a month and before long
trips.
An insufficient tire inflation pressure increases
the rolling resistance an d thus increases the
fuel consumption and tire wear.
Driving off immediately
Do not allow the engine to warm up by leaving it
running while the vehicl e remains stationary.
Instead, begin to drive at a moderate engine
Page 142 of 317
Things to remember when driving
140
planing, and is characterized by a partial or
complete loss of contac
t between the tires and
the road surface, ultima tely undermining your
ability to steer and brake the vehicle. <
The risk of hydroplaning increases as the tread
depth of the tires decreases, also refer to Mini-
mum tread depth on page 255.
Driving through water
Maximum water depth:
>BMW X5 20 in/50 cm
> BMW X6 17 in/45 cm
Only drive through water up to the above-
mentioned depth at no greater than walk-
ing speed; otherwise, the engine, electrical sys-
tem, and transmission can be damaged. <
Braking safely
Your BMW is equipped with ABS as a standard
feature. In situations that require it, it is best to
brake with full force. Since the vehicle maintains
steering responsiveness, you can still avoid
possible obstacles with a minimum of steering
effort.
Pulsation of the brake pedal, combined with
sounds from the hydraulic circuits, indicate that
ABS is in its active mode.
Do not drive with your foot resting on the
brake pedal. Even light but consistent
pedal pressure can lead to high temperatures,
brake wear and possibly even brake failure.<
Driving in wet conditions
When roads are wet or there is heavy rain,
briefly exert gentle pre ssure on the brake pedal
every few miles. Monitor traffic conditions to
ensure that this maneuver does not endanger
other road users. The heat generated in this
process helps dry the pads and rotors to ensure
that full braking efficiency will then be available
when you need it.
Hills
To prevent overheating and the resulting
reduced efficiency of the brake system,
drive long or steep downhill gradients in the gear in which the least br
aking is required. Even
light but consistent pressure on the brake pedal
can lead to high temperatures, brake wear and
possibly even brake failure. <
The braking effect of the engine can be further
increased by downshifting in the manual mode
of the automatic transmis sion, if necessary into
first gear, refer to page 71. This prevents an
excessive strain on the brakes.
Do not drive in idle or with the engine
stopped, otherwise there will be no
engine braking action or support of the braking
force and steering.
Never allow floor mats, carpets or any other
objects to protrude into the area of movement
of the pedals and impair their operation. <
Corrosion on brake rotors
When the vehicle is driven only occasionally,
during extended periods when the vehicle is not
used at all, and in op erating conditions where
brake applications are less frequent, there is an
increased tendency for corrosion to form on
rotors, while contaminan ts accumulate on the
brake pads. This occurs because the minimum
pressure which must be exerted by the pads
during brake applications to clean the rotors is
not reached.
Should corrosion form on the brake rotors, the
brakes will tend to re spond with a pulsating
effect that even extended application will fail to
cure.
When vehicle is parked
Condensation forms in the automatic climate
control system during operation, and then exits
under the vehicle. Traces of condensed water
under the vehicle are therefore normal.
Before driving into a car wash
Fold in the exterior mirrors, refer to page 57,
otherwise they could be damaged due to the
width of the vehicle.
Release the parking brake, particularly when
you have activated Auto matic Hold, refer to
page 67.
Page 267 of 317
Mobility
265Reference
At a glance
Controls
Driving tips
Communications
Navigation
Entertainment
Care
Car-care products
For the cleaning and care of your vehicle, BMW
recommends using only products that BMW
has approved for this purpose.
Regular cleaning and care make a significant
contribution to retain ing your BMW's value.
The BMW Sports Activity Vehicle Center will be
happy to consult you on products and services
for the cleaning and care of your BMW.
Genuine BMW Care Products are materi-
als tested, laboratory tested, and tested in
actual use. They offer optimum care and pro-
tection for your vehicle. <
Do not use cleaners that contain alcohol
or solvents; they can damage your vehi-
cle. <
Cleaning agents can contain substances
that are dangerous or pose health risks.
You should therefore heed the warnings and
hazard indications on the packaging. Open the
doors or windows on your vehicle whenever
cleaning the interior. Make sure there is suffi-
cient ventilation in enclosed spaces. Use only
products that are formul ated for vehicle clean-
ing. <
Exterior care
Washing your vehicle
In the winter months, it is especially
important to ensure that the vehicle is
washed on a regular basis. Otherwise, signifi-
cant soiling and road salt can cause damage to
the vehicle.<
After washing the vehicle, apply the
brakes briefly to dry th em. Failure to do so
may lead to a reduction in braking efficiency and
also to corrosion of the brake rotors. <
Car washes
Give preference to cloth car washes.
Before driving into the car wash, make sure that
it is suitable for your BMW. Pay attention to the
following points:
> Dimensions of your vehicle, refer to
page 287.
> If necessary: fold in door mirror, refer to
page 57.
> Maximum permissible tire width.
Preparations for driving into the car wash:
> Deactivate rain sensor
* to prevent
unwanted wiper activation.
> BMW X5: deactivate rear window wiper and
protect it from damage. Take appropriate
protective measures; inquiring with the car
wash operator as needed.
> Remove additional add- on parts, e.g. spoil-
ers or phone antennas, if they could be
damaged.
Automatic transmission with
Steptronic
Before driving into the car wash, observe the
following so that the vehicle is able to roll:
1. Insert the remote cont rol into the ignition
lock, even with comfort access.
2. Shift into transmission position N.
3. Release the parking brake.
4. Deactivate Automatic Hold, refer to
page 68.
5. Switch off the engine.
6. Leave the remote control in the ignition lock
so that the vehicle can roll.
Page 268 of 317
Care
266
Steam cleaners/high-pressure
cleaning jets
When using steam cleaners or high-pres-
sure cleaning jets, make sure to maintain
a sufficient distance and stay below a maximum
temperature of 140 7/60 6.
Insufficient distance or excessive pressure or
temperature can damage pa rts of the vehicle or
can result in water pene tration. Follow the oper-
ating instructions for the high-pressure clean-
ing jets. <
When using high-pressure cleaning jets,
do not remain in one place for a long time
and be sure to maintain a distance of at least
12 in/30 cm from sensors and cameras, e.g.
Park Distance Control sensors or rear view
camera. <
Hand washing
When washing the vehicle by hand, use plenty
of water and car washing shampoo. Clean the
vehicle with gentle pressure using a sponge or a
washing brush.
Before cleaning the windshield, deacti-
vate the rain sensor or switch off the igni-
tion to prevent unwanted wiper operation. <
Follow local guidelines for washing vehi-
cles by hand. <
Headlamps
Do not rub dry and never use abrasives or
strong solvents to clean the covers.
Loosen dirt, e.g. insects, with shampoo or
insect remover and wash away with plenty of
water.
Use a window de-icer to remove accumulated
ice and snow, not a scraper.
Windows
Use a glass cleaner to clean the inside and out-
side surfaces of the windows and the glass sur-
faces of the mirrors.
Do not use quartz-containing cleansers
to clean glass surfaces of the mirrors. <
Wiper blades
Clean with soapy water and replace regularly to
prevent streaking.
The presence of wax and sealant residues
and dirt on the windows leads to streaking
during wiper operation and results in premature
wear on wiper blades as well as interference
with the rain sensor. <
Caring for the vehicle finish
Regular care helps your vehicle retain its value
and protects the paint from the long-term
effects of aggressive substances.
Regionally occurring en vironmental factors can
affect and damage vehicle finish. It is therefore
important to tailor the fr equency and extent of
your car care accordingly.
Immediately remove particularly aggressive
substances such as sp illed fuel, oil, grease,
brake fluid, tree resin, or bird droppings; other-
wise, they may damage your paint.
Repairing paint damage
Repair stone damage or scratches imme-
diately, depending on the severity of the
damage, to prevent the formation of rust. <
BMW recommends having paint damage pro-
fessionally repaired us ing Genuine BMW finish
materials in accordance with factory guidelines.
Waxing
Sealant is required when w a t e r n o l o ng e r b e a ds
on the clean surface of the paint. Use only prod-
ucts that contain carnauba wax or synthetic wax
to seal your finish.
Rubber gaskets
Treat only with water or a rubber care product.
To avoid noise or damage, do not use
products that contain silicone to care for
rubber gaskets. <
Chrome components
Particularly after exposure to road salt, thor-
oughly cleanse parts like the radiator grille, door
handles, or window frames with plenty of water
Page 280 of 317
Replacing components
278
Vehicle Center or bring them to a collection
point. Maintain the battery
in an upright position
for transport and storage. Always restrain the
battery to prevent it from tipping over during
transport. <
Power failure
Following a temporary power failure, e.g. due to
a discharged battery, the use of some equip-
ment will be restricted, requiring its reinitializa-
tion. In the same way, individual settings are lost
and must be updated again:
> Seat, mirror and steering wheel memory
The positions must be stored again, refer to
page 50.
> Time and Date
The values must be updated again, refer to
pages 88, 89.
> Radio
Radio stations must be stored again, refer
to page 180.
> Navigation system
You must wait until the system becomes
functional again, refer to page 170.
> Glass sunroof/panorama glass sunroof
It may only be possible to raise the glass
sunroof/panorama gl ass sunroof The sys-
tem must be initialized, refer to page 46.
> Digital compass
The system must be calibrated, refer to
page 126.
Before removing the vehicle from stor-
age, consult your BMW Sports Activity
Vehicle Center. <
Fuses
Never attempt to repair a blown fuse and
do not replace a defective fuse with a sub-
stitute of another color or amperage rating, as
this could lead to a circ uit overload, ultimately
resulting in a fire in the vehicle. <
Spare fuses, a pair of plastic tweezers and infor-
mation on the fuse assi gnment are located near
the fuses in the cargo bay.
In interior
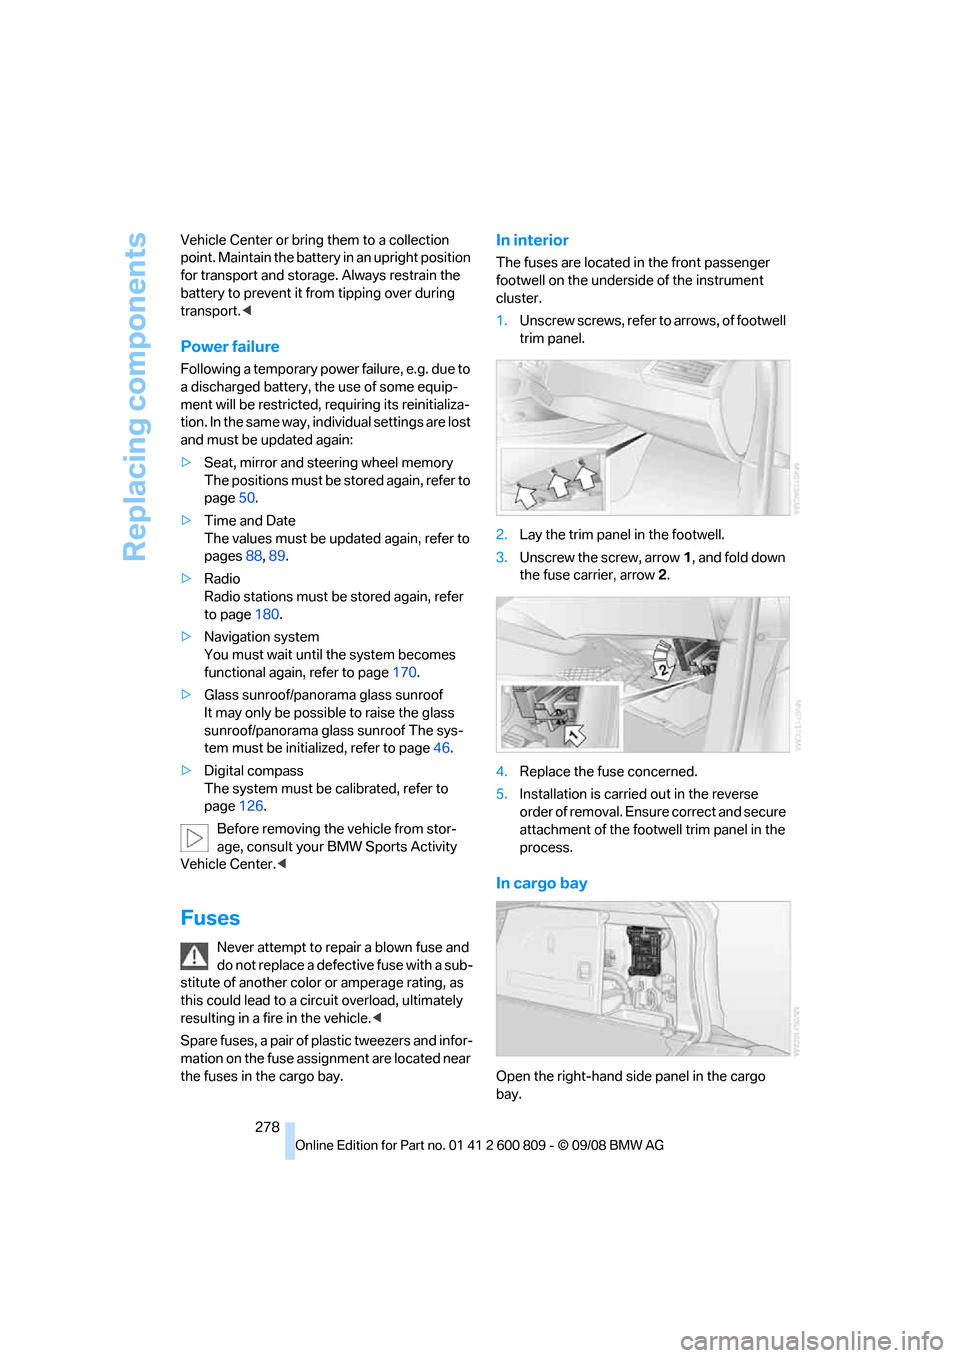
The fuses are located in the front passenger
footwell on the undersid e of the instrument
cluster.
1. Unscrew screws, refer to arrows, of footwell
trim panel.
2. Lay the trim panel in the footwell.
3. Unscrew the screw, arrow 1, and fold down
the fuse carrier, arrow 2.
4. Replace the fuse concerned.
5. Installation is carrie d out in the reverse
order of removal. Ensure correct and secure
attachment of the foot well trim panel in the
process.
In cargo bay
Open the right-hand side panel in the cargo
bay.
Page 304 of 317
Everything from A to Z
302
Dynamic Performance
Control 97
"Dynamic route" in navigation 161
Dynamic Stability Control
DSC 96
Dynamic Traction Control DTC 97
E
Easy entry/exit 58
Eject button, refer to Buttons
on the CD player 174
Electrical malfunction
– automatic transmission with
Steptronic 72
– door lock 32
– driver's door 32
– fuel filler door 244
– glass sunroof, electric 46
– liftgate 33
– panorama glass sunroof 44
– parking brake 69
Electric seat 49
Electronic brake-force distribution 96
Electronic oil level check 260
Emergency operation, refer to Manual operation
– door lock 32
– driver's door 32
– fuel filler door 244
– liftgate 33
– transmission lock, automatic transmission 72
Emergency request 279
Emergency services, refer to Roadside Assistance 280
"Enabled services" 241
"Enabled TeleServices" 238
"End call" 228 Engine
– breaking-in
138
– data 286
– oil temperature 79
– overheated, refer to Coolant
temperature 79
– speed 286
– starting 66
– starting, with comfort access 40
– switching off 66
Engine compartment 259
Engine coolant 262
Engine oil
– adding 261
– additives, refer to Approved
engine oils 262
– approved engine oil 262
– checking oil level 260
– electronic oil level check 260
– temperature 79
Engine oil temperature 79
Engine output, refer to Engine data 286
Engine overheating, refer to
Coolant temperature 79
Engine speed 286
Engine starting, refer to
Starting engine 66
E
ntering country of destination 151
Entering destination 151
Entering house number or intersection 152
Entering intersection 152
Entering street 152
"Entertainment" 174
Entertainment sound output on/off 175
"Equalizer", refer to Tone
control 177
Equalizer, refer to Tone control 177
"ESN" 184
ESP Electronic Stability Program, refer to DSC
Dynamic Stability
Control 96 Event Data Recorders
264
Exhaust system, refer to Hot
exhaust system 139
Exterior mirrors 57
– adjusting 57
– automatic dimming feature 58
– automatic heating 58
– folding in and out 57
– tilting down passenger-side exterior mirror 58
External audio device 127
– refer to AUX-In
connection 200
Eye for tow-starting and towing, refer to Tow
fitting 281
F
Fader, refer to Tone
control 176
Failure messages, refer to Check Control 85
False alarm, refer to Avoiding
unintentional alarms 39
Fastening safety belts, refer to Safety belts 54
– warning lamp 55
Fastest route for navigation 160
Fast forward
– CD changer 190
– CD player 190
– DVD changer 195
"Fast route" in navigation 160
Fault displays, refer to Check
Control 85
Filler neck for washer fluid 75
First aid, refer to First-aid
kit 279
First-aid kit 279
Fixing system, adaptive 133
Flashing during locking/ unlocking, refer to Setting
confirmation signals 31