2009 BMW X6 XDRIVE 50I steering
[x] Cancel search: steeringPage 114 of 317

Lamps
112
Adaptive Head Light*
The concept
Adaptive Head Light is a variable headlamp
control system that enables better illumination
of the road surface. Depending on the steering
angle and other parameters, the light from the
headlamp follows the course of the road.
In tight curves, e.g. serp entines, or when turn-
ing, one of the two front fog lamps is also
switched on up to a speed of approx. 45 mph/
70 km/h. This provides improved illumination of
the area inside the curve.
Activating Adapti ve Head Light
With the ignition switched on, turn the light
switch to position 3, refer to page 110.
The turning lamps are au tomatically switched
on depending on the steering angle or the use
of turn signals.
To avoid blinding oncoming traffic, the Adaptive
Head Light directs light towards the front pas-
senger side when the vehicle is at a standstill.
When driving in reverse, both turning lamps are
active.
High beams/
roadside parking lamps
1 High beams
2 Headlamp flasher
3 Roadside parking lamps
Roadside parking lamps, left or right*
You also enjoy the option of lighting up just one
side of your vehicle when parking.
Switching on
After parking the vehicle, press the lever up or
down beyond the resist ance point for approx.
1second, arrow 3.
The roadside parking lamps drain the bat-
tery. Do not leave th em switched on for
long periods of time, otherwise it may no longer
be possible to start the engine. <
Switching off
Briefly press the lever in the opposite direction
up to the resistance point, arrow 3.
Fog lamps*
First, switch on the parking lamps or the low
beams. The green indicator lamp in the instru-
ment panel lights up whenever the fog lamps
are on.
If the automatic headlamp control is acti-
vated, the low beams will come on auto-
matically when you switch on the fog lamps. <
Page 142 of 317

Things to remember when driving
140
planing, and is characterized by a partial or
complete loss of contac
t between the tires and
the road surface, ultima tely undermining your
ability to steer and brake the vehicle. <
The risk of hydroplaning increases as the tread
depth of the tires decreases, also refer to Mini-
mum tread depth on page 255.
Driving through water
Maximum water depth:
>BMW X5 20 in/50 cm
> BMW X6 17 in/45 cm
Only drive through water up to the above-
mentioned depth at no greater than walk-
ing speed; otherwise, the engine, electrical sys-
tem, and transmission can be damaged. <
Braking safely
Your BMW is equipped with ABS as a standard
feature. In situations that require it, it is best to
brake with full force. Since the vehicle maintains
steering responsiveness, you can still avoid
possible obstacles with a minimum of steering
effort.
Pulsation of the brake pedal, combined with
sounds from the hydraulic circuits, indicate that
ABS is in its active mode.
Do not drive with your foot resting on the
brake pedal. Even light but consistent
pedal pressure can lead to high temperatures,
brake wear and possibly even brake failure.<
Driving in wet conditions
When roads are wet or there is heavy rain,
briefly exert gentle pre ssure on the brake pedal
every few miles. Monitor traffic conditions to
ensure that this maneuver does not endanger
other road users. The heat generated in this
process helps dry the pads and rotors to ensure
that full braking efficiency will then be available
when you need it.
Hills
To prevent overheating and the resulting
reduced efficiency of the brake system,
drive long or steep downhill gradients in the gear in which the least br
aking is required. Even
light but consistent pressure on the brake pedal
can lead to high temperatures, brake wear and
possibly even brake failure. <
The braking effect of the engine can be further
increased by downshifting in the manual mode
of the automatic transmis sion, if necessary into
first gear, refer to page 71. This prevents an
excessive strain on the brakes.
Do not drive in idle or with the engine
stopped, otherwise there will be no
engine braking action or support of the braking
force and steering.
Never allow floor mats, carpets or any other
objects to protrude into the area of movement
of the pedals and impair their operation. <
Corrosion on brake rotors
When the vehicle is driven only occasionally,
during extended periods when the vehicle is not
used at all, and in op erating conditions where
brake applications are less frequent, there is an
increased tendency for corrosion to form on
rotors, while contaminan ts accumulate on the
brake pads. This occurs because the minimum
pressure which must be exerted by the pads
during brake applications to clean the rotors is
not reached.
Should corrosion form on the brake rotors, the
brakes will tend to re spond with a pulsating
effect that even extended application will fail to
cure.
When vehicle is parked
Condensation forms in the automatic climate
control system during operation, and then exits
under the vehicle. Traces of condensed water
under the vehicle are therefore normal.
Before driving into a car wash
Fold in the exterior mirrors, refer to page 57,
otherwise they could be damaged due to the
width of the vehicle.
Release the parking brake, particularly when
you have activated Auto matic Hold, refer to
page 67.
Page 145 of 317

Driving tips
143Reference
At a glance
Controls
Communications
Navigation
Entertainment
Mobility
Securing cargo
BMW X5
BMW X6
>Use the luggage net*, retaining straps*, or
securing straps to hold down small and
lightweight luggage and cargo.
> For larger and heavier pieces, heavy-duty
cargo straps
* are available from your BMW
Sports Activity Vehicl e Center. Four lashing
eyes
* mounted in the cargo bay are used to
secure these heavy-duty cargo straps, refer
to illustrations.
> Observe the special instructions supplied
with the heavy-duty cargo straps.
Position and secure the cargo as
described above, so that it cannot endan-
ger the car's occupants, for example if sudden
braking or evasive maneuvers are necessary.
Never exceed either the approved gross vehicle
weight or either of the approved axle weights,
refer to page 289, as excessive loads can pose
a safety hazard, and may also place you in viola-
tion of traffic safety laws.
You should never transport unsecured heavy or
hard objects in the passenger compartment, as
they could fly around and pose a safety hazard to the vehicle's occupants during abrupt brak-
ing or evasive maneuvers.
Use only the lashing eyes pictured to fasten the
heavy-duty cargo straps. Do not secure cargo
with the attachment points for the top tether,
refer to page
62; otherwise they could be dam-
aged. <
Roof-mounted luggage rack*
A special rack system is available as an option
for your BMW. Please co mply with the precau-
tions included with the installation instructions.
Loading roof-mounted luggage rack
Because roof racks raise the vehicle's center of
gravity when loaded, they have a major effect on
its handling and steering response. You should
therefore always remember not to exceed the
approved roof load capacity, the approved
gross vehicle weight or the axle weights when
loading the rack.
You can find the specified weights under
Weights on page 289.
The load on the roof must be evenly distributed
and must not extend outward beyond the limits
of the loading surface. Always stow the heaviest
pieces on the bottom. Be sure that adequate
clearance is maintained for raising the glass
sunroof
*/panorama glass sunroof* and that
objects do not project into the opening path of
the liftgate.
Secure roof-mounted cargo correctly and
securely to prevent it fr om shifting or falling off
during the trip.
Drive smoothly. Avoid su dden acceleration and
braking maneuvers. Take corners gently.
Page 155 of 317

Navigation
Driving tips
153Reference
At a glance
Controls
Communications
Entertainment
Mobility
The related town/city is displayed after the
street name.
If a town/city has already been entered, you can
undo this entry. This may be practical if the
desired street does not exist in the entered des-
tination, because, for example, it belongs to
another part of the town/city.
1. Change to upper field.
The arrow is selected.
2. Turn the controller to the right until the
request for the entry of a street in the coun-
try appears and press the controller.
3. Change to the second field from the top and
enter the street.
Entering house number
All house numbers stored for the street on the
navigation DVD can be entered.
1.Select "House number" and press the con-
troller.
2. Enter the house number:
Select the desired digits and press the con-
troller.
3. Change into the third field from the top.
Turn the controller until the house number
is selected and press the controller.
Starting destination guidance with
manual destination entry
>Select "Start guidance" and press the con-
troller.
Destination guidance starts immediately.
> If the destination guidance does not need to
be started immediately:
Select "Add to destination list" and press
the controller.
The destination is stored in the destination
list, refer to page 157.
Entering destination via
voice*
You can enter a desired destination with the
voice activation system . When entering the
destination, it is possible to change between
voice command and iDrive at any time. Reacti-
vate the voice command system for this pur-
pose if necessary.
With {Options } you can have the possible
commands read aloud. <
1. Press the button on the steering wheel.
2.{Enter address }
Page 167 of 317

Navigation
Driving tips
165Reference
At a glance
Controls
Communications
Entertainment
Mobility
To exit from the menu: Select the arrow and press the controller.
Destination guidance via
voice instructions
Switching voice in structions on/off
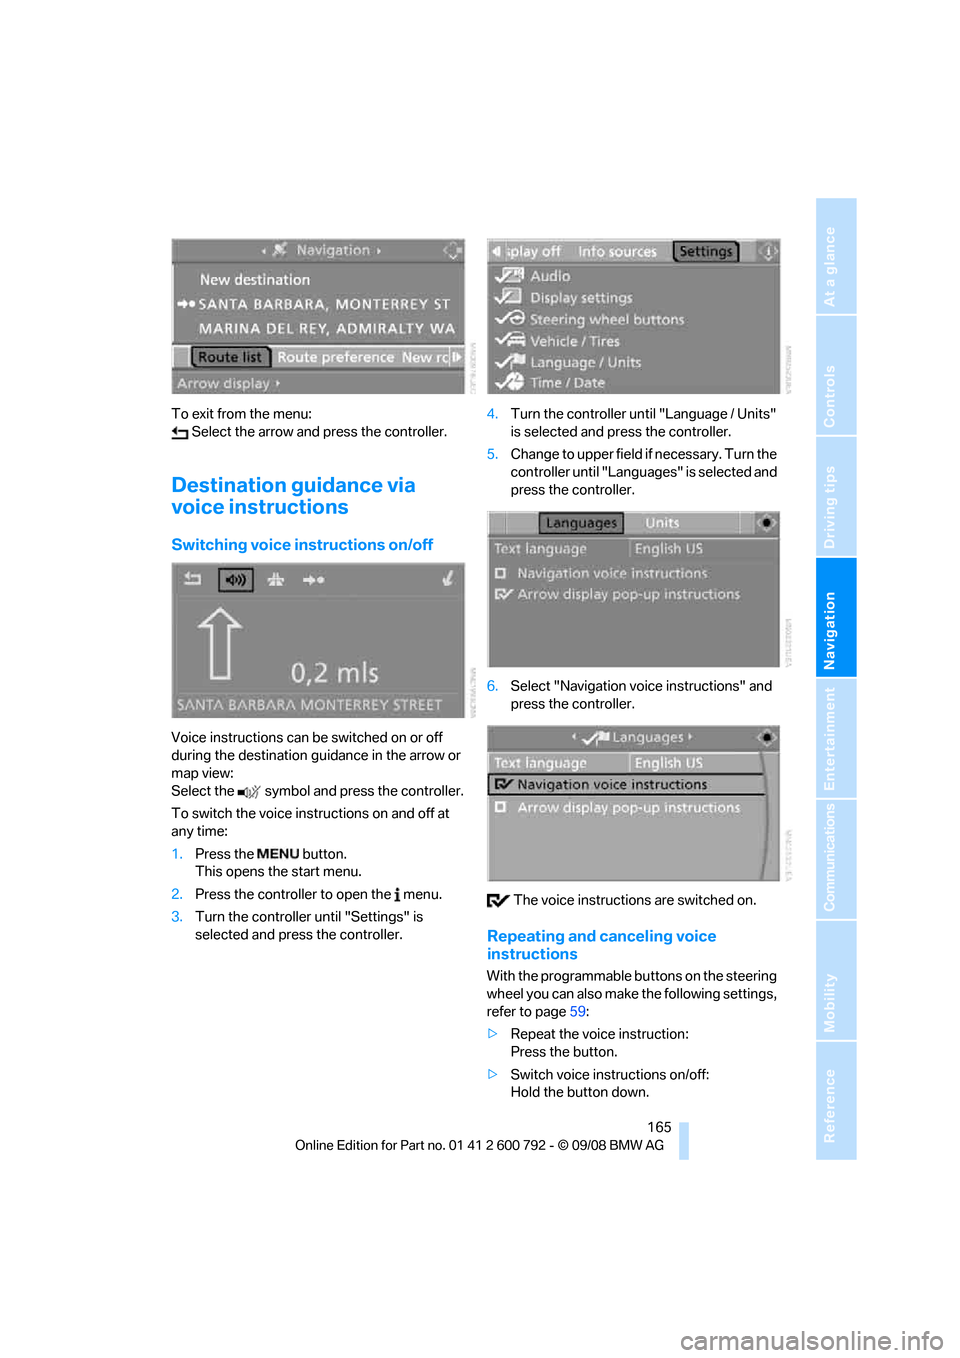
Voice instructions can be switched on or off
during the destination guidance in the arrow or
map view:
Select the symbol and press the controller.
To switch the voice instructions on and off at
any time:
1.Press the button.
This opens the start menu.
2. Press the controller to open the menu.
3. Turn the controller until "Settings" is
selected and press the controller. 4.
Turn the controller until "Language / Units"
is selected and pr ess the controller.
5. Change to upper field if necessary. Turn the
controller until "Languages" is selected and
press the controller.
6. Select "Navigation voice instructions" and
press the controller.
The voice instructio ns are switched on.
Repeating and canceling voice
instructions
With the programmable buttons on the steering
wheel you can also make the following settings,
refer to page59:
> Repeat the voice instruction:
Press the button.
> Switch voice instructions on/off:
Hold the button down.
Page 176 of 317

On/Off and settings
174
On/Off and settings
The following audio sources have shared con-
trols and setting options:
> Radio
> CD player
> CD changer
*
Controls
The audio sources can be controlled using:
>Buttons in the area of the CD player
> iDrive
> Buttons
on steering wheel, refer to page 11
> Programmable memory buttons, refer to
page 21
Buttons on CD player
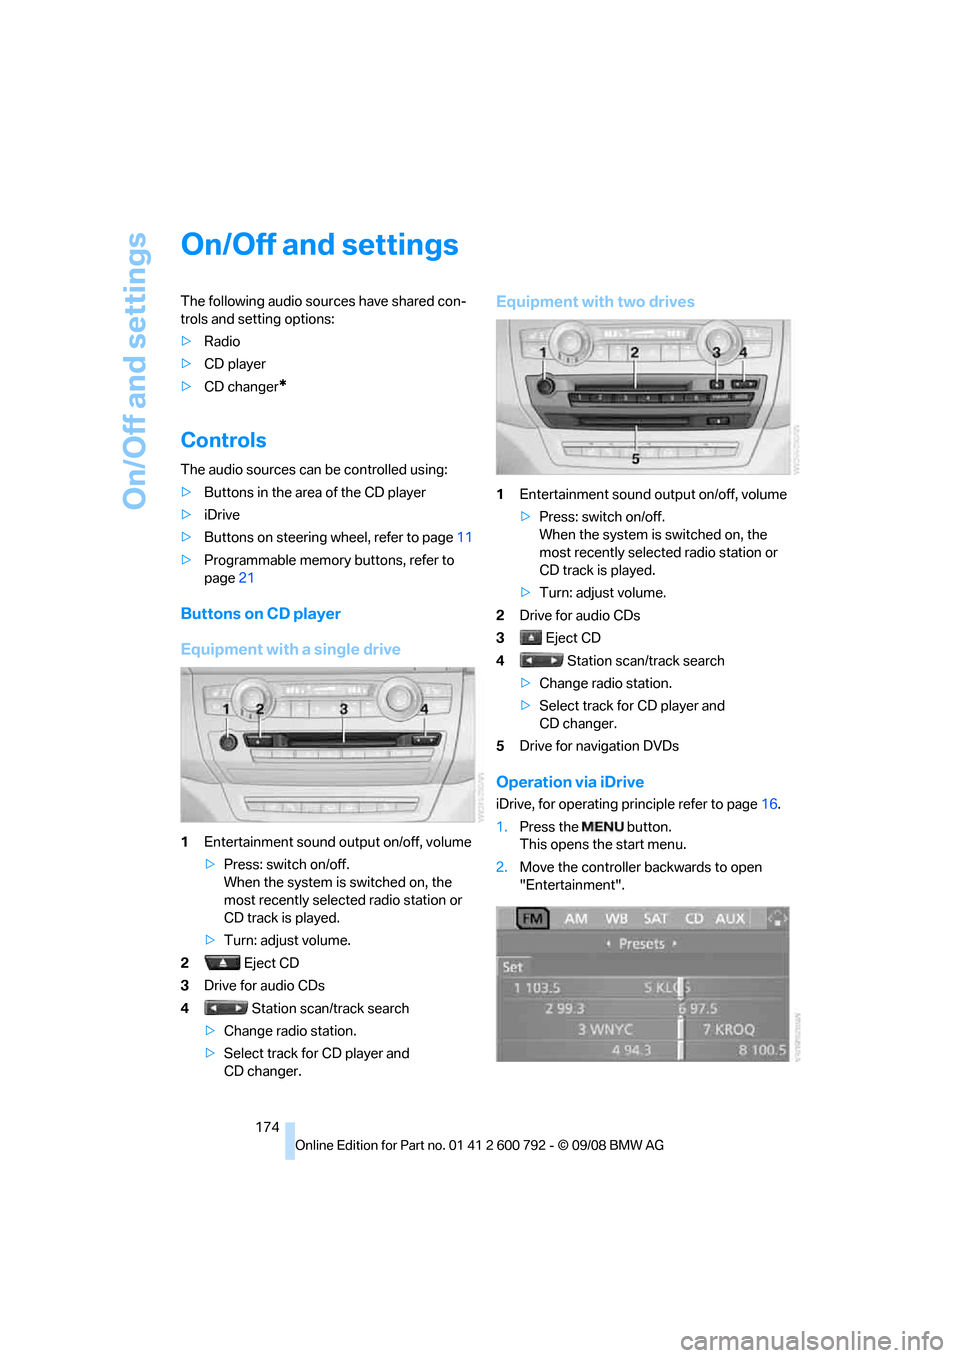
Equipment with a single drive
1Entertainment sound output on/off, volume
>Press: switch on/off.
When the system is switched on, the
most recently select ed radio station or
CD track is played.
> Turn: adjust volume.
2 Eject CD
3 Drive for audio CDs
4 Station scan/track search
> Change radio station.
> Select track for CD player and
CD changer.
Equipment with two drives
1 Entertainment sound output on/off, volume
>Press: switch on/off.
When the system is switched on, the
most recently select ed radio station or
CD track is played.
> Turn: adjust volume.
2 Drive for audio CDs
3 Eject CD
4 Station scan/track search
> Change radio station.
> Select track for CD player and
CD changer.
5 Drive for navigation DVDs
Operation via iDrive
iDrive, for operating pr inciple refer to page16.
1. Press the button.
This opens the start menu.
2. Move the controller backwards to open
"Entertainment".
Page 177 of 317

Navigation
Entertainment
Driving tips
175Reference
At a glance
Controls
Communications
Mobility
You have the following choices:
>"FM" and "AM": radio reception
> "WB": Weather Band station
> "SAT": satellite radio
*
>"CD": CD player or changer*
>"AUX": AUX-In connection, USB audio
interface
*
>"Set": depending on the audio source,
other adjustments can be made, e.g. with
the radio: update st ation with strongest
reception, store station, tone control, sam-
ple stations.
From another menu, you can change
directly to the scr een last displayed,
refer to Comfort opening of menu items,
page 18.<
From radio readiness, the selected audio
source is stored for the remote control currently
in use.
Switching on/off
To switch the Entertainment sound output on
and off:
Press knob 1 on the CD player.
This symbol on the Control Display indi-
cates that sound output is switched off.
For equipment with a single drive, the sound
output is available for approx. 20 minutes with
the ignition switched off.
Switch on the sound output again for this pur-
pose.
Adjusting volume
Turn knob 1 on the CD player until the desired
volume is set.
You can also adjust the volume with buttons on
the steering wheel, refer to page 11.
From radio readiness, the setting is stored for
the remote control currently in use.
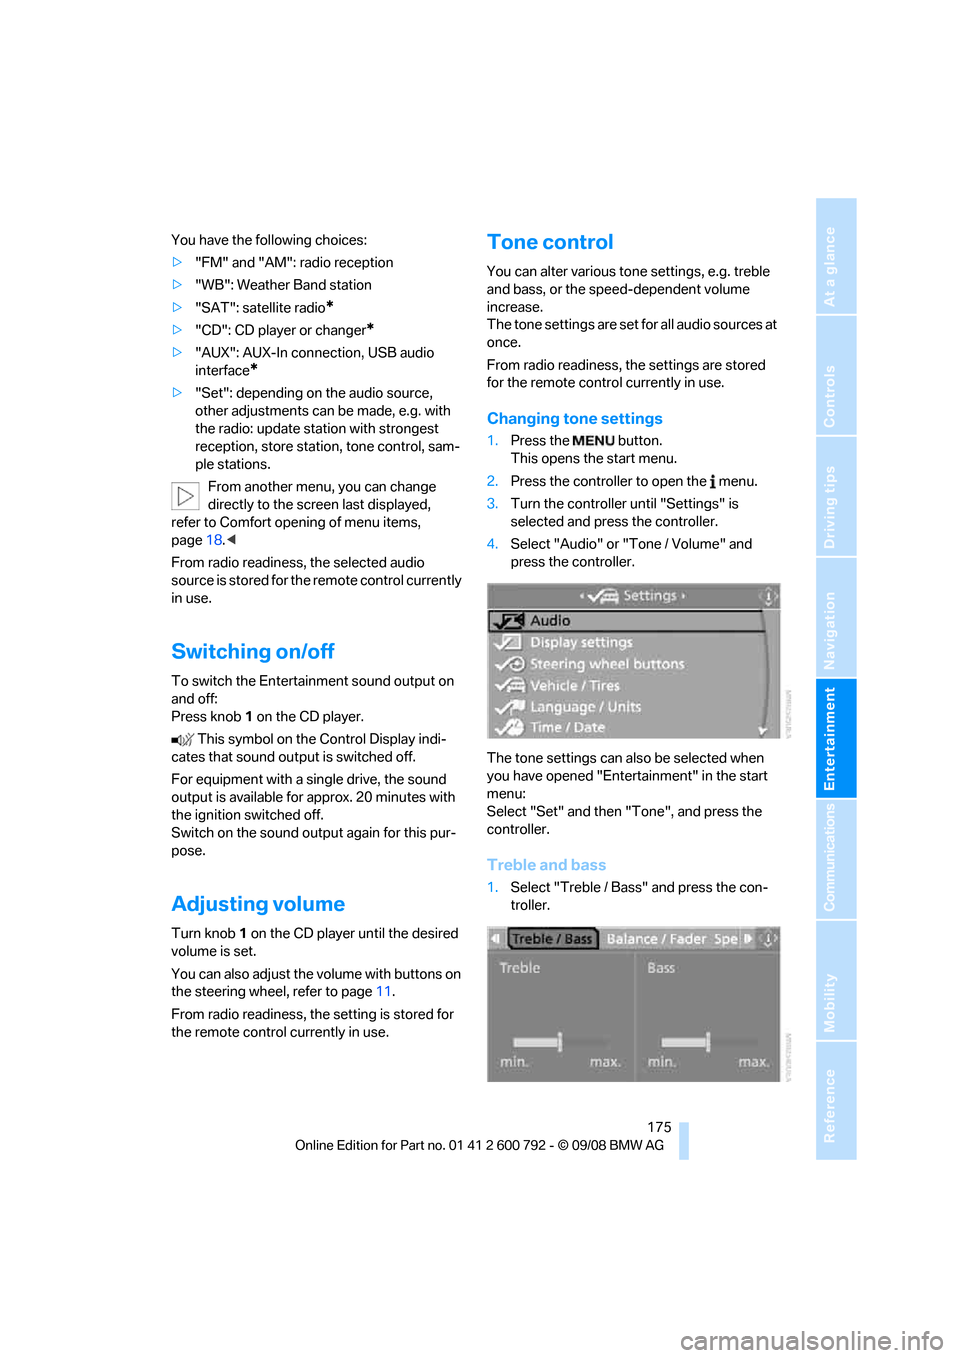
Tone control
You can alter various tone settings, e.g. treble
and bass, or the speed-dependent volume
increase.
The tone settings are set for all audio sources at
once.
From radio readiness, the settings are stored
for the remote contro l currently in use.
Changing tone settings
1.Press the button.
This opens the start menu.
2. Press the controller to open the menu.
3. Turn the controller until "Settings" is
selected and press the controller.
4. Select "Audio" or "Tone / Volume" and
press the controller.
The tone settings can also be selected when
you have opened "Entertainment" in the start
menu:
Select "Set" and then "Tone", and press the
controller.
Treble and bass
1. Select "Treble / Bass" and press the con-
troller.
Page 180 of 317

Radio
178
Radio
Your radio provides reception of the FM and AM
wavebands.
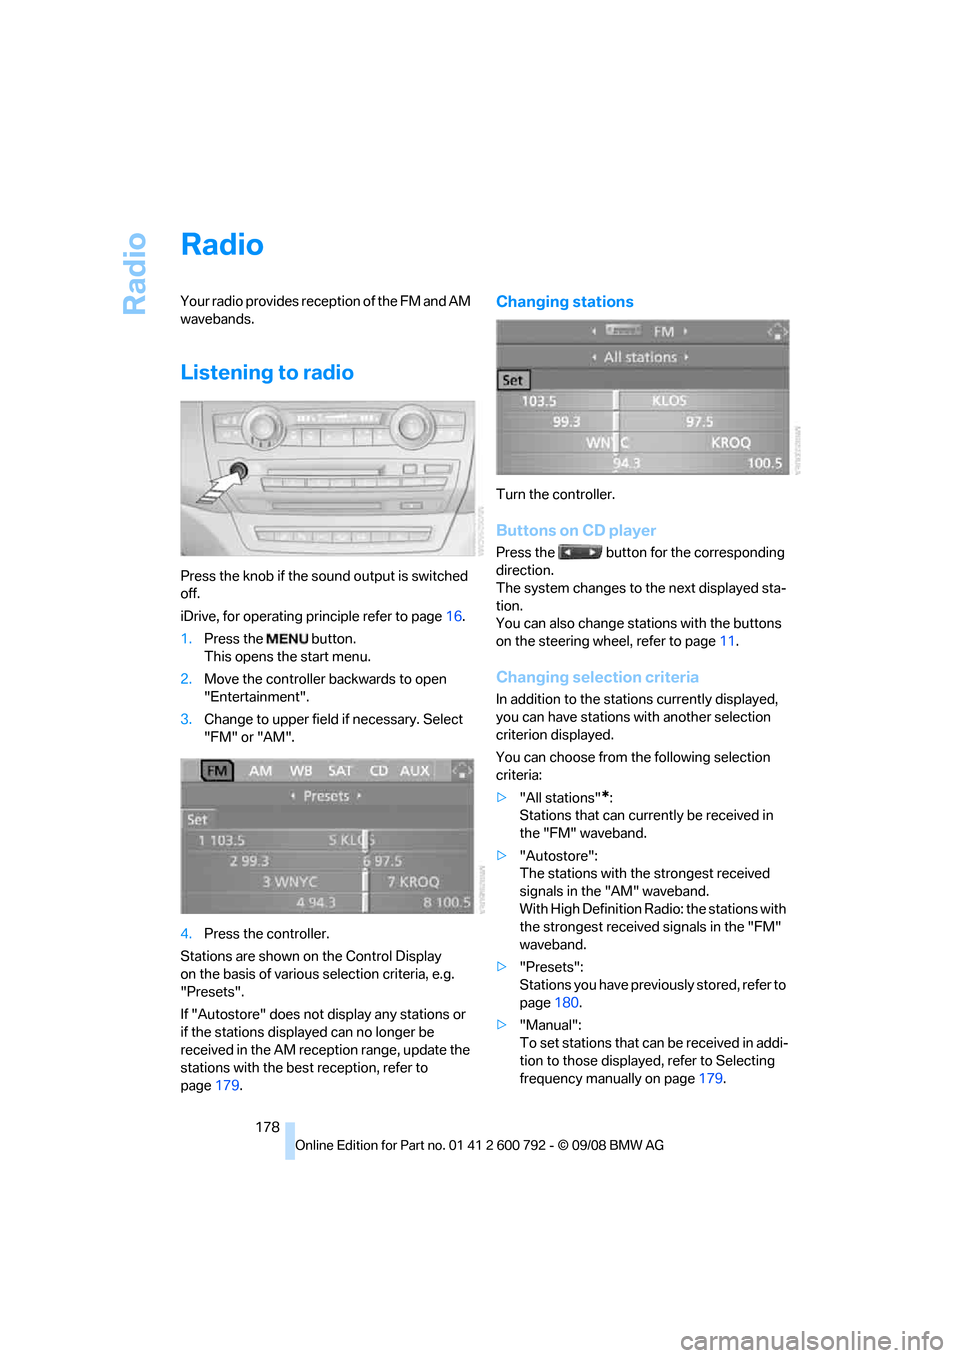
Listening to radio
Press the knob if the sound output is switched
off.
iDrive, for operating principle refer to page16.
1. Press the button.
This opens the start menu.
2. Move the controller backwards to open
"Entertainment".
3. Change to upper field if necessary. Select
"FM" or "AM".
4. Press the controller.
Stations are shown on the Control Display
on the basis of various selection criteria, e.g.
"Presets".
If "Autostore" does not display any stations or
if the stations displayed can no longer be
received in the AM reception range, update the
stations with the best reception, refer to
page 179.
Changing stations
Turn the controller.
Buttons on CD player
Press the button for the corresponding
direction.
The system changes to the next displayed sta-
tion.
You can also change stat ions with the buttons
on the steering wheel, refer to page 11.
Changing selection criteria
In addition to the stations currently displayed,
you can have stations with another selection
criterion displayed.
You can choose from the following selection
criteria:
> "All stations"
*:
Stations that can currently be received in
the "FM" waveband.
> "Autostore":
The stations with the strongest received
signals in the "AM" waveband.
With High Definition Radio: the stations with
the strongest received signals in the "FM"
waveband.
> "Presets":
Stations you have previously stored, refer to
page 180.
> "Manual":
To set stations that ca n be received in addi-
tion to those displayed, refer to Selecting
frequency manually on page 179.