2009 BMW X5 reset
[x] Cancel search: resetPage 104 of 317

Technology for comfort, convenience and safety
102
the tire inflation pressu
re has dropped consid-
erably in one or several tires.
Function requirements
In order to assure the re liable reporting of a flat
tire, the system must have been reset with the
correct tire inflation pressure.
Always use wheels with TPM electronics, oth-
erwise fault-free operation of the system is not
ensured.
Reset the system again after each correc-
tion of the tire inflation pressure and after
every tire or wheel change.<
System limits
TPM cannot announce sudden serious
tire damage caused by external influ-
ences. <
The system does not function properly if it has
n o t b e e n r e s e t , e . g . a f l a t t i r e i s r e p o r t e d d e s p i t e
correct tire inflation pressures.
The system is inactive and cannot display a flat
tire if a wheel has be en mounted without TPM
electronics, e.g. a compact wheel
*, or if TPM is
temporarily interfered wi th by other systems or
devices which use the same radio frequency.
Status display on Control Display
The tire and system stat us is indicated by the
color of the tires.
TPM takes the fact that the tire pressure
changes during driving in to account. A correc-
tion is only required if requested by TPM with
the color.
Green
The tire pressure matche s the learned set state.
"TPM active" is displayed on the Control Dis-
play.
One wheel is yellow
Flat tire or a major drop in inflation pressure in
the indicated tire. A me ssage appears on the
Control Display.
All wheels are yellow
Flat tire or a major drop in inflation pressure in
several tires. A message appears on the Control
Display.
Gray
The system cannot detect a flat tire.
Reasons for this can be:
> TPM is being reset
> Temporary interference due to systems or
devices which use the same radio fre-
quency
> Malfunction
Resetting system
Reset the system again after each correc-
tion of the tire inflation pressure and after
every tire or wheel change.<
Resetting finishes during driving, which can be
interrupted at any time. When driving resumes,
resetting is continued automatically. Do not
reset the system when driving with a compact
wheel
*.
iDrive, for operating pr inciple refer to page16.
1. Press the button.
This opens the start menu.
2. Press the controller to open the menu.
3. Select "Settings" an d press the controller.
4. Select "Vehicle / Tire s" and press the con-
troller.
5. Change to upper field if necessary. Turn the
controller until "TPM" is selected and press
the controller.
Page 105 of 317

Controls
103Reference
At a glance
Driving tips
Communications
Navigation
Entertainment
Mobility
6.Start the engine, but do not start driving.
7. Select "Reset" and press the controller.
8. Select "Yes" and press the controller.
9. Start to drive.
The tires are shown in gray and "Resetting
TPM..." is displayed.
After a few minutes of driving, the set tire infla-
tion pressures in the tire s are applied as the set
values to be monitored. Resetting finishes dur-
ing driving. The tires ar e shown in green on the
Control Display.
If a flat tire is detected during resetting
and applying the tire inflation pressures,
all tires are shown in yellow on the Control Dis-
play. The message "Tir e low!" is displayed.<
Message with low tire inflation
pressure
The warning lamp lights up yellow. A
message appears on the Control Dis-
play. In addition, an acoustic signal
sounds. There is a flat tire or extensive inflation
pressure loss.
1. Cautiously reduce speed to below 50 mph/
80 km/h. Avoid sudden braking and steer-
ing maneuvers. Do not exceed a speed of
50 mph/80 km/h. If the vehicle is not equipped with run-
flat tires as provided at the factory,
refer to page 256, do not continue driving.
Continuing to drive with a flat tire could
cause severe accidents. <
2. In the event of complete tire pressure loss,
0 psi/0 kPa, you can estimate the possible
distance for continued driving on the basis
of the following guide values:
> With a light load:
1 to 2 persons without luggage:
approx. 155 miles/250 km
> With a medium load:
2 persons, cargo bay full, or
4 persons without luggage:
approx. 95 miles/150 km
> With a full load:
4 or more persons, cargo bay full:
approx. 30 miles/50 km
Drive cautiously and do not exceed
speeds of 50 mph/80 km/h or else you
run the risk of causing an accident. In the event
of pressure loss, vehicl e handling changes. This
includes reduced tracking stability in braking,
extended braking distance and altered natural
steering characteristics.
If unusual vibrations or loud noises occur while
the vehicle is being driven , this can indicate final
failure of the damaged tire. Reduce speed and
stop at a suitable location as soon as possible,
otherwise pieces of the tire could become
detached and cause an accident. Do not con-
tinue driving, but instead contact the BMW
Sports Activity Vehicle Center. <
Malfunction
The yellow warning lamp flashes and
then lights up continuously. The tires
are shown in gray on the Control Dis-
play and a message is displayed. No flat tire can
be detected.
A message like this is displayed in the following
situations:
> In case of a malfunction:
Have the system checked
Page 179 of 317

Navigation
Entertainment
Driving tips
177Reference
At a glance
Controls
Communications
Mobility
Professional HiFi System*
You can choose between stereo and multichan-
nel playback, surround.
1.Select "Surround Settings" and press the
controller.
2. Select "Stereo" or "Surround".
3. Press the controller.
The spatial sound effect is activated.
Equalizer*
You can set individual sound frequency ranges.
1.Select "Equalizer" and press the controller. 2.
Move the controller to the left or right to
select the desired frequency range.
3. Turn the controller until the desired setting
is selected.
Resetting tone settings
You can reset all tone settings to the default
settings.
1.Open the start menu.
2. Press the controller to open the menu.
3. Turn the controller until "Settings" is
selected and press the controller.
4. Select "Audio" and press the controller.
5. Change to upper field if necessary. Turn the
controller until "Reset" is selected and
press the controller.
6. When equipped with two drives:
Select "Yes" and press the controller.
Page 180 of 317

Radio
178
Radio
Your radio provides reception of the FM and AM
wavebands.
Listening to radio
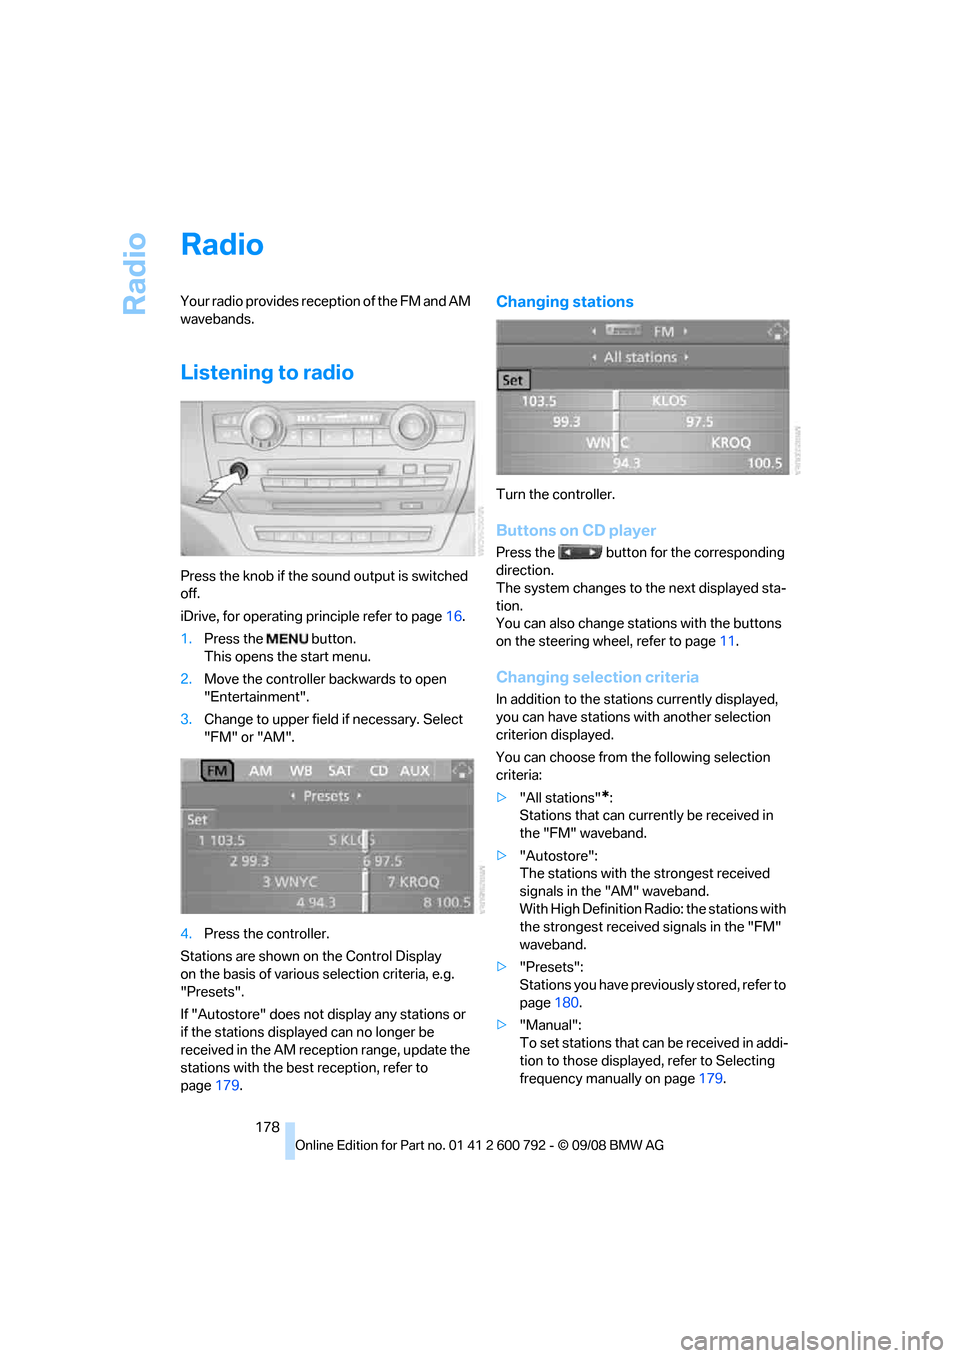
Press the knob if the sound output is switched
off.
iDrive, for operating principle refer to page16.
1. Press the button.
This opens the start menu.
2. Move the controller backwards to open
"Entertainment".
3. Change to upper field if necessary. Select
"FM" or "AM".
4. Press the controller.
Stations are shown on the Control Display
on the basis of various selection criteria, e.g.
"Presets".
If "Autostore" does not display any stations or
if the stations displayed can no longer be
received in the AM reception range, update the
stations with the best reception, refer to
page 179.
Changing stations
Turn the controller.
Buttons on CD player
Press the button for the corresponding
direction.
The system changes to the next displayed sta-
tion.
You can also change stat ions with the buttons
on the steering wheel, refer to page 11.
Changing selection criteria
In addition to the stations currently displayed,
you can have stations with another selection
criterion displayed.
You can choose from the following selection
criteria:
> "All stations"
*:
Stations that can currently be received in
the "FM" waveband.
> "Autostore":
The stations with the strongest received
signals in the "AM" waveband.
With High Definition Radio: the stations with
the strongest received signals in the "FM"
waveband.
> "Presets":
Stations you have previously stored, refer to
page 180.
> "Manual":
To set stations that ca n be received in addi-
tion to those displayed, refer to Selecting
frequency manually on page 179.
Page 182 of 317

Radio
180
5.
Select "Autostore" and press the controller.
The display of the stations with the strongest
reception is updated. The frequencies of the
stations are displayed.
Storing stations
Via iDrive
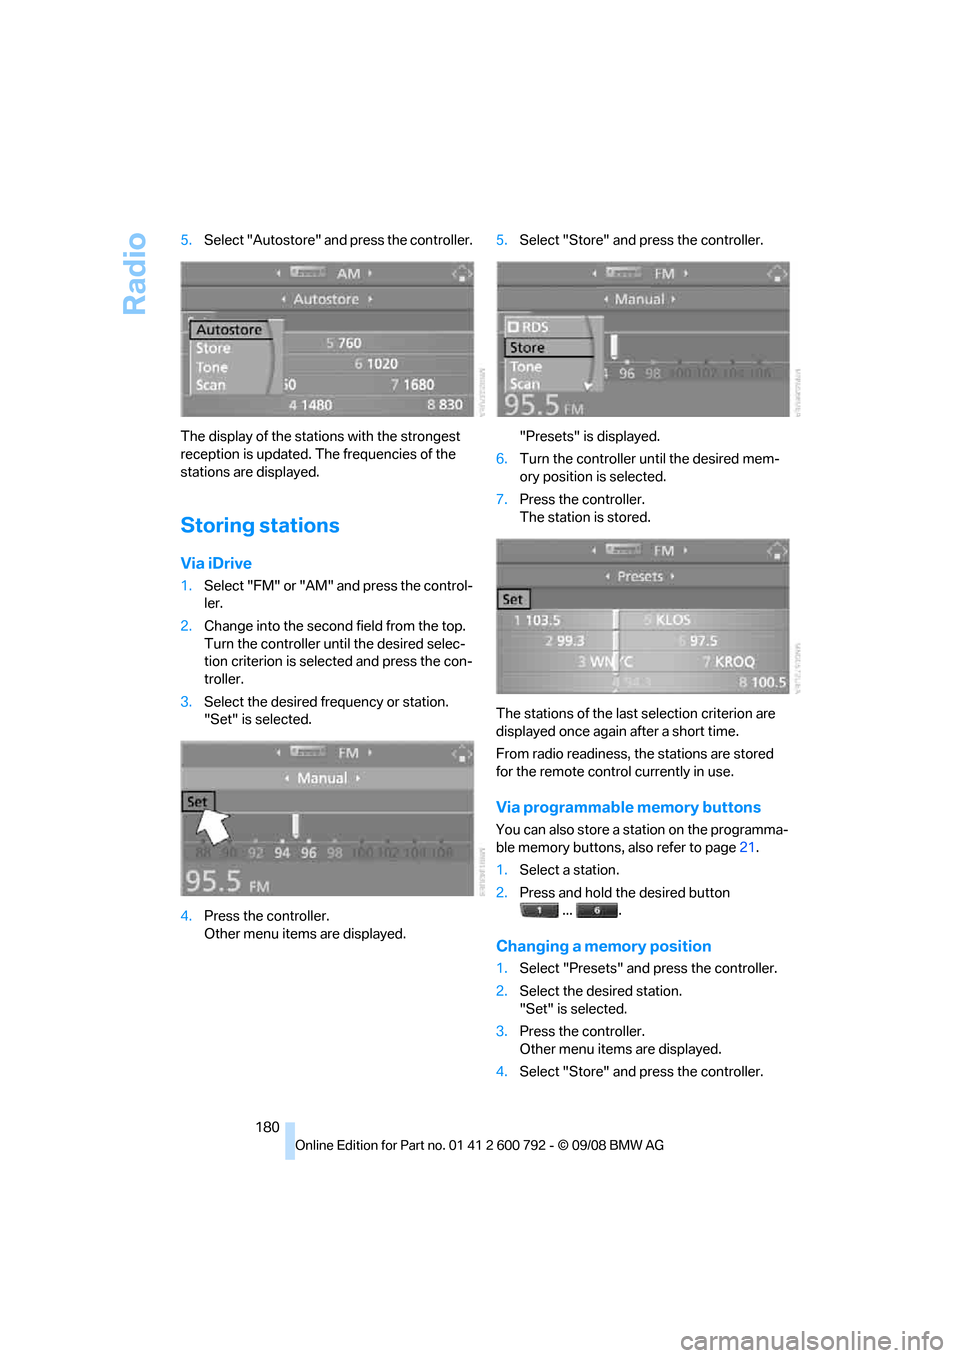
1. Select "FM" or "AM" and press the control-
ler.
2. Change into the second field from the top.
Turn the controller until the desired selec-
tion criterion is selected and press the con-
troller.
3. Select the desired frequency or station.
"Set" is selected.
4. Press the controller.
Other menu items are displayed. 5.
Select "Store" and press the controller.
"Presets" is displayed.
6. Turn the controller until the desired mem-
ory position is selected.
7. Press the controller.
The station is stored.
The stations of the last selection criterion are
displayed once again after a short time.
From radio readiness, the stations are stored
for the remote control currently in use.
Via programmable memory buttons
You can also store a station on the programma-
ble memory buttons, also refer to page21.
1. Select a station.
2. Press and hold the desired button
... .
Changing a memory position
1.Select "Presets" and press the controller.
2. Select the desired station.
"Set" is selected.
3. Press the controller.
Other menu items are displayed.
4. Select "Store" and press the controller.
Page 187 of 317

Navigation
Entertainment
Driving tips
185Reference
At a glance
Controls
Communications
Mobility
Selecting and storing channel
1.Select "SAT" and press the controller.
Channels or categories appear on the Con-
trol Display.
2. Select a menu item:
>"Presets":
Up to twelve channels you have stored
previously.
> "All channels":
All channels are displayed.
> "Categories":
All channels, sorted by categories, e.g.
news, jazz.
3. Press the controller.
4. If "Categories" has been selected:
Select the desired category and press the
controller. The channels of this
category are displayed.
5. Select a channel marked with this sym-
bol.
6. Press the controller.
Other menu items are displayed.
7. Select "Details" and press the controller.
Additional information
The name of the channel and additional infor-
mation on the current track are displayed, e.g.
the name of the artist.
1Artist
2 Track
Page 188 of 317

Satellite radio
186
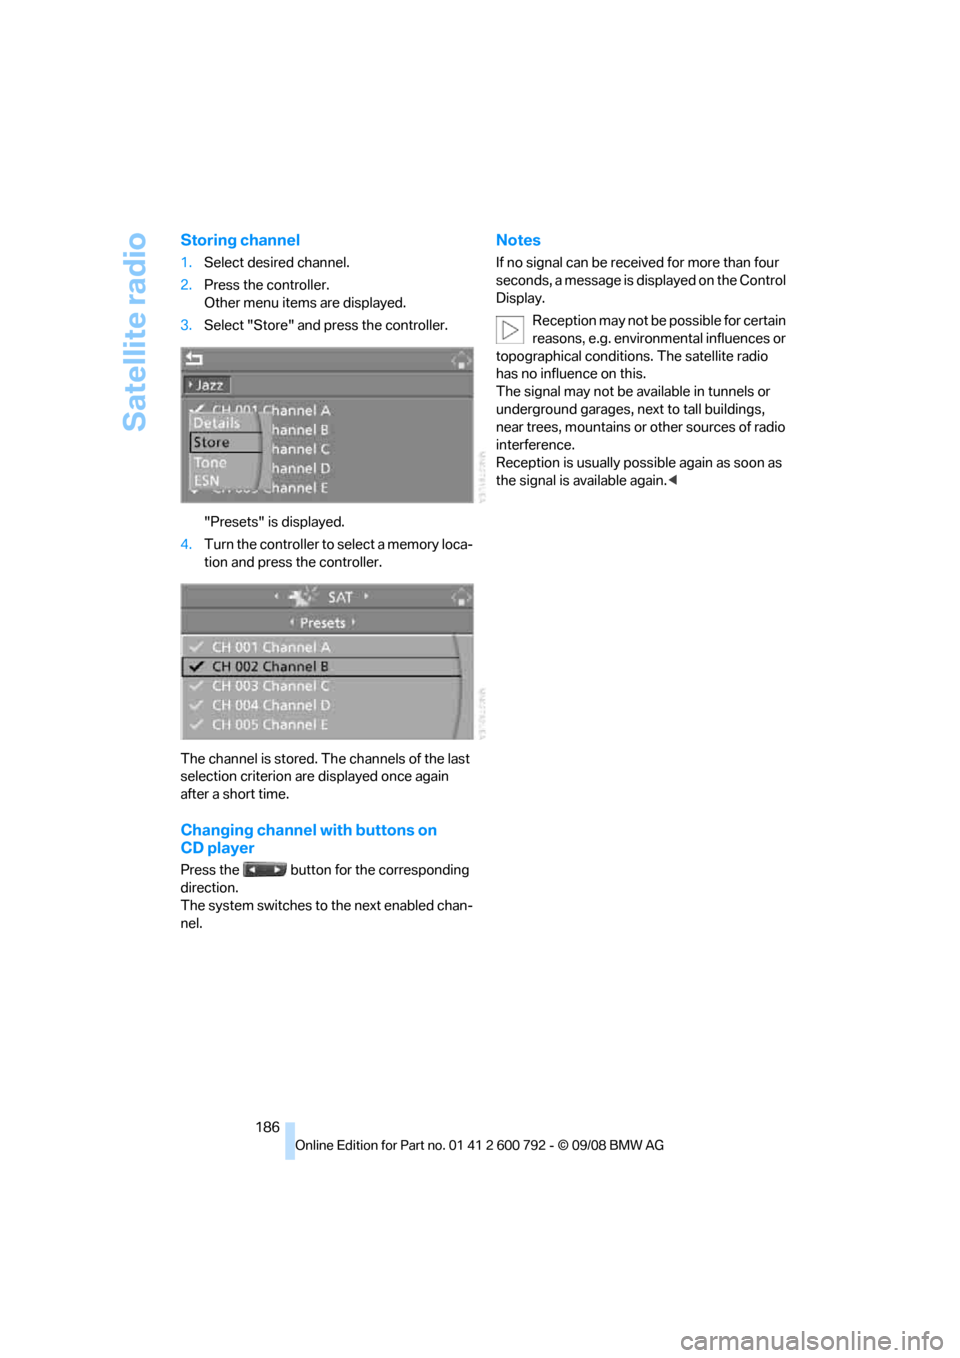
Storing channel
1.Select desired channel.
2. Press the controller.
Other menu items are displayed.
3. Select "Store" and press the controller.
"Presets" is displayed.
4. Turn the controller to select a memory loca-
tion and press the controller.
The channel is stored. Th e channels of the last
selection criterion are displayed once again
after a short time.
Changing channel with buttons on
CD player
Press the button for the corresponding
direction.
The system switches to the next enabled chan-
nel.
Notes
If no signal can be rece ived for more than four
seconds, a message is displayed on the Control
Display.
Reception may not be possible for certain
reasons, e.g. environmental influences or
topographical conditions. The satellite radio
has no influence on this.
The signal may not be av ailable in tunnels or
underground garages, ne xt to tall buildings,
near trees, mountains or other sources of radio
interference.
Reception is usually poss ible again as soon as
the signal is available again. <
Page 198 of 317

DVD changer
196
Adjusting brightness and contrast
1.Press the controller during playback.
2. Select "SET" and pr ess the controller.
3. Select "Video settings" and press the con-
troller.
4. Select "Brightness" or "Contrast" and
press the controller.
5. Turn the controller until the desired setting
is selected.
Resetting to defaults:
Select "Reset" and press the controller.
DVD format
1. Press the controller during playback.
2. Select "SET" and pr ess the controller.
3. Select "DVD format" and press the control-
ler.
> "Standard"
> "Zoom": full-screen playback
Selecting language
1. Press the controller during playback.
2. Select "SET" and pr ess the controller.
3. Select "Language" and press the controller.
4. Select language or audio track and press
the controller.
The languages and audio tracks are generally
accompanied by an in dication of how may
channels are included. 5.1 means multichannel.
Selecting subtitling
1. Press the controller during playback.
2. Select "SET" and pr ess the controller.
3. Select "Subtitles" and press the controller.