2009 BMW M5 SEDAN warning
[x] Cancel search: warningPage 220 of 266

Care
218
Care
Car-care products
Regular cleaning and care make a significant
contribution to retaining your BMW's value.
For the cleaning and care of your vehicle, BMW
recommends using only products that BMW
has approved for this purpose.
Your BMW center will be glad to advise you
about products and services for the cleaning
and care of your BMW.
Genuine BMW Care Products are materi-
als tested, laboratory tested, and tested in
actual use. They offer optimum care and pro-
tection for your vehicle.<
Do not use cleaners that contain alcohol
or solvents; they can damage your vehi-
cle.<
Cleaning agents can contain substances
that are dangerous or pose health risks.
You should therefore heed the warnings and
hazard indications on the packaging. Open the
doors or windows on your vehicle whenever
cleaning the interior. Make sure there is suffi-
cient ventilation in enclosed spaces. Use only
products that are formulated for vehicle clean-
ing.<
Exterior care
Washing your vehicle
In the winter months, it is especially
important to ensure that the vehicle is
washed on a regular basis. Otherwise, signifi-
cant soiling and road salt can cause damage to
the vehicle.<
After washing the vehicle, apply the
brakes briefly to dry them. Failure to do so
may lead to a reduction in braking efficiency and
also to corrosion of the brake rotors.<
Car washes
Give preference to cloth car washes.Before driving into the car wash, make sure that
it is suitable for your BMW. Pay attention to the
following points:
>Dimensions of your vehicle, refer to
page238.
>If necessary, fold in the outside rearview
mirrors, refer to page50.
>Maximum permissible tire width.
Preparations for driving into the car wash:
>Deactivate rain sensor to prevent unwanted
wiper activation.
>Deactivate Remove additional add-on
parts, e.g. spoilers or phone antennas, if
they could be damaged.
Sequential Manual Transmission
Before driving into the car wash, make sure the
vehicle is able to roll by making sure to:
1.Insert the remote control into the ignition
lock, even with comfort access.
2.Shift into transmission position N.
3.Release the parking brake.
4.Switch off the engine.
5.Leave the remote control in the ignition lock
so that the vehicle can roll.
Steam cleaners/high-pressure
cleaning jets
When using steam jets or high-pressure
washers, ensure that you maintain suffi-
cient clearance to the vehicle and do not exceed
a temperature of 1407/606.
Insufficient distance or excessive pressure or
temperature can damage parts of the vehicle or
can result in water penetration. Follow the oper-
ating instructions for the high-pressure clean-
ing jets.<
When using high-pressure cleaning jets,
do not remain in one place for a long time
and be sure to maintain a distance of at least
Page 227 of 266

Mobility
225Reference
At a glance
Controls
Driving tips
Communications
Navigation
Entertainment
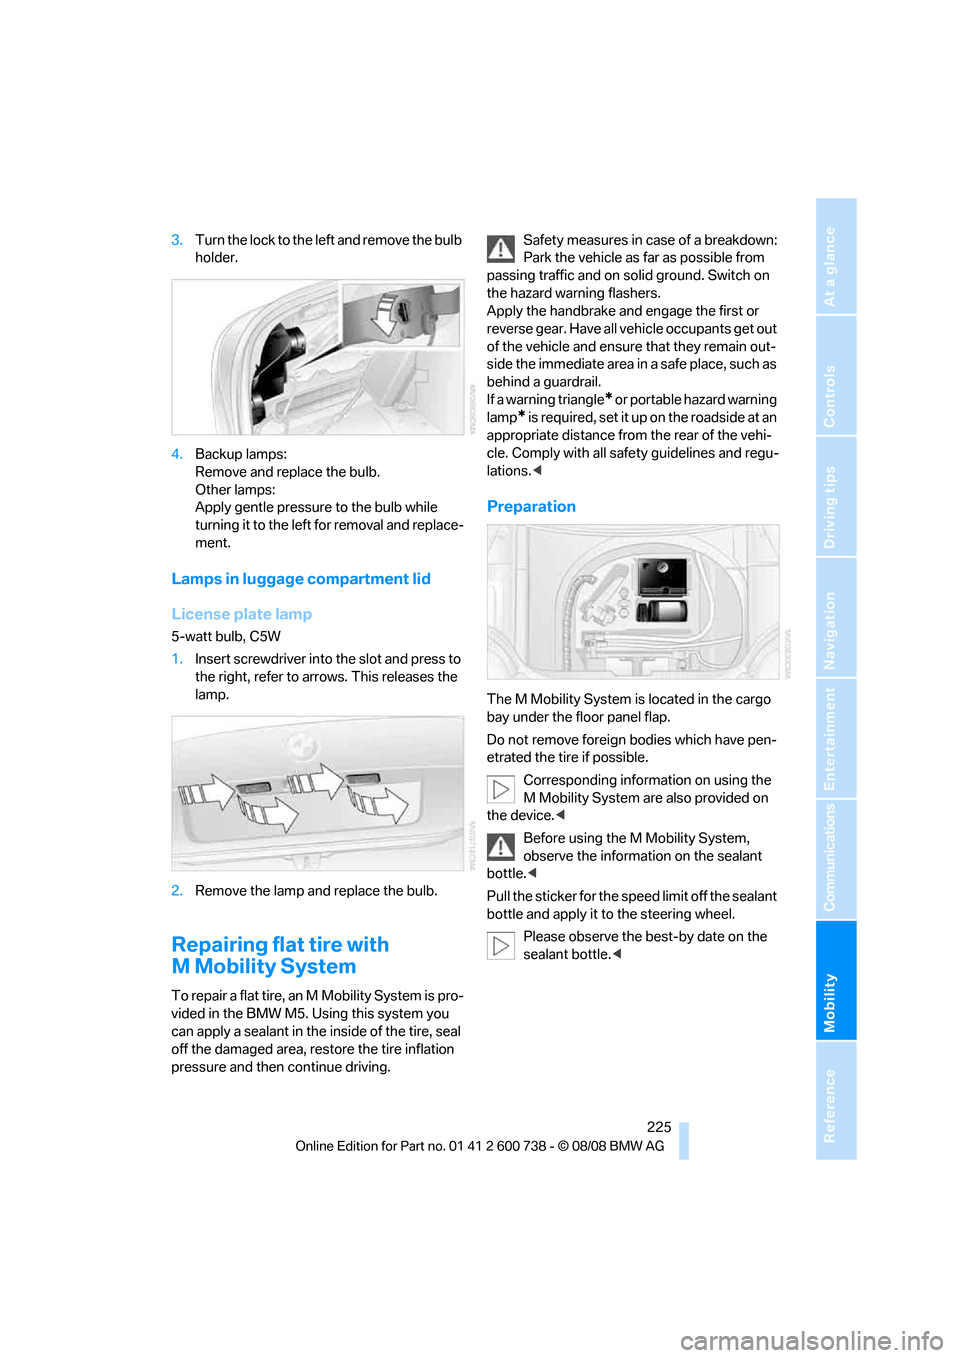
3.Turn the lock to the left and remove the bulb
holder.
4.Backup lamps:
Remove and replace the bulb.
Other lamps:
Apply gentle pressure to the bulb while
turning it to the left for removal and replace-
ment.
Lamps in luggage compartment lid
License plate lamp
5-watt bulb, C5W
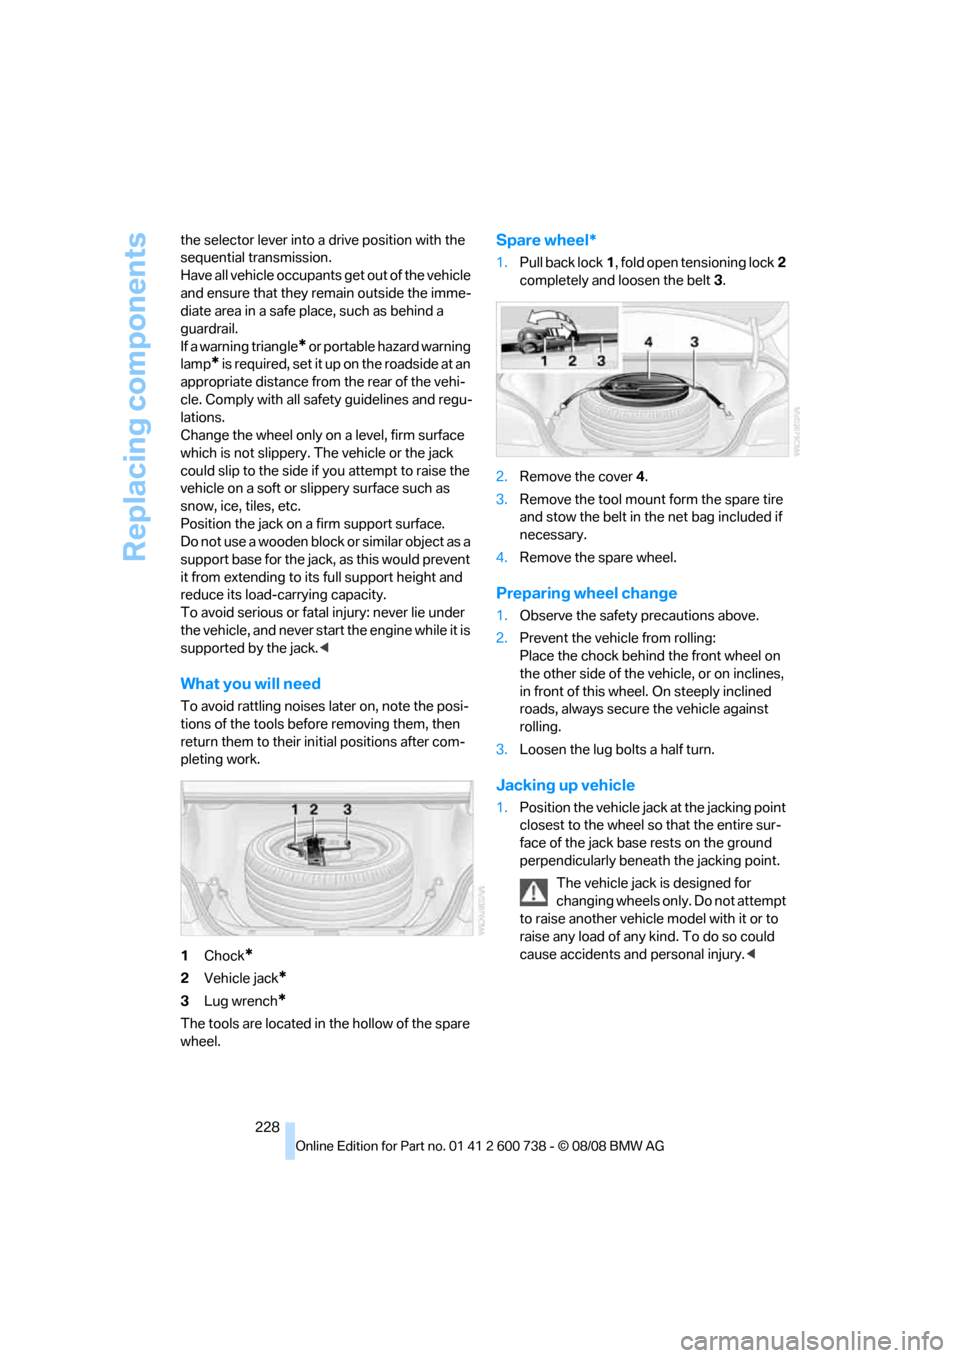
1.Insert screwdriver into the slot and press to
the right, refer to arrows. This releases the
lamp.
2.Remove the lamp and replace the bulb.
Repairing flat tire with
M Mobility System
To repair a flat tire, an M Mobility System is pro-
vided in the BMW M5. Using this system you
can apply a sealant in the inside of the tire, seal
off the damaged area, restore the tire inflation
pressure and then continue driving.Safety measures in case of a breakdown:
Park the vehicle as far as possible from
passing traffic and on solid ground. Switch on
the hazard warning flashers.
Apply the handbrake and engage the first or
reverse gear. Have all vehicle occupants get out
of the vehicle and ensure that they remain out-
side the immediate area in a safe place, such as
behind a guardrail.
If a warning triangle
* or portable hazard warning
lamp
* is required, set it up on the roadside at an
appropriate distance from the rear of the vehi-
cle. Comply with all safety guidelines and regu-
lations.<
Preparation
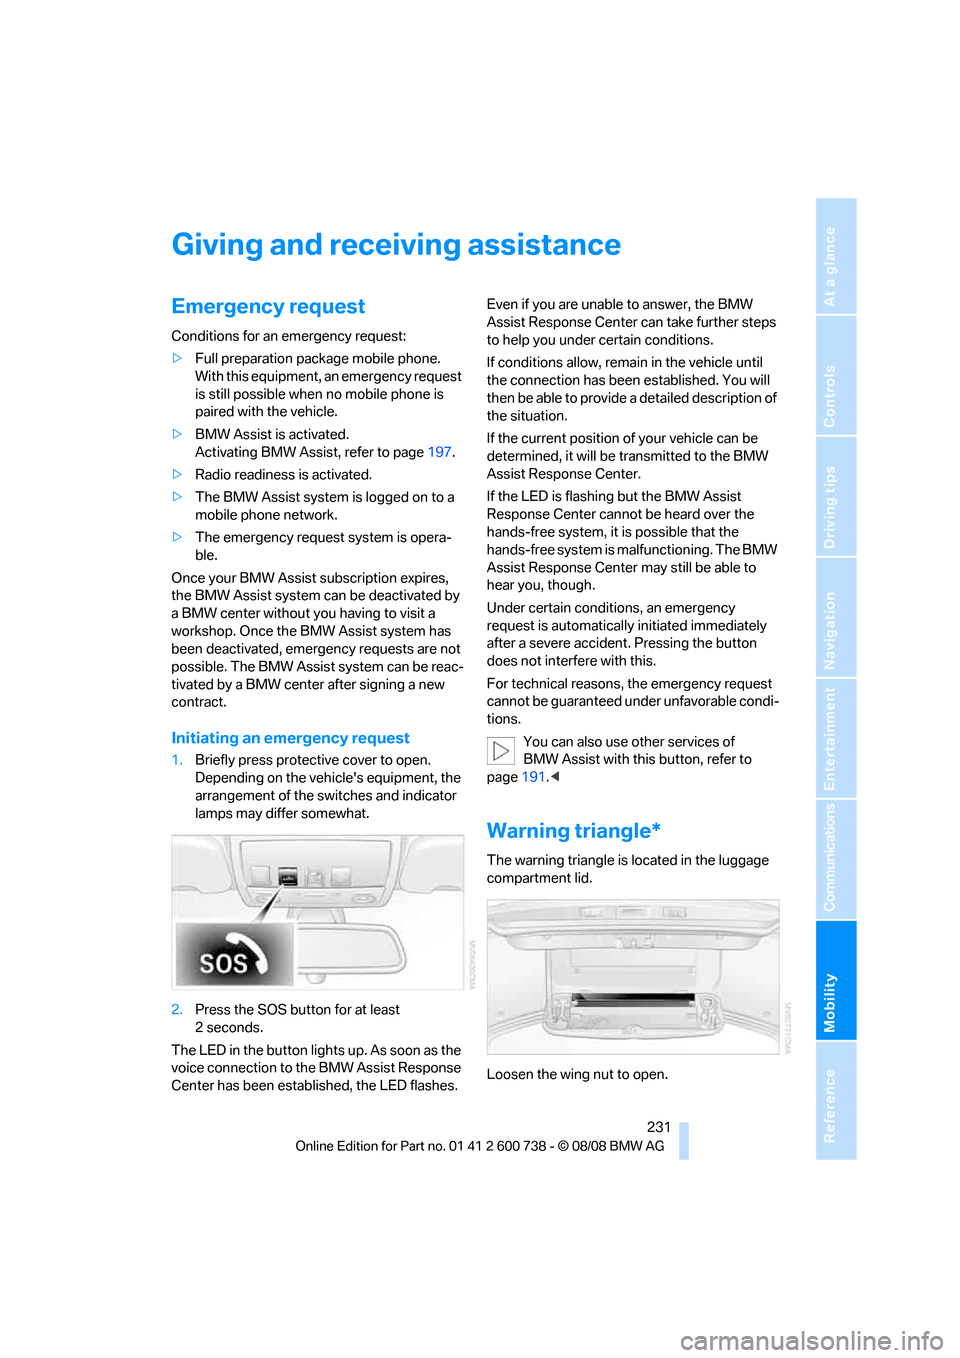
The M Mobility System is located in the cargo
bay under the floor panel flap.
Do not remove foreign bodies which have pen-
etrated the tire if possible.
Corresponding information on using the
M Mobility System are also provided on
the device.<
Before using the M Mobility System,
observe the information on the sealant
bottle.<
Pull the sticker for the speed limit off the sealant
bottle and apply it to the steering wheel.
Please observe the best-by date on the
sealant bottle.<
Page 229 of 266

Mobility
227Reference
At a glance
Controls
Driving tips
Communications
Navigation
Entertainment
4.Screw dust cap off valve of defective wheel
and screw filling hose2 of sealant bottle
onto valve.
5.Insert sealant bottle on compressor hous-
ing so that it is positioned upright.
6.Make sure that the device is switched off,
position 0.
7.Insert connector3 into lighter socket in
vehicle interior, refer to page109.
8.With the ignition switched on:
Switch on the device and allow to run for
approx. 3 minutes to fill wheel with sealant.
It is not important what inflation pressure
the tire has after filling.
9.Switch off device.
10.Remove connecting hose from connection
of sealant bottle and tire valve.
Stow the M Mobility System in the vehicle
again.
Distributing sealant
Immediately drive approx. 2 miles/3 km so that
sealant is evenly distributed in tire.
Do not exceed a maximum speed of
35 mph/60 km/h. Do not drop below
12 mph/20 km/h if possible.<
Producing tire inflation pressure
1.After approx. 2 miles/3 km, stop at suitable
location.
2.Screw compressor hose9 directly onto tire
valve.
3.Insert connector 3 in lighter socket in vehi-
cle interior.4.Correct tire inflation pressure to 29 psi/
200 kPa. With the ignition switched on:
>Increase inflation pressure: switch on
compressor, position I. To check cur-
rently set inflation pressure, briefly
switch off device.
Do not allow compressor to run
longer than 10 minutes, otherwise
the device will overheat and may be dam-
aged.<
>Reduce inflation pressure: press
button8 or turn screw8 on pressure
gauge.
If the inflation pressure is not held, drive
the vehicle again, refer to Distributing
sealant. Then repeat steps 1 to 4 once.
Using the M Mobility System can be ineffective
in the event of tire damage greater than
approx. 0.16 in/4 mm in size. Please contact the
nearest BMW center, refer to page232, or a
workshop that works according to BMW repair
procedures with correspondingly trained per-
sonnel if the tire cannot be made ready for driv-
ing with the M Mobility System.<
The tire inflation pressure must be at least
29 psi/200 kPa. Otherwise do not con-
tinue driving.<
Continue driving
Do not exceed the permissible maximum
speed of 50 mph/80 km/h, otherwise
accidents can occur.<
Reinitialize the Flat Tire Monitor.
For details, refer to page84.
Have the defective tire and the sealant bottle of
the M Mobility System replaced as soon as
possible.<
Changing wheels*
Safety precautions in the event of a flat
tire or wheel change: Park the vehicle as
far as possible from passing traffic and on solid
ground. Switch on the hazard warning flashers.
Apply the handbrake and shift into first gear or
reverse with the manual transmission, or move
Page 230 of 266

Replacing components
228 the selector lever into a drive position with the
sequential transmission.
Have all vehicle occupants get out of the vehicle
and ensure that they remain outside the imme-
diate area in a safe place, such as behind a
guardrail.
If a warning triangle
* or portable hazard warning
lamp
* is required, set it up on the roadside at an
appropriate distance from the rear of the vehi-
cle. Comply with all safety guidelines and regu-
lations.
Change the wheel only on a level, firm surface
which is not slippery. The vehicle or the jack
could slip to the side if you attempt to raise the
vehicle on a soft or slippery surface such as
snow, ice, tiles, etc.
Position the jack on a firm support surface.
Do not use a wooden block or similar object as a
support base for the jack, as this would prevent
it from extending to its full support height and
reduce its load-carrying capacity.
To avoid serious or fatal injury: never lie under
the vehicle, and never start the engine while it is
supported by the jack.<
What you will need
To avoid rattling noises later on, note the posi-
tions of the tools before removing them, then
return them to their initial positions after com-
pleting work.
1Chock
*
2Vehicle jack*
3Lug wrench*
The tools are located in the hollow of the spare
wheel.
Spare wheel*
1.Pull back lock1, fold open tensioning lock2
completely and loosen the belt3.
2.Remove the cover4.
3.Remove the tool mount form the spare tire
and stow the belt in the net bag included if
necessary.
4.Remove the spare wheel.
Preparing wheel change
1.Observe the safety precautions above.
2.Prevent the vehicle from rolling:
Place the chock behind the front wheel on
the other side of the vehicle, or on inclines,
in front of this wheel. On steeply inclined
roads, always secure the vehicle against
rolling.
3.Loosen the lug bolts a half turn.
Jacking up vehicle
1.Position the vehicle jack at the jacking point
closest to the wheel so that the entire sur-
face of the jack base rests on the ground
perpendicularly beneath the jacking point.
The vehicle jack is designed for
changing wheels only. Do not attempt
to raise another vehicle model with it or to
raise any load of any kind. To do so could
cause accidents and personal injury.<
Page 233 of 266

Mobility
231Reference
At a glance
Controls
Driving tips
Communications
Navigation
Entertainment
Giving and receiving assistance
Emergency request
Conditions for an emergency request:
>Full preparation package mobile phone.
With this equipment, an emergency request
is still possible when no mobile phone is
paired with the vehicle.
>BMW Assist is activated.
Activating BMW Assist, refer to page197.
>Radio readiness is activated.
>The BMW Assist system is logged on to a
mobile phone network.
>The emergency request system is opera-
ble.
Once your BMW Assist subscription expires,
the BMW Assist system can be deactivated by
a BMW center without you having to visit a
workshop. Once the BMW Assist system has
been deactivated, emergency requests are not
possible. The BMW Assist system can be reac-
tivated by a BMW center after signing a new
contract.
Initiating an emergency request
1.Briefly press protective cover to open.
Depending on the vehicle's equipment, the
arrangement of the switches and indicator
lamps may differ somewhat.
2.Press the SOS button for at least
2seconds.
The LED in the button lights up. As soon as the
voice connection to the BMW Assist Response
Center has been established, the LED flashes.Even if you are unable to answer, the BMW
Assist Response Center can take further steps
to help you under certain conditions.
If conditions allow, remain in the vehicle until
the connection has been established. You will
then be able to provide a detailed description of
the situation.
If the current position of your vehicle can be
determined, it will be transmitted to the BMW
Assist Response Center.
If the LED is flashing but the BMW Assist
Response Center cannot be heard over the
hands-free system, it is possible that the
hands-free system is malfunctioning. The BMW
Assist Response Center may still be able to
hear you, though.
Under certain conditions, an emergency
request is automatically initiated immediately
after a severe accident. Pressing the button
does not interfere with this.
For technical reasons, the emergency request
cannot be guaranteed under unfavorable condi-
tions.
You can also use other services of
BMW Assist with this button, refer to
page191.<
Warning triangle*
The warning triangle is located in the luggage
compartment lid.
Loosen the wing nut to open.
Page 236 of 266

Giving and receiving assistance
234 This then requires increased effort for braking
and steering.<
Switch on the hazard warning flashers depend-
ing on the local regulations. If the electrical sys-
tem fails, mark the vehicle to be towed, e.g. with
a sign or warning triangle in the rear window.
Manual transmission
Gearshift lever in neutral position.
Sequential Manual Transmission with
Drivelogic
Make sure that selector lever position N is
engaged with the ignition switched on, as
otherwise the engine can be damaged during
towing.<
Towing methods
Do not lift vehicle by tow fitting or body
and chassis parts, otherwise damage may
result.<
In some countries, towing with tow bars or
ropes in public traffic is not permitted. Familiar-
ize yourself with the regulations on towing in the
respective country.
With tow bar
The towing vehicle may not be lighter
than the vehicle to be towed, otherwise it
will not be possible to reliably control vehicle
response.<
The tow fittings used should be on the same
side on both vehicles. Should it prove impossi-
ble to avoid mounting the tow bar at an offset
angle, please observe the following:
>Clearance and maneuvering capability will
be sharply limited during cornering.
>When mounted at an angle, the tow bar will
exert lateral forces, tending to push the
vehicle sideways.
Only attach the tow bar to the tow fittings,
as attachment to other vehicle parts can
lead to damage.<
With tow rope
When starting off in the towing vehicle, make
sure that the tow rope is taut.
To avoid jerking and the associated
stresses on vehicle components when
towing, always use nylon ropes or nylon straps.
Only attach tow ropes to the tow fittings, as
attachment to other vehicle parts can lead to
damage.<
With tow truck
Do not tow the vehicle with only the front
or rear axle raised, as otherwise the
engine may be damaged or the steering can
turn to the left or right.<
Have the BMW transported only on a flatbed
surface.
Tow-starting
Do not tow-start the vehicle if possible, but
instead start the engine by means of jump start-
ing, refer to page232. With a catalytic con-
verter, the vehicle should only be tow-started
with the engine cold.
Manual transmission
1.Switch on the hazard warning flashers,
comply with country-specific regulations.
2.Switch on the ignition, refer to page57.
3.Shift into 3rd gear.
4.Tow-start with the clutch completely
depressed and slowly release the clutch.
After the engine starts, immediately
depress the clutch again completely.
Page 237 of 266

Mobility
235Reference
At a glance
Controls
Driving tips
Communications
Navigation
Entertainment
5.Stop at a suitable location, remove the tow
bar or rope and switch off the hazard warn-
ing flashers.
6.Have the vehicle checked.
Sequential Manual Transmission with
Drivelogic
1.Switch on the hazard warning flashers,
comply with country-specific regulations.
2.Switch on the ignition, refer to page57.
3.Tow-start in selector lever position N.
4.Move the selector lever into the drive posi-
tion and pull toward + within 2 seconds.
The correct gear will be selected and
engaged automatically.
5.Stop at a suitable location, remove the tow
bar or rope and switch off the hazard warn-
ing flashers.
6.Have the vehicle checked.
Page 246 of 266

Everything from A to Z
244
Everything from A to Z
Index
"..." Identifies Control Display
texts used to select
individual functions and
refers you to the page where
these texts can be found.
A
ABS Antilock Brake
System80
– indicator lamp82
Accepted calls184
Accessories6
Accident, refer to Emergency
request231
Acoustic signal, refer to Check
Control72
Activated-charcoal filter for
automatic climate
control102
"Activation time" for parked
car ventilation103
Active front head restraints46
Active seat ventilation49
Adapter for spare key30
Adaptive brake lamps, refer to
Brake force display88
Adaptive Head Light95
"Add digits" in mobile phone
mode184
Additives
– coolant215
– engine oil, refer to Approved
engine oils214
"Address book" in
navigation134
Address for navigation
– deleting135
– entering126,129
– selecting135
– storing134
– storing current position134
"Add to address book"134"Add to destination
list"129,131
Adjusting active backrest
width44
Adjusting interior
temperature99
Adjusting the tone during
audio operation, refer to
Tone control151
Adjusting thigh support44
"After door opened"46
"After unlocking"46
Airbags88
– indicator/warning lamp90
– indicator lamp for front
passenger airbags89
– sitting safely43
Air distribution
– automatic99
– manual100
Airing, refer to Ventilation102
Air recirculation
– AUC Automatic
recirculated-air control101
– recirculated-air mode
101
Air recirculation, refer to
Recirculated-air mode101
"Air recirculation on / off"52
Air supply, automatic climate
control98
Air volume100
AKI, refer to Fuel quality203
Alarm system37
– avoiding unintentional
alarms37
– interior motion sensor37
– switching off alarm37
– switching off tilt alarm
sensor and interior motion
sensor38
– tilt alarm sensor37
"All channels"162
"All doors"32Alloy wheels219
All-season tires, refer to
Winter tires208
"All stations", requesting in
radio mode154
Alterations, technical, refer to
For your own safety5
Altering stretch of road142
"AM", reception
range150,154
Antenna for mobile phone176
Antifreeze
– coolant215
– washer fluid65
Anti-theft alarm system, refer
to Alarm system37
Anti-theft system, refer to
Central lokking system32
Approved axle loads, refer to
Weights239
Approved engine oils214
Approved gross vehicle
weight, refer to Weights239
Armrest, refer to Center
armrest, rear111
Around the center console14
Around the steering wheel10
Arrival time
– refer to Computer69
– refer to Starting destination
guidance138
"Arrow display" in
navigation139
"Arrow display pop-up
instructions"125
Ashtray
– front109
– rear110
Assist, refer to
BMW Assist191
Assistance systems, refer to
Driving stability control
systems80