2009 BMW M3 SEDAN remove seats
[x] Cancel search: remove seatsPage 41 of 246

Controls
39Reference
At a glance
Driving tips
Communications
Navigation
Entertainment
Mobility
Backrest width*
You can change the width of the backrest to suit
your individual preferences by adjusting the lat-
eral-support pads.
Press the front or rear end of the switch.
Backrest width decreases or increases accord-
ingly.
Head restraints
A correctly adjusted head restraint reduces the
risk of neck injury in the event of an accident.
Adjust the head restraint in such a way
that its center is at approx. ear level. Oth-
erwise, there is an increased risk of injury in the
event of an accident. Only remove a head
restraint if no one will be sitting on the seat in
question. Reinstall the head restraint before
transporting anyone on that seat. Otherwise,
the passenger will be without protection from
the head restraint.<
Front active head restraints
In a rear collision of a sufficient strength, the
active head restraint reduces the distance to
the head.
Do not use seat or head restraint covers
that could impair the function of the active
head restraint. Otherwise, the protective func-
tion of the active head restraint will not be
ensured and its full potential in reducing the risk
of injury in the event of a rear collision may not
be realized.
In the event of malfunctions, deactivation or
triggering of the active head restraints, have the
testing, repair and removal executed only by a
BMW center or a workshop that works accord-ing to repair procedures of BMW with corre-
spondingly trained personnel and that has the
required explosives licenses. Unprofessional
attempts to work on the system could lead to
failure in an emergency or to undesired airbag
activation, either of which could result in per-
sonal injury.<
For technical reasons, the head restraint
cannot be removed.<
Front seats
Height adjustment
>To raise: pull up.
>To lower: press the button, arrow1, and
slide the head restraint down.
Rear seats
Height adjustment
>To raise: pull up.
>To lower: press the button, arrow1, and
slide the head restraint down.
The center head restraint is not height-adjust-
able.
Removing
Only with through-loading system*:
ba8_E90M3_cic.book Seite 39 Dienstag, 19. August 2008 11:51 11
Page 42 of 246

Adjustments
40 1.Pull up as far as it will go.
2.Press the button, arrow 1, tilt the rear seat
backrest slightly forward and pull the head
restraint all the way out.
Only remove the head restraints if no pas-
sengers will be sitting in the rear. Reinstall
head restraints before transporting passengers
in the rear.<
Folding head restraints down and back
up
Folding down:
Press the button, arrow1.
Folding up:
Pull the head restraint.
Depending on the equipment version, it may be
possible to fold down the outer rear head
restraints as well.
Only fold the head restraints down if no
passengers will be sitting in the rear. Fold
up the head restraints before transporting pas-
sengers in the rear.<
Heated seats*
Press once for each temperature level.
Three LEDs indicate the highest temperature.To switch off:
Press button longer.
If you continue driving within approx.
15 minutes, the seat heating is automatically
activated at the previously set temperature.
The temperature is lowered or the heating is
switched off entirely to save on battery power.
The LEDs stay lit.
Seat and mirror memory
You can store and call up two different combi-
nations of driver's-seat and exterior-mirror
positions.
Settings for the backrest width and lumbar sup-
port are not stored in memory.
Storing
1.Switch on radio readiness or the ignition,
refer to page49.
2.Adjust the seat and exterior mirrors to the
desired positions.
3.Press the button.
The LED in the button lights up.
4.Press the desired memory button 1 or 2: the
LED goes out.
The driver's seat and exterior mirror posi-
tions are stored for the remote control cur-
rently in use.
Call-up
Do not call up memory while you are driv-
ing, otherwise unexpected seat move-
ment could result in an accident.<
ba8_E90M3_cic.book Seite 40 Dienstag, 19. August 2008 11:51 11
Page 49 of 246

Controls
47Reference
At a glance
Driving tips
Communications
Navigation
Entertainment
Mobility
To lock the safety belt
1.Secure the child-restraint system with the
belt.
2.Pull the belt strap all the way out.
3.Allow the belt strap to retract and pull it taut
against the child-restraint system.
The safety belt is locked.
To unlock the safety belt
1.Open the belt buckle.
2.Remove the child-restraint system.
3.Allow the safety belt strap to retract all the
way.
LATCH child-restraint fixing
system
LATCH: Lower Anchors and Tethers for CHil-
dren.
To install and use the LATCH child
restraint system, follow the operating and
safety instructions provided by the manufac-
turer of the system, otherwise the protective
function of the seat may be compromised.<
Before installing the child seat, pull the belt out
of the area for the child-restraint fixing system.
Ensure that both lower LATCH anchors
are correctly engaged and that the child
restraint system is resting firmly against the
backrest, otherwise the protective function of
the seat may be compromised.<
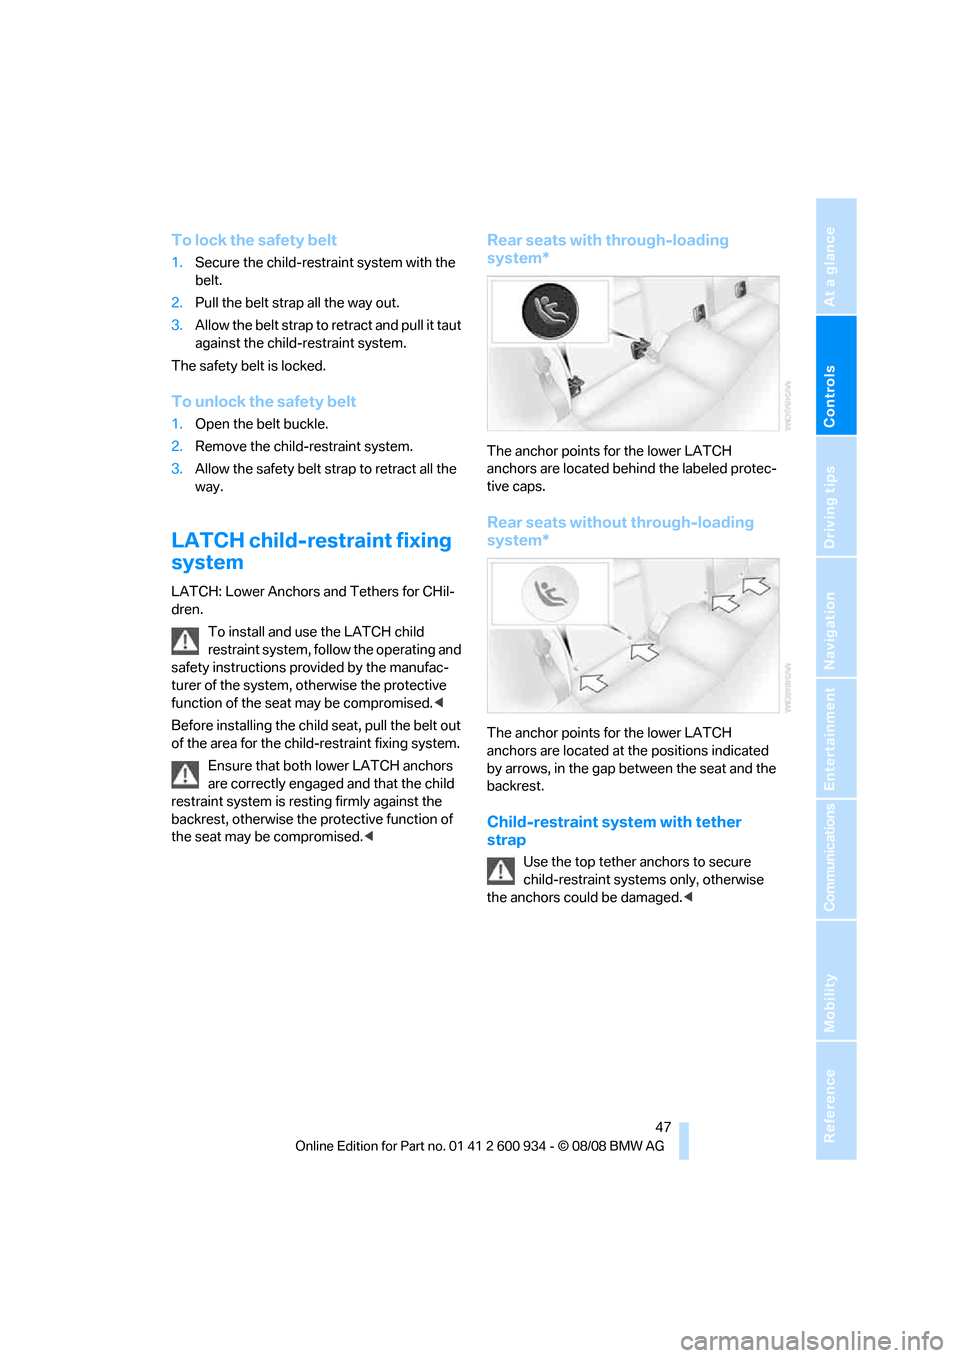
Rear seats with through-loading
system*
The anchor points for the lower LATCH
anchors are located behind the labeled protec-
tive caps.
Rear seats without through-loading
system*
The anchor points for the lower LATCH
anchors are located at the positions indicated
by arrows, in the gap between the seat and the
backrest.
Child-restraint system with tether
strap
Use the top tether anchors to secure
child-restraint systems only, otherwise
the anchors could be damaged.<
ba8_E90M3_cic.book Seite 47 Dienstag, 19. August 2008 11:51 11
Page 85 of 246

Controls
83Reference
At a glance
Driving tips
Communications
Navigation
Entertainment
Mobility
integral side airbags to the front seats. Do not
hang items of clothing such as coats or jackets
over the backrests. Do not attempt to remove
the airbag retention system from the vehicle. Do
not modify the individual components of the
system or its wiring in any way. This includes
the upholstered covers on the steering wheel,
instrument panel, seats and roof posts, as well
as the sides of the roof lining. Do not attempt to
remove or dismantle the steering wheel.
Do not touch the individual components imme-
diately after the system has been triggered,
because there is a danger of burns.
In the event of malfunctions, deactivation or
triggering of the airbag restraint system, have
the testing, repair, removal and disposal of air-
bag generators executed only by a BMW center
or a workshop that works according to repair
procedures of BMW with correspondingly
trained personnel and that has the required
explosives licenses. Unprofessional attempts to
work on the system could lead to failure in an
emergency or to undesired airbag activation,
either of which could result in personal injury.<
Warning notices and information about the air-
bags can also be found on the sun visors.
Automatic deactivation of the front
passenger airbags
An analysis of the impression in the front pas-
senger seat cushion determines whether and
how the seat is occupied. The front and side air-
bags for the front passenger are activated or
deactivated by the system accordingly.
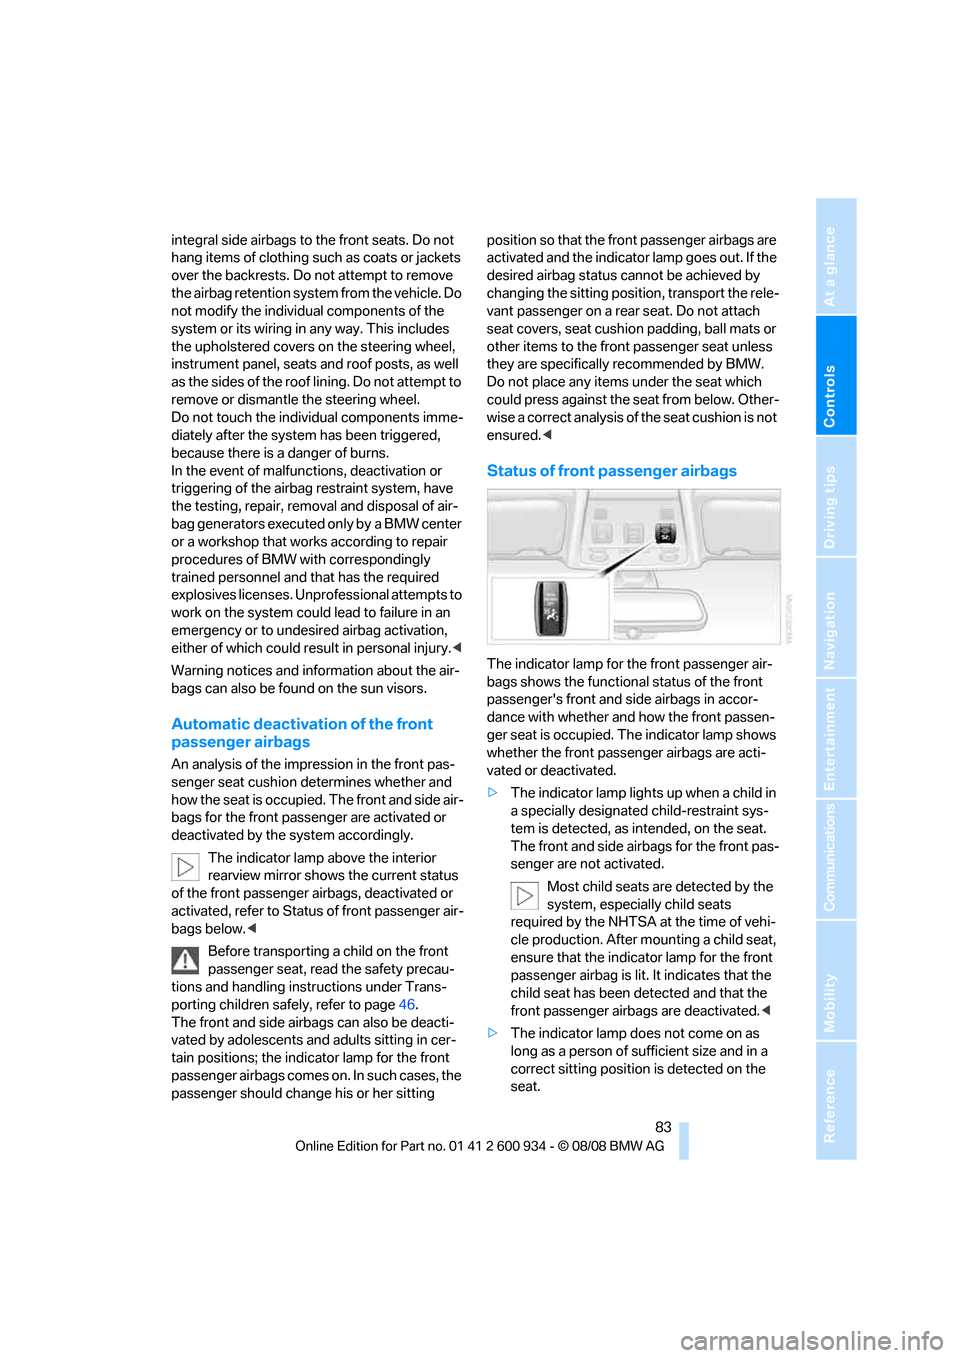
The indicator lamp above the interior
rearview mirror shows the current status
of the front passenger airbags, deactivated or
activated, refer to Status of front passenger air-
bags below.<
Before transporting a child on the front
passenger seat, read the safety precau-
tions and handling instructions under Trans-
porting children safely, refer to page46.
The front and side airbags can also be deacti-
vated by adolescents and adults sitting in cer-
tain positions; the indicator lamp for the front
passenger airbags comes on. In such cases, the
passenger should change his or her sitting position so that the front passenger airbags are
activated and the indicator lamp goes out. If the
desired airbag status cannot be achieved by
changing the sitting position, transport the rele-
vant passenger on a rear seat. Do not attach
seat covers, seat cushion padding, ball mats or
other items to the front passenger seat unless
they are specifically recommended by BMW.
Do not place any items under the seat which
could press against the seat from below. Other-
wise a correct analysis of the seat cushion is not
ensured.<
Status of front passenger airbags
The indicator lamp for the front passenger air-
bags shows the functional status of the front
passenger's front and side airbags in accor-
dance with whether and how the front passen-
ger seat is occupied. The indicator lamp shows
whether the front passenger airbags are acti-
vated or deactivated.
>The indicator lamp lights up when a child in
a specially designated child-restraint sys-
tem is detected, as intended, on the seat.
The front and side airbags for the front pas-
senger are not activated.
Most child seats are detected by the
system, especially child seats
required by the NHTSA at the time of vehi-
cle production. After mounting a child seat,
ensure that the indicator lamp for the front
passenger airbag is lit. It indicates that the
child seat has been detected and that the
front passenger airbags are deactivated.<
>The indicator lamp does not come on as
long as a person of sufficient size and in a
correct sitting position is detected on the
seat.
ba8_E90M3_cic.book Seite 83 Dienstag, 19. August 2008 11:51 11
Page 104 of 246

Practical interior accessories
102 Press the floor panel up and secure it with the
catch.
Lashing eyes
You will find lashing eyelets in the cargo bay for
securing luggage items with nets or tensioning
straps, refer to page109.
Ski bag*
The ski bag is designed for safe, clean transport
of up to 4 pairs of standard skis or up to
2snowboards.
With the ski bag you can stow skis with a length
of up to 6 ft 10 in/2.10 m. When skis of 6 ft 10 in/
2.10 m length are loaded, the overall capacity of
the ski bag is reduced due to its tapered design.
Loading
1.Fold down the center armrest.
2.Press the button, reach into the recess and
fold down the cover.
3.Open the Velcro fastener, spread the ski
bag between the front seats and insert the
skis or snowboards.
The zip fastener makes objects in the ski
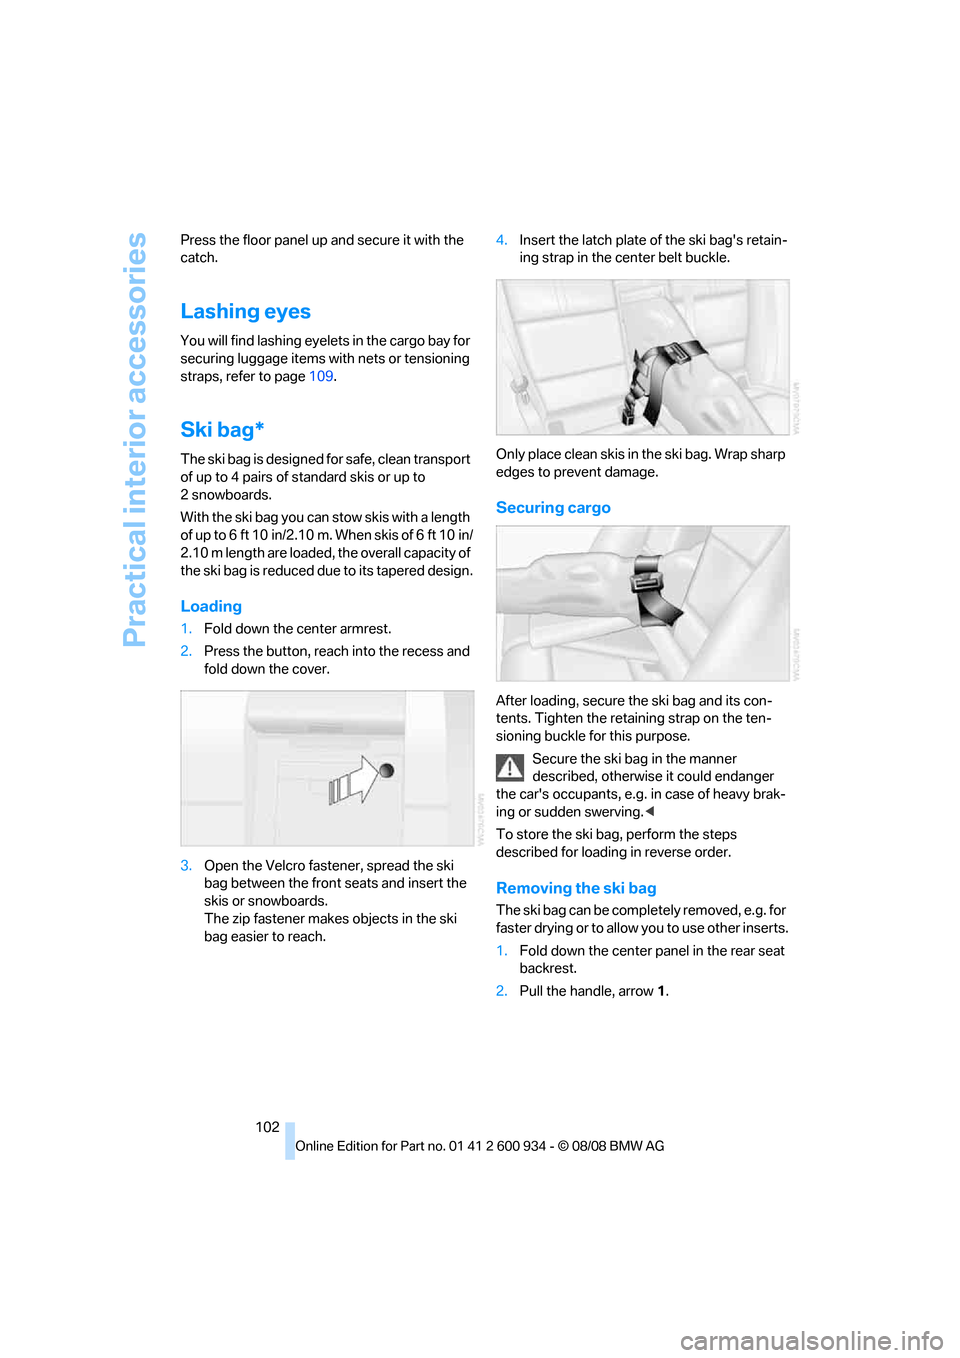
bag easier to reach.4.Insert the latch plate of the ski bag's retain-
ing strap in the center belt buckle.
Only place clean skis in the ski bag. Wrap sharp
edges to prevent damage.
Securing cargo
After loading, secure the ski bag and its con-
tents. Tighten the retaining strap on the ten-
sioning buckle for this purpose.
Secure the ski bag in the manner
described, otherwise it could endanger
the car's occupants, e.g. in case of heavy brak-
ing or sudden swerving.<
To store the ski bag, perform the steps
described for loading in reverse order.
Removing the ski bag
The ski bag can be completely removed, e.g. for
faste r drying or to allow you to use other inserts.
1.Fold down the center panel in the rear seat
backrest.
2.Pull the handle, arrow1.
ba8_E90M3_cic.book Seite 102 Dienstag, 19. August 2008 11:51 11