2009 BMW 650I CONVERTIBLE remote control
[x] Cancel search: remote controlPage 101 of 272

Controls
99Reference
At a glance
Driving tips
Communications
Navigation
Entertainment
Mobility
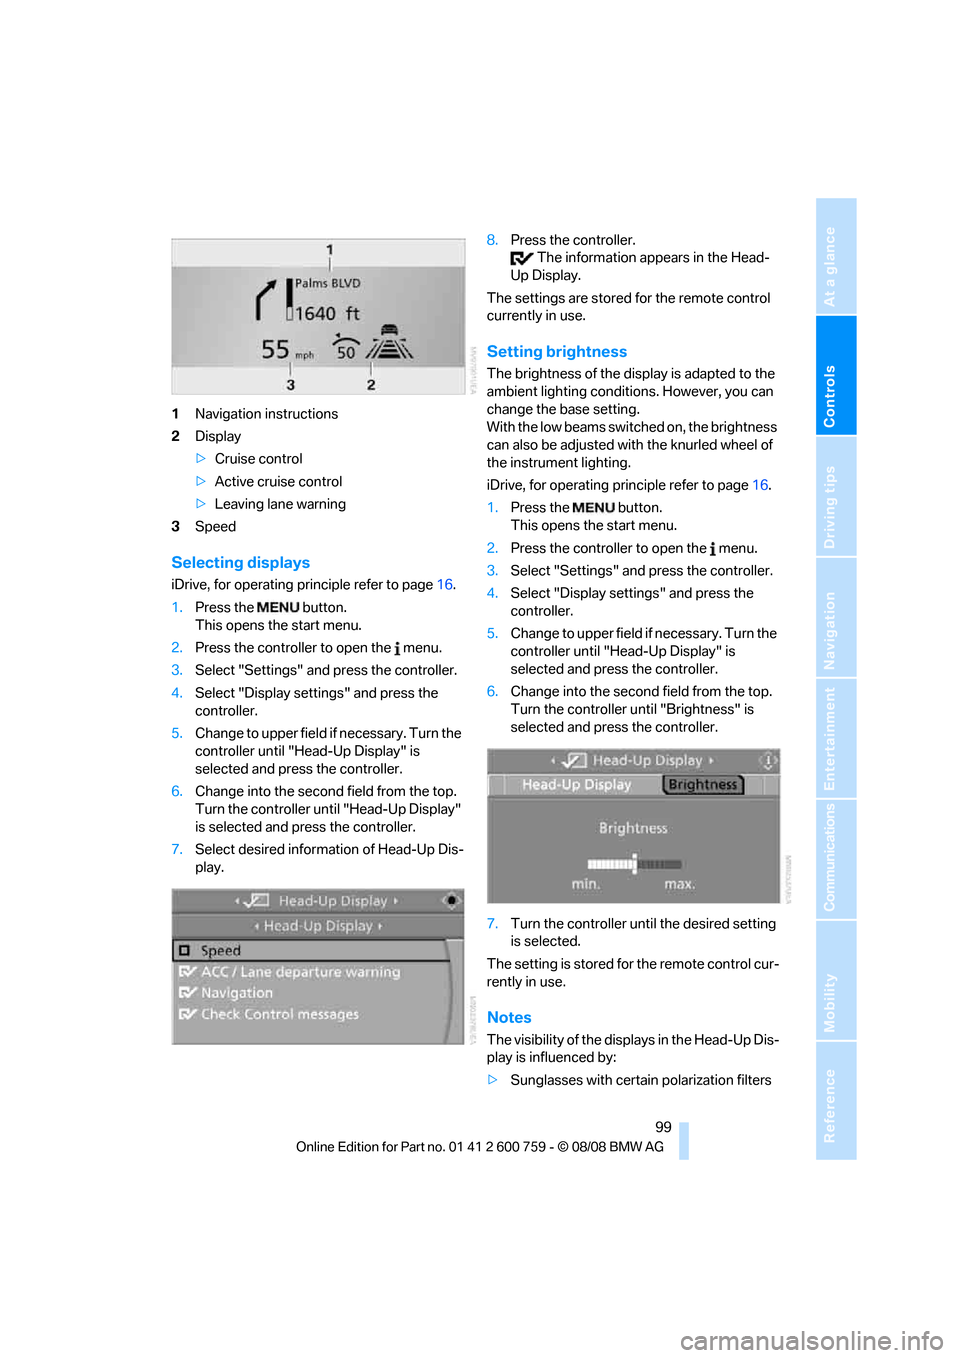
1Navigation instructions
2Display
>Cruise control
>Active cruise control
>Leaving lane warning
3Speed
Selecting displays
iDrive, for operating principle refer to page16.
1.Press the button.
This opens the start menu.
2.Press the controller to open the menu.
3.Select "Settings" and press the controller.
4.Select "Display settings" and press the
controller.
5.Change to upper field if necessary. Turn the
controller until "Head-Up Display" is
selected and press the controller.
6.Change into the second field from the top.
Turn the controller until "Head-Up Display"
is selected and press the controller.
7.Select desired information of Head-Up Dis-
play.8.Press the controller.
The information appears in the Head-
Up Display.
The settings are stored for the remote control
currently in use.
Setting brightness
The brightness of the display is adapted to the
ambient lighting conditions. However, you can
change the base setting.
With the low beams switched on, the brightness
can also be adjusted with the knurled wheel of
the instrument lighting.
iDrive, for operating principle refer to page16.
1.Press the button.
This opens the start menu.
2.Press the controller to open the menu.
3.Select "Settings" and press the controller.
4.Select "Display settings" and press the
controller.
5.Change to upper field if necessary. Turn the
controller until "Head-Up Display" is
selected and press the controller.
6.Change into the second field from the top.
Turn the controller until "Brightness" is
selected and press the controller.
7.Turn the controller until the desired setting
is selected.
The setting is stored for the remote control cur-
rently in use.
Notes
The visibility of the displays in the Head-Up Dis-
play is influenced by:
>Sunglasses with certain polarization filters
Page 104 of 272

Technology for comfort, convenience and safety
102 >Press the button.
>Via iDrive, refer to Selecting settings.
Selecting settings
iDrive, for explanation of principle, refer to
page16.
1.Activate BMW Night Vision.
2.Press the controller to display the menu
items.
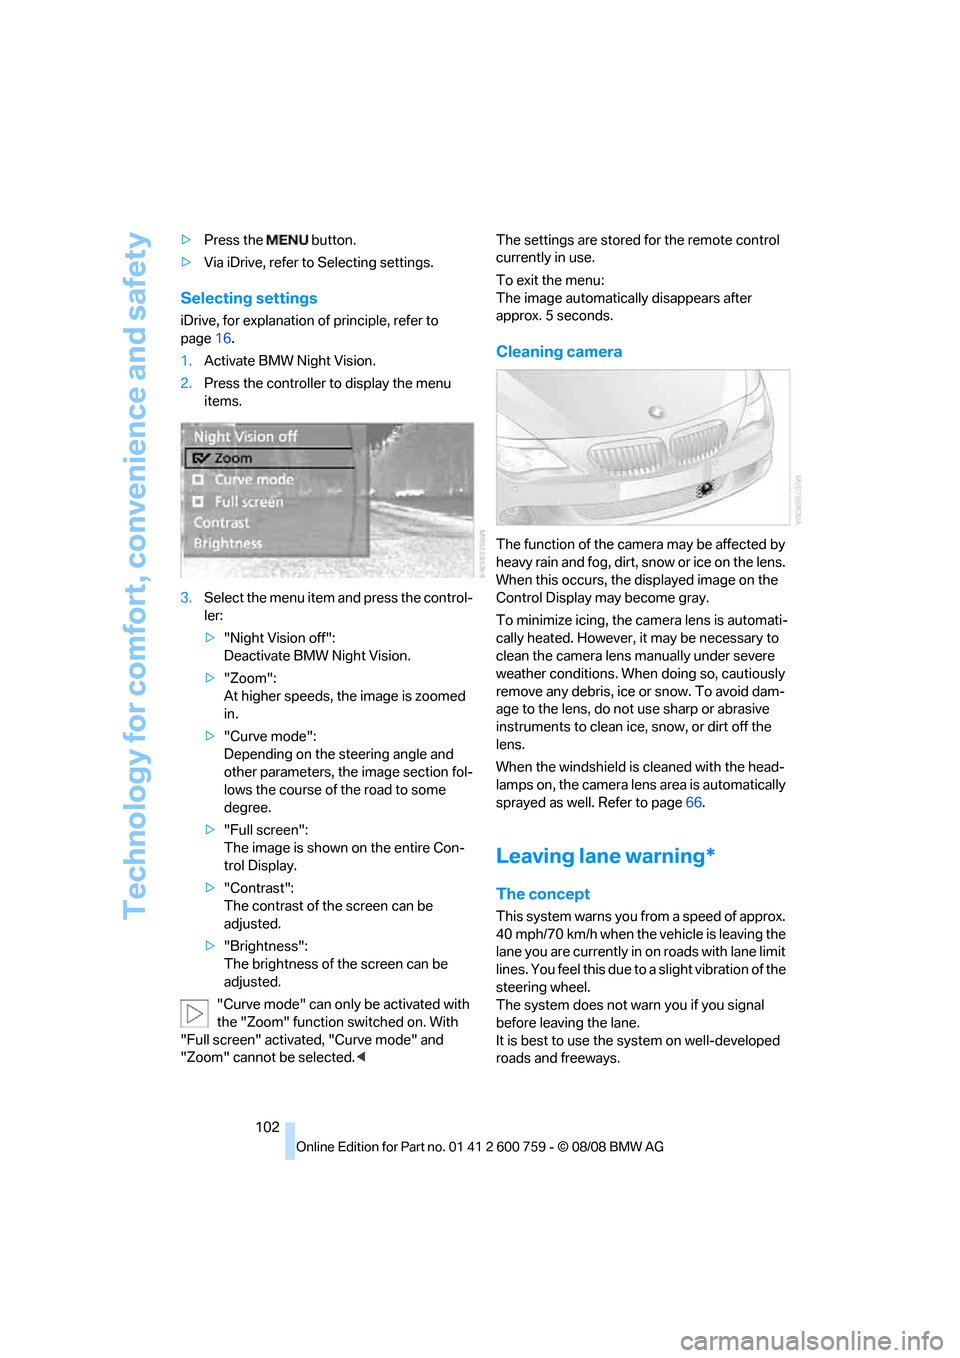
3.Select the menu item and press the control-
ler:
>"Night Vision off":
Deactivate BMW Night Vision.
>"Zoom":
At higher speeds, the image is zoomed
in.
>"Curve mode":
Depending on the steering angle and
other parameters, the image section fol-
lows the course of the road to some
degree.
>"Full screen":
The image is shown on the entire Con-
trol Display.
>"Contrast":
The contrast of the screen can be
adjusted.
>"Brightness":
The brightness of the screen can be
adjusted.
"Curve mode" can only be activated with
the "Zoom" function switched on. With
"Full screen" activated, "Curve mode" and
"Zoom" cannot be selected.
To exit the menu:
The image automatically disappears after
approx. 5 seconds.
Cleaning camera
The function of the camera may be affected by
heavy rain and fog, dirt, snow or ice on the lens.
When this occurs, the displayed image on the
Control Display may become gray.
To minimize icing, the camera lens is automati-
cally heated. However, it may be necessary to
clean the camera lens manually under severe
weather conditions. When doing so, cautiously
remove any debris, ice or snow. To avoid dam-
age to the lens, do not use sharp or abrasive
instruments to clean ice, snow, or dirt off the
lens.
When the windshield is cleaned with the head-
lamps on, the camera lens area is automatically
sprayed as well. Refer to page66.
Leaving lane warning*
The concept
This system warns you from a speed of approx.
40 mph/70 km/h when the vehicle is leaving the
lane you are currently in on roads with lane limit
lines. You feel this due to a slight vibration of the
steering wheel.
The system does not warn you if you signal
before leaving the lane.
It is best to use the system on well-developed
roads and freeways.
Page 107 of 272

Controls
105Reference
At a glance
Driving tips
Communications
Navigation
Entertainment
Mobility
5.Change to upper field if necessary. Turn the
controller until "Lighting" is selected and
press the controller.
6.Select "Welcome light" and press the con-
troller.
The welcome lamps are switched on.
The setting is stored for the remote control cur-
rently in use.
Pathway lighting
When you activate the headlamp flasher after
parking the vehicle and switching off the lamps,
the low beams will come on for a brief period.
You can set the duration or deactivate the func-
tion via iDrive.
iDrive, for operating principle refer to page16.
1.Press the button.
This opens the start menu.
2.Press the controller to open the menu.
3.Select "Settings" and press the controller.
4.Select "Vehicle / Tires" and press the con-
troller.
5.Change to upper field if necessary. Turn the
controller until "Lighting" is selected and
press the controller.6.Select "Pathway lighting" and press the
controller.
7.Turn the controller to select the desired
duration.
8.Press the controller to apply the setting.
The setting is stored for the remote control cur-
rently in use.
Daytime running lamps*
The daytime running lamps light up in
position0, 1 and 3. If the light switch remains in
position1, the parking lamps light up after the
ignition is switched off.
Activating/deactivating daytime
running lamps*
1.Open the start menu.
2.Press the controller to open the menu.
3.Select "Settings" and press the controller.
4.Select "Vehicle / Tires" and press the con-
troller.
5.Change to upper field if necessary. Turn the
controller until "Lighting" is selected and
press the controller.
6.Select "Daytime running lamps" and press
the controller.
The daytime running lamps are
switched on.
The setting is stored for the remote control cur-
rently in use.
Page 110 of 272

Lamps
108 5.Change to upper field if necessary. Turn the
controller until "Lighting" is selected and
press the controller.
6.Select "High-beam assistant" and press
the controller.
High-beam assistant is switched off.
The setting is stored for the remote control cur-
rently in use.
Fog lamps
First switch on the parking lamps or the low
beams. The green indicator lamp in the instru-
ment cluster lights up whenever the fog lamps
are on.
The fog lamps are switched off whenever the
high beams are switched on.
If the automatic headlamp control is acti-
vated, the low beams will come on when
you switch on the fog lamps.<
Instrument lighting
You can control the lighting intensity by using
the knurled wheel.
Interior lamps
Control of the interior lamps, footwell lamps,
door entry lighting, courtesy lamps
* and sill
panel lighting
* is automatic.
With the courtesy lamps,
LED lights are pro-
vided in the outside rearview mirrors to illumi-
nate the exterior area around the doors.
To protect the battery, all lamps in the
vehicle are switched off approx. 15 min-
utes after radio readiness is switched off, refer
to Start/Stop button on page60.<
Switching interior lamps on and off
manually
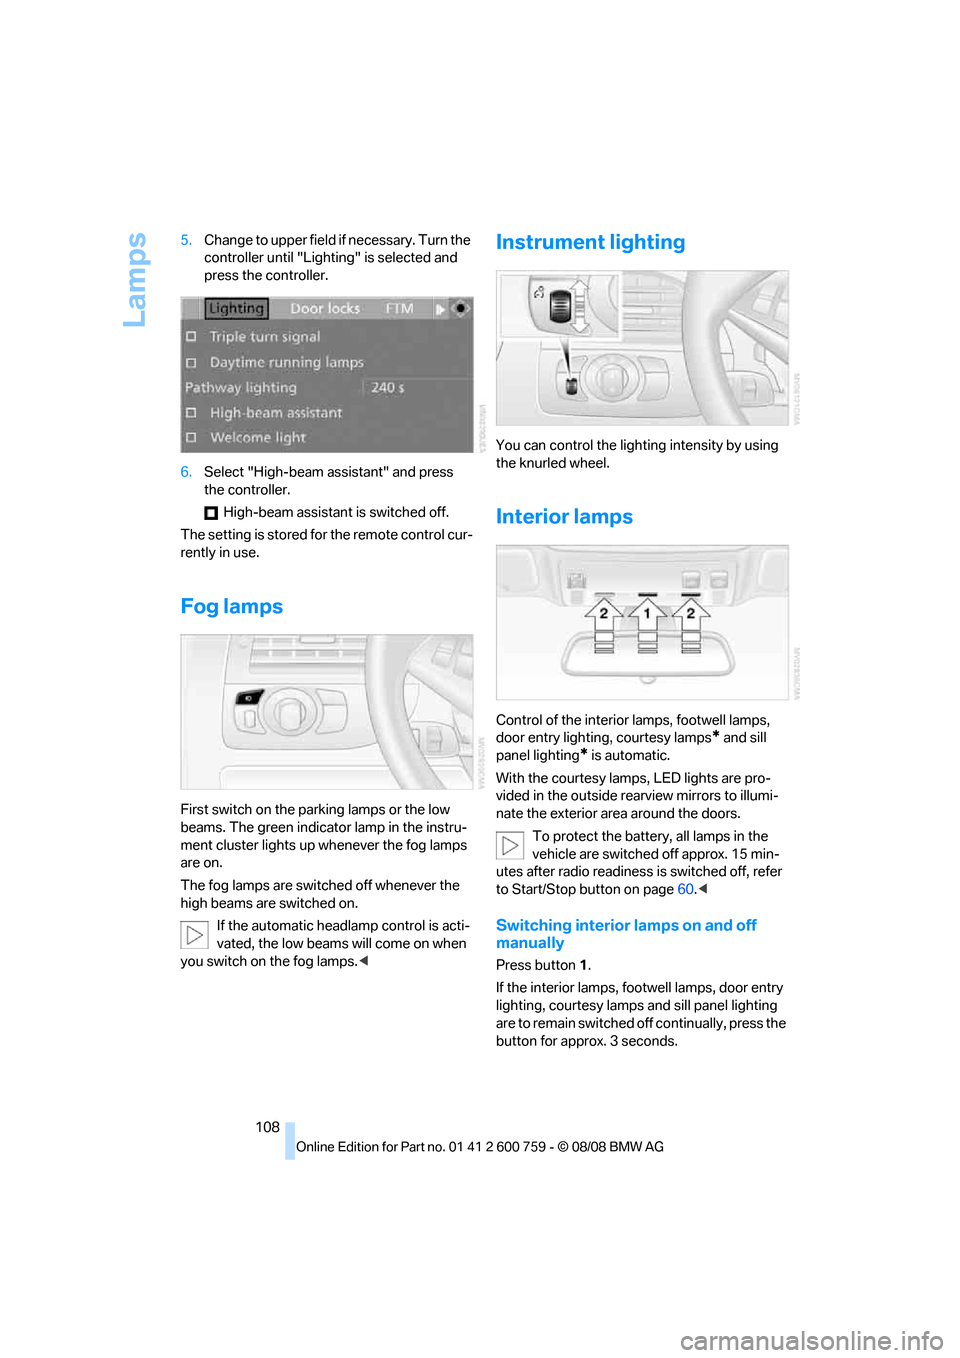
Press button 1.
If the interior lamps, footwell lamps, door entry
lighting, courtesy lamps and sill panel lighting
are to remain switched off continually, press the
button for approx. 3 seconds.
Page 113 of 272

Controls
111Reference
At a glance
Driving tips
Communications
Navigation
Entertainment
Mobility
16Air grill for interior temperature sensor –
please keep clear and unobstructed
The current setting for air distribution is dis-
played on the Control Display.
A congenial climate
The AUTO program offers the optimum air dis-
tribution and air volume for virtually all condi-
tions, refer to AUTO program below. Now you
only need to select an interior temperature
pleasant to you.
The following sections contain more detailed
information on the available setting options.
Most settings are stored for the remote control
currently in use, also refer to Personal Profile
settings on page31.
AUTO program
The AUTO program handles the
adjustment of air volume and air
distribution to the windshield and
side windows, in the direction of
the upper body and in the footwell.
It also adapts your instructions for the tempera-
ture to outside influences throughout the year.
The cooling function is switched on along with
the AUTO program. At the same time, a con-
densation sensor controls the program in such
a way that window condensation is prevented
as much as possible.
Intensity of AUTO program
You can adjust the intensity of the AUTO pro-
gram by repeatedly pressing the AUTO button.
The respective current setting is briefly dis-
played on the Control Display when the button
is pressed.
You can also adjust the intensity of the AUTO
program via iDrive.
iDrive, for operating principle refer to page16.
1.Press the button.
This opens the start menu.
2.Move the controller to the left to open "Cli-
mate".3.Select "Automatic programs" and press the
controller.
4.Select the desired intensity and press the
controller.
The marked intensity of the automatic
program is switched on.
Convertible program*
When the convertible top is opened, the con-
vertible program can also be selected. In the
convertible program, the automatic climate
control is optimized for driving with the convert-
ible top open. In addition, the air volume is
increased as the speed increases.
If the convertible program has been selected,
it is automatically active every time the top is
opened.
The effect of the convertible program can
be greatly enhanced if the wind deflector
is installed.<
Temperature
Set the desired temperature indi-
vidually on the driver's and front
passenger side.
The automatic climate control
achieves this temperature as quickly as possi-
ble at any time of year, if necessary with the
maximum cooling or heating capacity, and then
keeps it constant.
When changing between different tem-
perature settings in rapid succession, the
automatic climate control does not have suffi-
cient time to adjust the set temperature.<
Page 119 of 272

Controls
117Reference
At a glance
Driving tips
Communications
Navigation
Entertainment
Mobility
Practical interior accessories
Integrated universal remote
control*
The concept
The integrated universal remote control can
replace as many as three hand-held transmit-
ters for various remote-controlled accessories,
such as garage and gate or lighting systems.
The integrated universal remote control regis-
ters and stores signals from the original hand-
held transmitters.
The signal of an original hand-held transmitter
can be programmed on one of the three mem-
ory buttons1. After this, the programmed
memory button1 will operate the system in
question. The LED2 flashes to confirm trans-
mission of the signal.
Should you sell your vehicle one day, be sure to
delete the stored programs beforehand for your
safety, refer to page118.
To prevent possible damage or injury,
before programming or using the inte-
grated universal remote control, always inspect
the immediate area to make certain that no peo-
ple, animals or objects are within the travel
range of the device. Also, comply with the
safety precautions of the original hand-held
transmitter.<
Checking compatibility
If you see this symbol on the packaging
or in the manual supplied with the orig-
inal hand-held transmitter, it is safe to
assume that it is compatible with the integrated
universal remote control.
If you have additional questions, please
contact your BMW center or call:
1-800-355-3515.
Information is also provided on the Internet at:
www.bmwusa.com or
www.homelink.com.
HomeLink is a registered trademark of Johnson
Controls, Inc.<
Programming
1Memory buttons
2LED
Fixed-code hand-held transmitters
1.Switch on ignition, refer to page60.
2.When starting operation for the first time:
Press the left and right-hand memory
button1 for approx. 20 seconds until the
LED2 flashes quickly. All stored programs
are deleted.
3.Hold the original hand-held transmitter at a
distance of approx. 4 in/10 cm to 12 in/
30 cm from the memory buttons1.
The required distance between the
hand-held transmitter and the mem-
ory buttons1 depends on the relevant sys-
tem of the original hand-held transmitter
used.<
4.Simultaneously press the transmit button
on the original hand-held transmitter and
the desired memory button 1 on the inte-
grated universal remote control. The LED 2
flashes slowly at first. As soon as the LED2
flashes rapidly, release both buttons. If the
LED2 does not flash rapidly after approx.
15 seconds, alter the distance and repeat
the step.
5.To program other original hand-held trans-
mitters, repeat steps 3 and 4.
The corresponding memory button 1 is now
programmed with the signal of the original
hand-held transmitter.
Page 120 of 272

Practical interior accessories
118 You can operate the device when the engine is
running or when the ignition is switched on.
If the device fails to function even after
repeated programming, check whether
the original hand-held transmitter uses an alter-
nating-code system. To do so, either read the
instructions for the original hand-held transmit-
ter or hold down the programmed memory
button1 of the integrated universal remote
control. If the LED2 on the integrated universal
remote control flashes rapidly for a short time
and then remains lit for approx. 2 seconds, this
indicates that the original hand-held transmitter
uses an alternating-code system. In the case of
an alternating-code system, program the mem-
ory buttons1 as described at Alternating-code
hand-held transmitters.<
Alternating-code hand-held
transmitters
To program the integrated universal remote
control, consult the operating instructions for
the equipment to be set. You will find informa-
tion there on the possibilities for synchroniza-
tion.
When programming hand-held transmitters
that employ an alternating code, please observe
the following supplementary instructions:
Programming will be easier with the aid of
a second person.<
1.Park your vehicle within the range of the
remote-controlled device.
2.Program the integrated universal remote
control as described above in the section
Fixed-code hand-held transmitters.
3.Locate the button on the receiver of the
device to be set, e. g. on the drive unit.
4.Press the button on the receiver of the
device to be set. After step 4, you have
approx. 30 seconds for step 5.
5.Press the programmed memory button1
of the integrated universal remote control
three times.
The corresponding memory button 1 is now
programmed with the signal of the original
hand-held transmitter.If you have any additional questions,
please contact your BMW center.<
Deleting all stored programs
Press the left and right-hand memory button1
for approx. 20 seconds until the LED2 flashes.
All stored programs are deleted.
Individual programs cannot be deleted.
Rememorizing individual programs
1.Hold the original handheld remote control
approx. 4 in/10 cm to 12 in/30 cm away
from the memory buttons1.
The required distance between the
hand-held transmitter and the mem-
ory buttons1 depends on the relevant sys-
tem of the original hand-held transmitter
used.<
2.Press the desired memory button1 of the
integrated universal remote.
3.If the LED2 flashes slowly after approx.
20 seconds, press the command button of
the original hand-held transmitter. As soon
as the LED2 flashes rapidly, release both
buttons. If the LED2 does not flash rapidly
after approx. 15 seconds, alter the distance
and repeat the step.
Glove compartment
Opening
Press the button. The glove compartment
opens automatically and the lamps come on.
To prevent injury in the event of an acci-
dent while the vehicle is being driven,
Page 123 of 272

Controls
121Reference
At a glance
Driving tips
Communications
Navigation
Entertainment
Mobility
The removable cup holder can be inserted into
the side of the center console.
Ashtray
Opening
Press the trim strip of the cover.
Emptying
Press the opened cover beyond the resistance
point, refer to arrow: the ashtray lifts up for
removal.
Cigarette lighter
Press in the lighter with the engine running or
the ignition switched on.The lighter can be removed as soon as it pops
back out.
Hold or touch the hot cigarette lighter by
the knob only. Holding or touching it in
other areas could result in burns.
Always take along the remote control when you
leave the vehicle, otherwise children could, for
example, use the lighter and burn themselves.<
Connecting electrical devices
Socket
With the engine running or the ignition switched
on, the cigarette lighter socket can be used as a
power outlet for hand flashlights, car vacuum
cleaners, etc., with power ratings of up to
approx. 200 W at 12 V. Avoid damaging the
socket due to inserting plugs of different
shapes or sizes.
In front passenger footwell
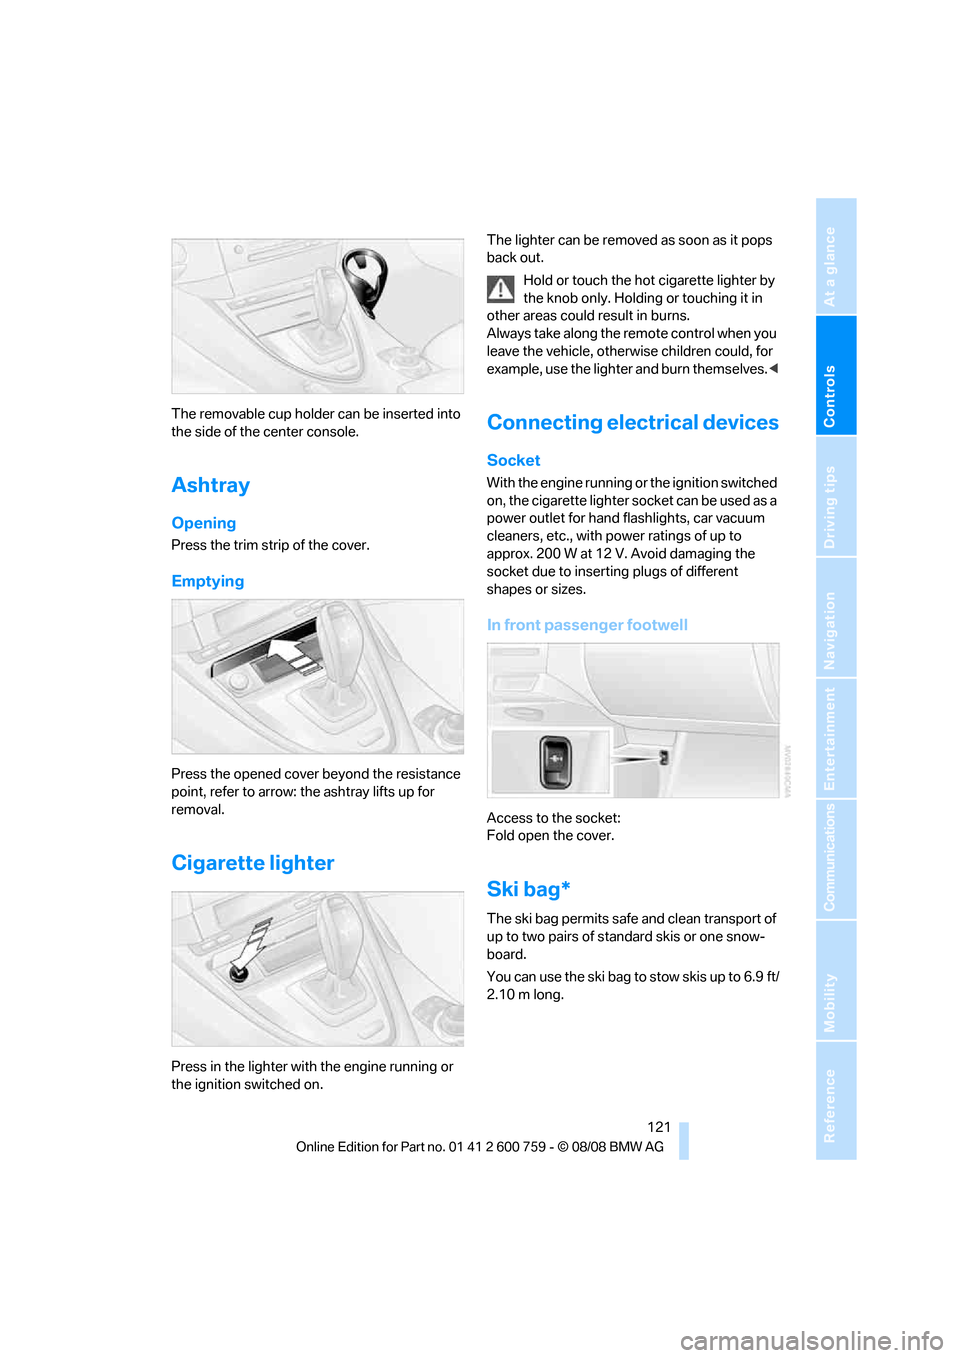
Access to the socket:
Fold open the cover.
Ski bag*
The ski bag permits safe and clean transport of
up to two pairs of standard skis or one snow-
board.
You can use the ski bag to stow skis up to 6.9 ft/
2.10 m long.