2009 BMW 650I CONVERTIBLE stop start
[x] Cancel search: stop startPage 76 of 272

Driving
74 ruption, the system will no longer automatically
activate the vehicle brakes, which means the
driver must intervene and resume manual brak-
ing. You should then reactivate the system only
when you are fully aware of the prior speed and
distance settings.<
Active cruise control may brake when you
reduce the stored desired speed; however, the
driver must constantly monitor traffic and inter-
vene if necessary.
When you switch off the engine or ignition,
active cruise control is fully switched off, too,
and any settings you have selected are can-
celed.
Unexpected lane change
If a vehicle in front of you is behind a stopped
vehicle and unexpectedly changes lanes, you
must react yourself, as the system does not
react to stopped vehicles.
Swerving vehicles
When a vehicle swerves out of adjacent lanes
into your lane, the system does not detect the
vehicle until it is completely in your lane.
When a vehicle ahead suddenly swerves
into your lane, the system may not be able
to restore the selected distance automatically. This also applies to great differences in speed
between your vehicle and vehicles ahead, e. g.
when quickly approaching a truck. Once the
system has established that a vehicle is indeed
in front of you, it will indicate that you must
brake and/or maneuver the vehicle yourself.
Take action yourself, otherwise there is a risk of
an accident.<
Behavior in curves
If the selected desired speed for a curve is too
high, the system reduces the speed within a
curve. However, it cannot detect curves in
advance. Therefore, select a suitable speed at
the start of a curve.
Because of the limited range of the system, it is
possible that in curves or on the peaks and val-
leys of hilly roads, a vehicle ahead may be rec-
ognized late, or not at all. Therefore, it is up to
the driver to select a speed that is prudent in
view of the curves and terrain of the roadway.
In approaching a curve, it is possible that active
cruise control might react briefly to a vehicle in
the adjacent lane. In addition, the system can
sense if your vehicle is in a curve and may not
accelerate. If your vehicle decelerates in either
case, you can choose to overcome the deceler-
ation by briefly pressing the accelerator pedal.
Page 85 of 272

Controls
83Reference
At a glance
Driving tips
Communications
Navigation
Entertainment
Mobility
Displaying the urgency of malfunctions
Depending on the equipment, the stored Check
Control messages are also displayed with the
following symbols:
No malfunctions detected in the moni-
tored systems.
Malfunctions are present in the moni-
tored systems. Depending on the mal-
function, supplementary information is
shown on the Control Display.
The symbols also indicate the status of the ser-
vice requirements display, refer to page79.
Displays after completion of trip
Malfunction reports generated during the trip
are shown consecutively when you switch off
the ignition.
Before the display disappears, you can display
the messages once again. Press the CHECK
button for approx. 2 seconds. If several mes-
sages are present, you can continue to press
the CHECK button to view them in succession.
The display goes out:
>after a short time
>when you press the CHECK button again
for approx. 2 seconds
Speed limit
You can enter a speed and a Check Control
message indicates when you have reached this
speed. This enables you, for example, to
receive warnings if you exceed a speed limit in
an urban area.
You are only warned of reaching this speed a second time if your vehicle speed falls below it
again by at least 3 mph/5 km/h.
Displaying, setting or changing limit
iDrive, for operating principle refer to page16.
1.Open the start menu.
2.Open "Navigation".
Without navigation system
*: Open "Car
Data".
3.Select "Car Data" and press the controller.
4.Select "Limit" and press the controller.
5.Select the speed value and press the con-
troller.
6.Turn the controller to set the limit.
7.Press the controller to apply the setting.
The limit is activated.
Applying your current speed as limit
Select "Select current speed" and press the
controller. The system adopts your current
speed as the limit.
Activating/deactivating limit
Select "On" and press the controller.
The limit is activated.
Stopwatch
iDrive, for operating principle refer to page16.
1.Open the start menu.
2.Open "Navigation".
Without navigation system
*: Open "Car
Data".
3.Select "Car Data" and press the controller.
Page 86 of 272

Everything under control
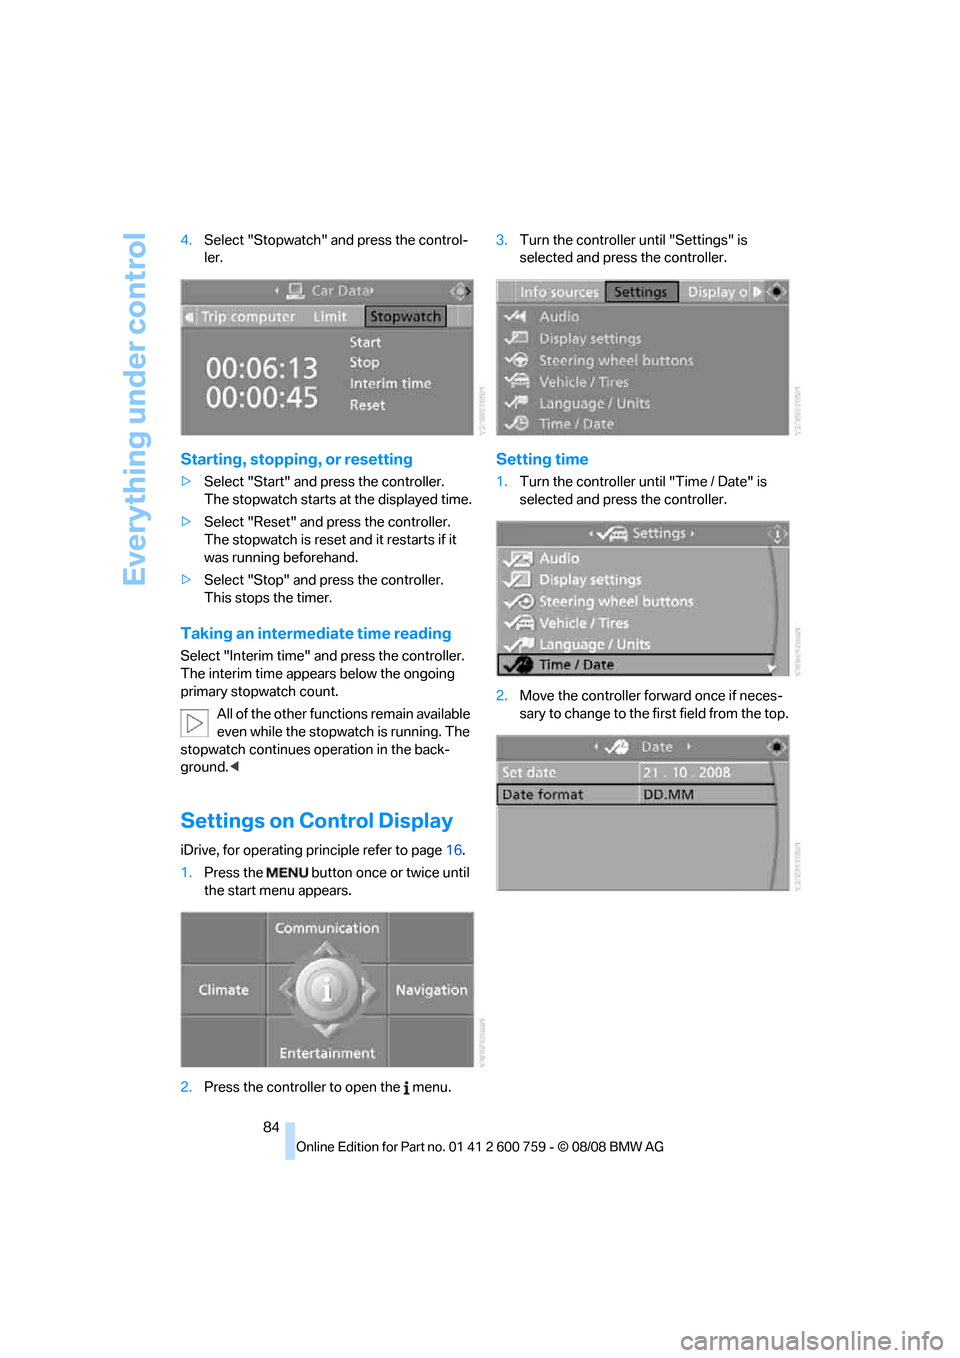
84 4.Select "Stopwatch" and press the control-
ler.
Starting, stopping, or resetting
>Select "Start" and press the controller.
The stopwatch starts at the displayed time.
>Select "Reset" and press the controller.
The stopwatch is reset and it restarts if it
was running beforehand.
>Select "Stop" and press the controller.
This stops the timer.
Taking an intermediate time reading
Select "Interim time" and press the controller.
The interim time appears below the ongoing
primary stopwatch count.
All of the other functions remain available
even while the stopwatch is running. The
stopwatch continues operation in the back-
ground.<
Settings on Control Display
iDrive, for operating principle refer to page16.
1.Press the button once or twice until
the start menu appears.
2.Press the controller to open the menu.3.Turn the controller until "Settings" is
selected and press the controller.
Setting time
1.Turn the controller until "Time / Date" is
selected and press the controller.
2.Move the controller forward once if neces-
sary to change to the first field from the top.
Page 91 of 272

Controls
89Reference
At a glance
Driving tips
Communications
Navigation
Entertainment
Mobility
Do not reduce the pressure on the brake pedal
for the duration of the full braking.
Adaptive brake assistant*
In conjunction with the active cruise control
with the stop-and-go function, the adaptive
brake assistant ensures that the brake
responds even more quickly during braking
with the brake assistant.
DSC Dynamic Stability Control
DSC prevents traction loss in the driving wheels
when starting off and accelerating. The system
also identifies unstable driving conditions, such
as a loss of traction at the rear of the vehicle or
sliding of the vehicle in its front wheels. In these
cases, DSC helps the vehicle maintain a safe
course within physical limits by reducing engine
output and through braking actions in the indi-
vidual wheels.
The laws of physics cannot be repealed,
even with DSC. An appropriate driving
style always remains the responsibility of the
driver. Therefore, do not restrict the additional
safety margin with a risky driving style, as other-
wise there is a risk of an accident.<
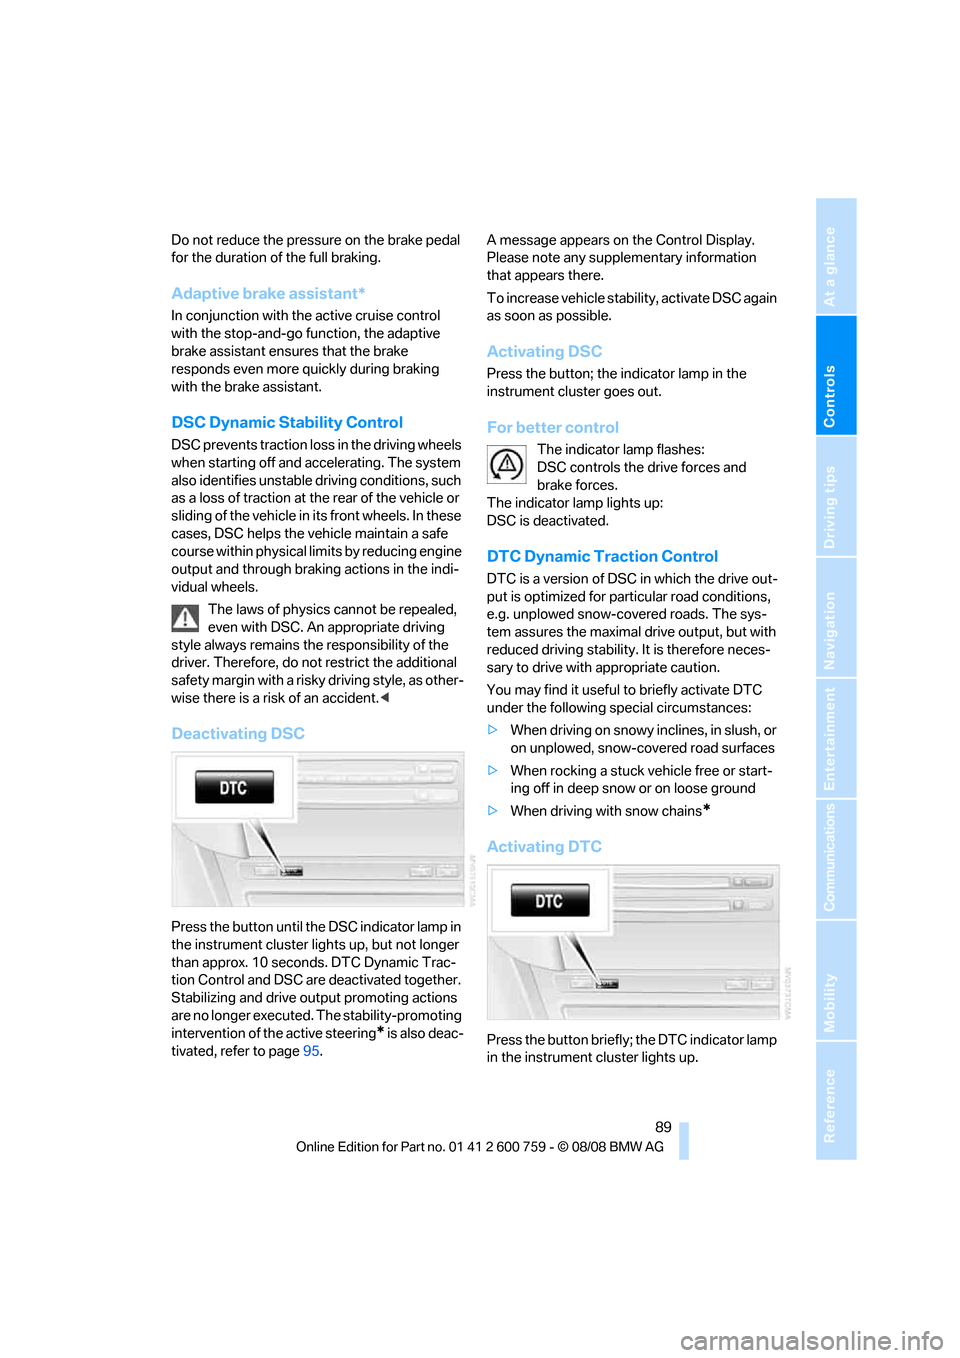
Deactivating DSC
Press the button until the DSC indicator lamp in
the instrument cluster lights up, but not longer
than approx. 10 seconds. DTC Dynamic Trac-
tion Control and DSC are deactivated together.
Stabilizing and drive output promoting actions
are no longer executed. The stability-promoting
intervention of the active steering
* is also deac-
tivated, refer to page95.A message appears on the Control Display.
Please note any supplementary information
that appears there.
To increase vehicle stability, activate DSC again
as soon as possible.
Activating DSC
Press the button; the indicator lamp in the
instrument cluster goes out.
For better control
The indicator lamp flashes:
DSC controls the drive forces and
brake forces.
The indicator lamp lights up:
DSC is deactivated.
DTC Dynamic Traction Control
DTC is a version of DSC in which the drive out-
put is optimized for particular road conditions,
e.g. unplowed snow-covered roads. The sys-
tem assures the maximal drive output, but with
reduced driving stability. It is therefore neces-
sary to drive with appropriate caution.
You may find it useful to briefly activate DTC
under the following special circumstances:
>When driving on snowy inclines, in slush, or
on unplowed, snow-covered road surfaces
>When rocking a stuck vehicle free or start-
ing off in deep snow or on loose ground
>When driving with snow chains
*
Activating DTC
Press the button briefly; the DTC indicator lamp
in the instrument cluster lights up.
Page 96 of 272

Technology for comfort, convenience and safety
94 1.Cautiously reduce speed to below 50 mph/
80 km/h. Avoid sudden braking and steer-
ing maneuvers. Do not exceed a speed of
50 mph/80 km/h.
Stop driving if the vehicle is no longer
equipped with run-flat tires, as it was
when it came from the factory, refer to
page218. Continued driving after a flat tire
can result in serious accidents.<
2.In the event of complete tire pressure loss,
0 psi/0 kPa, you can estimate the possible
distance for continued driving on the basis
of the following guide values:
>With a light load:
1 to 2 persons without luggage:
approx. 155 miles/250 km
>With a medium load:
2 persons, cargo bay full, or
4 persons without luggage:
approx. 95 miles/150 km
>With a full load:
4 persons, luggage compartment full:
approx. 30 miles/50 km
Drive reservedly and do not exceed a
speed of 50 mph/80 km/h. In the event of
pressure loss, vehicle handling changes. This
includes reduced tracking stability in braking,
extended braking distance and altered natural
steering characteristics.
If unusual vibrations or loud noises occur while
the vehicle is being driven, this can indicate final
failure of the damaged tire. Reduce speed and
stop at a suitable location as soon as possible,
otherwise pieces of the tire could become
detached and cause an accident. Do not con-
tinue driving, but instead contact your BMW
center.<
Malfunction
The yellow warning lamp flashes and
then lights up continuously. The tires
are shown in gray on the Control Dis-
play and a message is displayed. No flat tire can
be detected.
A message like this is displayed in the following
situations:>In case of a malfunction;
have the system checked.
>If a wheel is mounted without TPM elec-
tronics.
>If TPM is temporarily interfered with by
other systems or devices which use the
same radio frequency.
Declaration according to NHTSA/
FMVSS 138 Tire Pressure Monitoring
Systems
Each tire should be checked monthly when cold
and inflated to the inflation pressure recom-
mended by the vehicle manufacturer on the
vehicle placard or tire inflation pressure label. If
your vehicle has tires of a different size than the
size indicated on the vehicle placard or tire infla-
tion pressure label, you should determine the
proper tire inflation pressure for those tires. As
an added safety feature, your vehicle has been
equipped with a tire pressure monitoring sys-
tem, TPMS, that illuminates a low tire pressure
telltale when one or more of your tires are signif-
icantly underinflated. Accordingly, when the
low tire pressure telltale illuminates, you should
stop and check your tires as soon as possible,
and inflate them to the proper pressure. Driving
on a significantly underinflated tire causes the
tire to overheat and can lead to tire failure.
Underinflation also reduces fuel efficiency and
tire tread life, and may affect the vehicle's han-
dling and stopping ability. Please note that the
TPMS is not a substitute for proper tire mainte-
nance, and it is the driver's responsibility to
maintain correct tire pressure, even if underin-
flation has not reached the level to trigger illumi-
nation of the TPMS low tire pressure telltale.
The TPMS malfunction indicator is combined
with the low tire pressure telltale. When the sys-
tem detects a malfunction, the telltale will flash
for approximately one minute and then remain
continuously illuminated. This sequence will
continue upon subsequent vehicle startups as
long as the malfunction exists. When the mal-
function indicator lights up, the system may not
be able to detect or signal low tire pressure as
intended. TPMS malfunctions may occur for a
variety of reasons, including the installation of
Page 102 of 272

Technology for comfort, convenience and safety
100 >Certain seating positions
>Objects on the cover of the Head-Up Dis-
play
>Wet road surface and unfavorable lighting
conditions
If the image is distorted, please have the base
setting checked at a BMW center.
Special windshield
The windshield is part of the system. The shape
of the windshield complies with the require-
ments of the Head-Up Display to enable a pre-
cise display. A film in the windshield prevents
double images from being displayed.
Windshield replacement should be carried out
by a BMW center or a workshop that works
according to BMW repair procedures with cor-
respondingly trained personnel.
Care instructions
You can find valuable information on this topic
under Care, starting on page227.
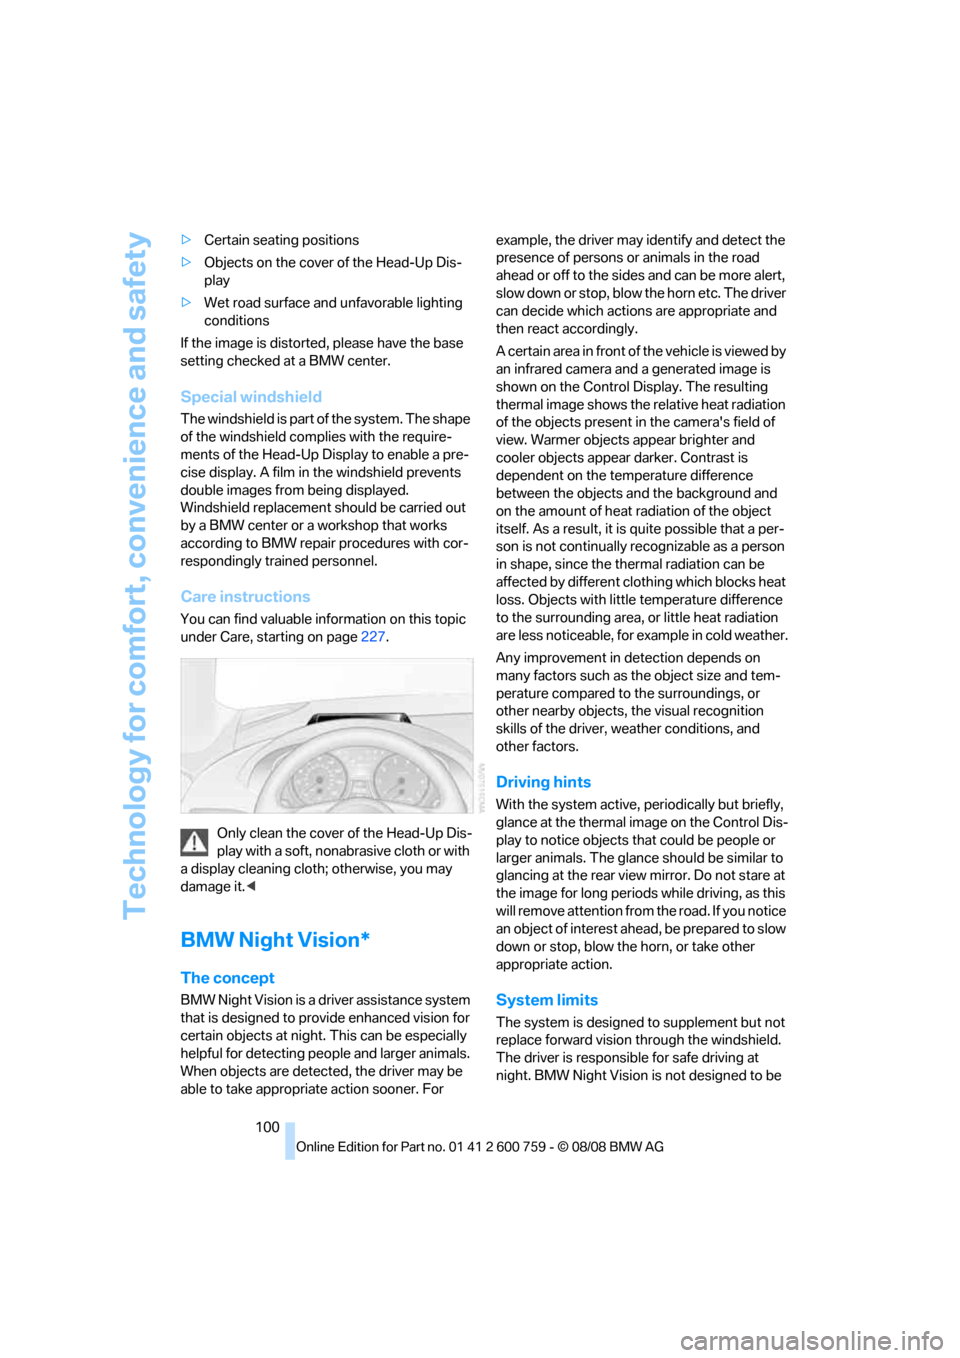
Only clean the cover of the Head-Up Dis-
play with a soft, nonabrasive cloth or with
a display cleaning cloth; otherwise, you may
damage it.<
BMW Night Vision*
The concept
BMW Night Vision is a driver assistance system
that is designed to provide enhanced vision for
certain objects at night. This can be especially
helpful for detecting people and larger animals.
When objects are detected, the driver may be
able to take appropriate action sooner. For example, the driver may identify and detect the
presence of persons or animals in the road
ahead or off to the sides and can be more alert,
slow down or stop, blow the horn etc. The driver
can decide which actions are appropriate and
then react accordingly.
A certain area in front of the vehicle is viewed by
an infrared camera and a generated image is
shown on the Control Display. The resulting
thermal image shows the relative heat radiation
of the objects present in the camera's field of
view. Warmer objects appear brighter and
cooler objects appear darker. Contrast is
dependent on the temperature difference
between the objects and the background and
on the amount of heat radiation of the object
itself. As a result, it is quite possible that a per-
son is not continually recognizable as a person
in shape, since the thermal radiation can be
affected by different clothing which blocks heat
loss. Objects with little temperature difference
to the surrounding area, or little heat radiation
are less noticeable, for example in cold weather.
Any improvement in detection depends on
many factors such as the object size and tem-
perature compared to the surroundings, or
other nearby objects, the visual recognition
skills of the driver, weather conditions, and
other factors.
Driving hints
With the system active, periodically but briefly,
glance at the thermal image on the Control Dis-
play to notice objects that could be people or
larger animals. The glance should be similar to
glancing at the rear view mirror. Do not stare at
the image for long periods while driving, as this
will remove attention from the road. If you notice
an ob je c t o f intere st ahea d, be pre pare d to slow
down or stop, blow the horn, or take other
appropriate action.
System limits
The system is designed to supplement but not
replace forward vision through the windshield.
The driver is responsible for safe driving at
night. BMW Night Vision is not designed to be
Page 108 of 272

Lamps
106
Adaptive Head Light*
The concept
Adaptive Head Light is a variable headlamp
control system that enables better illumination
of the road surface. Depending on the steering
angle and other parameters, the light from the
headlamp follows the course of the road.
Activating Adaptive Head Light
With the ignition switched on, turn the light
switch into position 3, refer to page104.
To avoid blinding oncoming traffic, the Adaptive
Head Light is not active when driving in reverse
and points toward the passenger side when the
vehicle is stopped.
High beams/
roadside parking lamps
1High beams
2Headlamp flasher
3Roadside parking lamps
Roadside parking lamps, left or right*
You also enjoy the option of lighting up just one
side of your vehicle when parking.
Switching on
After parking the vehicle, press the lever up or
down beyond the resistance point, arrow 3.
The roadside parking lamps drain the bat-
tery. Do not leave them switched on for
long periods of time, otherwise it may no longer
be possible to start the engine.<
Switching off
Briefly press the lever in the opposite direction
up to the resistance point, arrow3.
High-beam assistant*
The concept
This system automatically switches the high
beams on and off. A sensor on the front side of
the inside rearview mirror controls the process.
The assistant makes sure that the high beams
are switched on whenever traffic conditions
permit. This relieves you of the burden of con-
stantly switching back and forth and simulta-
neously provides you with the best possible vis-
ibility. Naturally, you can intervene at any time to
switch the high beams on and off as usual.
Activating system
1.Turn the light switch to position3, refer to
page104.
2.With the low beams switched on, briefly
press the turn signal lever in the high-beam
direction.
The indicator lamp in the instrument
cluster lights up when the high-beam
assistant is activated. The system
automatically switches between high beams
and low beams, reacting to oncoming traffic,
vehicles ahead of you, and sufficiently lit areas,
e.g. in built-up zones.
Manually switching between high
beams and low beams
If you wish or the situation requires, you can
intervene at any time.
Page 110 of 272

Lamps
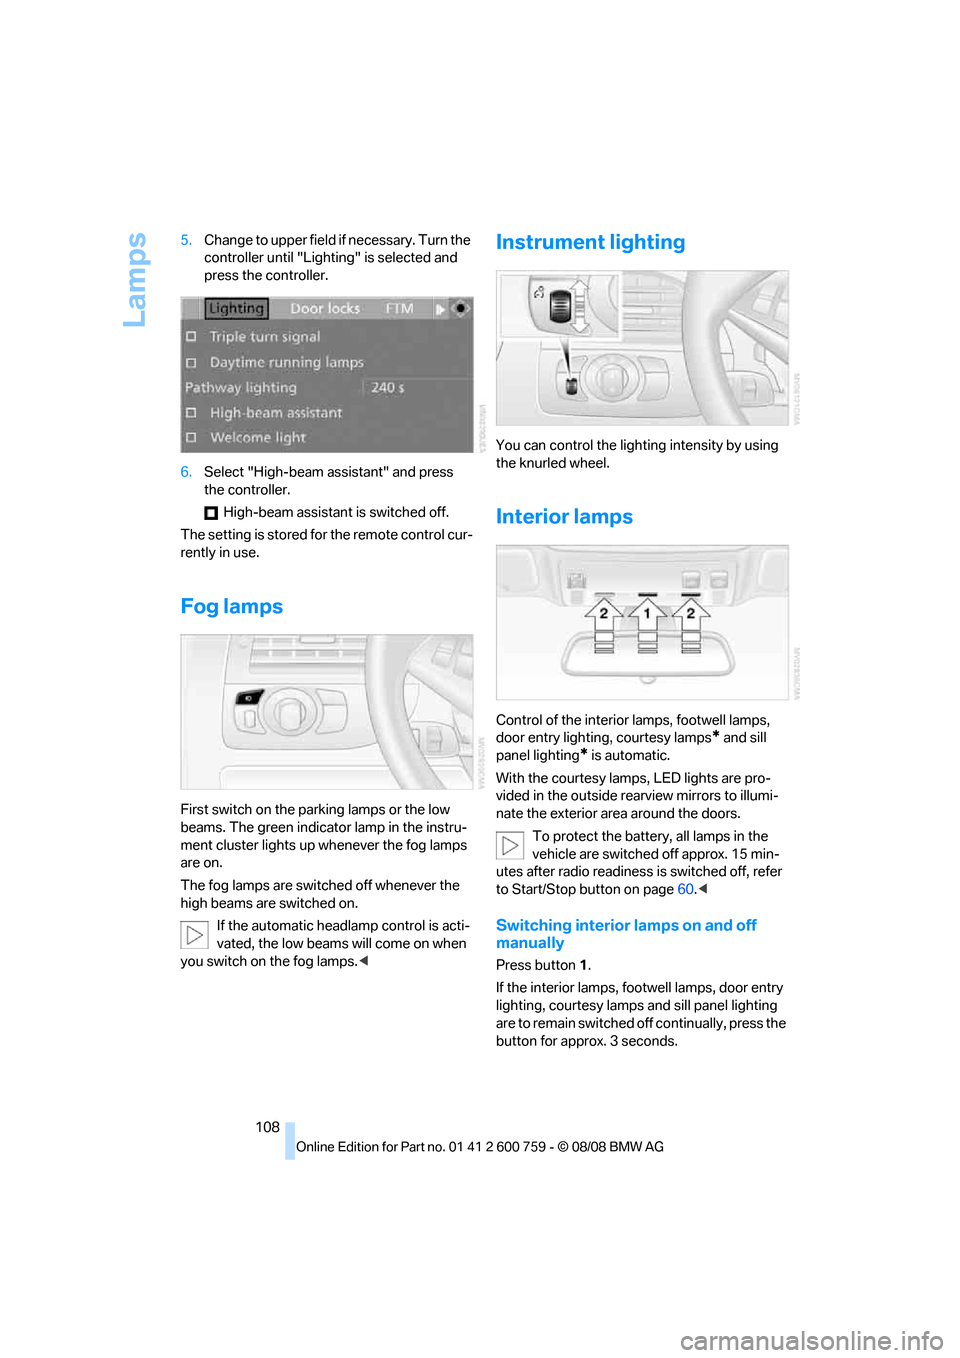
108 5.Change to upper field if necessary. Turn the
controller until "Lighting" is selected and
press the controller.
6.Select "High-beam assistant" and press
the controller.
High-beam assistant is switched off.
The setting is stored for the remote control cur-
rently in use.
Fog lamps
First switch on the parking lamps or the low
beams. The green indicator lamp in the instru-
ment cluster lights up whenever the fog lamps
are on.
The fog lamps are switched off whenever the
high beams are switched on.
If the automatic headlamp control is acti-
vated, the low beams will come on when
you switch on the fog lamps.<
Instrument lighting
You can control the lighting intensity by using
the knurled wheel.
Interior lamps
Control of the interior lamps, footwell lamps,
door entry lighting, courtesy lamps
* and sill
panel lighting
* is automatic.
With the courtesy lamps,
LED lights are pro-
vided in the outside rearview mirrors to illumi-
nate the exterior area around the doors.
To protect the battery, all lamps in the
vehicle are switched off approx. 15 min-
utes after radio readiness is switched off, refer
to Start/Stop button on page60.<
Switching interior lamps on and off
manually
Press button 1.
If the interior lamps, footwell lamps, door entry
lighting, courtesy lamps and sill panel lighting
are to remain switched off continually, press the
button for approx. 3 seconds.