2009 BMW 528I XDRIVE start stop button
[x] Cancel search: start stop buttonPage 13 of 294

At a glance
11Reference
Controls
Driving tips
Communications
Navigation
Entertainment
Mobility
7Buttons on the steering wheel
8Instrument cluster12
11Ignition lock6212Horn, entire surface
15Releasing hood232 Mobile phone
*194:
>Press: accepting and ending
call, starting dialing
* for
selected phone number and
redialing if no phone number is
selected
>Press and hold: redialing
Volume
Activating/deactivating voice com-
mand system
* 24
Changing radio station172
Selecting music track183
Scrolling in phone book and in lists
with stored phone numbers
Individually programmable
*56
Individually programmable
*56
Leaving lane warning
*106
9
Windshield wipers69
Rain sensor69
Sports Wagon: rear window
wiper70
10Starting/stopping engine and
switching ignition on/off 62
13
Steering wheel heater*56
Steering wheel adjustment56
14
Cruise control
*70
Active cruise control71
16Opening luggage compartment lid/
tailgate36, 37
17
Head-Up Display
*102
BMW Night Vision
*104
18Parking lamp108
Daytime running lamps
*109
Low beams108
Welcome lamps108
Automatic headlamp control
*108
Daytime running lamps
*109
Welcome lamps108
Adaptive Head Light
*110
High-beam assistant
*110
19
Instrument lighting112
Fog lamps
*112
Page 43 of 294
Controls
41Reference
At a glance
Driving tips
Communications
Navigation
Entertainment
Mobility
>Sports Wagon: opening rear window sepa-
rately
>Starting engine
Functional requirement
>The vehicle or the luggage compartment
lid/tailgate can only be locked if the vehicle
detects that the remote control you are car-
rying is outside the vehicle.
>The next unlocking and locking cycle is not
possible until after approx. 2 seconds.
>The engine can only be started if the vehicle
detects that the remote control is located in
the vehicle.
Comparison with ordinary remote
control
You can control the functions mentioned previ-
ously with the comfort access or by pressing
the buttons on the remote control. Therefore,
please familiarize yourself with the information
on opening and closing beginning on page30
beforehand.
The special features when using comfort
access are described in the following.
Should a short delay occur when opening
or closing the windows or the glass sun-
roof, the system is checking whether a remote
control is located in the vehicle. Please repeat
opening or closing if necessary.<
Unlocking
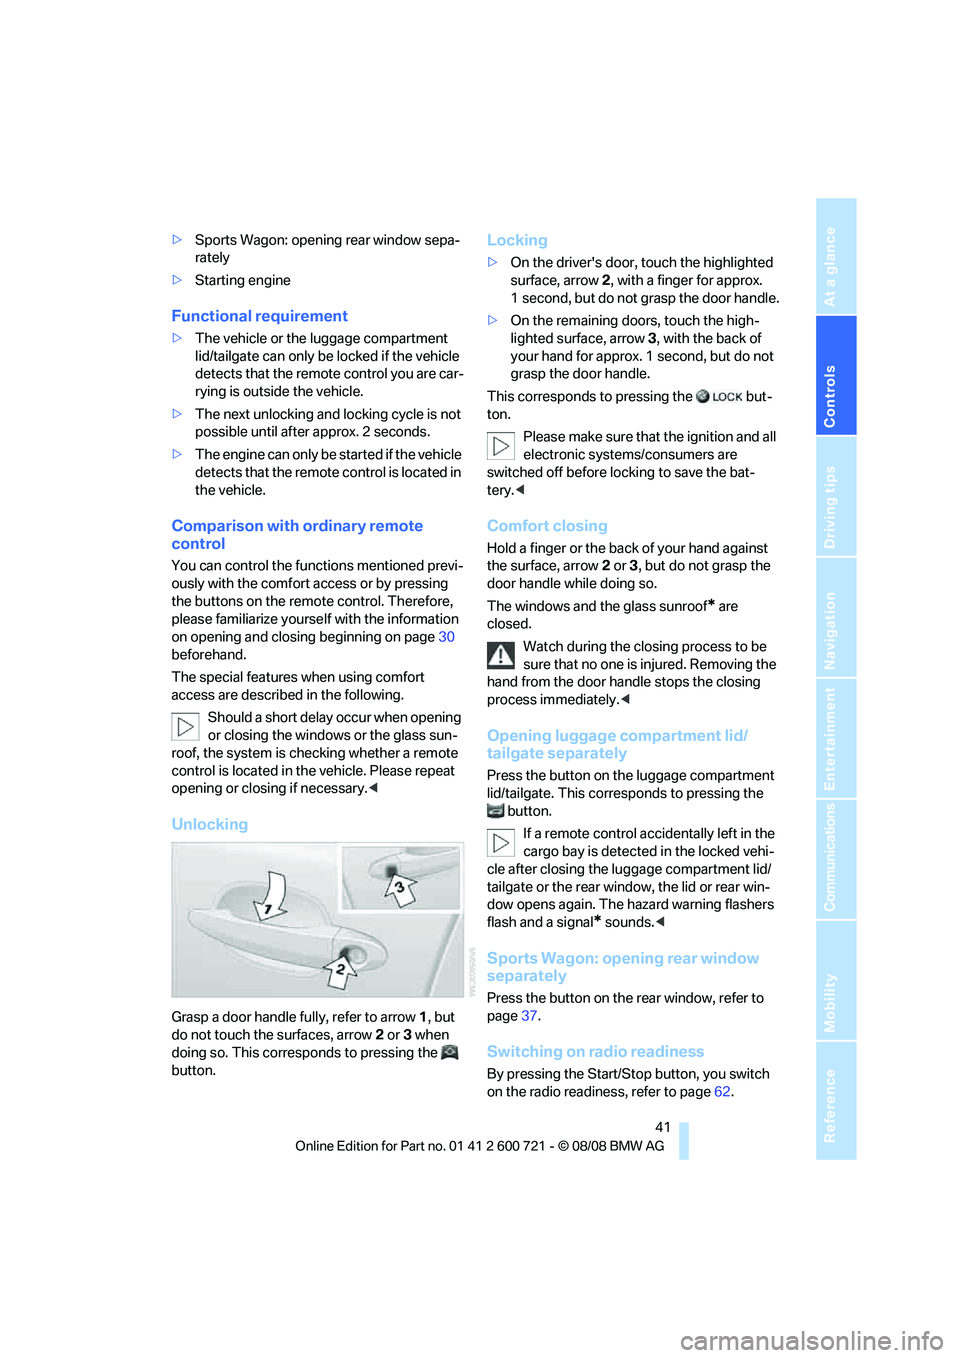
Grasp a door handle fully, refer to arrow1, but
do not touch the surfaces, arrow2 or 3 when
doing so. This corresponds to pressing the
button.
Locking
>On the driver's door, touch the highlighted
surface, arrow2, with a finger for approx.
1 second, but do not grasp the door handle.
>On the remaining doors, touch the high-
lighted surface, arrow3, with the back of
your hand for approx. 1 second, but do not
grasp the door handle.
This corresponds to pressing the but-
ton.
Please make sure that the ignition and all
electronic systems/consumers are
switched off before locking to save the bat-
tery.<
Comfort closing
Hold a finger or the back of your hand against
the surface, arrow2 or 3, but do not grasp the
door handle while doing so.
The windows and the glass sunroof
* are
closed.
Watch during the closing process to be
sure that no one is injured. Removing the
hand from the door handle stops the closing
process immediately.<
Opening luggage compartment lid/
tailgate separately
Press the button on the luggage compartment
lid/tailgate. This corresponds to pressing the
button.
If a remote control accidentally left in the
cargo bay is detected in the locked vehi-
cle after closing the luggage compartment lid/
tailgate or the rear window, the lid or rear win-
dow opens again. The hazard warning flashers
flash and a signal
* sounds.<
Sports Wagon: opening rear window
separately
Press the button on the rear window, refer to
page37.
Switching on radio readiness
By pressing the Start/Stop button, you switch
on the radio readiness, refer to page62.
Page 64 of 294
Driving
62
Driving
Ignition lock
Inserting remote control into ignition
lock
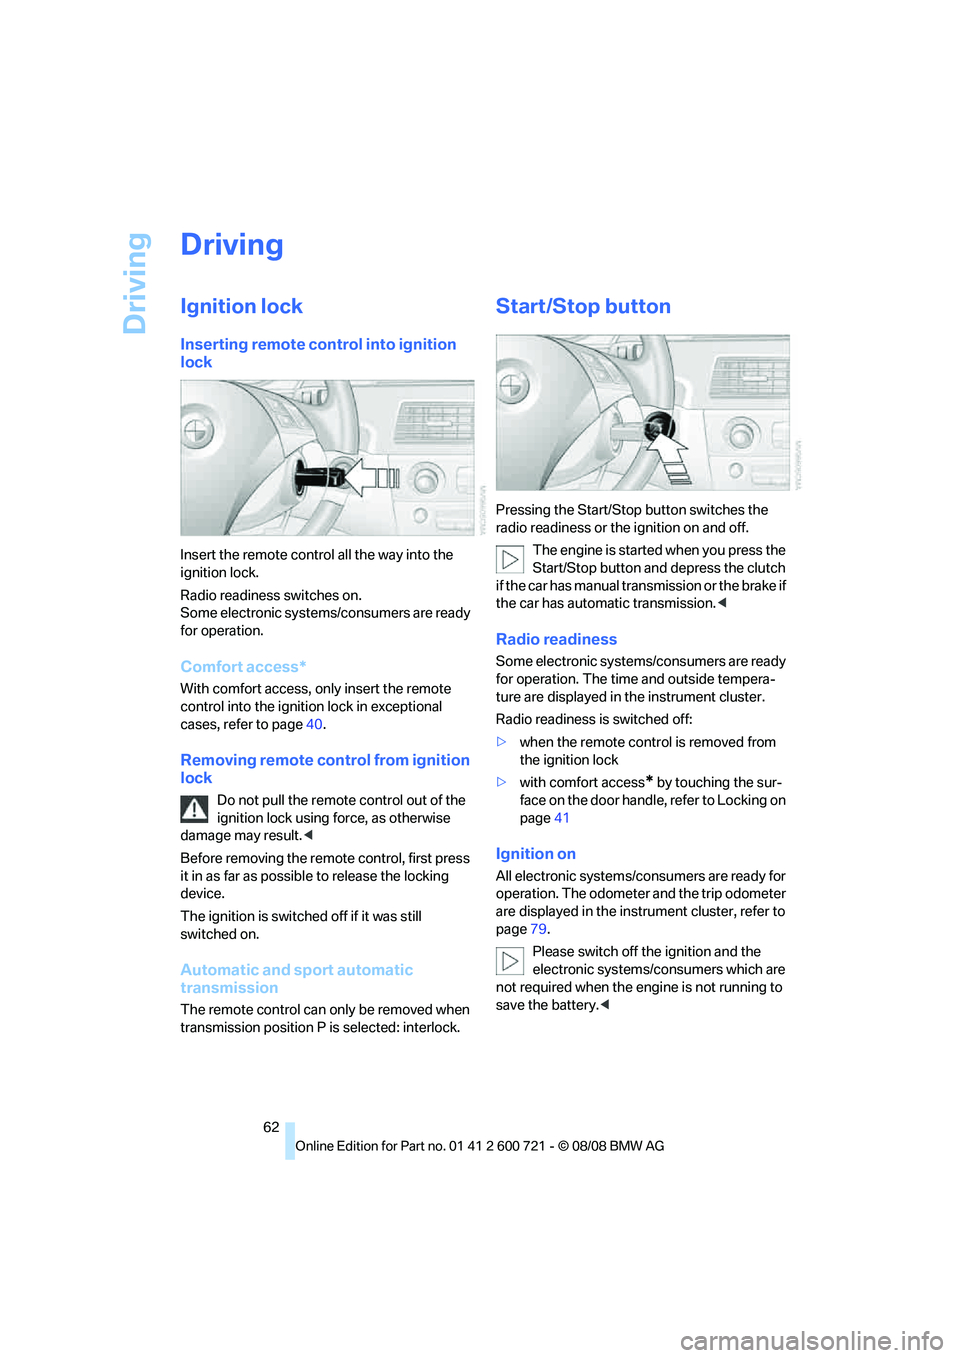
Insert the remote control all the way into the
ignition lock.
Radio readiness switches on.
Some electronic systems/consumers are ready
for operation.
Comfort access*
With comfort access, only insert the remote
control into the ignition lock in exceptional
cases, refer to page40.
Removing remote control from ignition
lock
Do not pull the remote control out of the
ignition lock using force, as otherwise
damage may result.<
Before removing the remote control, first press
it in as far as possible to release the locking
device.
The ignition is switched off if it was still
switched on.
Automatic and sport automatic
transmission
The remote control can only be removed when
transmission position P is selected: interlock.
Start/Stop button
Pressing the Start/Stop button switches the
radio readiness or the ignition on and off.
The engine is started when you press the
Start/Stop button and depress the clutch
if the car has manual transmission or the brake if
the car has automatic transmission.<
Radio readiness
Some electronic systems/consumers are ready
for operation. The time and outside tempera-
ture are displayed in the instrument cluster.
Radio readiness is switched off:
>when the remote control is removed from
the ignition lock
>with comfort access
* by touching the sur-
face on the door handle, refer to Locking on
page41
Ignition on
All electronic systems/consumers are ready for
operation. The odometer and the trip odometer
are displayed in the instrument cluster, refer to
page79.
Please switch off the ignition and the
electronic systems/consumers which are
not required when the engine is not running to
save the battery.<
Page 65 of 294
Controls
63Reference
At a glance
Driving tips
Communications
Navigation
Entertainment
Mobility
Radio readiness and ignition switched
off
All indicator and warning lamps in the instru-
ment cluster go out.
Starting the engine
Do not run the engine in closed rooms,
otherwise the inhalation of toxic exhaust
gases can cause unconsciousness and death.
The exhaust gases contain carbon monoxide,
an odorless and colorless, but highly toxic gas.
Never leave an unattended vehicle with the
engine running, as such a vehicle represents a
potential safety hazard.
Before leaving the vehicle with the engine run-
ning, select the idling position, or shift the trans-
mission into position P and firmly apply the
handbrake, otherwise the vehicle can begin to
roll.<
Avoid frequent starting in quick succes-
sion or repeated starting attempts in
which the engine does not start. Otherwise, the
fuel is not burned or inadequately burned and
there is a danger of overheating and damaging
the catalytic converter.<
Do not allow the engine to warm up by leaving it
running while the vehicle remains stationary.
Instead, begin to drive at a moderate engine
speed.
Manual transmission
Remote control in ignition lock or with comfort
access in vehicle, refer to page40.
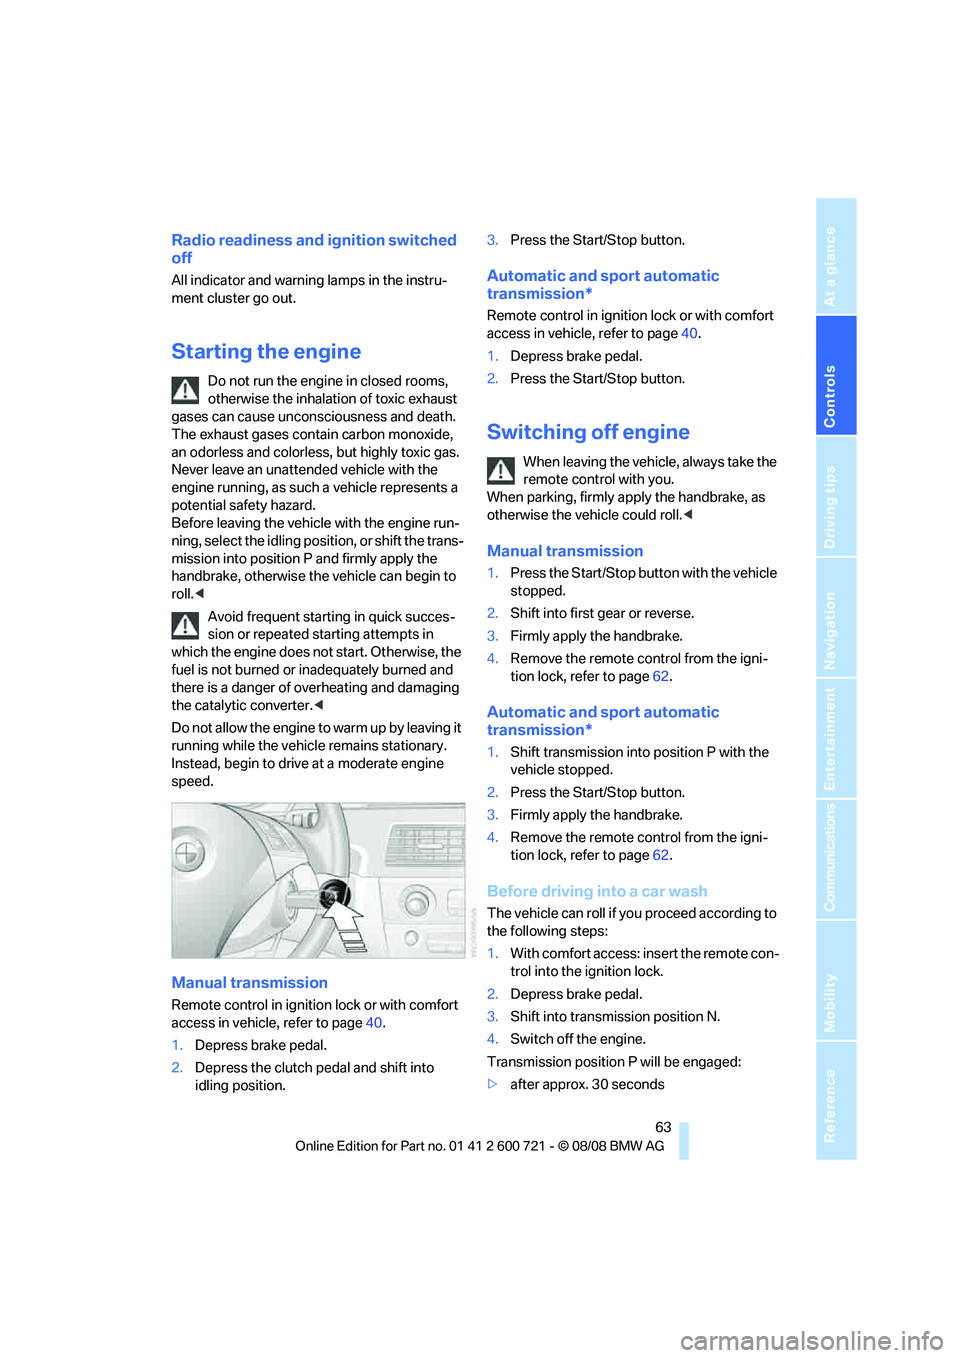
1.Depress brake pedal.
2.Depress the clutch pedal and shift into
idling position.3.Press the Start/Stop button.
Automatic and sport automatic
transmission*
Remote control in ignition lock or with comfort
access in vehicle, refer to page40.
1.Depress brake pedal.
2.Press the Start/Stop button.
Switching off engine
When leaving the vehicle, always take the
remote control with you.
When parking, firmly apply the handbrake, as
otherwise the vehicle could roll.<
Manual transmission
1.Press the Start/Stop button with the vehicle
stopped.
2.Shift into first gear or reverse.
3.Firmly apply the handbrake.
4.Remove the remote control from the igni-
tion lock, refer to page62.
Automatic and sport automatic
transmission*
1.Shift transmission into position P with the
vehicle stopped.
2.Press the Start/Stop button.
3.Firmly apply the handbrake.
4.Remove the remote control from the igni-
tion lock, refer to page62.
Before driving into a car wash
The vehicle can roll if you proceed according to
the following steps:
1.With comfort access: insert the remote con-
trol into the ignition lock.
2.Depress brake pedal.
3.Shift into transmission position N.
4.Switch off the engine.
Transmission position P will be engaged:
>after approx. 30 seconds
Page 66 of 294
Driving
64 >if you remove the remote control from the
ignition lock
Handbrake
The handbrake is primarily intended to prevent
the vehicle from rolling while parked; it brakes
the rear wheels.
Indicator lamp
The indicator lamp lights up, and a sig-
nal also sounds when starting off. The
handbrake is applied.
Indicator lamp for Canadian models.
Applying
The lever locks in position automatically.
Releasing
Pull slightly upwards, press the button and
lower the lever.
If exceptional circumstances should
make it necessary to apply the handbrake
while the vehicle is in motion, do not pull it too
firmly. In doing so, continuously press the but-
ton of the handbrake lever. Otherwise, too firm
an application of the handbrake can lock up the
rear wheels and cause the rear of the car to
swerve.<
To prevent corrosion and one-sided brak-
ing action, occasionally apply the hand-
brake lightly when the vehicle is slowly coming
to a stop if the traffic conditions are suitable.
The brake lamps do not light up when the hand-
brake is applied.<
Manual transmission
While shifting in the 5th/6th gear lane,
press the gearshift lever toward the right,
otherwise accidental shifting into the 3rd or 4th
gear could result in engine damage.<
Reverse gear
Select only when the vehicle is stationary.
When pressing the gearshift lever to the left,
overcome some resistance.
Automatic transmission with
Steptronic*
In addition to fully automatic operation, you can
also manually shift with the Steptronic, refer to
page65.
Transmission positions
P R N D M/S + –
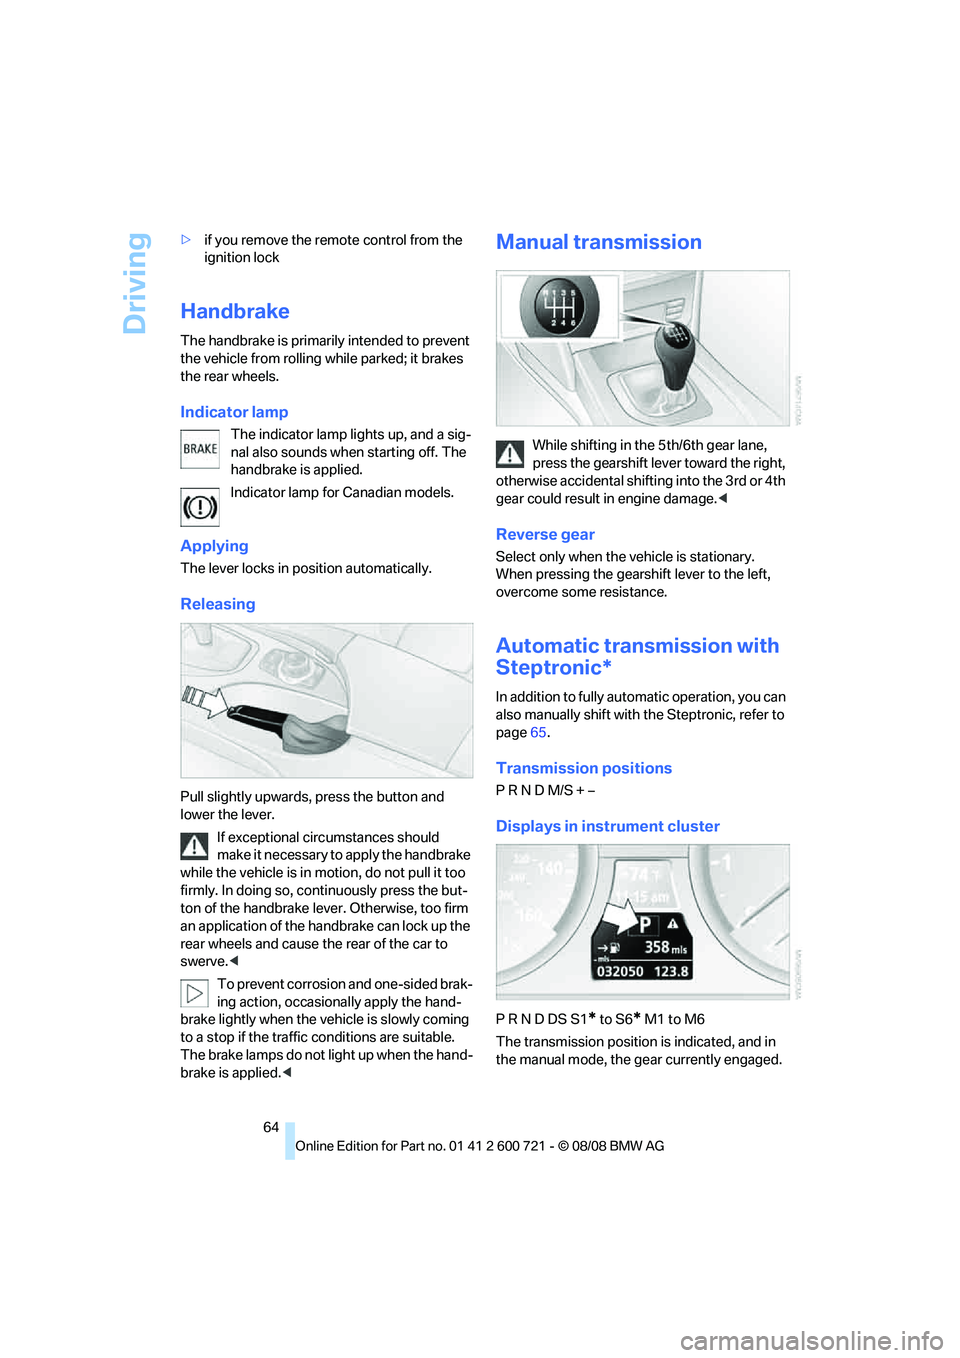
Displays in instrument cluster
P R N D DS S1* to S6* M1 to M6
The transmission position is indicated, and in
the manual mode, the gear currently engaged.
Page 88 of 294
Everything under control
86
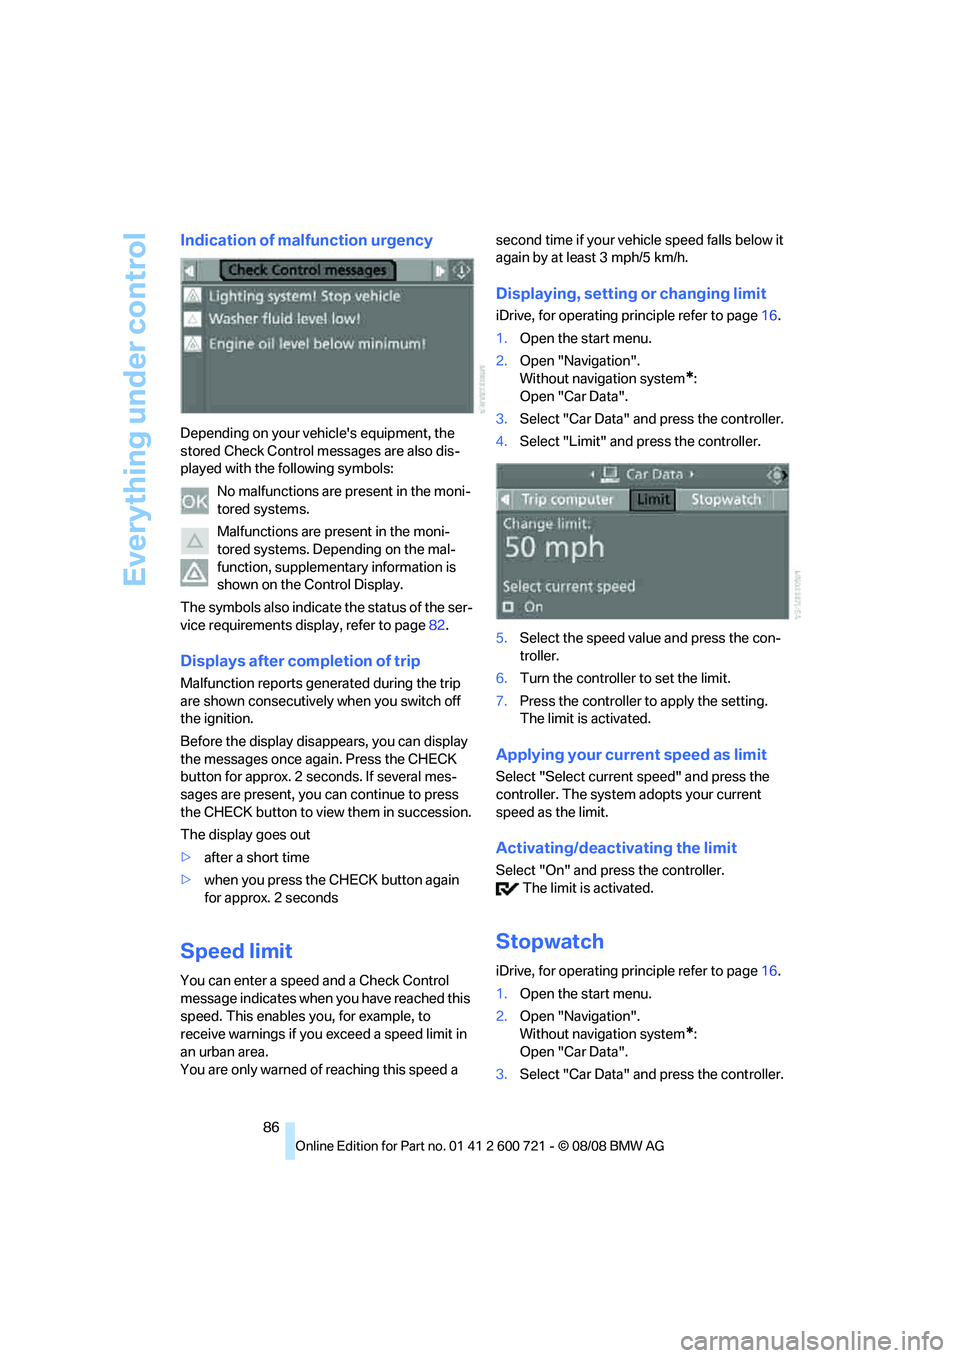
Indication of malfunction urgency
Depending on your vehicle's equipment, the
stored Check Control messages are also dis-
played with the following symbols:
No malfunctions are present in the moni-
tored systems.
Malfunctions are present in the moni-
tored systems. Depending on the mal-
function, supplementary information is
shown on the Control Display.
The symbols also indicate the status of the ser-
vice requirements display, refer to page82.
Displays after completion of trip
Malfunction reports generated during the trip
are shown consecutively when you switch off
the ignition.
Before the display disappears, you can display
the messages once again. Press the CHECK
button for approx. 2 seconds. If several mes-
sages are present, you can continue to press
the CHECK button to view them in succession.
The display goes out
>after a short time
>when you press the CHECK button again
for approx. 2 seconds
Speed limit
You can enter a speed and a Check Control
message indicates when you have reached this
speed. This enables you, for example, to
receive warnings if you exceed a speed limit in
an urban area.
You are only warned of reaching this speed a second time if your vehicle speed falls below it
again by at least 3 mph/5 km/h.
Displaying, setting or changing limit
iDrive, for operating principle refer to page16.
1.Open the start menu.
2.Open "Navigation".
Without navigation system
*:
Open "Car Data".
3.Select "Car Data" and press the controller.
4.Select "Limit" and press the controller.
5.Select the speed value and press the con-
troller.
6.Turn the controller to set the limit.
7.Press the controller to apply the setting.
The limit is activated.
Applying your current speed as limit
Select "Select current speed" and press the
controller. The system adopts your current
speed as the limit.
Activating/deactivating the limit
Select "On" and press the controller.
The limit is activated.
Stopwatch
iDrive, for operating principle refer to page16.
1.Open the start menu.
2.Open "Navigation".
Without navigation system
*:
Open "Car Data".
3.Select "Car Data" and press the controller.
Page 89 of 294
Controls
87Reference
At a glance
Driving tips
Communications
Navigation
Entertainment
Mobility
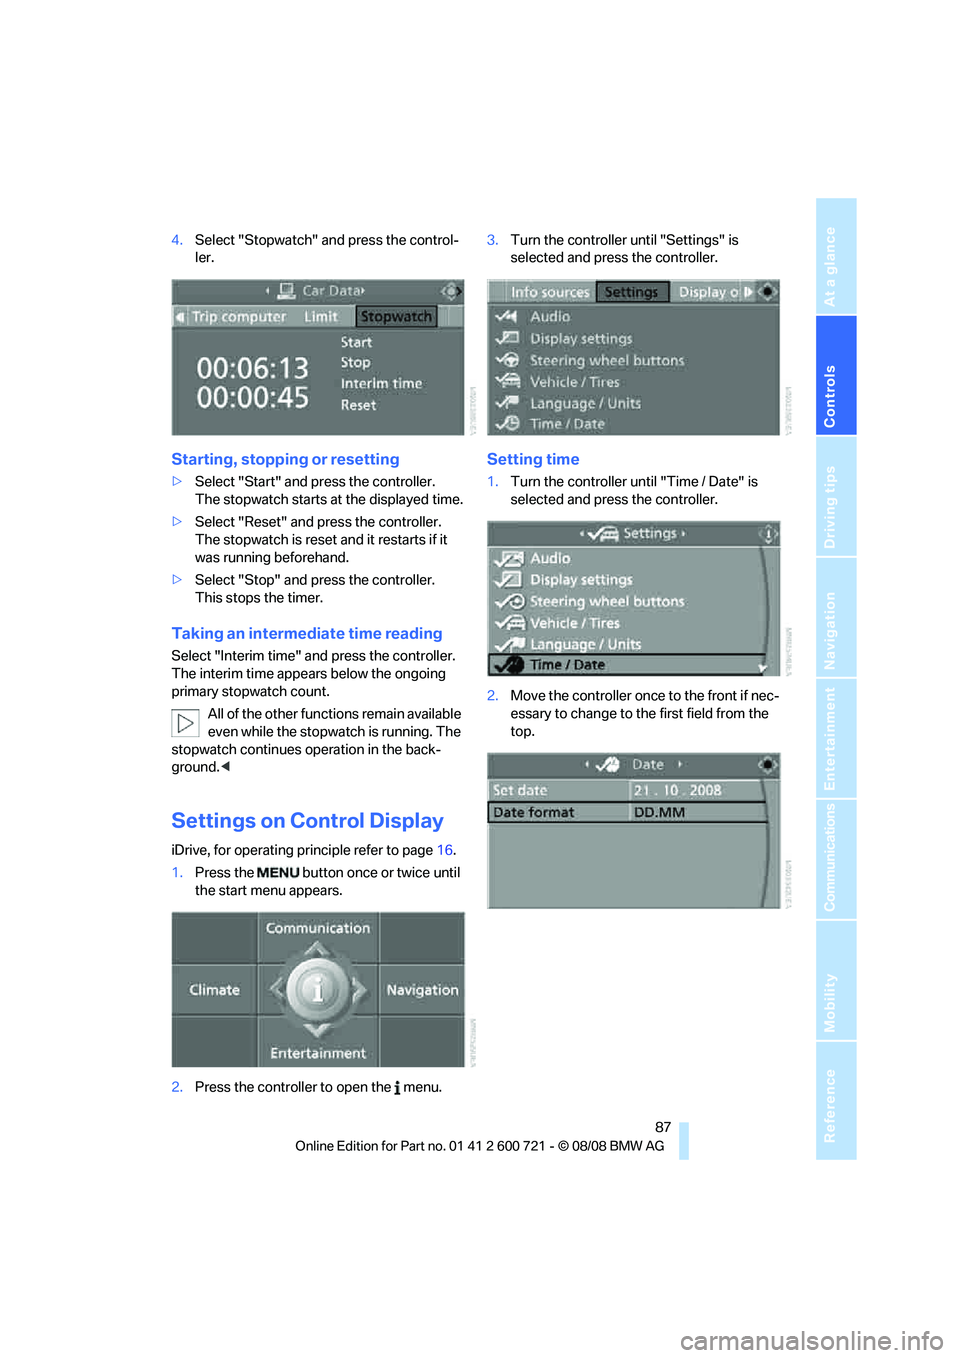
4.Select "Stopwatch" and press the control-
ler.
Starting, stopping or resetting
>Select "Start" and press the controller.
The stopwatch starts at the displayed time.
>Select "Reset" and press the controller.
The stopwatch is reset and it restarts if it
was running beforehand.
>Select "Stop" and press the controller.
This stops the timer.
Taking an intermediate time reading
Select "Interim time" and press the controller.
The interim time appears below the ongoing
primary stopwatch count.
All of the other functions remain available
even while the stopwatch is running. The
stopwatch continues operation in the back-
ground.<
Settings on Control Display
iDrive, for operating principle refer to page16.
1.Press the button once or twice until
the start menu appears.
2.Press the controller to open the menu.3.Turn the controller until "Settings" is
selected and press the controller.
Setting time
1.Turn the controller until "Time / Date" is
selected and press the controller.
2.Move the controller once to the front if nec-
essary to change to the first field from the
top.
Page 94 of 294
Technology for comfort, convenience and safety
92
Adaptive brake assistant*
In conjunction with the active cruise control
with the stop-and-go function, the adaptive
brake assistant ensures that the brake
responds even more quickly during braking
with the brake assistant.
DSC Dynamic Stability Control
DSC prevents traction loss in the driving wheels
when starting off and accelerating. The system
also identifies unstable driving conditions, such
as a loss of traction at the rear of the vehicle or
sliding of the vehicle in its front wheels. In these
cases, DSC helps the vehicle maintain a safe
course within physical limits by reducing engine
output and through braking actions in the indi-
vidual wheels.
The laws of physics cannot be repealed,
even with DSC. An appropriate driving
style always remains the responsibility of the
driver. Therefore, do not restrict the additional
safety margin with a risky driving style, as other-
wise there is a risk of an accident.<
Deactivating DSC
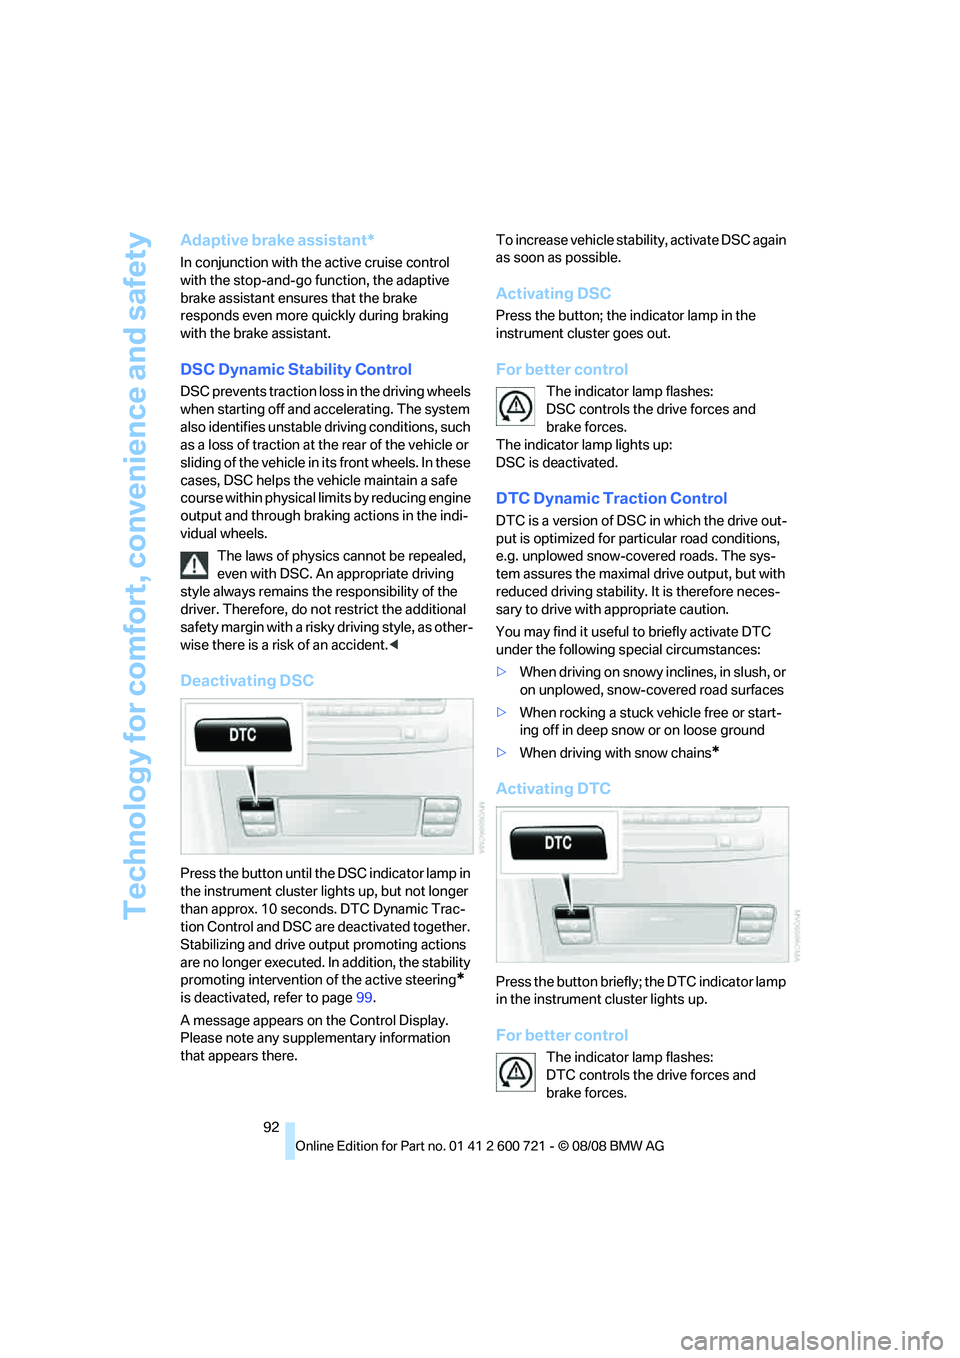
Press the button until the DSC indicator lamp in
the instrument cluster lights up, but not longer
than approx. 10 seconds. DTC Dynamic Trac-
tion Control and DSC are deactivated together.
Stabilizing and drive output promoting actions
are no longer executed. In addition, the stability
promoting intervention of the active steering
*
is deactivated, refer to page99.
A message appears on the Control Display.
Please note any supplementary information
that appears there.To increase vehicle stability, activate DSC again
as soon as possible.
Activating DSC
Press the button; the indicator lamp in the
instrument cluster goes out.
For better control
The indicator lamp flashes:
DSC controls the drive forces and
brake forces.
The indicator lamp lights up:
DSC is deactivated.
DTC Dynamic Traction Control
DTC is a version of DSC in which the drive out-
put is optimized for particular road conditions,
e.g. unplowed snow-covered roads. The sys-
tem assures the maximal drive output, but with
reduced driving stability. It is therefore neces-
sary to drive with appropriate caution.
You may find it useful to briefly activate DTC
under the following special circumstances:
>When driving on snowy inclines, in slush, or
on unplowed, snow-covered road surfaces
>When rocking a stuck vehicle free or start-
ing off in deep snow or on loose ground
>When driving with snow chains
*
Activating DTC
Press the button briefly; the DTC indicator lamp
in the instrument cluster lights up.
For better control
The indicator lamp flashes:
DTC controls the drive forces and
brake forces.