2009 BMW 525I TOURING heating
[x] Cancel search: heatingPage 35 of 294

Controls
33Reference
At a glance
Driving tips
Communications
Navigation
Entertainment
Mobility
8.Select a menu item:
>"All doors"
Pressing the button once unlocks the
entire vehicle.
>"Driver's door only"
Pressing the button once unlocks the
driver's door and the fuel filler door.
Pressing the button twice unlocks the
entire vehicle.
9.Press the controller.
The setting is stored for the remote control cur-
rently in use.
Comfort opening
Press and hold the button. The windows and
the glass sunroof
* open.
Locking
Press the button.
Do not lock the vehicle from the outside if
persons are inside, as unlocking from the
inside is not possible without special knowl-
edge.<
Switching on interior lamps
With vehicle locked:
Press the button.
You can also use this function to locate your
vehicle in parking garages etc.
Panic mode*
You can trigger the alarm system in case of dan-
ger:
Press the button for at least 3 seconds.
Switching off alarm: press any button.
Sedan: opening luggage
compartment lid
Press the button for approx. 1 second.
The luggage compartment lid opens, regard-
less of whether it was previously locked or
unlocked.
During opening, the luggage compart-
ment lid pivots back and up. Make sure
that adequate clearance is available before
opening.
To prevent accidentally locking yourself out,
never lay the remote control in the cargo bay. A
previously locked luggage compartment lid is
also locked again after closing.<
Sports Wagon: unlocking tailgate
Press the button for approx. 1 second.
The tailgate will open slightly, regardless of
whether it was previously locked or unlocked.
During opening, the tailgate pivots back
and up. Make sure that adequate clear-
ance is available before opening.
To prevent accidentally locking yourself out,
never lay the remote control in the cargo bay. A
previously locked tailgate is also locked again
after closing.
When opening the tailgate, the roll-up cover is
raised.<
If pointed or sharp-edged objects could
strike the rear window while driving, be
sure to provide protection around all edges.
Failure to do so could result in damage to the
heating conductors of the rear window.<
Confirmation signals
You can activate or deactivate the confirmation
signals.
1.Open the start menu.
2.Press the controller to open the menu.
3.Select "Settings" and press the controller.
4.Select "Vehicle / Tires" and press the con-
troller.
5.Change to upper field if necessary. Turn the
controller until "Door locks" is selected and
press the controller.
Page 39 of 294

Controls
37Reference
At a glance
Driving tips
Communications
Navigation
Entertainment
Mobility
The handle recesses on the interior trim of the
luggage compartment lid make it easier to pull
down.
Emergency release
Pull the lever in the cargo bay. The luggage
compartment lid is unlocked.
Sports Wagon: opening and closing
rear window
Small items can be loaded and unloaded
quickly when the rear window is opened sepa-
rately.
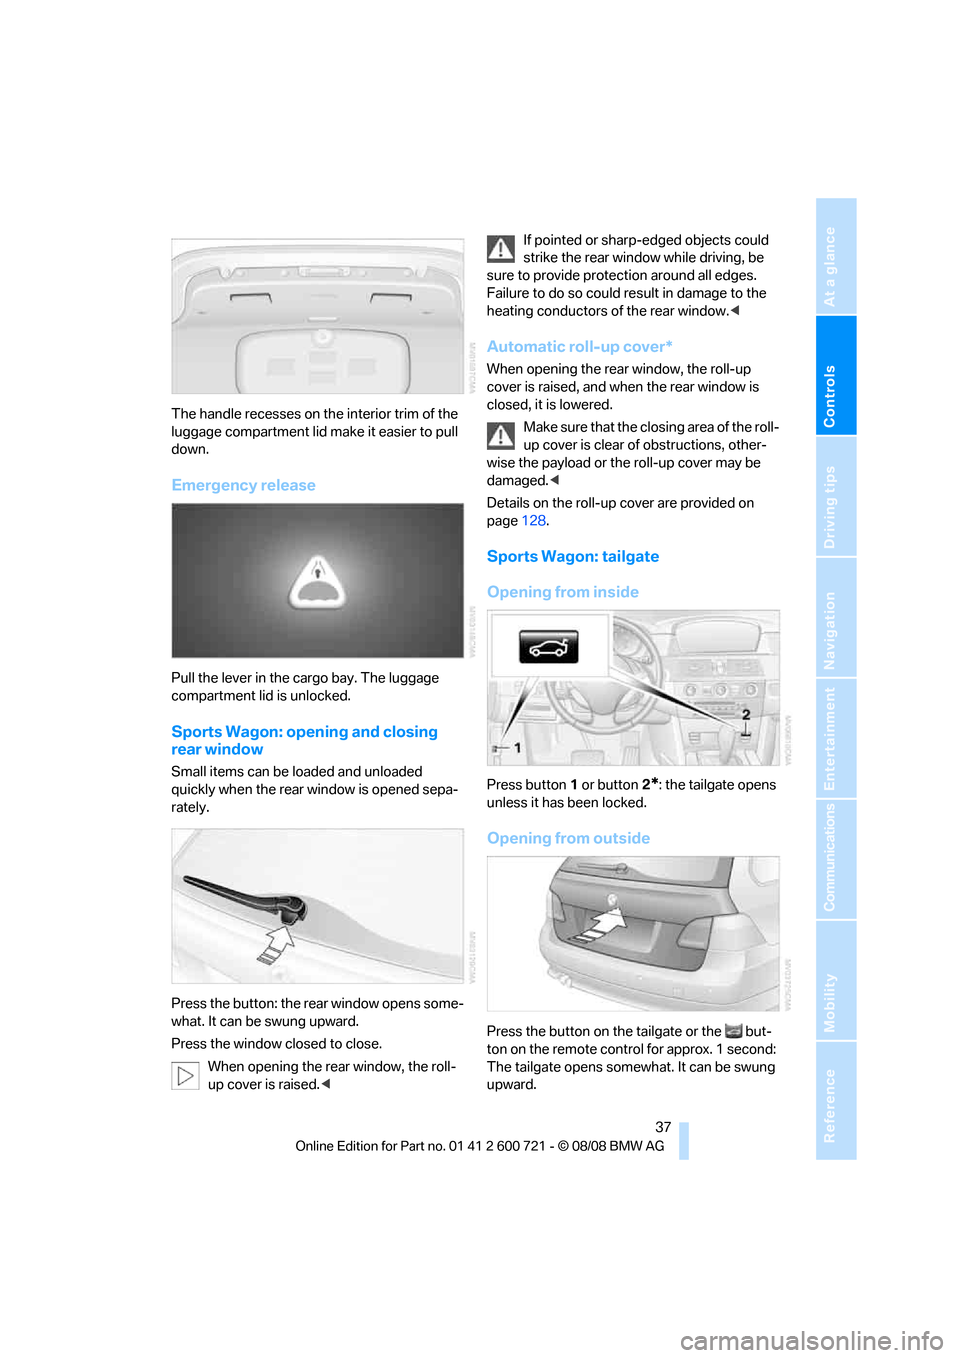
Press the button: the rear window opens some-
what. It can be swung upward.
Press the window closed to close.
When opening the rear window, the roll-
up cover is raised.
sure to provide protection around all edges.
Failure to do so could result in damage to the
heating conductors of the rear window.<
Automatic roll-up cover*
When opening the rear window, the roll-up
cover is raised, and when the rear window is
closed, it is lowered.
Make sure that the closing area of the roll-
up cover is clear of obstructions, other-
wise the payload or the roll-up cover may be
damaged.<
Details on the roll-up cover are provided on
page128.
Sports Wagon: tailgate
Opening from inside
Press button1 or button2*: the tailgate opens
unless it has been locked.
Opening from outside
Press the button on the tailgate or the but-
ton on the remote control for approx. 1 second:
The tailgate opens somewhat. It can be swung
upward.
Page 55 of 294

Controls
53Reference
At a glance
Driving tips
Communications
Navigation
Entertainment
Mobility
left and right. The belt buckle embossed with
the word CENTER is intended exclusively for
use by passengers riding in the center position.
Damage to safety belts
When subjected to strain due to an acci-
dent or in the event of damage, replace
the safety belts, the belt tensioners, and any
child restraint systems and have the belt anchor
points checked. Only have this work carried out
at a BMW center or at a workshop that works
according to BMW repair procedures with cor-
respondingly trained personnel. Otherwise cor-
rect operation of this safety equipment is not
guaranteed.<
Seat heating*
Front
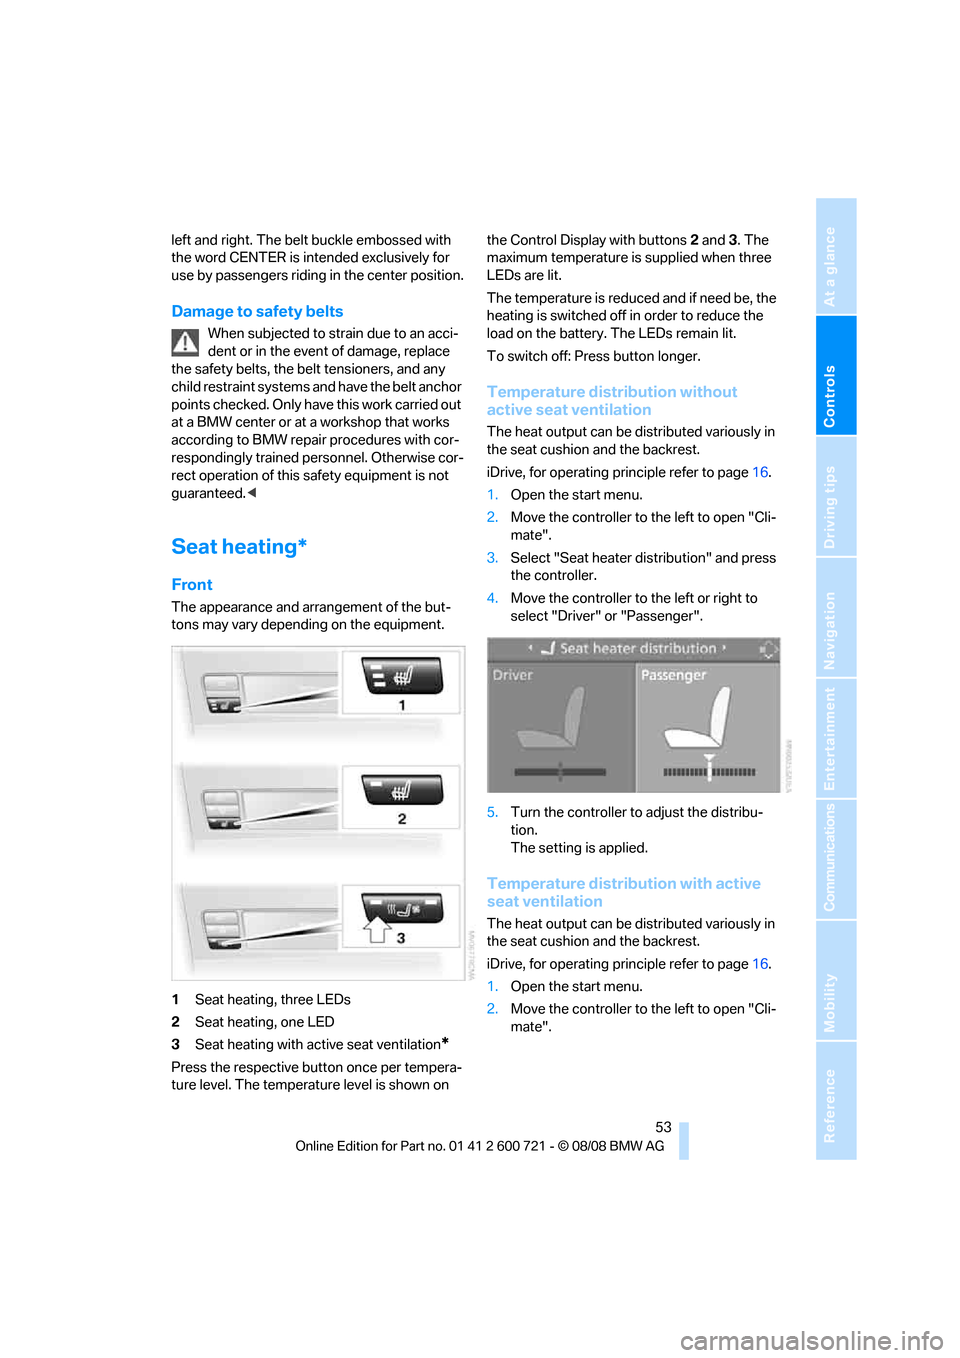
The appearance and arrangement of the but-
tons may vary depending on the equipment.
1Seat heating, three LEDs
2Seat heating, one LED
3Seat heating with active seat ventilation
*
Press the respective button once per tempera-
ture level. The temperature level is shown on the Control Display with buttons2 and3. The
maximum temperature is supplied when three
LEDs are lit.
The temperature is reduced and if need be, the
heating is switched off in order to reduce the
load on the battery. The LEDs remain lit.
To switch off: Press button longer.
Temperature distribution without
active seat ventilation
The heat output can be distributed variously in
the seat cushion and the backrest.
iDrive, for operating principle refer to page16.
1.Open the start menu.
2.Move the controller to the left to open "Cli-
mate".
3.Select "Seat heater distribution" and press
the controller.
4.Move the controller to the left or right to
select "Driver" or "Passenger".
5.Turn the controller to adjust the distribu-
tion.
The setting is applied.
Temperature distribution with active
seat ventilation
The heat output can be distributed variously in
the seat cushion and the backrest.
iDrive, for operating principle refer to page16.
1.Open the start menu.
2.Move the controller to the left to open "Cli-
mate".
Page 56 of 294

Adjusting
54 3.Select "Driver's seat climate" or "Passen-
ger's seat climate" and press the controller.
Turn the controller to adjust the distribution.
The setting is applied.
Rear
Operation similar to front seat heating; two tem-
perature levels, without temperature distribu-
tion.
Active seat ventilation*
The appearance and arrangement of the but-
tons may vary depending on the equipment.
1Active seat ventilation
2Active seat ventilation with seat heatingPress the respective button once per ventila-
tion level. The ventilation level appears on the
Control Display. The maximum level is supplied
when three LEDs are lit.
The air quantity is reduced and if need be, the
ventilation is switched off in order to reduce the
load on the battery. The LEDs remain lit.
To switch off: Press button longer.
The highest level is used for rapid cooling,
e.g. when the vehicle has become heated
up. After a short time, the system is automati-
cally switched down one level in order to pre-
vent excessive cooling.<
Active seat*
The seat cushion is actively varied by alter-
nately raising and lowering the right and left half
of the seat cushion. This reduces muscular ten-
sion and fatigue to help prevent lower back
pain.
Press the button to switch on; the LED lights
up.
The action of the system is reduced and if need
be, switched off in order to reduce the load on
the battery. The LED remains lit.
If you switch off the active seat, it can take up
to 1 minute before the two halves of the seat
cushion have returned to their initial position.
Mirrors
Exterior mirrors
The mirror on the passenger's side is
more curved than the driver's mirror.
Page 57 of 294

Controls
55Reference
At a glance
Driving tips
Communications
Navigation
Entertainment
Mobility
Objects reflected in the mirror are closer than
they appear. Do not estimate the distance of
following traffic based on what you see in the
mirrors, otherwise there is an increased acci-
dent risk.<
1Adjusting
2Switching to the other mirror or to the auto-
matic curb monitor
3Folding mirrors in and out
*
Storing the mirror positions, refer to Seat, mir-
ror and steering wheel memory on page49.
Adjusting manually
You can also adjust the mirrors manually by
pressing against the outer edges of their mirror
glass.
Folding mirrors in and out*
Pressing button3 allows you to fold mirrors
in and out up to a speed of approx. 20 mph/
30 km/h. This is advantageous, for example, in
car washes, narrow streets or for bringing mir-
r o r s t h a t ha v e b e e n m a nu ally folded in back into
the correct position. Mirrors that were folded in
are folded out automatically at a speed of
approx. 25 mph/40 km/h.
Before going through a car wash, fold the
mirrors in manually, or with button 3, oth-
erwise they could be damaged, depending on
the width of the car wash system.<
Automatic heating
Below a certain outdoor temperature, both
exterior mirrors are heated whenever the
engine is running or the ignition is switched on.
Tilting down passenger-side exterior
mirror – automatic curb monitor*
Activating
1.Slide switch into the driver's side mirror
position, arrow 1.
2.Shift into reverse or move selector lever into
position R.
The mirror glass tilts downward somewhat
on the passenger's side. This allows the
driver to see the area immediately adjacent
to the vehicle – such as a curb – when park-
ing, etc.
Deactivating
Slide switch into the passenger side mirror
position, arrow 2.
Interior rearview mirror
To reduce the dazzle effect of following vehi-
cles at night, turn the knob.
Page 58 of 294

Adjusting
56
Interior and exterior mirrors,
automatic dimming feature*
This feature is controlled by two photocells in
the inside rearview mirror, one on the front and
one on the back.
For trouble-free operation, keep the photocells
clean and do not cover the area between the
interior rearview mirror and the windshield. Do
not attach stickers of any kind to the windshield
in front of the mirror, either.
Steering wheel
Adjusting
Do not adjust the steering wheel while the
vehicle is moving. There is a risk of acci-
dent as the result of unexpected movement.<
The steering wheel can be adjusted in four
directions.
Storing steering wheel positions, refer to Seat,
mirror and steering wheel memory on page49.
Easy entry/exit*
To facilitate entry and exit, the steering wheel
temporarily moves into the uppermost position.
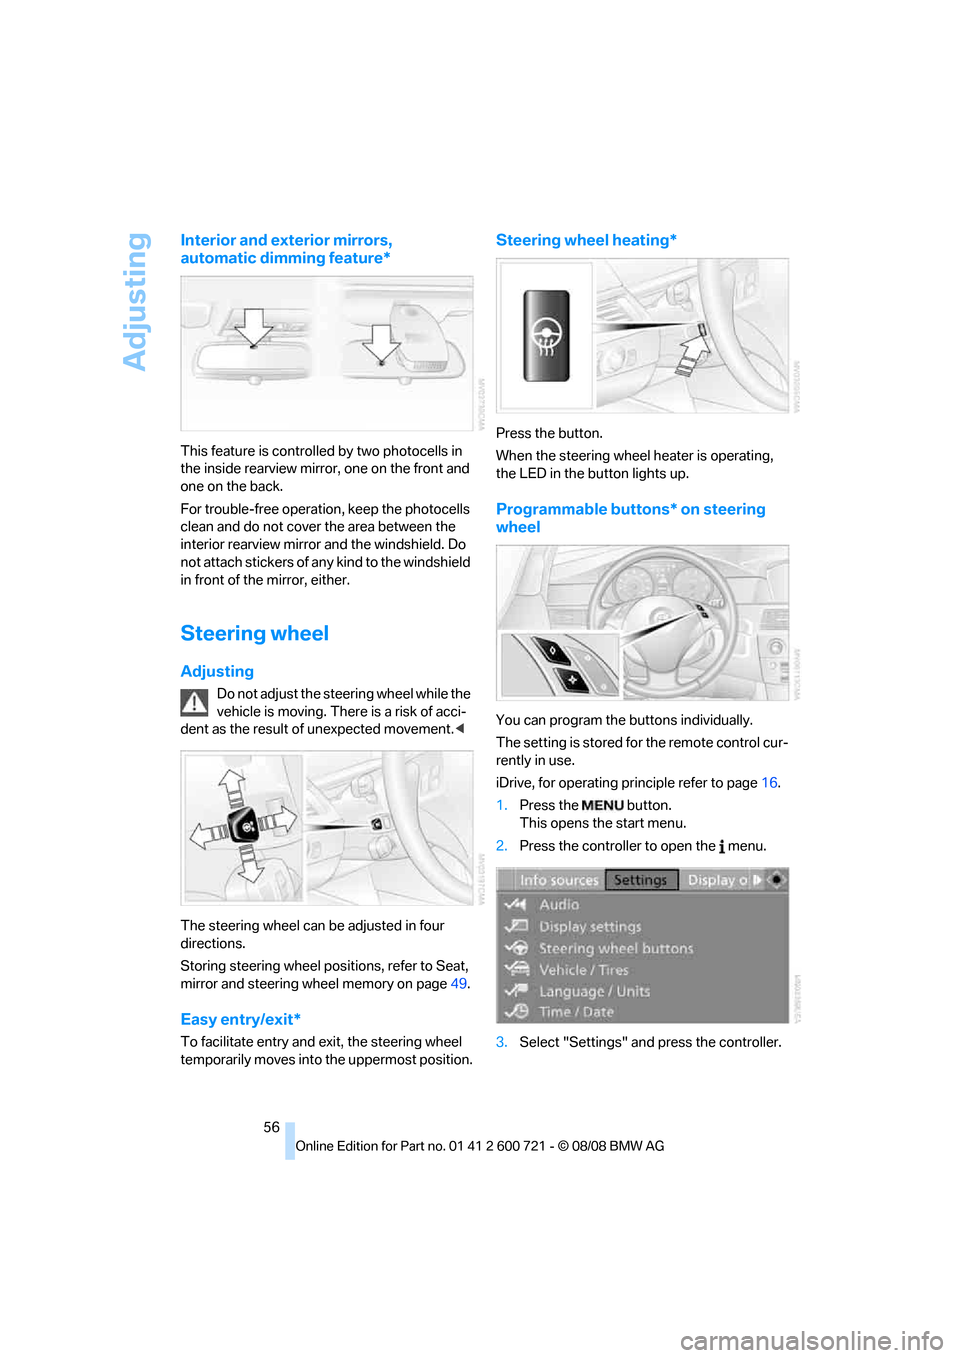
Steering wheel heating*
Press the button.
When the steering wheel heater is operating,
the LED in the button lights up.
Programmable buttons* on steering
wheel
You can program the buttons individually.
The setting is stored for the remote control cur-
rently in use.
iDrive, for operating principle refer to page16.
1.Press the button.
This opens the start menu.
2.Press the controller to open the menu.
3.Select "Settings" and press the controller.
Page 65 of 294

Controls
63Reference
At a glance
Driving tips
Communications
Navigation
Entertainment
Mobility
Radio readiness and ignition switched
off
All indicator and warning lamps in the instru-
ment cluster go out.
Starting the engine
Do not run the engine in closed rooms,
otherwise the inhalation of toxic exhaust
gases can cause unconsciousness and death.
The exhaust gases contain carbon monoxide,
an odorless and colorless, but highly toxic gas.
Never leave an unattended vehicle with the
engine running, as such a vehicle represents a
potential safety hazard.
Before leaving the vehicle with the engine run-
ning, select the idling position, or shift the trans-
mission into position P and firmly apply the
handbrake, otherwise the vehicle can begin to
roll.<
Avoid frequent starting in quick succes-
sion or repeated starting attempts in
which the engine does not start. Otherwise, the
fuel is not burned or inadequately burned and
there is a danger of overheating and damaging
the catalytic converter.<
Do not allow the engine to warm up by leaving it
running while the vehicle remains stationary.
Instead, begin to drive at a moderate engine
speed.
Manual transmission
Remote control in ignition lock or with comfort
access in vehicle, refer to page40.
1.Depress brake pedal.
2.Depress the clutch pedal and shift into
idling position.3.Press the Start/Stop button.
Automatic and sport automatic
transmission*
Remote control in ignition lock or with comfort
access in vehicle, refer to page40.
1.Depress brake pedal.
2.Press the Start/Stop button.
Switching off engine
When leaving the vehicle, always take the
remote control with you.
When parking, firmly apply the handbrake, as
otherwise the vehicle could roll.<
Manual transmission
1.Press the Start/Stop button with the vehicle
stopped.
2.Shift into first gear or reverse.
3.Firmly apply the handbrake.
4.Remove the remote control from the igni-
tion lock, refer to page62.
Automatic and sport automatic
transmission*
1.Shift transmission into position P with the
vehicle stopped.
2.Press the Start/Stop button.
3.Firmly apply the handbrake.
4.Remove the remote control from the igni-
tion lock, refer to page62.
Before driving into a car wash
The vehicle can roll if you proceed according to
the following steps:
1.With comfort access: insert the remote con-
trol into the ignition lock.
2.Depress brake pedal.
3.Shift into transmission position N.
4.Switch off the engine.
Transmission position P will be engaged:
>after approx. 30 seconds
Page 117 of 294

Controls
115Reference
At a glance
Driving tips
Communications
Navigation
Entertainment
Mobility
16Air grill for interior temperature sensor –
please keep clear and unobstructed
The current setting for air distribution is dis-
played on the Control Display.
A congenial climate
The AUTO program offers the optimum air dis-
tribution and air volume for virtually all condi-
tions, refer to AUTO program below. Now you
only need to select an interior temperature
pleasant to you.
The following sections contain more detailed
information on the available setting options.
Most settings are stored for the remote control
currently in use, also refer to Personal Profile
settings on page31.
AUTO program
The AUTO program handles the
adjustment of air volume and air
distribution to the windshield and
side windows, in the direction of
the upper body and in the footwell.
It also adapts your instructions for the tempera-
ture to outside influences throughout the year.
The cooling function is switched on along with
the AUTO program. At the same time, a con-
densation sensor controls the program in such
a way that window condensation is prevented
as much as possible.
Intensity of AUTO program
You can adjust the intensity of the AUTO pro-
gram by repeatedly pressing the AUTO button.
The respective current setting is briefly dis-
played on the Control Display when the button
is pressed.
You can also adjust the intensity of the AUTO
program via iDrive.
iDrive, for operating principle refer to page16.
1.Press the button.
This opens the start menu.
2.Move the controller to the left to open "Cli-
mate".3.Select "Automatic programs" and press the
controller.
4.Select the desired intensity and press the
controller.
The marked intensity of the automatic
program is switched on.
Temperature
Set the desired temperature indi-
vidually on the driver's and front
passenger side.
The automatic climate control
adjusts this temperature as quickly as possible
at any time of year, if necessary with the maxi-
mum cooling or heating capacity, and then
keeps it constant.
When changing between different tem-
perature settings in rapid succession, the
automatic climate control does not have suffi-
cient time to adjust the set temperature.<
In the highest setting you activate the maximum
heating output, regardless of the outside tem-
perature.
Adjusting temperature in upper body
region
1.Press the button to display the current set-
ting on the Control Display.