2009 BMW 335I change wheel
[x] Cancel search: change wheelPage 5 of 268
Reference
At a glance
Controls
Driving tips
Communications
Navigation
Entertainment
Mobility
Contents
The fastest way to find information on a partic-
ular topic or item is by using the index, refer to
page250.
Using this Owner's Manual
4 Notes
6 Reporting safety defects
At a glance
10Cockpit
16 iDrive
21 Letters and numbers
22 Voice activation system
Controls
26Opening and closing
41 Adjustments
49 Transporting children safely
53 Driving
67 Everything under control
80 Technology for driving comfort and
safety
90 Lamps
94 Climate
99 Practical interior accessories
Driving tips
114Things to remember when driving
Navigation
122Navigation system
123 Destination entry
133 Destination guidance
139 What to do if …
Entertainment
142On/off and tone
145 Radio
148 Satellite radio
150 CD player and CD changer
157 Music collection
161 AUX-IN port
162 USB-audio interface/mobile phone audio
interface
Communications
168Telephone
179 Contacts
181 BMW Assist
Mobility
190Refueling
195 Wheels and tires
211 Under the hood
216 Maintenance
218 Care
222 Replacing components
230 Giving and rece iving assistance
Reference
238Technical data
243 Short commands for the voice activation
system
250 Everything from A - Z
ba8_E9091_cic.book Seite 3 Mittwoch, 29. Oktober 2008 2:59 14
Page 25 of 268
At a glance
23Reference
Controls
Driving tips
Communications
Navigation
Entertainment
Mobility
Using alternative commands
There are often a number of commands to run a
function, e.g.:
Calling up functions immediately via
short commands
Short commands enable you to perform certain
functions immediately, irrespective of which
menu item is selected, refer to page243.
Example: selecting the track of a CD
1.If necessary, switch on entertainment audio
output.
2. Press the button on the steering wheel.
Setting the voice dialog
You can set whether the system should use the
standard dialog or a shorter variant. In the
shorter variant of the voice dialog, the prompts
and responses from the system are abbrevi-
ated.
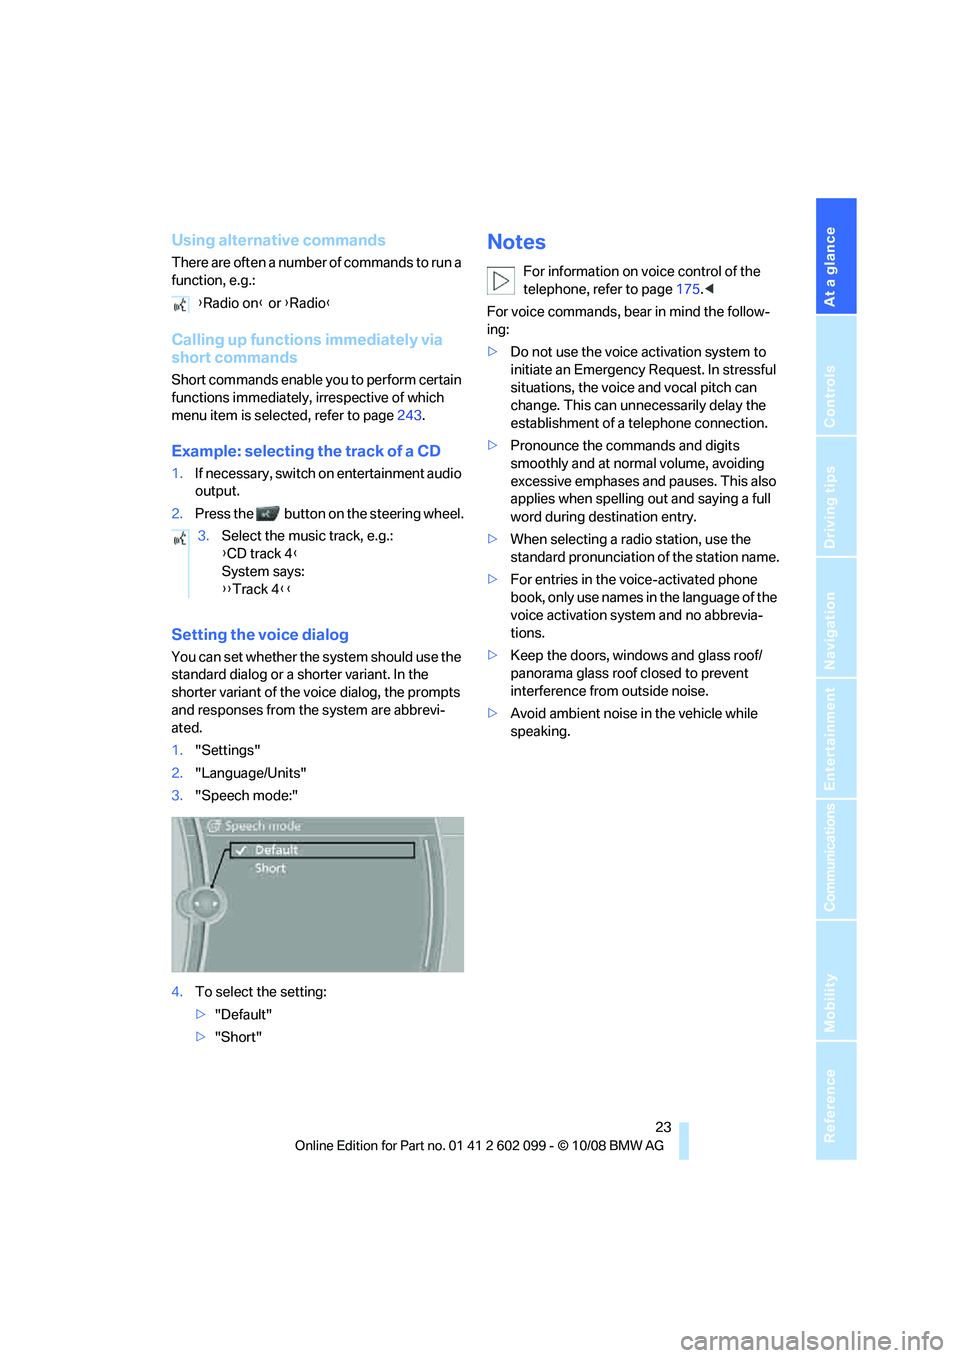
1."Settings"
2. "Language/Units"
3. "Speech mode:"
4. To select the setting:
>"Default"
> "Short"
Notes
For information on voice control of the
telephone, refer to page 175.<
For voice commands, bear in mind the follow-
ing:
> Do not use the voice activation system to
initiate an Emergency Request. In stressful
situations, the voice and vocal pitch can
change. This can unne cessarily delay the
establishment of a telephone connection.
> Pronounce the commands and digits
smoothly and at normal volume, avoiding
excessive emphases and pauses. This also
applies when spelling out and saying a full
word during destination entry.
> When selecting a radio station, use the
standard pronunciation of the station name.
> For entries in the voice-activated phone
book, only use names in the language of the
voice activation system and no abbrevia-
tions.
> Keep the doors, windows and glass roof/
panorama glass roof closed to prevent
interference from outside noise.
> Avoid ambient noise in the vehicle while
speaking.
{
Radio on } or {Radio }
3. Select the music track, e.g.:
{CD track 4 }
System says:
{{ Track 4 }}
ba8_E9091_cic.book Seite 23 Mittwoch, 29. Oktober 2008 2:59 14
Page 35 of 268
Controls
33Reference
At a glance
Driving tips
Communications
Navigation
Entertainment
Mobility
Press the window shut to close it.Make sure that the corners of any pointed
or sharp-edged cargo are padded if they
could bump against the rear window while the
vehicle is in motion, otherwise the heating ele-
ments of the rear window could be damaged. <
Alarm system*
The concept
The vehicle alarm system responds:
>When a door, the hood or the luggage com-
partment lid/tailgate is opened
> To movements inside the vehicle: Interior
motion sensor, refer to page 33
> When the car's inclination changes, for
instance if an attempt is made to jack it up
and steal the wheels or to raise it prior to
towing away
> When there is an interruption in the power
supply from the battery
The alarm system signals unauthorized entry
attempts for a short time by means of:
> An acoustic alarm
> Switching on the haza rd warning flashers
> Flashing the high beams
Arming and disarming
When you lock or unlock the vehicle, either with
the remote control or at the door lock, the alarm
system is armed or disarmed at the same time.
You can open the luggage compartment lid/tail-
gate even when the alarm system is armed, by
pressing the button on the remote control,
refer to page 28. The lid is locked and moni-
tored again as soon as you close it.
Panic mode*
You can trigger the alarm system if you find
yourself in a dangerous situation:
Press the button for at least three seconds.
To switch off the alarm: press any button.
Switching off an alarm
> Unlock the car with the remote control, refer
to page 27.
> Insert the remote control all the way into the
ignition lock.
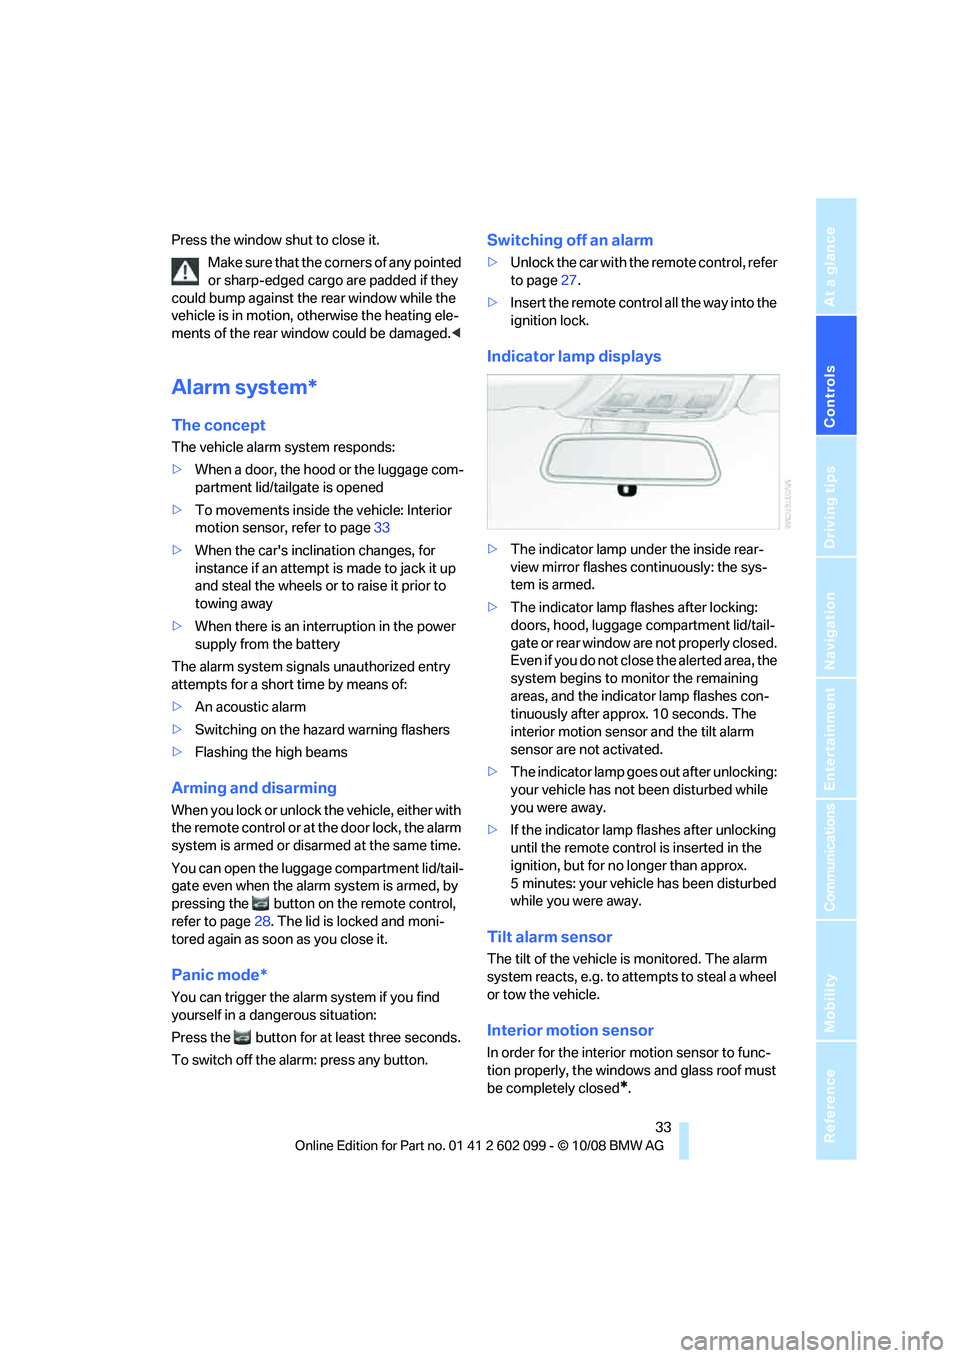
Indicator lamp displays
>The indicator lamp un der the inside rear-
view mirror flashes continuously: the sys-
tem is armed.
> The indicator lamp flashes after locking:
doors, hood, luggage compartment lid/tail-
gate or rear window are not properly closed.
Even if you do not close the alerted area, the
system begins to monitor the remaining
areas, and the indicator lamp flashes con-
tinuously after approx. 10 seconds. The
interior motion sensor and the tilt alarm
sensor are not activated.
> The indicator lamp goes out after unlocking:
your vehicle has not been disturbed while
you were away.
> If the indicator lamp flashes after unlocking
until the remote control is inserted in the
ignition, but for no longer than approx.
5 minutes: your vehicle has been disturbed
while you were away.
Tilt alarm sensor
The tilt of the vehicle is monitored. The alarm
system reacts, e.g. to attempts to steal a wheel
or tow the vehicle.
Interior motion sensor
In order for the interior motion sensor to func-
tion properly, the windows and glass roof must
be completely closed
*.
ba8_E9091_cic.book Seite 33 Mittwoch, 29. Oktober 2008 2:59 14
Page 58 of 268
Driving
56
Changing selector lever positions
>With the ignition switched on or the engine
running, the selector lever can be moved
out of position P: interlock.
> Before moving the lever away from P or N
with the vehicle stationary, first depress the
brake; otherwise the selector lever will
refuse to move: shiftlock.
To prevent the vehicle from creeping
after you select a driving position,
depress the brake until you are ready to
start. <
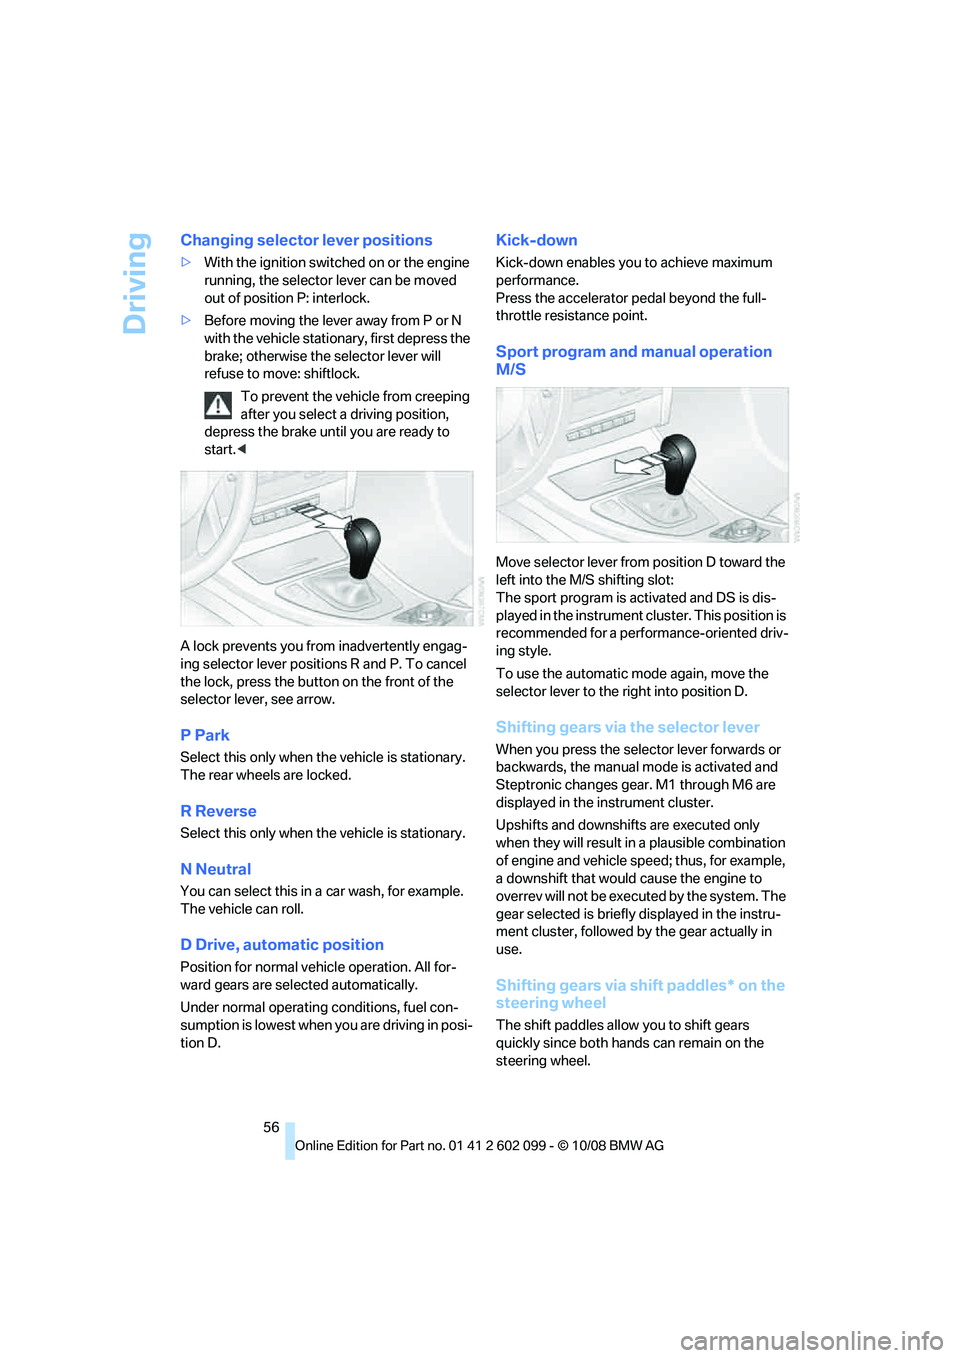
A lock prevents you from inadvertently engag-
ing selector lever positions R and P. To cancel
the lock, press the butto n on the front of the
selector lever, see arrow.
P Park
Select this only when th e vehicle is stationary.
The rear wheels are locked.
R Reverse
Select this only when th e vehicle is stationary.
N Neutral
You can select this in a car wash, for example.
The vehicle can roll.
D Drive, automatic position
Position for normal vehicle operation. All for-
ward gears are sele cted automatically.
Under normal operating conditions, fuel con-
sumption is lowest when you are driving in posi-
tion D.
Kick-down
Kick-down enables you to achieve maximum
performance.
Press the accelerator pedal beyond the full-
throttle resistance point.
Sport program and manual operation
M/S
Move selector lever from position D toward the
left into the M/S shifting slot:
The sport program is activated and DS is dis-
played in the instrument cl uster. This position is
recommended for a performance-oriented driv-
ing style.
To use the automatic mode again, move the
selector lever to the right into position D.
Shifting gears via the selector lever
When you press the select or lever forwards or
backwards, the manual mode is activated and
Steptronic changes gear. M1 through M6 are
displayed in the instrument cluster.
Upshifts and downshifts are executed only
when they will result in a plausible combination
of engine and vehicle speed; thus, for example,
a downshift that would cause the engine to
overrev will not be executed by the system. The
gear selected is briefly displayed in the instru-
ment cluster, followed by the gear actually in
use.
Shifting gears via shift paddles* on the
steering wheel
The shift paddles allo w you to shift gears
quickly since both hands can remain on the
steering wheel.
ba8_E9091_cic.book Seite 56 Mittwoch, 29. Oktober 2008 2:59 14
Page 84 of 268
Technology for driving comfort and safety
82
reduced driving stability. It is therefore neces-
sary to drive with appropriate caution.
You may find it useful
to briefly activate DTC
under the following sp ecial circumstances:
> When driving uphill on snow-covered roads,
in slush or on unplowed, snow-covered
roads
> When rocking a stuck vehicle free or start-
ing off in deep snow or on loose ground
> When driving with snow chains
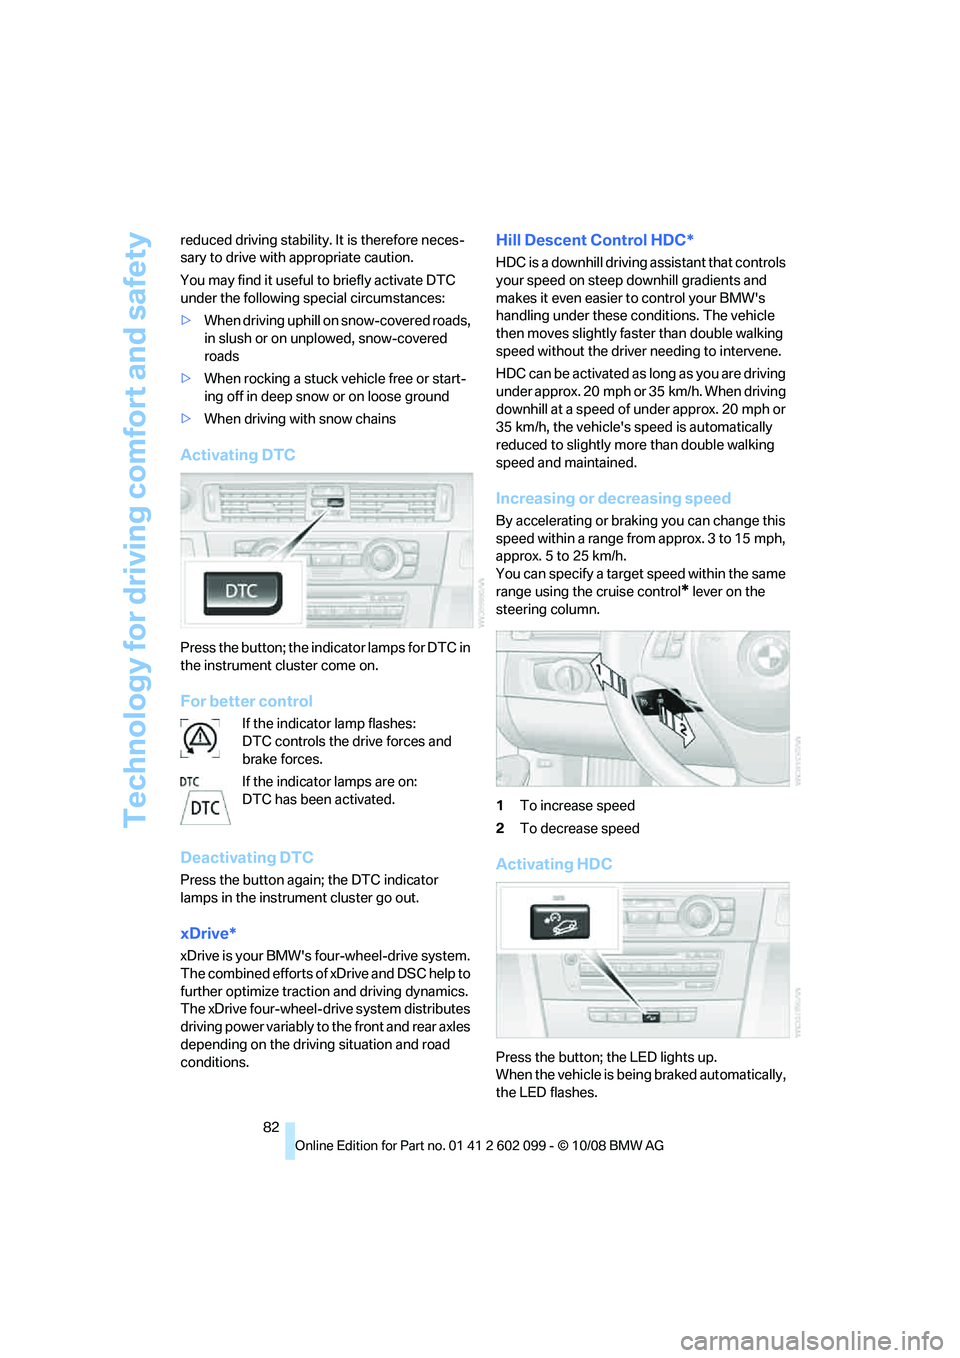
Activating DTC
Press the button; the indicator lamps for DTC in
the instrument cluster come on.
For better control
If the indicator lamp flashes:
DTC controls the drive forces and
brake forces.
If the indicator lamps are on:
DTC has been activated.
Deactivating DTC
Press the button again; the DTC indicator
lamps in the instrument cluster go out.
xDrive*
xDrive is your BMW's four-wheel-drive system.
The combined efforts of xDrive and DSC help to
further optimize traction and driving dynamics.
The xDrive four-wheel-drive system distributes
driving power variably to the front and rear axles
depending on the driving situation and road
conditions.
Hill Descent Control HDC*
HDC is a downhill driving assistant that controls
your speed on steep downhill gradients and
makes it even easier to control your BMW's
handling under these conditions. The vehicle
then moves slightly faster than double walking
speed without the driver needing to intervene.
HDC can be activated as long as you are driving
under approx. 20 mph or 35 km/h. When driving
downhill at a speed of under approx. 20 mph or
35 km/h, the vehicle's speed is automatically
reduced to slightly more than double walking
speed and maintained.
Increasing or decreasing speed
By accelerating or brak ing you can change this
speed within a range from approx. 3 to 15 mph,
approx. 5 to 25 km/h.
You can specify a target speed within the same
range using the cruise control
* lever on the
steering column.
1 To increase speed
2 To decrease speed
Activating HDC
Press the button; the LED lights up.
When the vehicle is being braked automatically,
the LED flashes.
ba8_E9091_cic.book Seite 82 Mittwoch, 29. Oktober 2008 2:59 14
Page 85 of 268
Controls
83Reference
At a glance
Driving tips
Communications
Navigation
Entertainment
Mobility
Deactivating HDC
Press the button again; the LED goes out.
HDC is automatically deactivated at speeds
greater than approx. 35 mph/60 km/h.
Using HDC
In cars with manual transmission:
Use HDC in lower gears and in reverse gear.
With automatic transmission:
You can use HDC in any drive position.
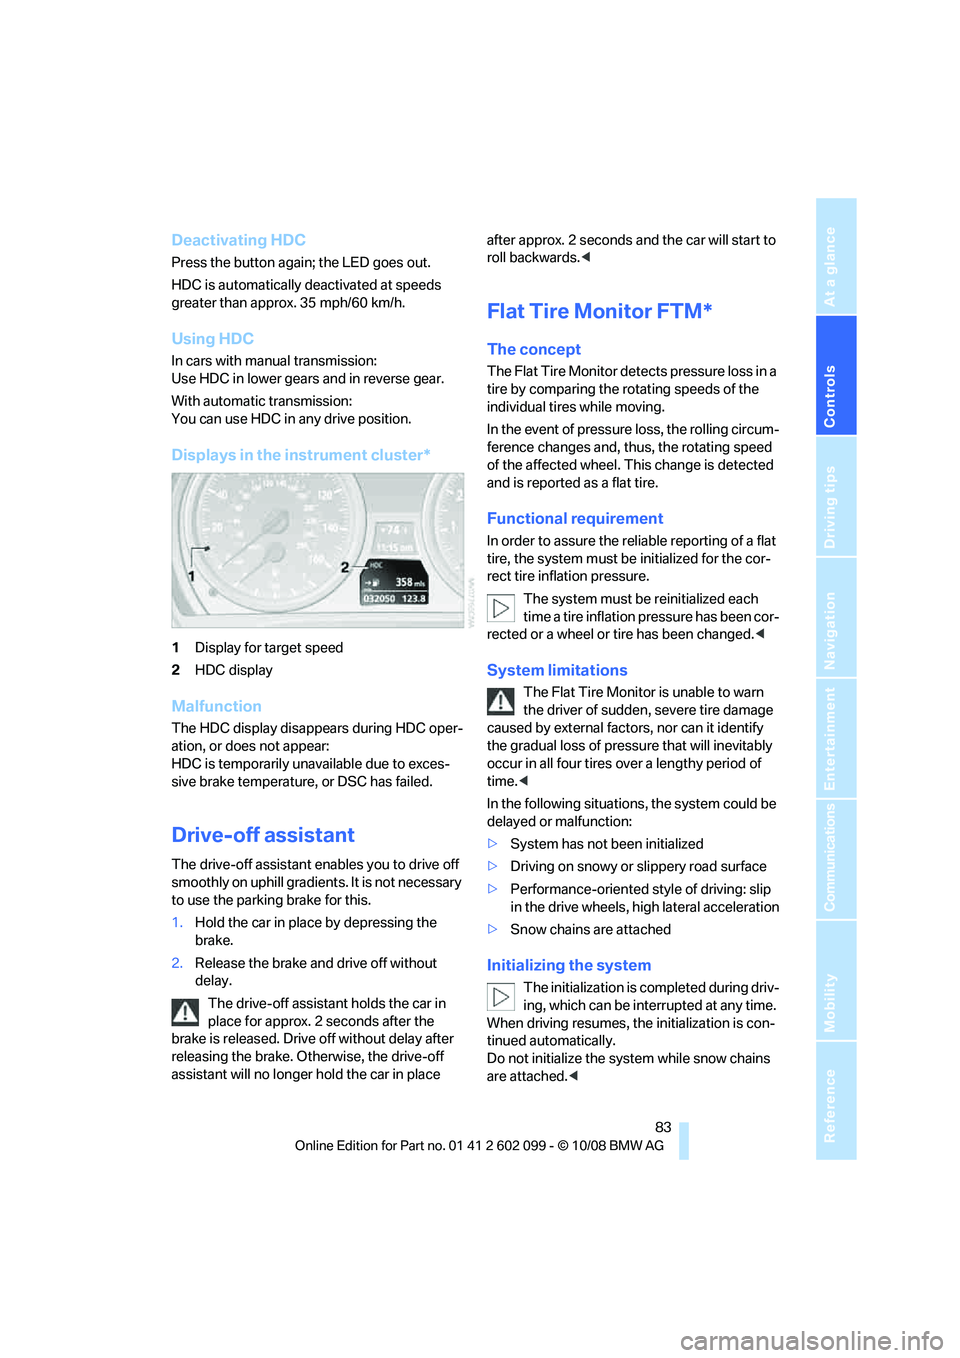
Displays in the instrument cluster*
1 Display for target speed
2 HDC display
Malfunction
The HDC display disappears during HDC oper-
ation, or does not appear:
HDC is temporarily unav ailable due to exces-
sive brake temperature, or DSC has failed.
Drive-off assistant
The drive-off assistant enables you to drive off
smoothly on uphill gradient s. It is not necessary
to use the parking brake for this.
1. Hold the car in place by depressing the
brake.
2. Release the brake and drive off without
delay.
The drive-off assistant holds the car in
place for approx. 2 seconds after the
brake is released. Drive off without delay after
releasing the brake. Otherwise, the drive-off
assistant will no longer hold the car in place after approx. 2 seconds an
d the car will start to
roll backwards. <
Flat Tire Monitor FTM*
The concept
The Flat Tire Monitor detects pressure loss in a
tire by comparing the rotating speeds of the
individual tires while moving.
In the event of pressure loss, the rolling circum-
ference changes and, thus, the rotating speed
of the affected wheel. This change is detected
and is reported as a flat tire.
Functional requirement
In order to assure the reliable reporting of a flat
tire, the system must be initialized for the cor-
rect tire inflation pressure.
The system must be reinitialized each
time a tire inflation pressure has been cor-
rected or a wheel or tire has been changed. <
System limitations
The Flat Tire Monitor is unable to warn
the driver of sudden, severe tire damage
caused by external factors, nor can it identify
the gradual loss of pressure that will inevitably
occur in all four tires over a lengthy period of
time. <
In the following situations, the system could be
delayed or malfunction:
> System has not been initialized
> Driving on snowy or slippery road surface
> Performance-oriented style of driving: slip
in the drive wheels, hi gh lateral acceleration
> Snow chains are attached
Initializing the system
The initialization is completed during driv-
ing, which can be interrupted at any time.
When driving resumes, the initialization is con-
tinued automatically.
Do not initialize the syst em while snow chains
are attached. <
ba8_E9091_cic.book Seite 83 Mittwoch, 29. Oktober 2008 2:59 14
Page 87 of 268
Controls
85Reference
At a glance
Driving tips
Communications
Navigation
Entertainment
Mobility
Functional requirement
In order to assure the reliable reporting of a flat
tire, the system must be reset while all tire infla-
tion pressures are correct.
Always use wheels with TPM electronics. Oth-
erwise, the system may malfunction.Each time a tire inflation pressure has
been corrected or a wheel or tire has been
changed, reset the system. <
System limitations
TPM cannot warn you in advance of sud-
den severe tire damage caused by out-
side influences. <
The system does not work correctly if it has not
been reset; for example, a flat tire may be indi-
cated even though the ti re inflation pressures
are correct.
The system is inactive and cannot indicate a flat
tire if a wheel without TPM electronics, such as
a compact spare wheel, has been mounted, or if
TPM is temporarily malfun ctioning due to other
systems or devices using the same radio fre-
quency.
Status indicator on the Control Display
The color of the tires represents the status of
the tires and the system.
TPM takes into account that tire pressures
change while the vehicle is being driven. The
tire pressures do not need to be corrected
unless the TPM instructs you to do so by means
of color indicators.
Green
The tire inflation pressure corresponds to the
established target value.
"TPM active" appears on the Control Display.
One wheel yellow
There is a flat tire or su bstantial loss of tire pres-
sure in the indicated tire. A message appears on
the Control Display.
All wheels yellow
There is a flat tire or substantial loss of tire pres-
sure in several tires. A message appears on the
Control Display.
Gray
The system cannot detect a puncture.
Possible reasons for this:
> TPM is being reset
> Temporary malfunction caused by systems
or devices using the same radio frequency
> Malfunction
Resetting the system
Each time a tire inflation pressure has
been corrected or a wheel or tire has been
changed, reset the system. <
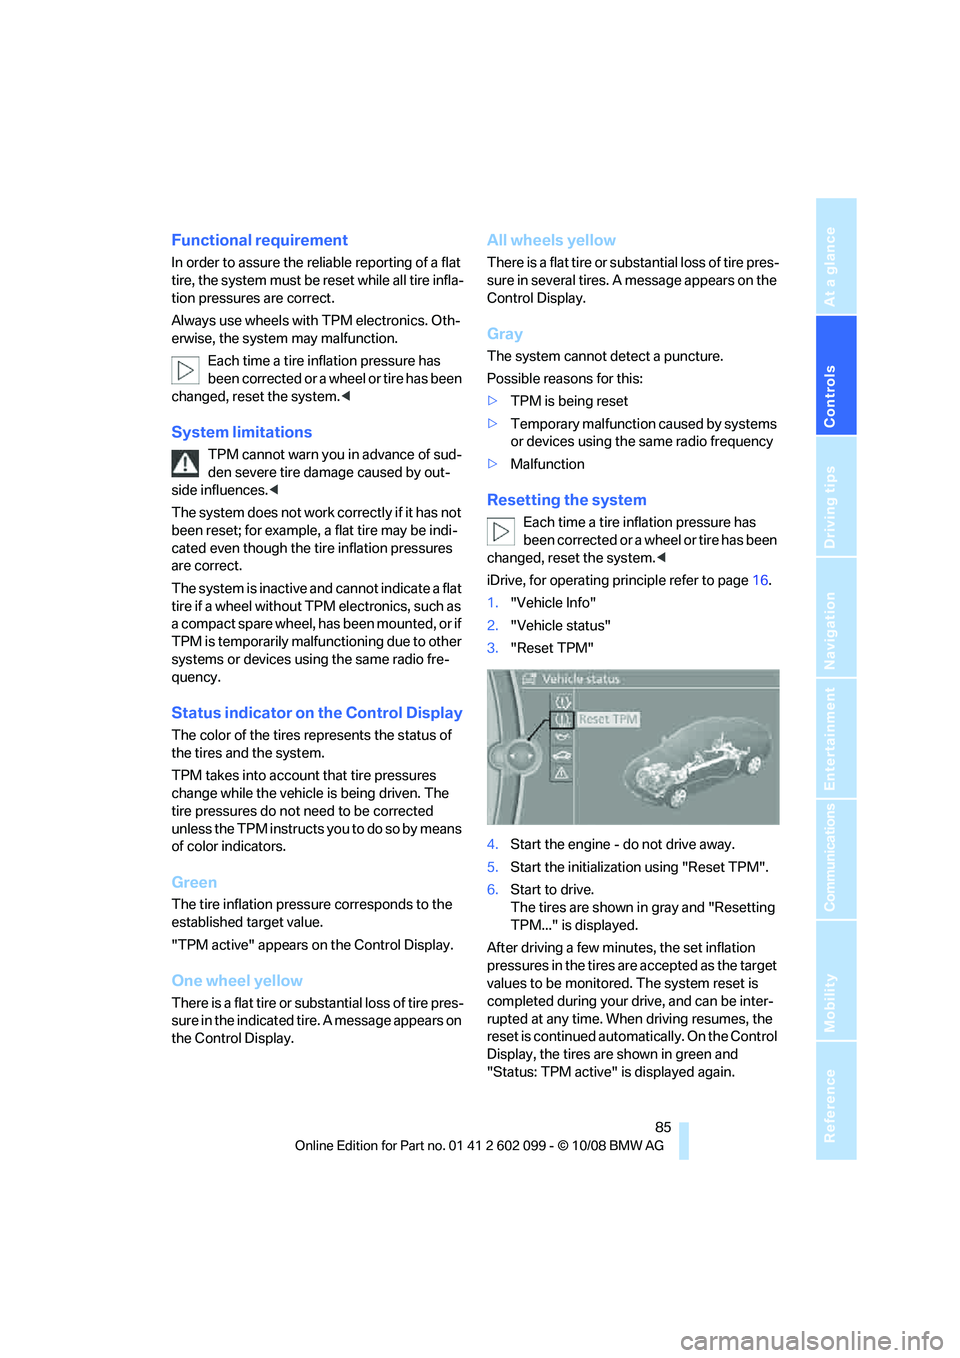
iDrive, for operating pr inciple refer to page16.
1. "Vehicle Info"
2. "Vehicle status"
3. "Reset TPM"
4. Start the engine - do not drive away.
5. Start the initialization using "Reset TPM".
6. Start to drive.
The tires are shown in gray and "Resetting
TPM..." is displayed.
After driving a few minutes, the set inflation
pressures in the tires are accepted as the target
values to be monitored. The system reset is
completed during your drive, and can be inter-
rupted at any time. When driving resumes, the
reset is continued automatically. On the Control
Display, the tires are shown in green and
"Status: TPM active" is displayed again.
ba8_E9091_cic.book Seite 85 Mittwoch, 29. Oktober 2008 2:59 14
Page 88 of 268
Technology for driving comfort and safety
86
If a flat tire is detect
ed while the system is
resetting and determining the inflation
pressures, all tires on the Control Display are
displayed in yellow. The message "Tire low!" is
shown. <
Message for low tire inflation pressure
The warning lamps come on in yellow
and red. A message appears on the
Control Display. In addition, a signal
sounds. There is a flat tire or substan-
tial loss of tire pressure.
1. Cautiously reduce sp eed to below 50 mph/
80 km/h. Avoid sudden braking and steer-
ing maneuvers. Do not exceed a speed of
50 mph/80 km/h.
If the car is not equipped with Run-
Flat Tires, refer to page 209, the stan-
dard equipment by design, do not continue
driving. Otherwise a se vere accident could
result after a tire punc ture if you continue
driving. <
2. In the event of complete pressure loss,
0 psi/0 kPa, you can estimate the possible
distance for continued driving on the basis
of the following guidelines:
>With a light load:
1 to 2 persons without luggage:
approx. 155 miles/250 km
> With a medium load:
2 persons, cargo bay full, or 4 persons
without luggage:
approx. 95 miles/150 km
> With a full load:
4 or more persons, cargo bay full:
approx. 30 miles/50 km
Drive cautiously and do not exceed a
speed of 50 mph/80 km/h. In the event of
pressure loss, vehicle handling changes. This
includes reduced tracking stability in braking,
extended braking distance and altered natural
steering characteristics.
If unusual vibration or lo ud noises occur during
the journey, this may be an indication that the
damaged tire has finally failed. Reduce your
speed and pull over as soon as possible at a
suitable location. Otherw ise parts of the tire could come loose, resulting in an accident. Do
not continue driving. Instead, contact your
BMW center.
<
Malfunction
The small warning lamp flashes in
yellow and then lights up continu-
ously; the larger warning lamp comes
on in yellow. On the Control Display,
the tires are shown in gray and a message
appears. No punctures can be detected.
his type of message is shown in the following
situations:
> If there is a malfunction
Have the system checked.
> If a wheel without TPM electronics has
been mounted
> If TPM is temporarily malfunctioning due to
other systems or devices using the same
radio frequency.
Message for unsuccessful system
reset
The warning lamp lights up yellow. A
message will appear on the Control
Display. The system is not reset after
a tire has been changed, for example.
Check the tire inflation pressure and reset the
system, refer to page 85.
Declaration according to NHTSA/
FMVSS 138
Tire Pressure Monitoring Systems
Each tire should be checked monthly when cold
and inflated to the inflation pressure recom-
mended by the vehicle manufacturer on the
vehicle placard or tire infl ation pressure label. If
your vehicle has tires of a different size than the
size indicated on the vehicle placard or tire infla-
tion pressure label, yo u should determine the
proper tire inflation pressure for those tires. As
an added safety feature, your vehicle has been
equipped with a tire pressure monitoring sys-
tem, TPMS, that illuminates a low tire pressure
telltale when one or more of your tires are signif-
icantly under-inflated. Accordingly, when the
low tire pressure telltale illuminates, you should
ba8_E9091_cic.book Seite 86 Mittwoch, 29. Oktober 2008 2:59 14