2009 BMW 330D remote start
[x] Cancel search: remote startPage 32 of 268
Opening and closing
30
integrated key to the corresponding limit posi-
tions in the door lock.
Opening and closing:
From inside
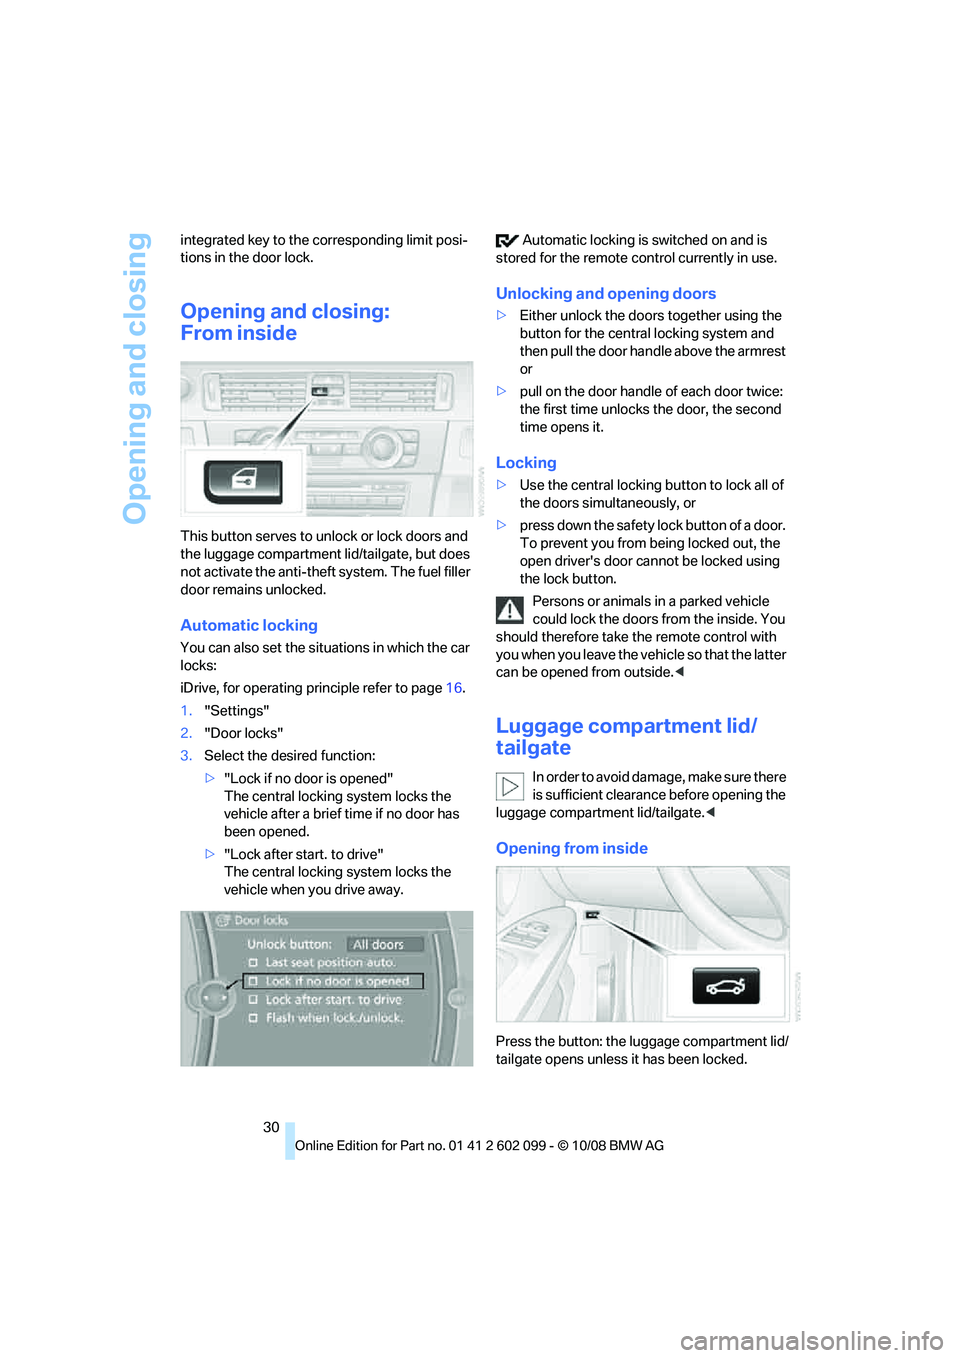
This button serves to unlock or lock doors and
the luggage compartment lid/tailgate, but does
not activate the anti-theft
system. The fuel filler
door remains unlocked.
Automatic locking
You can also set the situ ations in which the car
locks:
iDrive, for operating pr inciple refer to page16.
1. "Settings"
2. "Door locks"
3. Select the desired function:
>"Lock if no door is opened"
The central locking system locks the
vehicle after a brief time if no door has
been opened.
> "Lock after start. to drive"
The central locking system locks the
vehicle when you drive away. Automatic locking is switched on and is
stored for the remote control currently in use.
Unlocking and opening doors
>Either unlock the doors together using the
button for the central locking system and
then pull the door handle above the armrest
or
> pull on the door handle of each door twice:
the first time unlocks the door, the second
time opens it.
Locking
> Use the central locking button to lock all of
the doors simultaneously, or
> press down the safety lock button of a door.
To prevent you from being locked out, the
open driver's door cannot be locked using
the lock button.
Persons or animals in a parked vehicle
could lock the doors from the inside. You
should therefore take th e remote control with
you when you leave the ve hicle so that the latter
can be opened from outside. <
Luggage compartment lid/
tailgate
In order to avoid damage, make sure there
is sufficient clearance before opening the
luggage compartment lid/tailgate.<
Opening from inside
Press the button: the luggage compartment lid/
tailgate opens unless it has been locked.
ba8_E9091_cic.book Seite 30 Mittwoch, 29. Oktober 2008 2:59 14
Page 36 of 268

Opening and closing
34
Avoiding unintentional alarms
The tilt alarm sensor and interior motion sensor
may be switched off at the same time. This pre-
vents unintentional alarms, e.g. in the following
situations:
>In duplex garages
> During transport on car-carrying trains,
boats/ships or on a trailer
> When animals are to remain in the vehicle
Switching off tilt alarm sensor and
interior motion sensor
Press the button on the remote control
again as soon as the vehicle is locked.
The indicator lamp light s up briefly and then
flashes continuously. The tilt alarm sensor and
the interior motion sensor are switched off until
the next time the vehicle is unlocked and subse-
quently locked again.
Convenient access*
Convenient access enables you to enter your
vehicle without needing to hold the remote con-
trol in your hand. All you need to do is wear the
remote control close to your body, e.g. in your
jacket pocket. The vehicle detects the corre-
sponding remote control within the immediate
vicinity or in the passenger compartment.
Convenient access supports the following
functions:
> Unlocking/locking the vehicle
> Unlocking the luggage compartment lid/
tailgate separately
> Engine starting
> Convenient closure
Functional requirement
>The vehicle or the luggage compartment
lid/tailgate can only be locked when the
vehicle detects that th e remote control cur-
rently in use is ou tside of the vehicle.
> The vehicle cannot be locked or unlocked
again until after approx. 2 seconds. >
The engine can only be started when the
vehicle detects that th e remote control cur-
rently in use is inside the vehicle.
Comparison to the standard remote
control
In general, there is no difference between using
convenient access or pressing the buttons on
the remote control to carry out the functions
mentioned above. You should therefore first
familiarize yourself with the instructions on
opening and closing starting on page 26.
Special features regarding the use of conve-
nient access are described below. If you notice a brief delay while opening or
closing windows or the glass roof/pan-
orama glass roof, the system is checking
whether a remote control is inside the vehicle.
Please repeat the opening or closing proce-
dure, if necessary. <
Unlocking
Grasp the handle on the driver's or front pas-
senger's door completely, arrow 1. This corre-
sponds to pressing the button.
Locking
Touch the surface, arrow 2, with your finger for
approx. 1 second. This corresponds to pressing
the button.
To preserve the battery, please make
sure that the ignition and all electrical
consumers are switched off before locking the
vehicle. <
ba8_E9091_cic.book Seite 34 Mittwoch, 29. Oktober 2008 2:59 14
Page 37 of 268
Controls
35Reference
At a glance
Driving tips
Communications
Navigation
Entertainment
Mobility
Convenient closure
For convenient closure, keep your finger on the
surface, arrow 2.
Unlocking the luggage compartment
lid/tailgate separately
Press the button on the outside of the luggage
compartment lid/tailgate. This corresponds to
pressing the button.
If the vehicle detects that a remote con-
trol has been accident ally left inside the
locked vehicle's cargo bay after the luggage
compartment lid/tailgate or rear window is
closed, the lid will reopen. The hazard warning
flashers flash and an acoustic signal
* sounds. <
Switching on radio readiness
Radio readiness is switched on by pressing the
start/stop button, refer to page 53.
Do not depress the brake or the clutch,
otherwise the engine will start. <
Starting the engine
You can start the engine or switch on the igni-
tion when a remote control is inside the vehicle.
It is not necessary to insert a remote control into
the ignition switch, refer to page 53.
Switching off the engine in cars with
automatic transmission
The engine can only be switched off when the
selector lever is in position P, refer to page 54.
To switch the engine off when the selector lever
is in position N, the remote control must be in
the ignition switch.
Malfunction
Convenient access may malfunction due to
local radio waves. If this happens, open or close
the vehicle via the butto ns on the remote con-
trol or using the integrated key. To start the
engine afterward, insert the remote control into
the ignition switch.
Warning lamps
The warning lamp in the instrument
cluster lights up when you attempt to
start the engine: the engine cannot
be started. The remote co ntrol is not inside the
vehicle or is malfunctioning. Take the remote
control with you inside the vehicle or have it
checked. If necessary, insert another remote
control into the ignition switch.
The warning lamp in the instrument
cluster lights up while the engine is
running: the remote control is no
longer inside the vehicle. After the engine is
switched off, the engine can only be restarted
within approx. 10 seconds.
The indicator lamp in the instrument
cluster comes on and a message
appears on the Control Display:
replace the battery in the remote control.
Replacing the battery
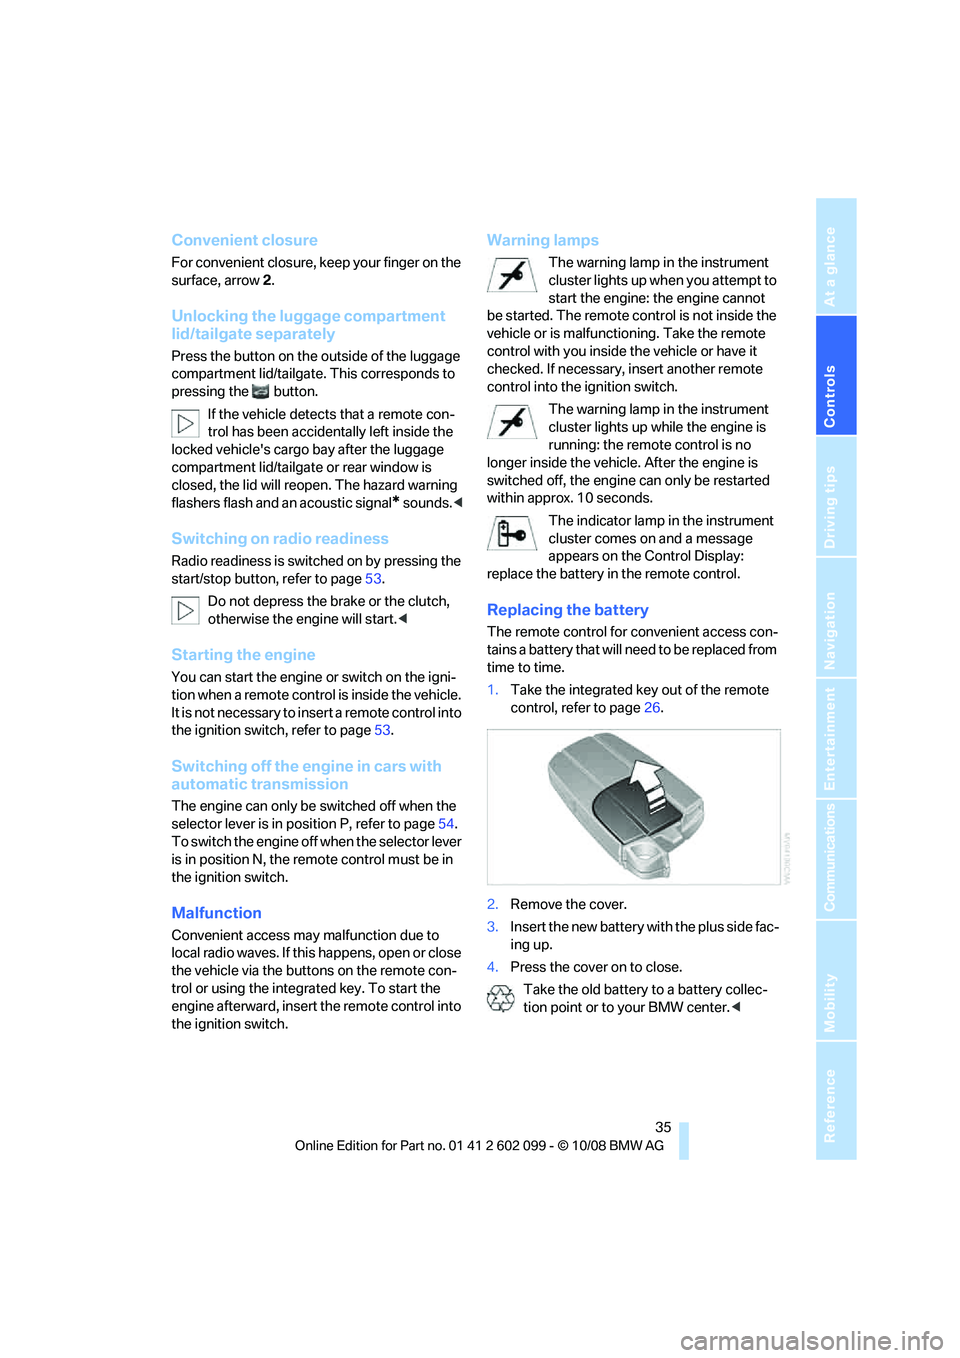
The remote control for convenient access con-
tains a battery that will n eed to be replaced from
time to time.
1. Take the integrated ke y out of the remote
control, refer to page 26.
2. Remove the cover.
3. Insert the new battery wi th the plus side fac-
ing up.
4. Press the cover on to close.
Take the old battery to a battery collec-
tion point or to your BMW center. <
ba8_E9091_cic.book Seite 35 Mittwoch, 29. Oktober 2008 2:59 14
Page 55 of 268
Controls
53Reference
At a glance
Driving tips
Communications
Navigation
Entertainment
Mobility
Driving
Ignition lock
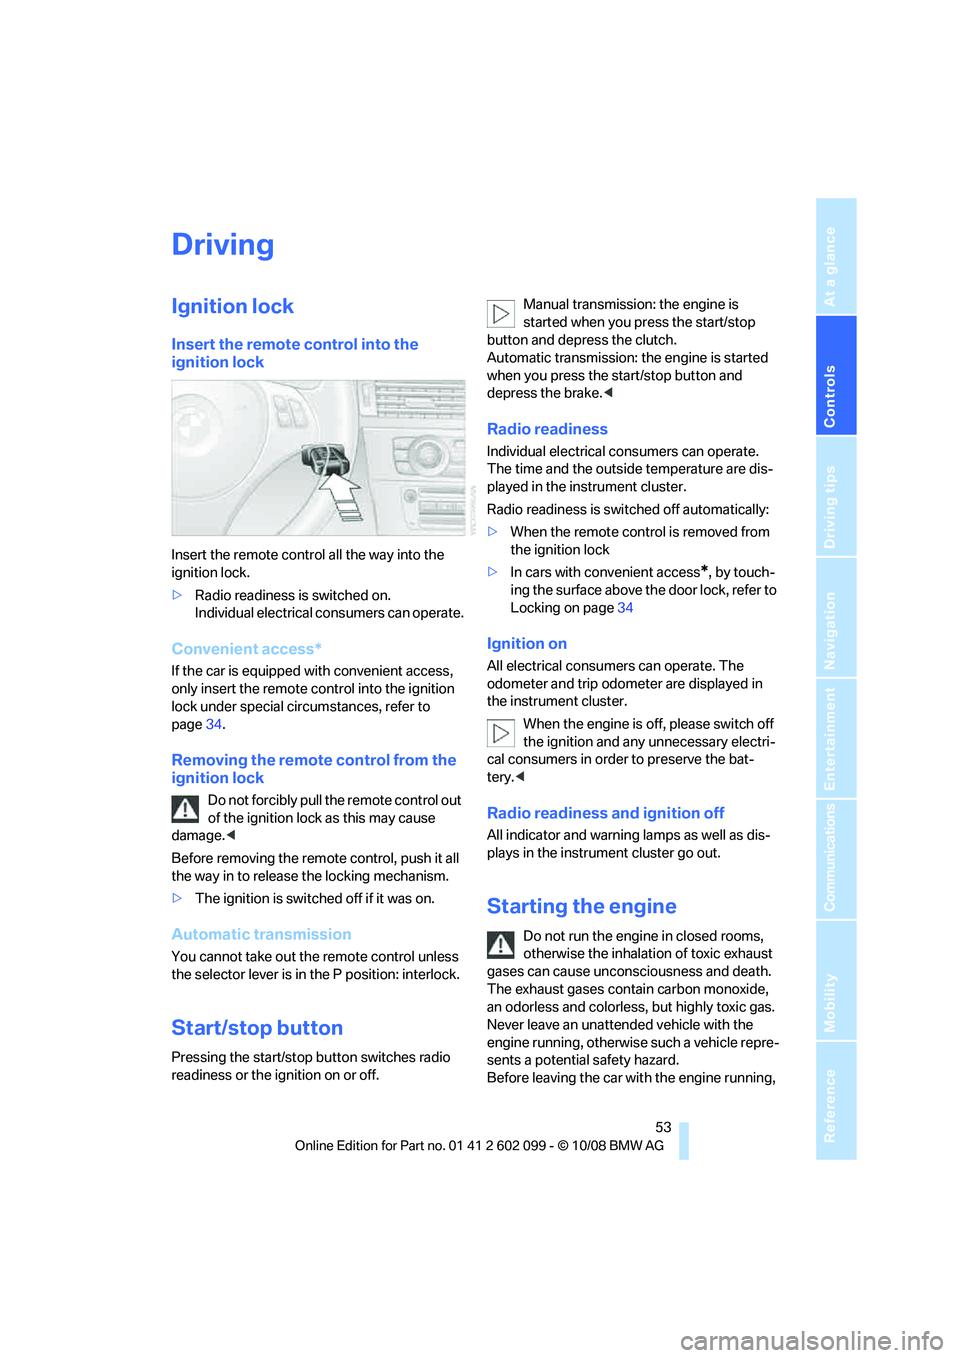
Insert the remote control into the
ignition lock
Insert the remote control all the way into the
ignition lock.
>Radio readiness is switched on.
Individual electrical consumers can operate.
Convenient access*
If the car is equipped with convenient access,
only insert the remote control into the ignition
lock under special circ umstances, refer to
page 34.
Removing the remote control from the
ignition lock
Do not forcibly pull the remote control out
of the ignition lock as this may cause
damage. <
Before removing the remote control, push it all
the way in to release the locking mechanism.
> The ignition is switched off if it was on.
Automatic transmission
You cannot take out th e remote control unless
the selector lever is in the P position: interlock.
Start/stop button
Pressing the start/stop button switches radio
readiness or the ignition on or off. Manual transmission: the engine is
started when you press the start/stop
button and depress the clutch.
Automatic transmission: the engine is started
when you press the start/stop button and
depress the brake. <
Radio readiness
Individual electrical consumers can operate.
The time and the outside temperature are dis-
played in the instrument cluster.
Radio readiness is swit ched off automatically:
> When the remote control is removed from
the ignition lock
> In cars with convenient access
*, by touch-
ing the surface above the door lock, refer to
Locking on page 34
Ignition on
All electrical consumers can operate. The
odometer and trip odometer are displayed in
the instrument cluster.
When the engine is off, please switch off
the ignition and any unnecessary electri-
cal consumers in order to preserve the bat-
tery. <
Radio readiness and ignition off
All indicator and warnin g lamps as well as dis-
plays in the instrument cluster go out.
Starting the engine
Do not run the engine in closed rooms,
otherwise the inhalation of toxic exhaust
gases can cause unconsciousness and death.
The exhaust gases contain carbon monoxide,
an odorless and colorless, but highly toxic gas.
Never leave an unattended vehicle with the
engine running, otherwise such a vehicle repre-
sents a potential safety hazard.
Before leaving the car wi th the engine running,
ba8_E9091_cic.book Seite 53 Mittwoch, 29. Oktober 2008 2:59 14
Page 56 of 268
Driving
54
place the transmission in neutral or engage
selector lever position P
and forcefully apply the
parking brake to prevent the car from moving. <
Avoid frequent starting in quick succes-
sion as well as repeated start attempts in
which the engine does no t start. Otherwise, the
fuel is not burned or incompletely burned and
there is a danger of overheating and damaging
the catalytic converter. <
Do not wait for the engine to warm up while the
vehicle remains stationary. Start driving right
away, but at moderate engine speeds.
Manual transmission
Remote control in the ignition lock or, with con-
venient access, inside the vehicle, refer to
page 34.
1. Depress the brake.
2. Depress the clutch and shift to neutral posi-
tion.
3. Press the start/stop button.
The starter operates automatically for a certain
time, and stops automatically as soon as the
engine has started.
Automatic transmission
Remote control in the ignition lock or, with con-
venient access, inside the vehicle, refer to
page 34.
1. Depress the brake.
2. Move the selector lever to position P.
3. Press the start/stop button.
The starter operates automatically for a certain
time, and stops automatically as soon as the
engine has started.
Diesel engine
When the engine is cold and temperatures are
below approx. 32 7/06 , the starting process
may take a little more time due to automatic
preheating. The preheating indicator lamp in
the instrument cluster comes on; at the same
time a message appears on the Control Display.
Switching off the engine
Always take the remote control with you
when you leave the vehicle.
When parking, apply th e parking brake force-
fully, otherwise the vehicle could begin to roll. <
Manual transmission
1.With the car at a standstill, press the start/
stop button.
2. Shift into first gear or reverse.
3. Forcefully apply the parking brake.
4. Removing the remote control from the igni-
tion lock, refer to page 53.
Automatic transmission
1. With the car at a standstill, move the selec-
tor lever to position P.
2. Press the start/stop button.
3. Forcefully apply the parking brake.
4. Removing the remote control from the igni-
tion lock, refer to page 53.
Parking brake
The parking brake is primarily intended to pre-
vent the vehicle from rolling while parked; it
brakes the rear wheels.
Indicator lamp
The indicator lamp is lit, and when you
drive off an acoustic signal sounds in
addition. The parking brake is still
applied.
Indicator lamp for Canadian models.
Applying
The lever locks in po sition automatically.
ba8_E9091_cic.book Seite 54 Mittwoch, 29. Oktober 2008 2:59 14
Page 73 of 268
Controls
71Reference
At a glance
Driving tips
Communications
Navigation
Entertainment
Mobility
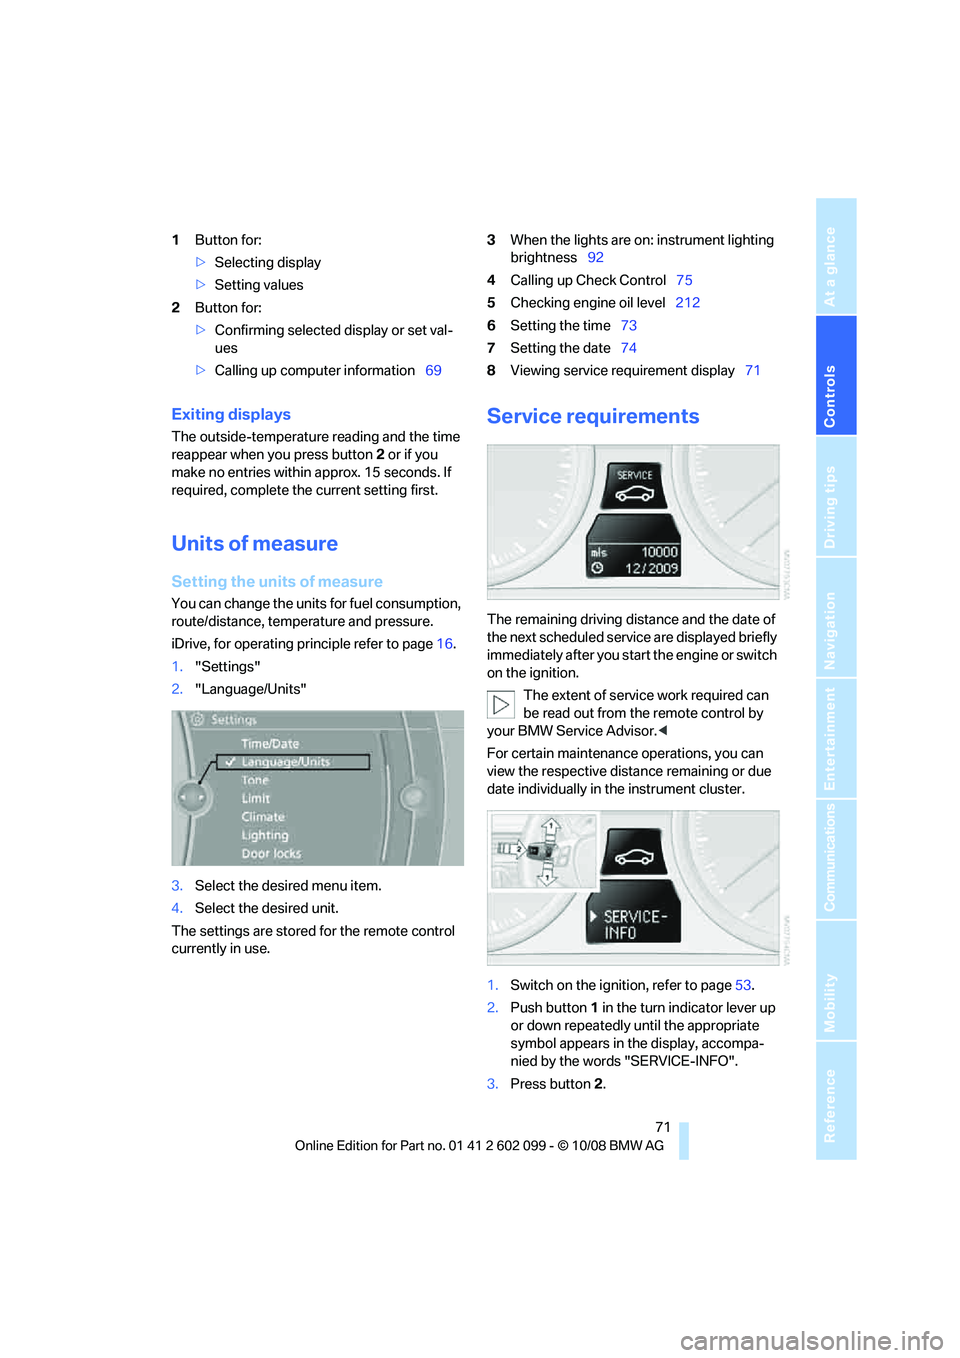
1Button for:
>Selecting display
> Setting values
2 Button for:
>Confirming selected display or set val-
ues
> Calling up computer information 693
When the lights are on: instrument lighting
brightness 92
4 Calling up Check Control 75
5 Checking engine oil level 212
6 Setting the time 73
7 Setting the date 74
8 Viewing service requirement display 71
Exiting displays
The outside-temperature reading and the time
reappear when you press button 2 or if you
make no entries within approx. 15 seconds. If
required, complete the current setting first.
Units of measure
Setting the units of measure
You can change the units for fuel consumption,
route/distance, temperature and pressure.
iDrive, for operating principle refer to page 16.
1. "Settings"
2. "Language/Units"
3. Select the desired menu item.
4. Select the desired unit.
The settings are stored for the remote control
currently in use.
Service requirements
The remaining driving dist ance and the date of
the next scheduled service are displayed briefly
immediately after you start the engine or switch
on the ignition.
The extent of service work required can
be read out from th e remote control by
your BMW Service Advisor. <
For certain maintenance operations, you can
view the respective distance remaining or due
date individually in the instrument cluster.
1. Switch on the ignition, refer to page 53.
2. Push button 1 in the turn indicator lever up
or down repeatedly until the appropriate
symbol appears in the display, accompa-
nied by the words "SERVICE-INFO".
3. Press button 2.
ba8_E9091_cic.book Seite 71 Mittwoch, 29. Oktober 2008 2:59 14
Page 101 of 268
Controls
99Reference
At a glance
Driving tips
Communications
Navigation
Entertainment
Mobility
Practical interior accessories
Integrated universal remote
control*
The concept
The integrated universal remote control can
replace as many as three hand-held transmit-
ters for various remote -controlled devices,
such as garage doors and gates or lighting sys-
tems. The integrated universal remote control
registers and stores sign als from the original
hand-held transmitters.
The signal of an original hand-held transmitter
can be programmed on one of the three mem-
ory buttons 1. After this, the programmed
memory button 1 will operate the system in
question. The LED 2 flashes to confirm trans-
mission of the signal.
Should you sell your vehicl e one day, be sure to
delete the stored progra ms beforehand for your
safety, refer to page 100.
To prevent possible damage or injury,
before programming or using the inte-
grated universal remote control, always inspect
the immediate area to make certain that no peo-
ple, animals or objects are within the pivoting or
travel range of the device being operated. Com-
ply also with the safety instructions supplied
with the original hand-held transmitter. <
Checking compatibility
If this symbol appears on the package
or in the instructions supplied with the
original hand-held transmitter, you can
assume that the radio remote control device will
be compatible with the integrated universal
remote control.
For additional information, please contact your
BMW center or call: 1-800-355-3515.
You can also obtain information on the Internet
at:
www.bmwusa.com or
www.homelink.com. HomeLink is a registered trademark of Johnson
Controls, Inc.
<
Programming
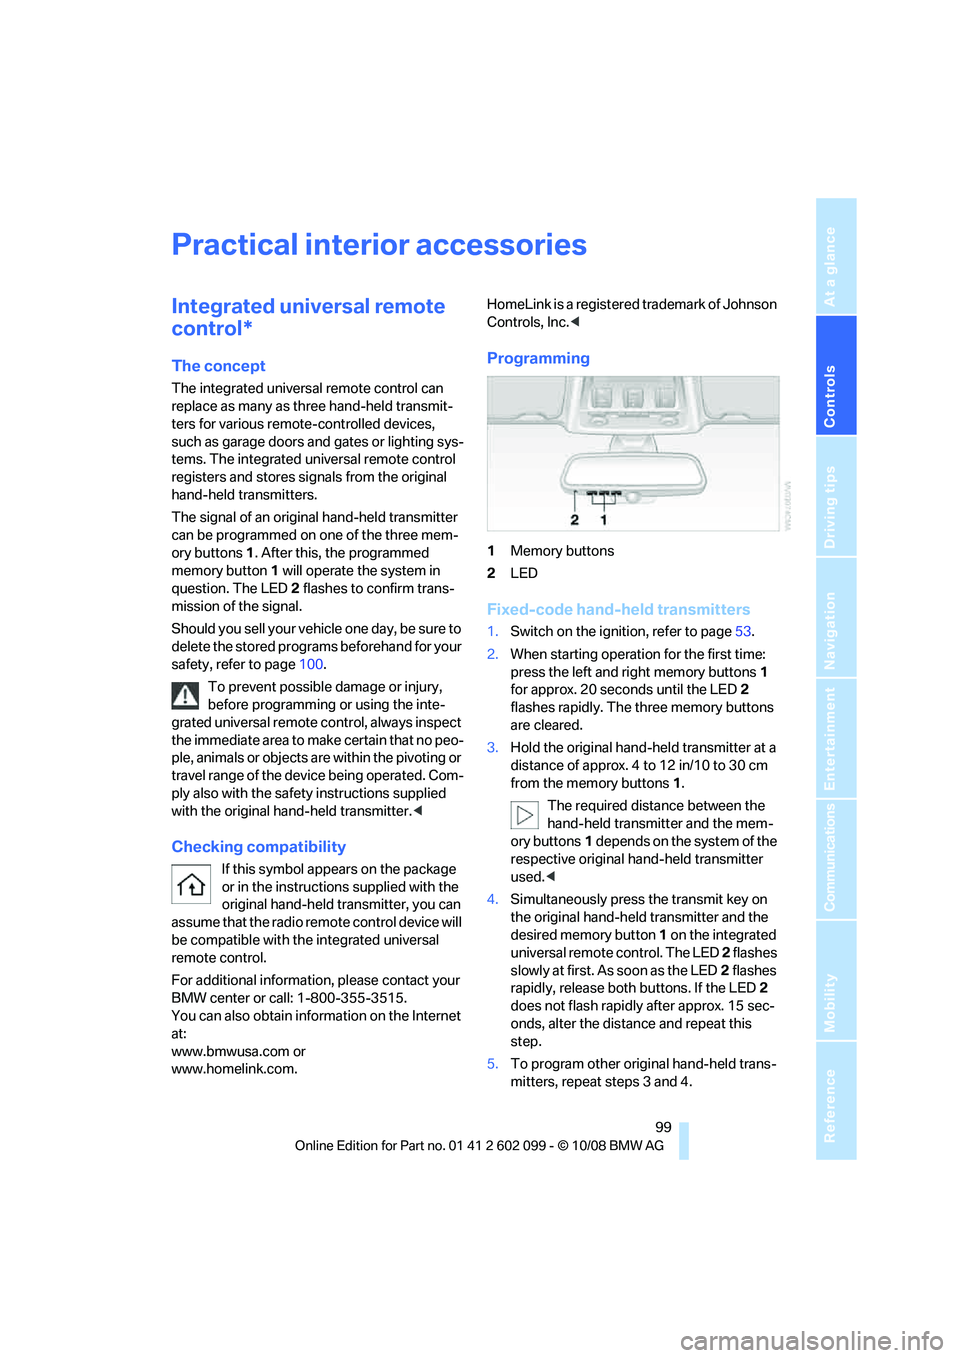
1Memory buttons
2 LED
Fixed-code hand-held transmitters
1.Switch on the ignition, refer to page 53.
2. When starting operation for the first time:
press the left and right memory buttons 1
for approx. 20 seconds until the LED 2
flashes rapidly. The three memory buttons
are cleared.
3. Hold the original hand-held transmitter at a
distance of approx. 4 to 12 in/10 to 30 cm
from the memory buttons 1.
The required distance between the
hand-held transmitter and the mem-
ory buttons 1 depends on the system of the
respective original hand-held transmitter
used. <
4. Simultaneously press the transmit key on
the original hand-held transmitter and the
desired memory button 1 on the integrated
universal remote control. The LED 2 flashes
slowly at first. As soon as the LED 2 flashes
rapidly, release both buttons. If the LED 2
does not flash rapidly after approx. 15 sec-
onds, alter the distance and repeat this
step.
5. To program other original hand-held trans-
mitters, repeat steps 3 and 4.
ba8_E9091_cic.book Seite 99 Mittwoch, 29. Oktober 2008 2:59 14
Page 135 of 268
Navigation
Driving tips
133Reference
At a glance
Controls
Communications
Entertainment
Mobility
Destination guidance
Starting destination
guidance
1."Navigation"
2. "Enter address"
3. Select the destination.
4. "Start guidance"
After the route is calculated, the route is dis-
played in the map on the Control Display.
Terminating destination
guidance
1. "Navigation"
2. "Map"
3. Select the symbol
Continuing destination
guidance
If the destination was not reached at the end of
the last trip, the system asks whether it should
continue destination guidance.
Select "Resume guidance" or "Stop guidance".
Route criteria
General information
You can influence the calculated route by
choosing certain route criteria. You can change
the route criteria as often as you like during des-
tination entry or during destination guidance.
The route is planned acco rding to fixed rules.
The type of road is taken into account, e.g.
whether it is a highway or a winding road. As a
result, the routes recommended by the naviga-
tion system may not alwa ys be the same ones
that you would choose ba sed on personal expe-
rience. The settings are stored for the remote control
currently in use.
Changing route criteria
1.
"Navigation"
2. "Map"
3. "Route preference"
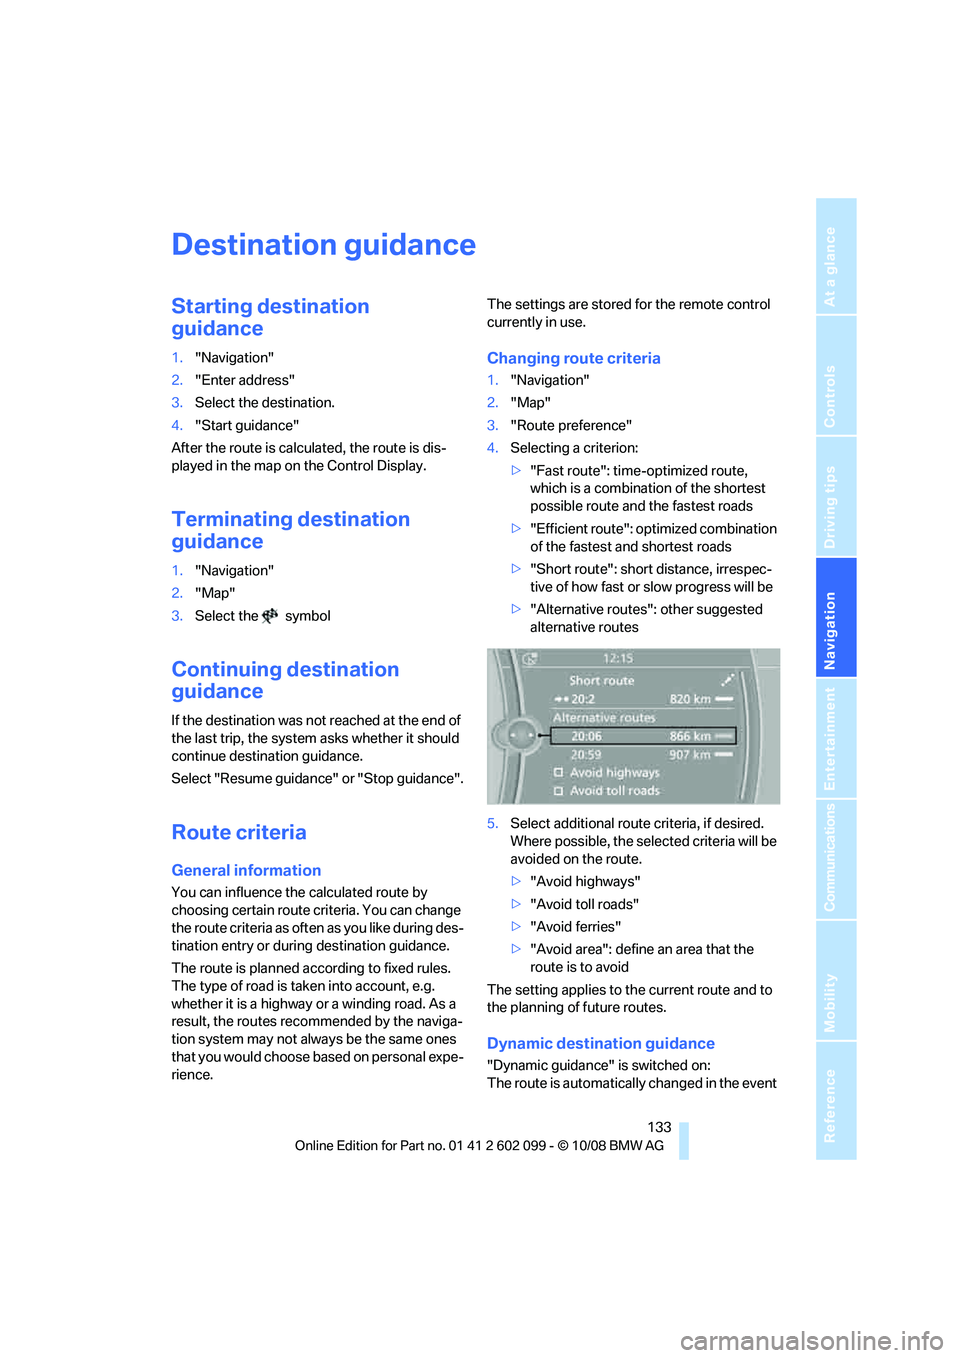
4. Selecting a criterion:
>"Fast route": time-optimized route,
which is a combination of the shortest
possible route and the fastest roads
> "Efficient route": optimized combination
of the fastest and shortest roads
> "Short route": short distance, irrespec-
tive of how fast or slow progress will be
> "Alternative routes ": other suggested
alternative routes
5. Select additional route criteria, if desired.
Where possible, the sele cted criteria will be
avoided on the route.
> "Avoid highways"
> "Avoid toll roads"
> "Avoid ferries"
> "Avoid area": define an area that the
route is to avoid
The setting applies to the current route and to
the planning of future routes.
Dynamic destination guidance
"Dynamic guidance" is switched on:
The route is automatically changed in the event
ba8_E9091_cic.book Seite 133 Mittwoch, 29. Oktober 2008 2:59 14