2009 BMW 330D rear entertainment
[x] Cancel search: rear entertainmentPage 51 of 268
Controls
49Reference
At a glance
Driving tips
Communications
Navigation
Entertainment
Mobility
Transporting children safely
The right place for children
Do not leave children unattended in the
vehicle, otherwise they could endanger
themselves and/or other persons by opening
the doors, for example. <
The rear center seat is not suitable for installing
child-restraint systems for all age groups,
approved for the age group in question.
Children always in the rear
Accident research has shown that the safest
place for children is on the rear seat.
Children under the age of 13 or smaller
than 5 ft/150 cm may be transported only
in the rear in suitable child-restraint systems
appropriate for their age, weight and size. Oth-
erwise there is an increase d risk of injury in the
event of an accident. <
Children 13 years of age or older must be buck-
led in with a safety belt as soon as there no
longer is any child-restraint system that is
appropriate for their age, size and weight.
Exception for front passenger seat
Should it be necessa ry to use a child-
restraint system on the front passenger
seat, the front and side airbags for the front pas-
senger must be deactiva ted. Otherwise, a child
traveling on that seat w ill face a significant risk
of injury if the airbags are triggered off, even
with a child-restraint system. <
For more information on automatic deactivation
of the front passenger airbags refer to page 88.
Installing child-restraint
systems
Observe the child-restraint system man-
ufacturer's instructio ns when selecting,
installing and using child -restraint systems.
Otherwise the protective effect may be dimin-
ished. < Standard child-restraint systems are designed
to be secured with a lap be
lt or with the lap-belt
section of a lap-and-shoulder belt. Incorrectly
or improperly installed child-restraint systems
can increase the risk of injury to children.
Always follow the installation instructions for
the system with the greatest care.
On the front passenger seat
After installing a child-restraint system on
the front passenger seat, make sure that
the front and side airbags for the front passen-
ger are deactivated, ot herwise there is an
increased risk of injury if the airbags deploy. <
Backrest width*
The backrest width of the front passen-
ger's seat must be at its widest possible
setting. Do not change the setting after install-
ing the child seat. Othe rwise the child seat's
stability on the front passenger's seat is lim-
ited. <
1. Adjust the backrest width to its widest set-
ting, refer to page 43.
2. Install the child seat.
Child seat security
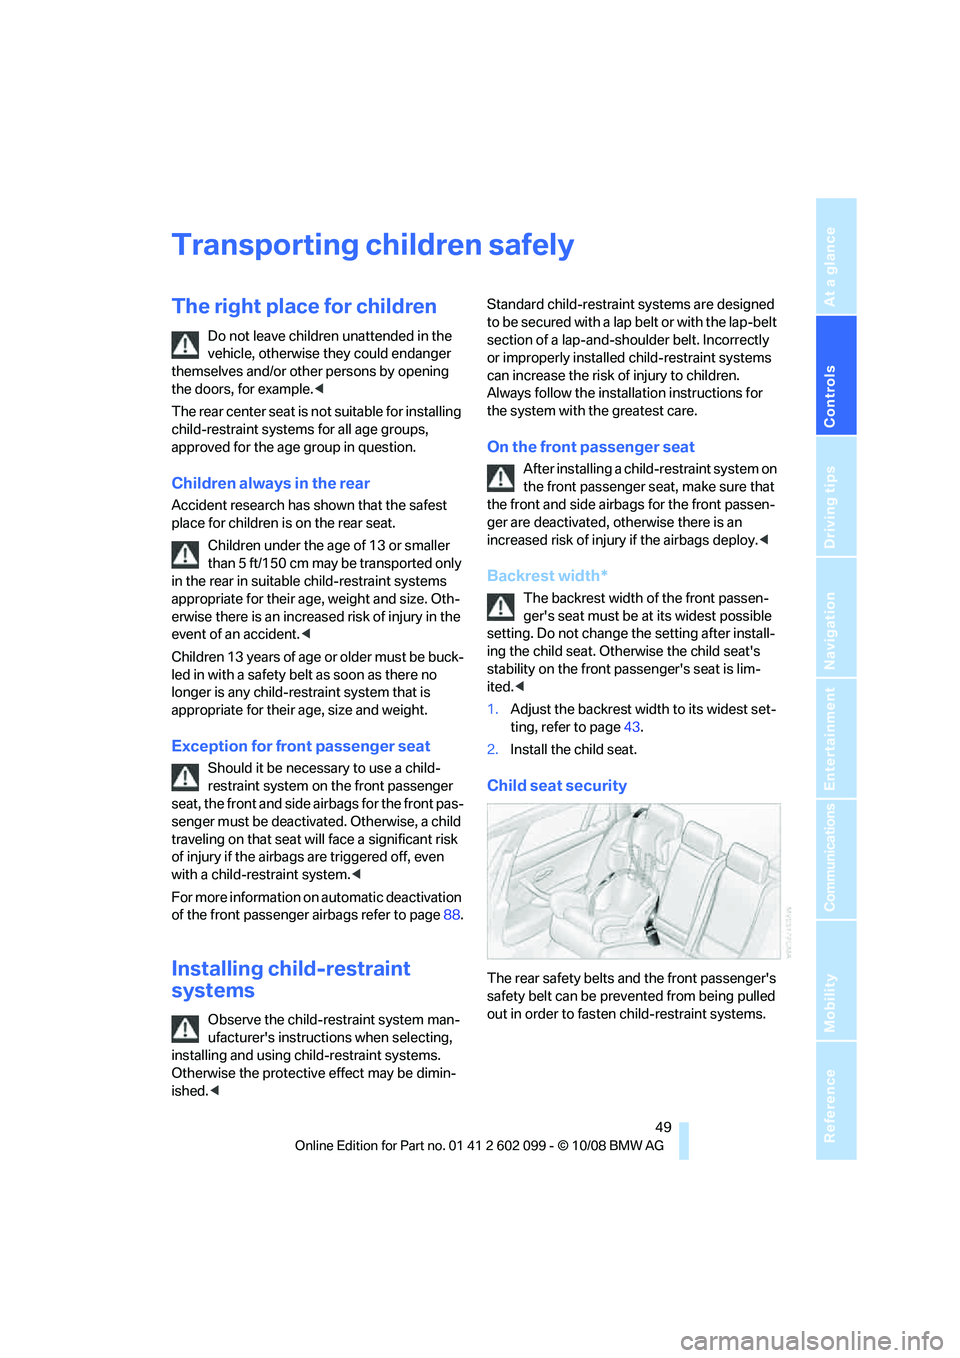
The rear safety belts and the front passenger's
safety belt can be prevented from being pulled
out in order to fasten child-restraint systems.
ba8_E9091_cic.book Seite 49 Mittwoch, 29. Oktober 2008 2:59 14
Page 53 of 268
Controls
51Reference
At a glance
Driving tips
Communications
Navigation
Entertainment
Mobility
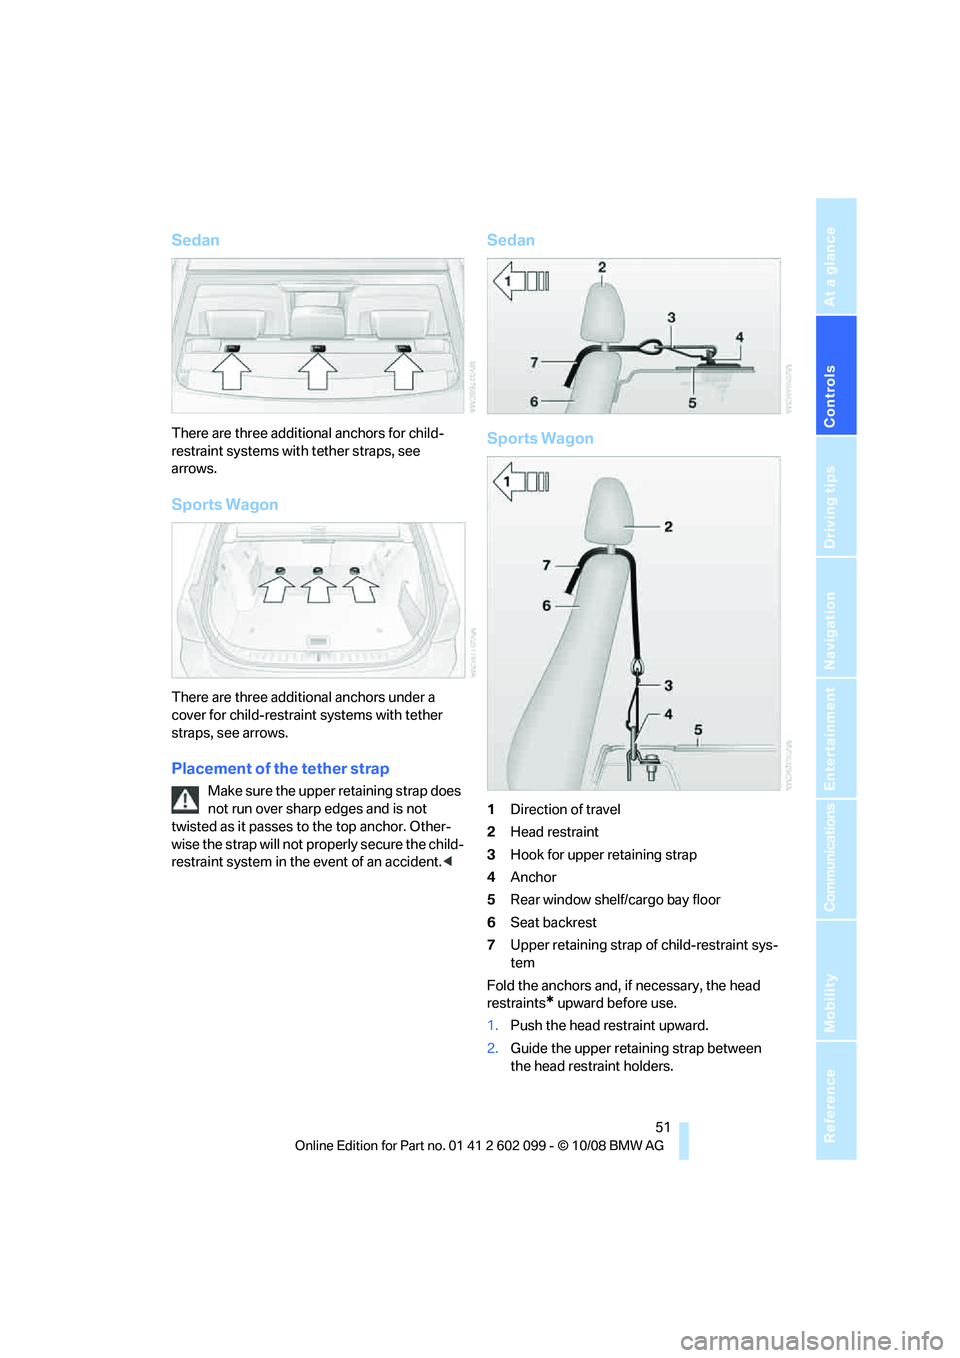
Sedan
There are three additional anchors for child-
restraint systems with tether straps, see
arrows.
Sports Wagon
There are three additional anchors under a
cover for child-restraint systems with tether
straps, see arrows.
Placement of the tether strap
Make sure the upper retaining strap does
not run over sharp edges and is not
twisted as it passes to the top anchor. Other-
wise the strap will not pr operly secure the child-
restraint system in the event of an accident. <
Sedan
Sports Wagon
1Direction of travel
2 Head restraint
3 Hook for upper retaining strap
4 Anchor
5 Rear window shelf/cargo bay floor
6 Seat backrest
7 Upper retaining strap of child-restraint sys-
tem
Fold the anchors and, if necessary, the head
restraints
* upward before use.
1. Push the head restraint upward.
2. Guide the upper retaining strap between
the head restraint holders.
ba8_E9091_cic.book Seite 51 Mittwoch, 29. Oktober 2008 2:59 14
Page 57 of 268
Controls
55Reference
At a glance
Driving tips
Communications
Navigation
Entertainment
Mobility
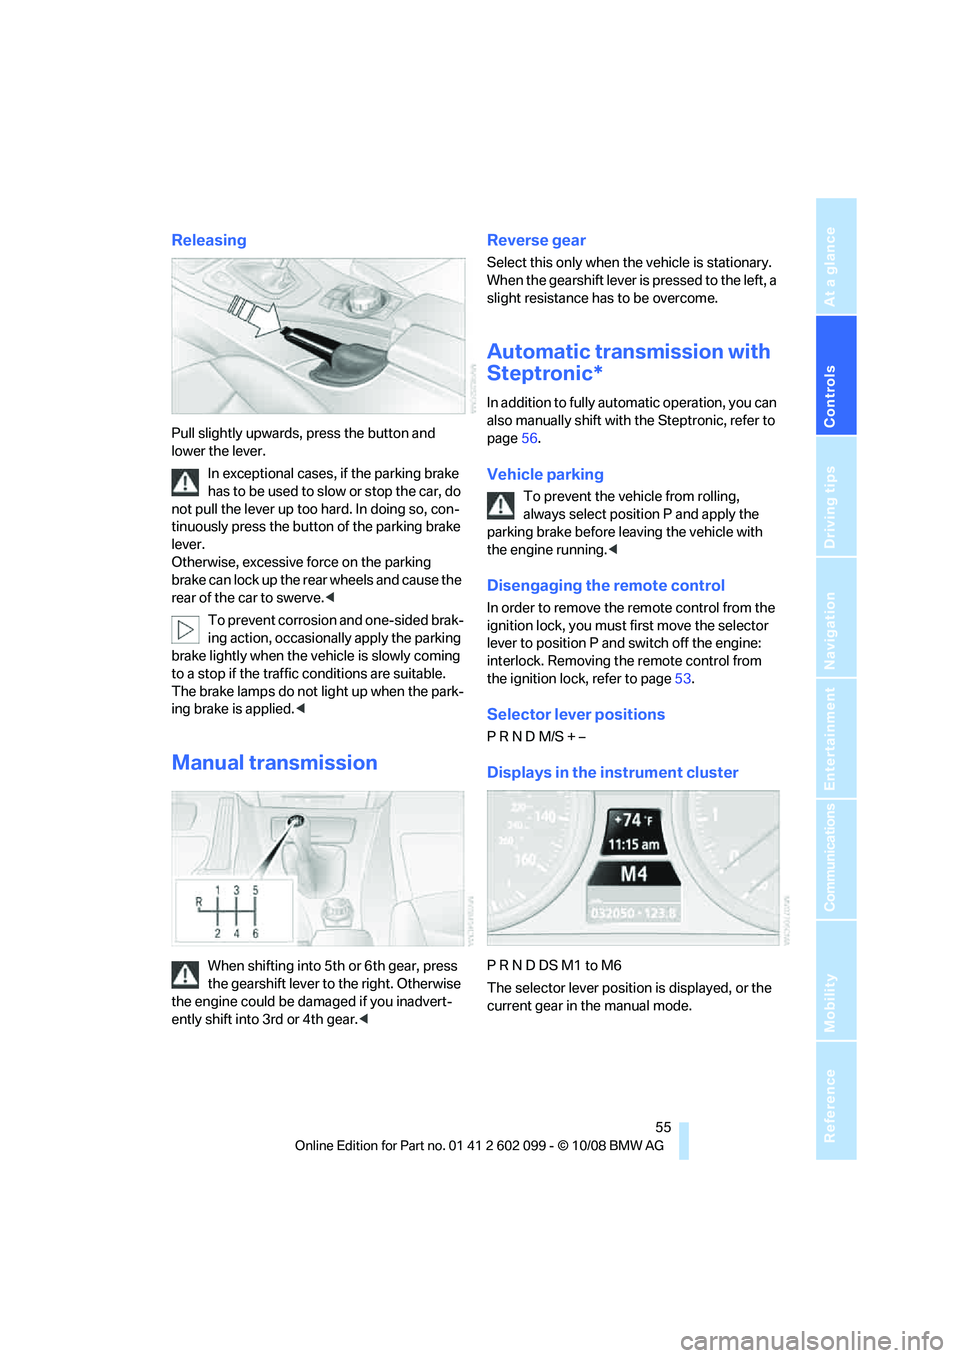
Releasing
Pull slightly upwards, press the button and
lower the lever.In exceptional cases, if the parking brake
has to be used to slow or stop the car, do
not pull the lever up too hard. In doing so, con-
tinuously press the button of the parking brake
lever.
Otherwise, excessive force on the parking
brake can lock up the rear wheels and cause the
rear of the car to swerve. <
To prevent corrosion and one-sided brak-
ing action, occasionally apply the parking
brake lightly when the vehicle is slowly coming
to a stop if the traffic conditions are suitable.
The brake lamps do not light up when the park-
ing brake is applied. <
Manual transmission
When shifting into 5th or 6th gear, press
the gearshift lever to the right. Otherwise
the engine could be da maged if you inadvert-
ently shift into 3rd or 4th gear. <
Reverse gear
Select this only when the vehicle is stationary.
When the gearshift lever is pressed to the left, a
slight resistance has to be overcome.
Automatic transmission with
Steptronic*
In addition to fully automatic operation, you can
also manually shift with the Steptronic, refer to
page 56.
Vehicle parking
To prevent the vehicle from rolling,
always select position P and apply the
parking brake before leaving the vehicle with
the engine running. <
Disengaging the remote control
In order to remove the remote control from the
ignition lock, you must first move the selector
lever to position P and switch off the engine:
interlock. Removing th e remote control from
the ignition lock, refer to page 53.
Selector lever positions
P R N D M/S + –
Displays in the instrument cluster
P R N D DS M1 to M6
The selector lever position is displayed, or the
current gear in the manual mode.
ba8_E9091_cic.book Seite 55 Mittwoch, 29. Oktober 2008 2:59 14
Page 61 of 268
Controls
59Reference
At a glance
Driving tips
Communications
Navigation
Entertainment
Mobility
Do not use the washers if there is any
danger that the fluid will freeze on the
windshield. If you do, your vision could be
obscured. Antifreeze should therefore be
added to the fluid, refer to Washer fluid.
Do not use the washers when the washer fluid
reservoir is empty, otherwise you will damage
the washer pump. <
Windshield washer nozzles
The windshield washer nozzles are heated
automatically while the engine is running or the
ignition is switched on
*.
Sports Wagon: re ar window wiper
1Intermittent operation. When reverse gear
is engaged, the system switches to contin-
uous operation.
2 Cleaning the rear window
The rear window wiper does not move if the
lever is in position 1 before the ignition is
switched on.
To switch on the rear window wiper:
1. Move the lever to its home position.
2. Reselect the desired position.
Do not use the washers when the washer
fluid reservoir is empty, otherwise you will
damage the washer pump. <
Washer fluid
Washer fluid antifreeze is flammable.
Therefore, keep it away from ignition
sources and only store it in the closed original
container that is kept ou t of reach of children,
otherwise there is a risk of personal injury.
Comply with the instructions on the con-
tainer. <
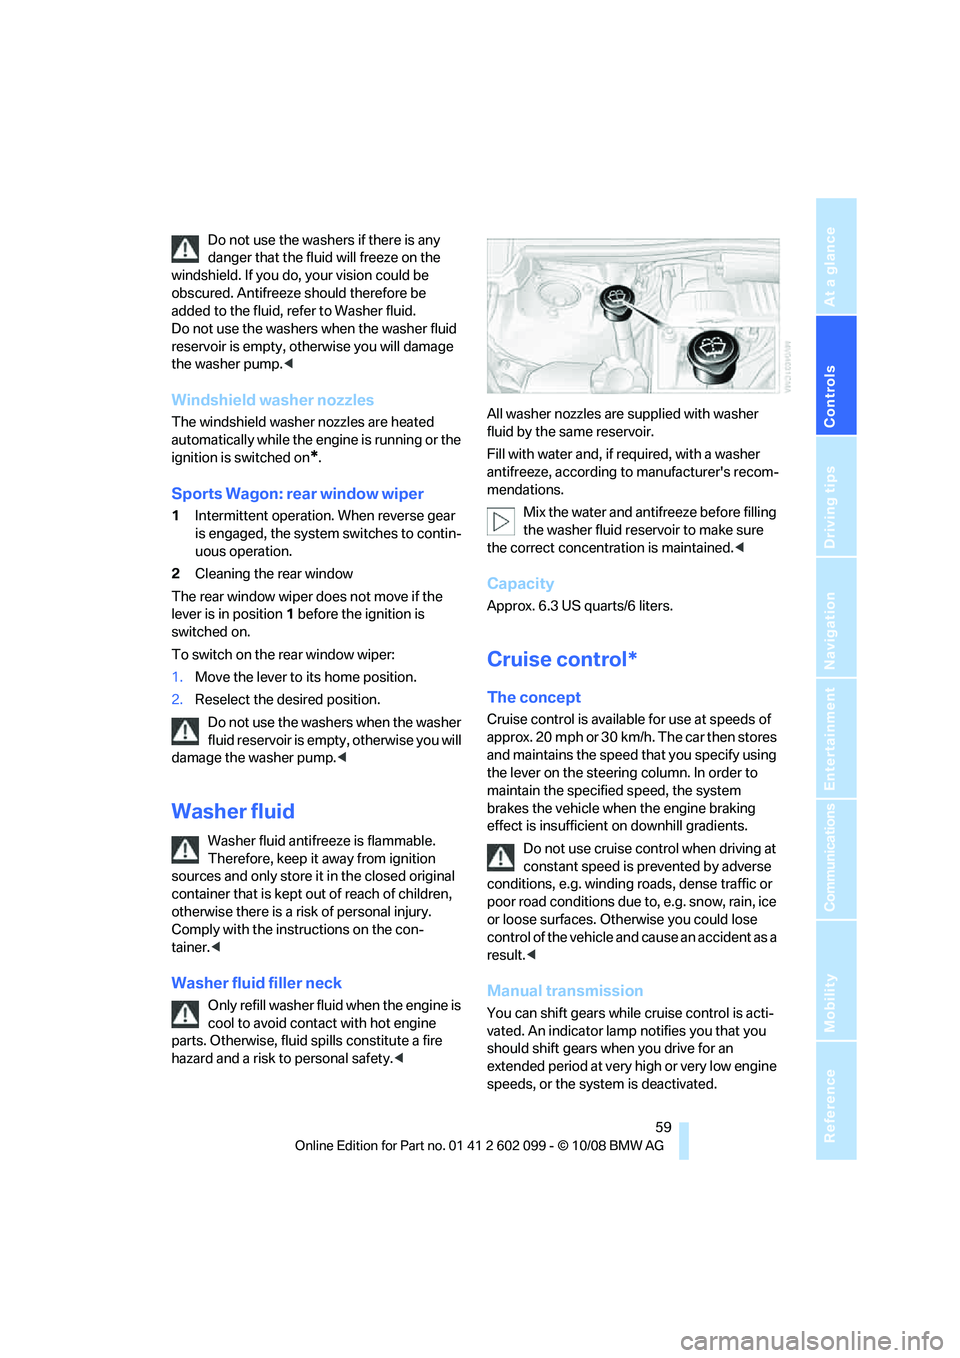
Washer fluid filler neck
Only refill washer fluid when the engine is
cool to avoid contac t with hot engine
parts. Otherwise, fluid spills constitute a fire
hazard and a risk to personal safety.
Fill with water and, if required, with a washer
antifreeze, according to manufacturer's recom-
mendations.
Mix the water and antifreeze before filling
the washer fluid rese rvoir to make sure
the correct concentration is maintained. <
Capacity
Approx. 6.3 US quarts/6 liters.
Cruise control*
The concept
Cruise control is available for use at speeds of
approx. 20 mph or 30 km/h. The car then stores
and maintains the speed that you specify using
the lever on the steering column. In order to
maintain the specified speed, the system
brakes the vehicle when the engine braking
effect is insufficient on downhill gradients.
Do not use cruise control when driving at
constant speed is prevented by adverse
conditions, e.g. winding roads, dense traffic or
poor road conditions due to, e.g. snow, rain, ice
or loose surfaces. Otherwise you could lose
control of the vehicle and cause an accident as a
result. <
Manual transmission
You can shift gears while cruise control is acti-
vated. An indicator lamp notifies you that you
should shift gears wh en you drive for an
extended period at very high or very low engine
speeds, or the system is deactivated.
ba8_E9091_cic.book Seite 59 Mittwoch, 29. Oktober 2008 2:59 14
Page 83 of 268
Controls
81Reference
At a glance
Driving tips
Communications
Navigation
Entertainment
Mobility
can drown out the PDC signal. Therefore,
always drive cautiously, otherwise there is a risk
of personal injury or property damage.<
Driving stability control
systems
Your BMW has a number of systems that help
to maintain the vehicle's stability even in
adverse driving conditions.
Antilock Brake System ABS
ABS prevents locking of the wheels during
braking. Safe steering response is maintained
even during full braking. Active safety is thus
increased.
The ABS is operational every time you start the
engine. Braking safely, refer to page 116.
Electronic brake-force distribution
The system controls the brake pressure in the
rear wheels to ensure stable braking behavior.
Dynamic Brake Control DBC
When you apply the brakes rapidly, this system
automatically produces the maximum braking
force boost and thus help s to achieve the short-
est possible braking distance during full brak-
ing. This system exploits all of the benefits pro-
vided by ABS.
Do not reduce the pressure on the brake for the
duration of the full braking application.
Dynamic Stability Control DSC
DSC prevents the driving wheels from losing
traction when you pull away from rest or accel-
erate. The system also recognizes unstable
driving conditions, for example if the rear of the
car is about to swerve or if momentum is acting
at an angle past the front wheels. In these
cases, DSC helps the ve hicle maintain a safe
course within physical lim its by reducing engine
output and through braking actions at the indi-
vidual wheels.
The laws of physics cannot be repealed,
even with DSC. An appropriate driving style always remains the responsibility of the
driver. Therefore, do not reduce the additional
s a f e t y m a r g i n a g a i n b y t a k i n g r i s k s , a s t h i s c o u l d
result in an accident.
<
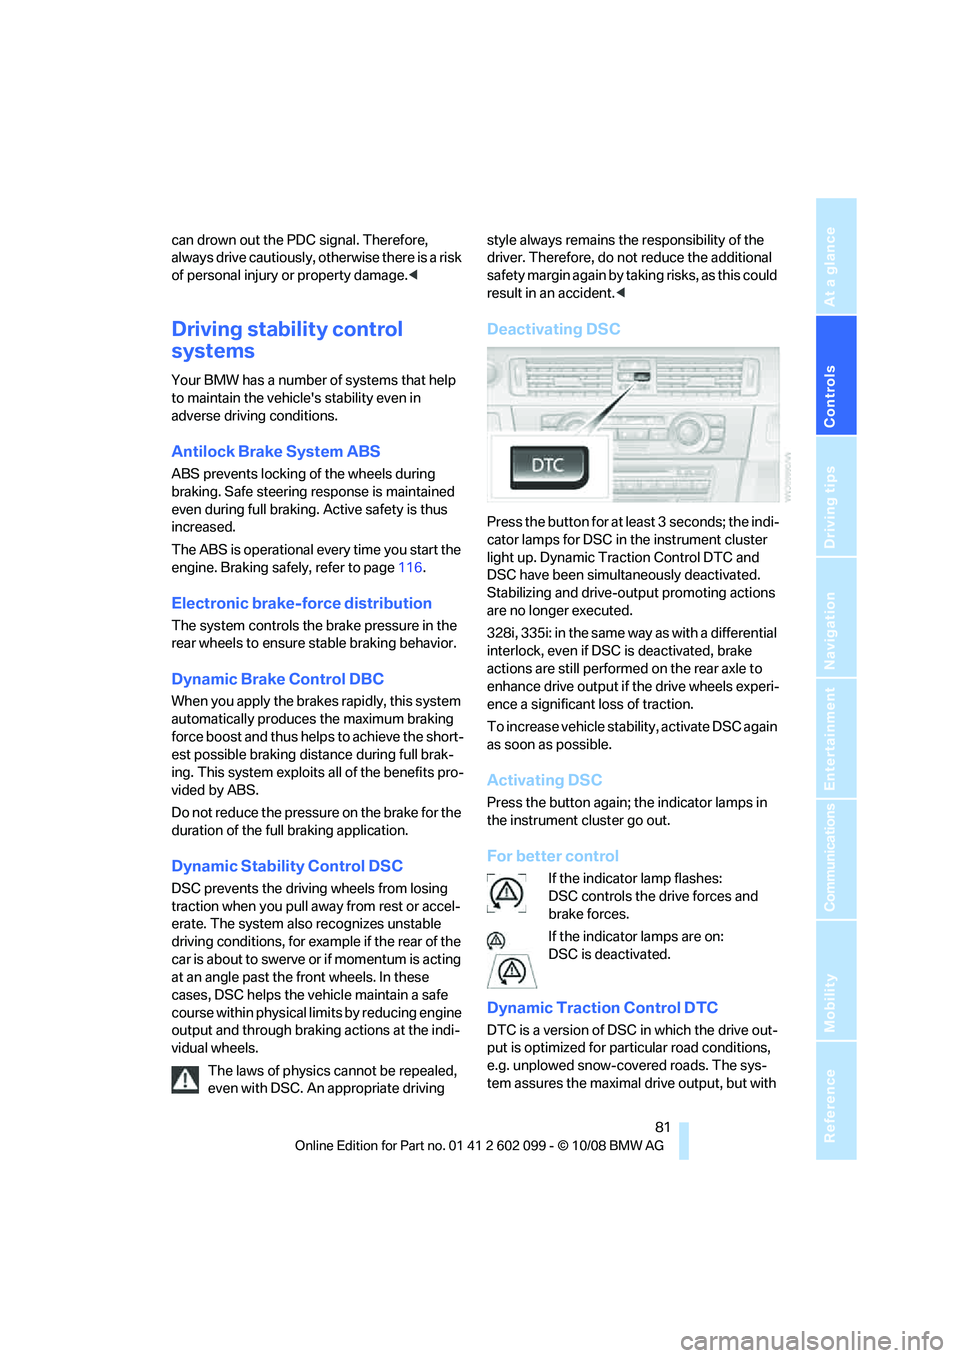
Deactivating DSC
Press the button for at least 3 seconds; the indi-
cator lamps for DSC in the instrument cluster
light up. Dynamic Traction Control DTC and
DSC have been simultaneously deactivated.
Stabilizing and drive-output promoting actions
are no longer executed.
328i, 335i: in the same way as with a differential
interlock, even if DSC is deactivated, brake
actions are still performed on the rear axle to
enhance drive output if the drive wheels experi-
ence a significant loss of traction.
To increase vehicle stability, activate DSC again
as soon as possible.
Activating DSC
Press the button again; the indicator lamps in
the instrument cluster go out.
For better control
If the indicator lamp flashes:
DSC controls the drive forces and
brake forces.
If the indicator lamps are on:
DSC is deactivated.
Dynamic Traction Control DTC
DTC is a version of DSC in which the drive out-
put is optimized for particular road conditions,
e.g. unplowed snow-covered roads. The sys-
tem assures the maximal drive output, but with
ba8_E9091_cic.book Seite 81 Mittwoch, 29. Oktober 2008 2:59 14
Page 91 of 268
Controls
89Reference
At a glance
Driving tips
Communications
Navigation
Entertainment
Mobility
activated, refer to Status of front passenger air-
bags below. <
Before transporting a child on the front
passenger seat, read the safety precau-
tions and handling instructions under Trans-
porting children safely, refer to page 49.
The front and side airbags can also be deacti-
vated by adolescents and adults sitting in cer-
tain positions; the indi cator lamp for the front
passenger airbags comes on. In such cases, the
passenger should change his or her sitting
position so that the front passenger airbags are
activated and the indicator lamp goes out. If the
desired airbag status cannot be achieved by
changing the sitting position, transport the rele-
vant passenger on a rear seat. Do not attach
seat covers, seat cushio n padding, ball mats or
other items to the front passenger seat unless
they are specifically recommended by BMW.
Do not place any items under the seat which
could press against the seat from below. Other-
wise a correct analysis of the seat cushion is not
ensured. <
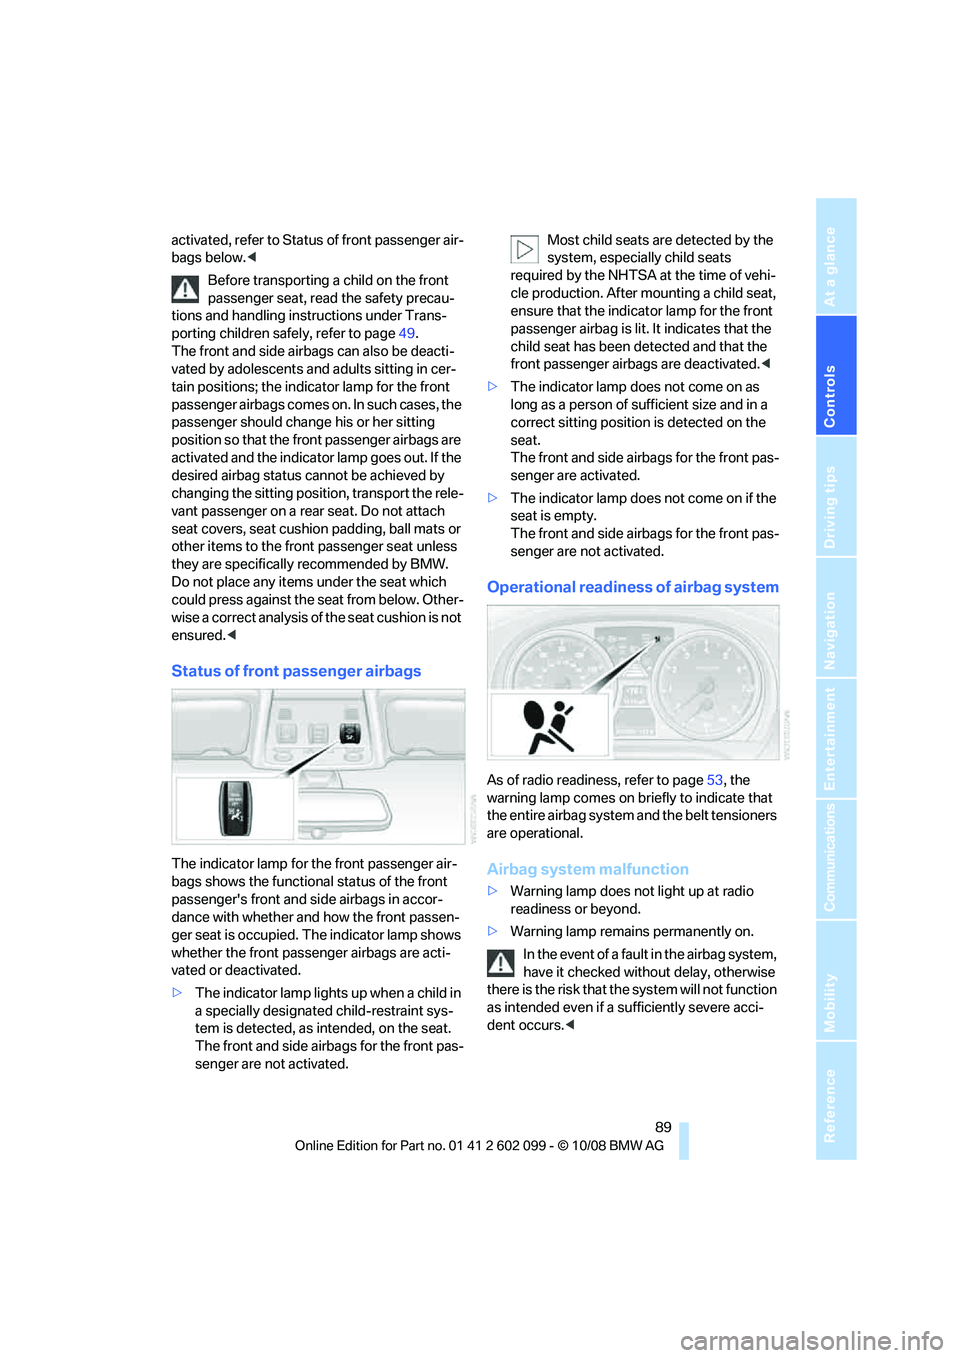
Status of front passenger airbags
The indicator lamp for the front passenger air-
bags shows the functional status of the front
passenger's front and side airbags in accor-
dance with whether and how the front passen-
ger seat is occupied. Th e indicator lamp shows
whether the front passenger airbags are acti-
vated or deactivated.
> The indicator lamp lights up when a child in
a specially designated child-restraint sys-
tem is detected, as intended, on the seat.
The front and side airbags for the front pas-
senger are not activated. Most child seats are detected by the
system, especially child seats
required by the NHTSA at the time of vehi-
cle production. After mounting a child seat,
ensure that the indica tor lamp for the front
passenger airbag is lit. It indicates that the
child seat has been detected and that the
front passenger airbags are deactivated. <
> The indicator lamp does not come on as
long as a person of sufficient size and in a
correct sitting position is detected on the
seat.
The front and side airbags for the front pas-
senger are activated.
> The indicator lamp does not come on if the
seat is empty.
The front and side airbags for the front pas-
senger are not activated.
Operational readine ss of airbag system
As of radio readiness, refer to page 53, the
warning lamp comes on br iefly to indicate that
the entire airbag system and the belt tensioners
are operational.
Airbag system malfunction
> Warning lamp does not light up at radio
readiness or beyond.
> Warning lamp remains permanently on.
In the event of a fault in the airbag system,
have it checked without delay, otherwise
there is the risk that th e system will not function
as intended even if a sufficiently severe acci-
dent occurs. <
ba8_E9091_cic.book Seite 89 Mittwoch, 29. Oktober 2008 2:59 14
Page 95 of 268
Controls
93Reference
At a glance
Driving tips
Communications
Navigation
Entertainment
Mobility
3.Push button 1 up or down to select the
desired brightness level.
4. Press button 2.
The display again shows the outside tem-
perature and the time.
Interior lamps
The interior lamps, footwell lamps*, entry
lamps
*, cargo bay lamp an d courtesy lamps*
are controlled automatically.
The LEDs for the courtesy lamps
are set in the
door handles and illuminate the ground in front
of the doors.
To avoid draining the battery, all lamps
inside the car are switched off about
8 minutes after the ignition is switched off, refer
to Start/stop button on page 53.<
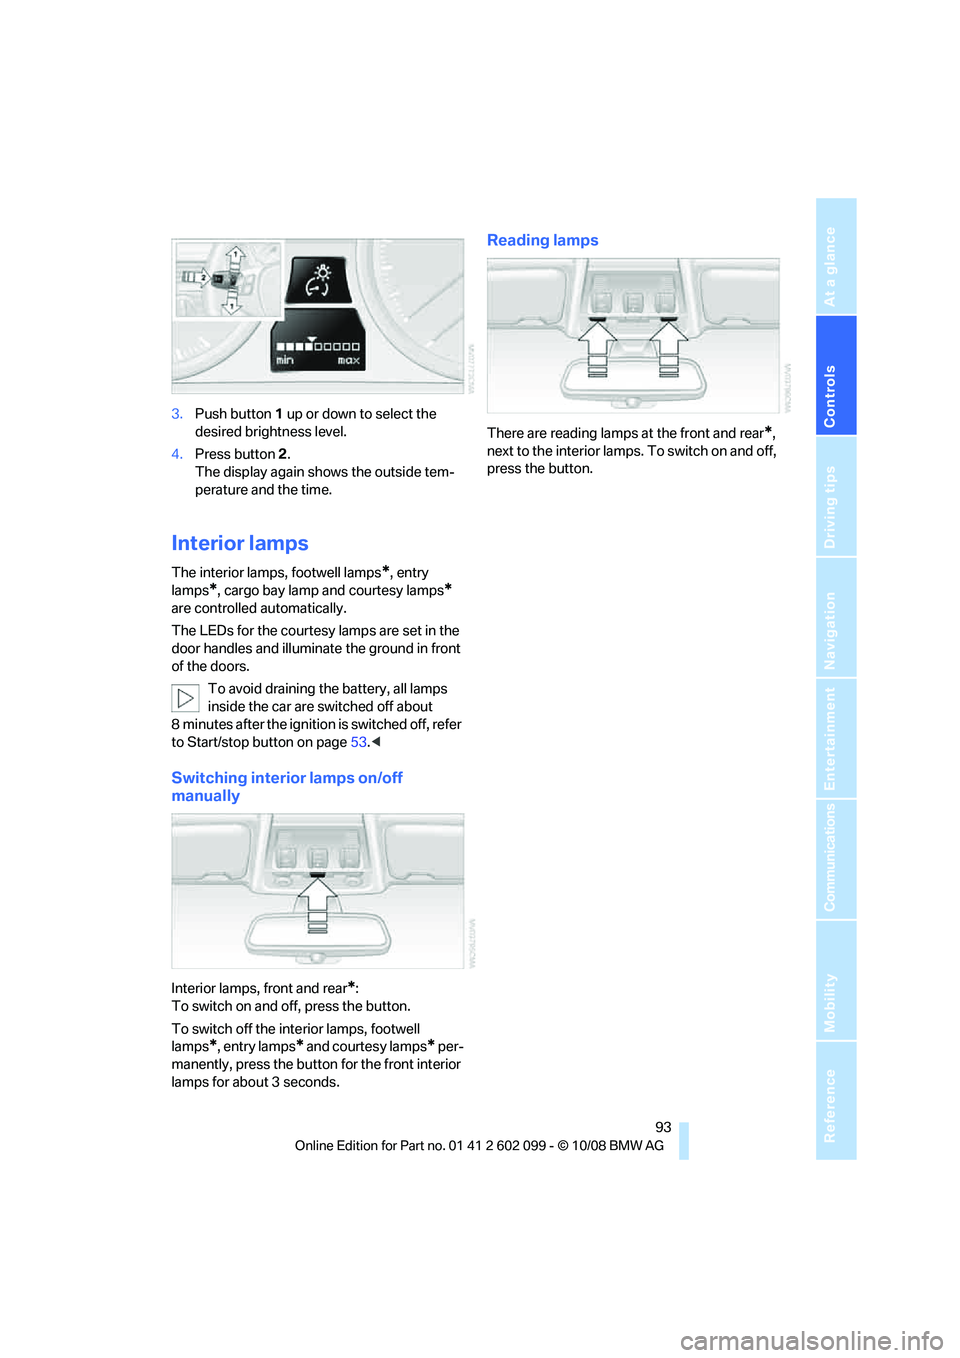
Switching interior lamps on/off
manually
Interior lamps, front and rear*:
To switch on and off, press the button.
To switch off the inte rior lamps, footwell
lamps
*, entry lamps* and courtesy lamps* per-
manently, press the button for the front interior
lamps for about 3 seconds.
Reading lamps
There are reading lamps at the front and rear*,
next to the interior lamps. To switch on and off,
press the button.
ba8_E9091_cic.book Seite 93 Mittwoch, 29. Oktober 2008 2:59 14
Page 99 of 268
Controls
97Reference
At a glance
Driving tips
Communications
Navigation
Entertainment
Mobility
Rear window defroster
The defroster is switched off auto-
matically after a certain time.
Depending on your vehicle's
equipment, the upper wires serve as an antenna
and are not part of the rear window defroster.
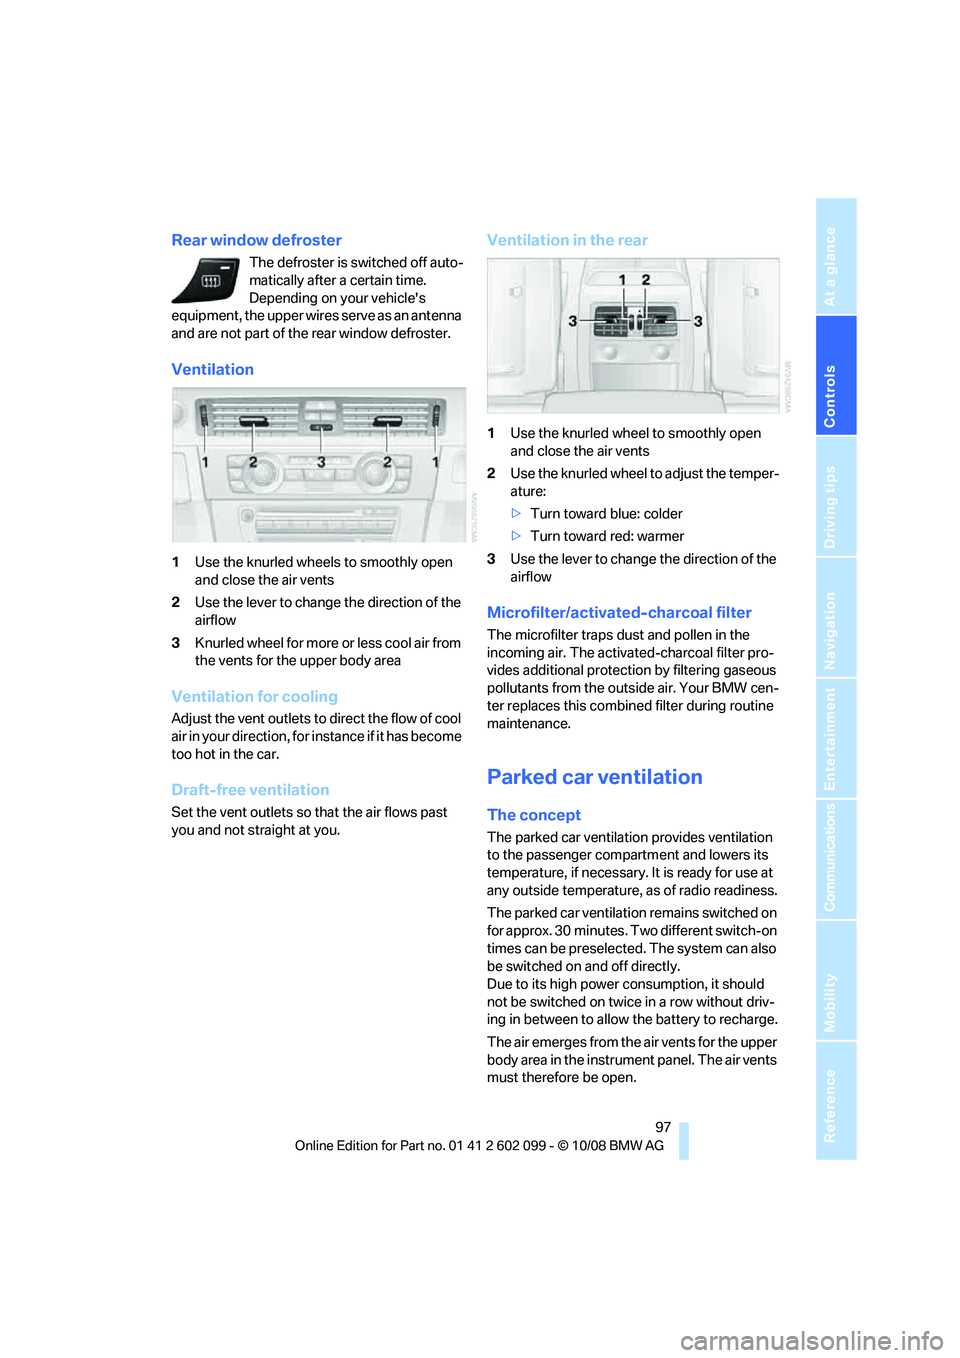
Ventilation
1 Use the knurled wheels to smoothly open
and close the air vents
2 Use the lever to change the direction of the
airflow
3 Knurled wheel for more or less cool air from
the vents for the upper body area
Ventilation for cooling
Adjust the vent outlets to direct the flow of cool
air in your direction, for instance if it has become
too hot in the car.
Draft-free ventilation
Set the vent outlets so that the air flows past
you and not straight at you.
Ventilation in the rear
1Use the knurled wheel to smoothly open
and close the air vents
2 Use the knurled wheel to adjust the temper-
ature:
>Turn toward blue: colder
> Turn toward red: warmer
3 Use the lever to change the direction of the
airflow
Microfilter/activated-charcoal filter
The microfilter traps dust and pollen in the
incoming air. The activated-charcoal filter pro-
vides additional protection by filtering gaseous
pollutants from the outs ide air. Your BMW cen-
ter replaces this combined filter during routine
maintenance.
Parked car ventilation
The concept
The parked car ventilation provides ventilation
to the passenger compartment and lowers its
temperature, if necessary. It is ready for use at
any outside temperature, as of radio readiness.
The parked car ventilation remains switched on
for approx. 30 minutes. Two different switch-on
times can be preselected. The system can also
be switched on and off directly.
Due to its high power consumption, it should
not be switched on twice in a row without driv-
ing in between to allow the battery to recharge.
The air emerges from the air vents for the upper
body area in the instrume nt panel. The air vents
must therefore be open.
ba8_E9091_cic.book Seite 97 Mittwoch, 29. Oktober 2008 2:59 14