2009 BMW 328I XDRIVE over heat
[x] Cancel search: over heatPage 50 of 268
Adjustments
48
The glass of the mirror on the passenger
side tilts slightly do
wn. This allows the
driver to see the area immediately adjacent
to the vehicle, e.g. a curb, when backing into
a parking space.
Deactivating
Push the switch to the position for the passen-
ger-side mirror, arrow 2.
Interior rearview mirror
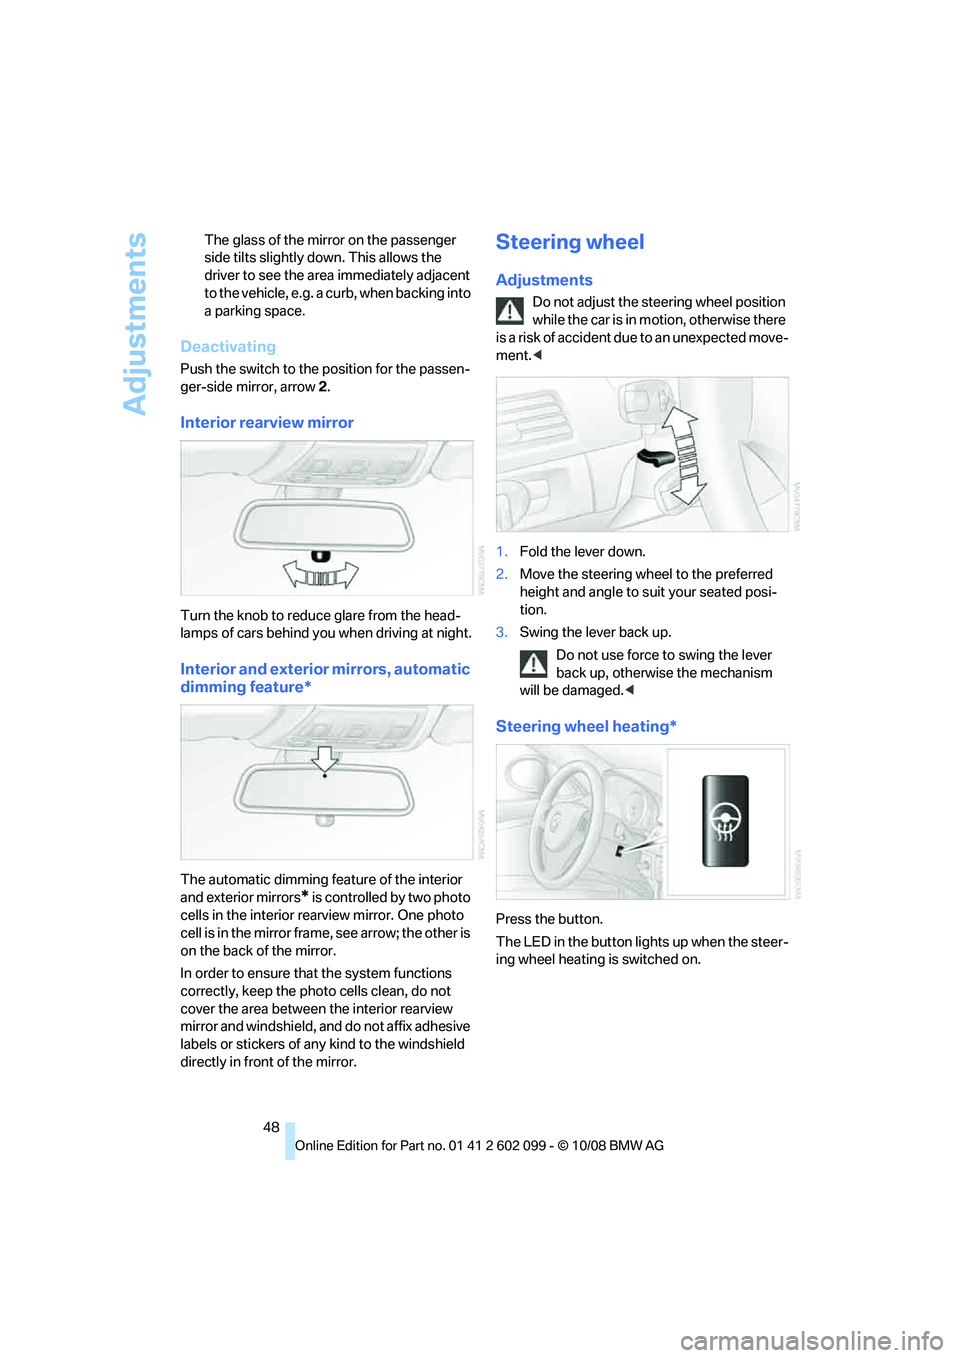
Turn the knob to reduce glare from the head-
lamps of cars behind yo u when driving at night.
Interior and exterior mirrors, automatic
dimming feature*
The automatic dimming fe ature of the interior
and exterior mirrors
* is controlled by two photo
cells in the interior re arview mirror. One photo
cell is in the mirror frame, see arrow; the other is
on the back of the mirror.
In order to ensure that the system functions
correctly, keep the photo cells clean, do not
cover the area between the interior rearview
mirror and windshield, and do not affix adhesive
labels or stickers of an y kind to the windshield
directly in front of the mirror.
Steering wheel
Adjustments
Do not adjust the steering wheel position
while the car is in mo tion, otherwise there
is a risk of accident due to an unexpected move-
ment. <
1. Fold the lever down.
2. Move the steering wheel to the preferred
height and angle to suit your seated posi-
tion.
3. Swing the lever back up.
Do not use force to swing the lever
back up, otherwise the mechanism
will be damaged. <
Steering wheel heating*
Press the button.
The LED in the button lights up when the steer-
ing wheel heating is switched on.
ba8_E9091_cic.book Seite 48 Mittwoch, 29. Oktober 2008 2:59 14
Page 56 of 268
Driving
54
place the transmission in neutral or engage
selector lever position P
and forcefully apply the
parking brake to prevent the car from moving. <
Avoid frequent starting in quick succes-
sion as well as repeated start attempts in
which the engine does no t start. Otherwise, the
fuel is not burned or incompletely burned and
there is a danger of overheating and damaging
the catalytic converter. <
Do not wait for the engine to warm up while the
vehicle remains stationary. Start driving right
away, but at moderate engine speeds.
Manual transmission
Remote control in the ignition lock or, with con-
venient access, inside the vehicle, refer to
page 34.
1. Depress the brake.
2. Depress the clutch and shift to neutral posi-
tion.
3. Press the start/stop button.
The starter operates automatically for a certain
time, and stops automatically as soon as the
engine has started.
Automatic transmission
Remote control in the ignition lock or, with con-
venient access, inside the vehicle, refer to
page 34.
1. Depress the brake.
2. Move the selector lever to position P.
3. Press the start/stop button.
The starter operates automatically for a certain
time, and stops automatically as soon as the
engine has started.
Diesel engine
When the engine is cold and temperatures are
below approx. 32 7/06 , the starting process
may take a little more time due to automatic
preheating. The preheating indicator lamp in
the instrument cluster comes on; at the same
time a message appears on the Control Display.
Switching off the engine
Always take the remote control with you
when you leave the vehicle.
When parking, apply th e parking brake force-
fully, otherwise the vehicle could begin to roll. <
Manual transmission
1.With the car at a standstill, press the start/
stop button.
2. Shift into first gear or reverse.
3. Forcefully apply the parking brake.
4. Removing the remote control from the igni-
tion lock, refer to page 53.
Automatic transmission
1. With the car at a standstill, move the selec-
tor lever to position P.
2. Press the start/stop button.
3. Forcefully apply the parking brake.
4. Removing the remote control from the igni-
tion lock, refer to page 53.
Parking brake
The parking brake is primarily intended to pre-
vent the vehicle from rolling while parked; it
brakes the rear wheels.
Indicator lamp
The indicator lamp is lit, and when you
drive off an acoustic signal sounds in
addition. The parking brake is still
applied.
Indicator lamp for Canadian models.
Applying
The lever locks in po sition automatically.
ba8_E9091_cic.book Seite 54 Mittwoch, 29. Oktober 2008 2:59 14
Page 89 of 268
Controls
87Reference
At a glance
Driving tips
Communications
Navigation
Entertainment
Mobility
stop and check your tires as soon as possible,
and inflate them to the proper pressure. Driving
on a significantly underinflated tire causes the
tire to overheat and can lead to tire failure.
Underinflation also redu ces fuel efficiency and
tire tread life, and may affect the vehicle’s han-
dling and stopping ability. Please note that the
TPMS is not a substitute for proper tire mainte-
nance, and it is the driver’s responsibility to
maintain correct tire pressure, even if underin-
flation has not reached the level at which the
TPMS low tire pressure telltale illuminates.
The TPMS malfunction indicator is combined
with the low tire pressure telltale. When the sys-
tem detects a malfunction, the telltale will flash
for approximately one minute and then remain
continuously lit. This sequence will continue
upon subsequent vehicle startups as long as
the malfunction exists. When the malfunction
indicator is illuminated, the system may not be
able to detect or signal low tire pressure as
intended. TPMS malfunctions may occur for a
variety of reasons, including the installation of
replacement or alternate tires or wheels on the
vehicle that prevent the TPMS from functioning
properly. Always check the TPMS malfunction
telltale after replacing one or more tires or
wheels on your vehicle to ensure that the
replacement or alternate tires and wheels allow
the TPMS to continue to function properly.
Active steering*
The concept
Active steering varies the turning angle of the
front wheels in relation to steering wheel move-
ments. It also varies the steering force required
to turn the wheels depending on the speed at
which you are driving.
When you are driving in the low road-speed
range, e.g. in a town or when parking, the steer-
ing angle increases, i.e. the steering becomes
very direct, and less effort is required to turn the
wheels. In the higher speed range, on the other
hand, the steering angle is reduced more and
more. This improves the handling capability of
your BMW over the entire speed range. In critical situations,
the system can make tar-
geted corrections to the steering angle pro-
vided by the driver and thus stabilize the vehicle
before the driver inte rvenes. This stabilizing
intervention is simult aneously deactivated
when DSC is switched off, refer to page 81.
Malfunction
The warning lamps come on. Active
steering is no longer operational. At
low speeds, greater steering wheel
movements are required, whereas at
higher speeds the vehicle reacts more sensi-
tively to steering wheel movements. The stabil-
ity-enhancing feature may also be deactivated.
Drive cautiously and thin k well ahead. Have the
system checked.
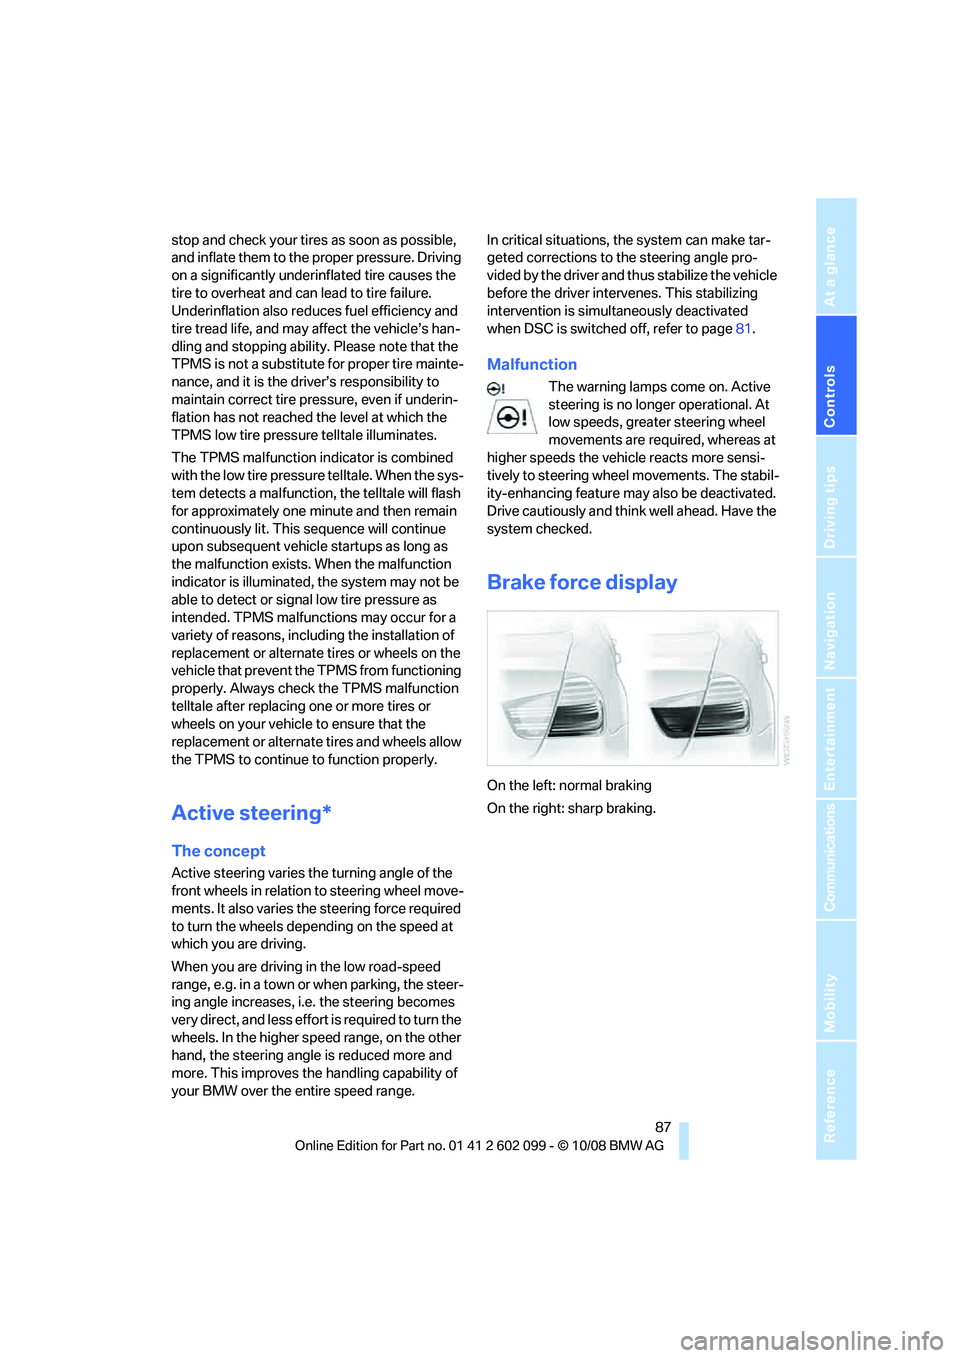
Brake force display
On the left: normal braking
On the right: sharp braking.
ba8_E9091_cic.book Seite 87 Mittwoch, 29. Oktober 2008 2:59 14
Page 98 of 268
Climate
96
You can reactivate the
automatic mode for the
air flow rate with the AUTO button.
The air flow rate may be reduced or the blower
may be switched off entire ly to save on battery
power. The display remains the same.
Switching the system on/off
With the blower at its lowest setting, press the
left side of the button to switch off the auto-
matic climate control. All displays are cleared
except for the rear window defroster if it is
switched on.
Press any button except REST or rear window
defroster to reactivate the automatic climate
control.
The recirculated-air mo de is switched on
when you switch off the automatic cli-
mate control. If the air qu ality deteriorates or the
window fogs over, switch the system back on
and increase the air volume.<
Automatic recirculated-air control
AUC/Recirculated-air mode
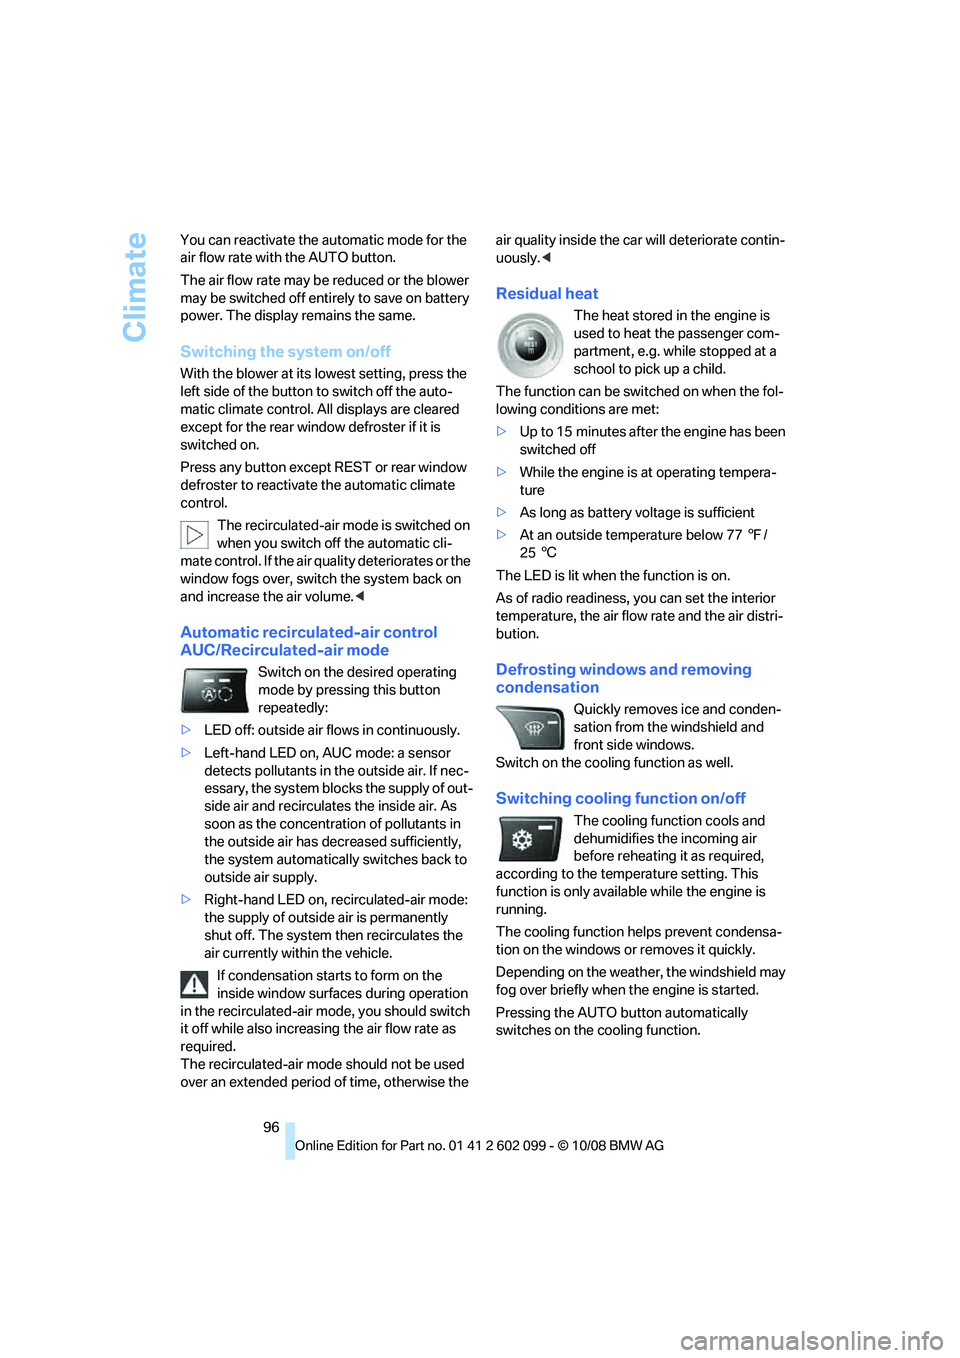
Switch on the desired operating
mode by pressing this button
repeatedly:
> LED off: outside air flows in continuously.
> Left-hand LED on, AUC mode: a sensor
detects pollutants in the outside air. If nec-
essary, the system blocks the supply of out-
side air and recirculates the inside air. As
soon as the concentration of pollutants in
the outside air has decreased sufficiently,
the system automatically switches back to
outside air supply.
> Right-hand LED on, recirculated-air mode:
the supply of outside air is permanently
shut off. The system then recirculates the
air currently within the vehicle.
If condensation star ts to form on the
inside window surfaces during operation
in the recirculated-air mode, you should switch
it off while also increasi ng the air flow rate as
required.
The recirculated-air mode should not be used
over an extended period of time, otherwise the air quality inside the ca
r will deteriorate contin-
uously. <
Residual heat
The heat stored in the engine is
used to heat the passenger com-
partment, e.g. while stopped at a
school to pick up a child.
The function can be switched on when the fol-
lowing conditions are met:
> Up to 15 minutes after the engine has been
switched off
> While the engine is at operating tempera-
ture
> As long as battery voltage is sufficient
> At an outside temperature below 77 7/
25 6
The LED is lit when the function is on.
As of radio readiness, you can set the interior
temperature, the air flow rate and the air distri-
bution.
Defrosting window s and removing
condensation
Quickly removes ice and conden-
sation from the windshield and
front side windows.
Switch on the cooling function as well.
Switching cooling function on/off
The cooling function cools and
dehumidifies the incoming air
before reheating it as required,
according to the temp erature setting. This
function is only availa ble while the engine is
running.
The cooling function helps prevent condensa-
tion on the windows or removes it quickly.
Depending on the weathe r, the windshield may
fog over briefly when the engine is started.
Pressing the AUTO button automatically
switches on the cooling function.
ba8_E9091_cic.book Seite 96 Mittwoch, 29. Oktober 2008 2:59 14
Page 118 of 268
Things to remember when driving
116
of smoke may emerge from the exhaust, even
for a short period after
the engine is switched
off.
Hydroplaning
When driving on wet or slushy roads,
reduce road speed. If you do not, a wedge
of water can form between tires and road sur-
face. This situation, known as hydroplaning,
means that the tire can completely lose contact
with the road surface, so that neither the car can
be steered nor the brak e be properly applied.<
The risk of hydroplaning increases with declin-
ing tread depth on the tire s, refer also to Mini-
mum tread depth on page 208.
Driving through water
Drive through water on the road only if it is
not deeper than 1 ft/30 cm, and then only
at walking speed at the most. Otherwise, the
vehicle's engine, the electrical systems and the
transmission may be damaged. <
Use the parking brake on inclines
On inclines, do not hold the vehicle for a
lengthy period using the clutch; use the
parking brake instead. Ot herwise greater clutch
wear will result. <
For more information about the drive-off assis-
tant, refer to page 83.
Braking safely
Your BMW is equipped with ABS as a standard
feature. Applying the brakes fully is the most
effective way of braking in situations in which
this is necessary. Since the vehicle maintains
steering responsiveness, you can still avoid
possible obstacles with a minimum of steering
effort.
Pulsation of the brake pedal, combined with
sounds from the hydraulic circuits, indicate that
ABS is in its active mode.
Driving in wet conditions
When roads are wet or there is heavy rain,
briefly exert gentle pre ssure on the brake pedal
every few miles. Monitor traffic conditions to ensure that this maneuver does not endanger
other road users. The heat generated in this
process helps dry the pads and rotors. Full
braking efficiency will th
en be available when
you need it.
Hills
To prevent overheating and the resulting
reduced efficiency of the brake system,
drive long or steep downhill gradients in the
gear in which the least br aking is required. Even
light but consistent brak e pressure can lead to
high temperatures, brake wear and possibly
even brake failure. <
You can increase the engine's braking effect by
shifting down, all the way to first gear if neces-
sary. This strategy helps you avoid placing
excessive loads on the brake system. Down-
shifting in manual mode of the automatic trans-
mission, refer to page 56.
Never drive with the clutch held down,
with the transmission in neutral or with
the engine switched off; otherwise, engine
braking action will not be present or there will be
no power assistance to the brakes or steering.
Never allow floor mats, carpets or any other
objects to protrude into the area around the
pedals, otherwise peda l function could be
impaired. <
Corrosion on brake rotors
When the vehicle is driv en only occasionally,
during extended periods when the vehicle is not
used at all, and in op erating conditions where
brake applications are less frequent, there is an
increased tendency for corrosion to form on
rotors, while contaminan ts accumulate on the
brake pads. This occurs because the minimum
pressure which must be exerted by the pads
during brake applications to clean the rotors is
not reached.
Should corrosion form on the brake rotors, the
brakes will tend to re spond with a pulsating
effect that even extended application will fail to
cure.
ba8_E9091_cic.book Seite 116 Mittwoch, 29. Oktober 2008 2:59 14
Page 119 of 268
Driving tips
117Reference
At a glance
Controls
Communications
Navigation
Entertainment
Mobility
When the vehicle is parked
Condensation forms while the automatic cli-
mate control is in operation, and then exits
under the vehicle. Traces of condensed water
under the vehicle are therefore normal.
Before driving into a car wash
General information on caring for your BMW
can be found on page218.
Sports Wagon: re ar window wiper
Driving through an automatic car wash can
result in damage to the rear window wiper. If
necessary, ask the operator of the car wash
about protective measures you should take.
With convenient access and automatic
transmission
Insert the remote control into the ignition
switch.
The engine can be switched off when the selec-
tor lever is in position N. Refer also to page 218.
Cargo loading
To avoid loading the tires beyond their
approved carrying capacity, never over-
load the vehicle. Overlo ading can lead to over-
heating and increases the rate at which damage
develops inside the tires. This can ultimately
result in a sudden blow-out. <
Make sure that no liquids are spilled or
leak from their containers in the cargo
bay, as this could result in damage to the vehi-
cle. <
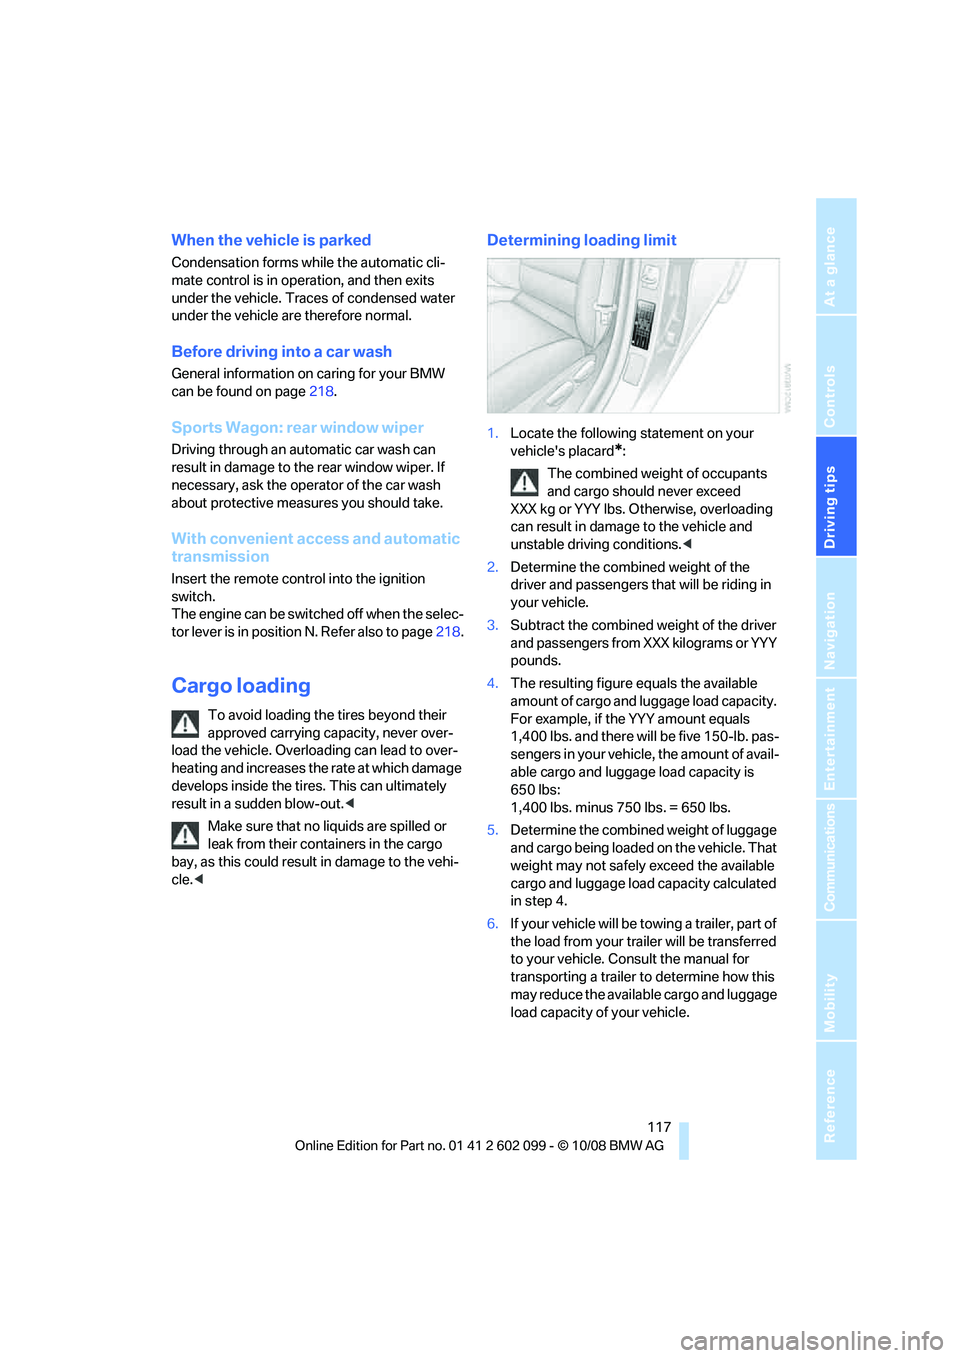
Determining loading limit
1. Locate the following statement on your
vehicle's placard
*:
The combined weight of occupants
and cargo should never exceed
XXX kg or YYY lbs. Otherwise, overloading
can result in damage to the vehicle and
unstable driving conditions.<
2. Determine the combined weight of the
driver and passengers that will be riding in
your vehicle.
3. Subtract the combined weight of the driver
and passengers from XXX kilograms or YYY
pounds.
4. The resulting figure equals the available
amount of cargo and luggage load capacity.
For example, if the YYY amount equals
1,400 lbs. and there will be five 150-lb. pas-
sengers in your vehicle, the amount of avail-
able cargo and luggage load capacity is
650 lbs:
1,400 lbs. minus 750 lbs. = 650 lbs.
5. Determine the combined weight of luggage
and cargo being loaded on the vehicle. That
weight may not safely exceed the available
cargo and luggage load capacity calculated
in step 4.
6. If your vehicle will be towing a trailer, part of
the load from your tra iler will be transferred
to your vehicle. Consult the manual for
transporting a trailer to determine how this
may reduce the availa ble cargo and luggage
load capacity of your vehicle.
ba8_E9091_cic.book Seite 117 Mittwoch, 29. Oktober 2008 2:59 14
Page 157 of 268
Navigation
Entertainment
Driving tips
155Reference
At a glance
Controls
Communications
Mobility
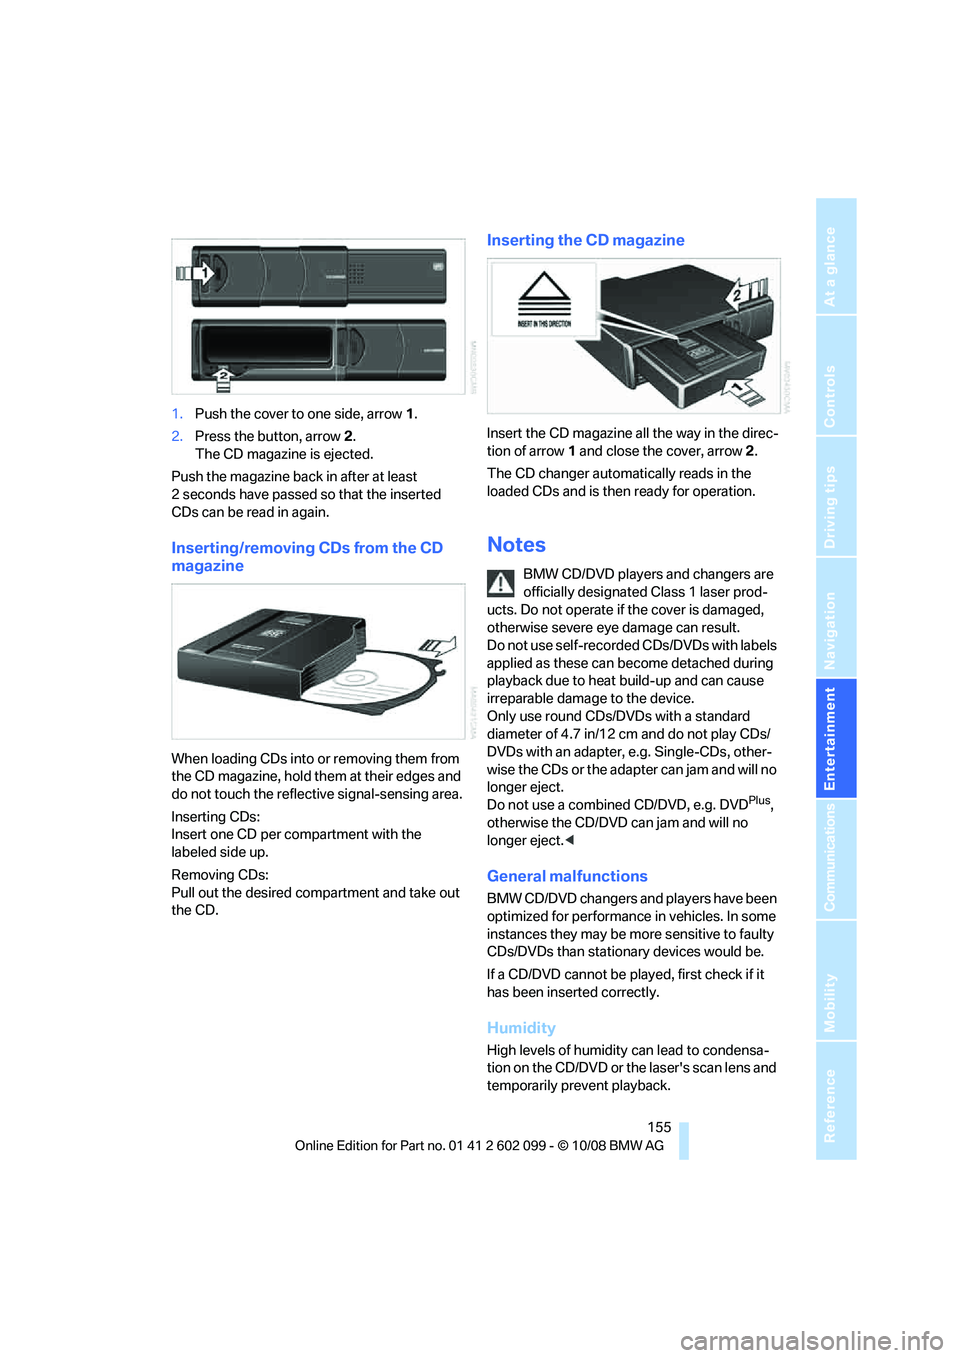
1.Push the cover to one side, arrow 1.
2. Press the button, arrow 2.
The CD magazine is ejected.
Push the magazine back in after at least
2seconds have passed so that the inserted
CDs can be read in again.
Inserting/removing CDs from the CD
magazine
When loading CDs into or removing them from
the CD magazine, hold them at their edges and
do not touch the reflecti ve signal-sensing area.
Inserting CDs:
Insert one CD per compartment with the
labeled side up.
Removing CDs:
Pull out the desired compartment and take out
the CD.
Inserting the CD magazine
Insert the CD magazine all the way in the direc-
tion of arrow 1 and close the cover, arrow 2.
The CD changer automa tically reads in the
loaded CDs and is then ready for operation.
Notes
BMW CD/DVD players and changers are
officially designated Class 1 laser prod-
ucts. Do not operate if the cover is damaged,
otherwise severe eye damage can result.
Do not use self-recorded CDs/DVDs with labels
applied as these can become detached during
playback due to heat build-up and can cause
irreparable damage to the device.
Only use round CDs/DVDs with a standard
diameter of 4.7 in/12 cm and do not play CDs/
DVDs with an adapter, e.g. Single-CDs, other-
wise the CDs or the adapter can jam and will no
longer eject.
Do not use a combined CD/DVD, e.g. DVD
Plus,
otherwise the CD/DVD can jam and will no
longer eject. <
General malfunctions
BMW CD/DVD changers and players have been
optimized for performance in vehicles. In some
instances they may be more sensitive to faulty
CDs/DVDs than stationary devices would be.
If a CD/DVD cannot be played, first check if it
has been inserted correctly.
Humidity
High levels of humidity can lead to condensa-
tion on the CD/DVD or the laser's scan lens and
temporarily prevent playback.
ba8_E9091_cic.book Seite 155 Mittwoch, 29. Oktober 2008 2:59 14
Page 209 of 268
Mobility
207Reference
At a glance
Controls
Driving tips
Communications
Navigation
Entertainment
Tire identification marks
Knowledge of the labeling on the side of the tire
makes it easier to identify and choose the right
tires.
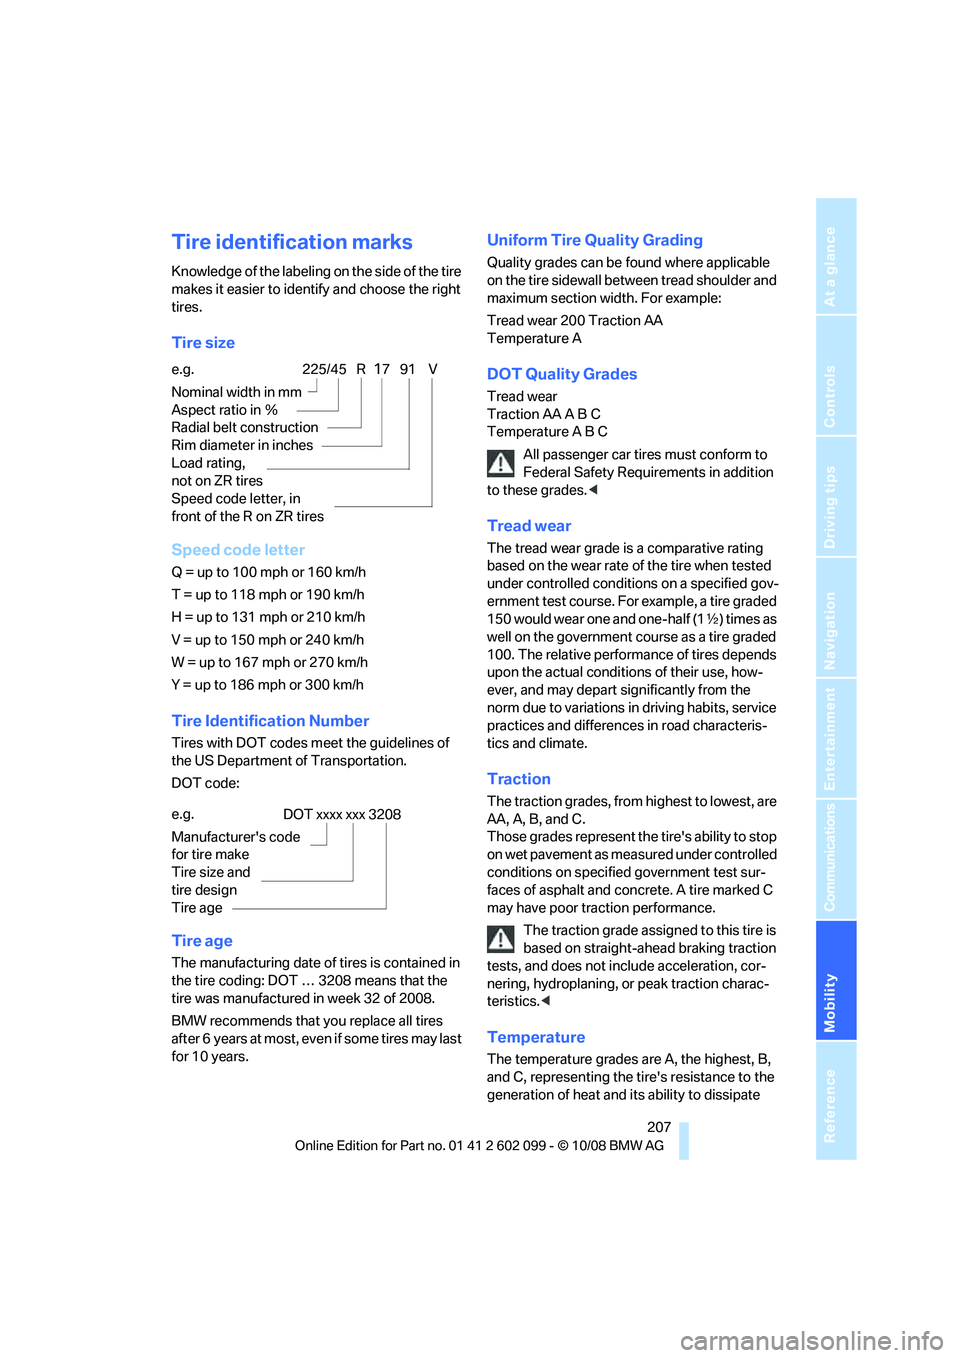
Tire size
Speed code letter
Q = up to 100 mph or 160 km/h
T = up to 118 mph or 190 km/h
H = up to 131 mph or 210 km/h
V = up to 150 mph or 240 km/h
W = up to 167 mph or 270 km/h
Y = up to 186 mph or 300 km/h
Tire Identification Number
Tires with DOT codes meet the guidelines of
the US Department of Transportation.
DOT code:
Tire age
The manufacturing date of tires is contained in
the tire coding: DOT … 3208 means that the
tire was manufactured in week 32 of 2008.
BMW recommends that you replace all tires
after 6 years at most, even if some tires may last
for 10 years.
Uniform Tire Quality Grading
Quality grades can be found where applicable
on the tire sidewall between tread shoulder and
maximum section width. For example:
Tread wear 200 Traction AA
Temperature A
DOT Quality Grades
Tread wear
Traction AA A B C
Temperature A B C
All passenger car tires must conform to
Federal Safety Requir ements in addition
to these grades. <
Tread wear
The tread wear grade is a comparative rating
based on the wear rate of the tire when tested
under controlled conditio ns on a specified gov-
ernment test course. For example, a tire graded
150 would wear one and one-half (1 γ) times as
well on the government course as a tire graded
100. The relative performance of tires depends
upon the actual conditions of their use, how-
ever, and may depart significantly from the
norm due to variations in driving habits, service
practices and differences in road characteris-
tics and climate.
Traction
The traction grades, from highest to lowest, are
AA, A, B, and C.
Those grades represent the tire's ability to stop
on wet pavement as measured under controlled
conditions on specified government test sur-
faces of asphalt and concrete. A tire marked C
may have poor traction performance.
The traction grade assigned to this tire is
based on straight-ahe ad braking traction
tests, and does not in clude acceleration, cor-
nering, hydroplaning, or peak traction charac-
teristics. <
Temperature
The temperature grades ar e A, the highest, B,
and C, representing the ti re's resistance to the
generation of heat and its ability to dissipate
e.g.
Nominal width in mm
Aspect ratio in Ξ
Radial belt construction
Rim diameter in inches
Load rating,
not on ZR tires
Speed code letter, in
front of the R on ZR tires225/45 R1791 V
e.g.
Manufacturer's code
for tire make
Tire size and
tire design
Tire ageDOT xxxx xxx 3208
ba8_E9091_cic.book Seite 207 Mittwoch, 29. Oktober 2008 2:59 14