2009 BMW 328I XDRIVE wheel
[x] Cancel search: wheelPage 50 of 268
Adjustments
48
The glass of the mirror on the passenger
side tilts slightly do
wn. This allows the
driver to see the area immediately adjacent
to the vehicle, e.g. a curb, when backing into
a parking space.
Deactivating
Push the switch to the position for the passen-
ger-side mirror, arrow 2.
Interior rearview mirror
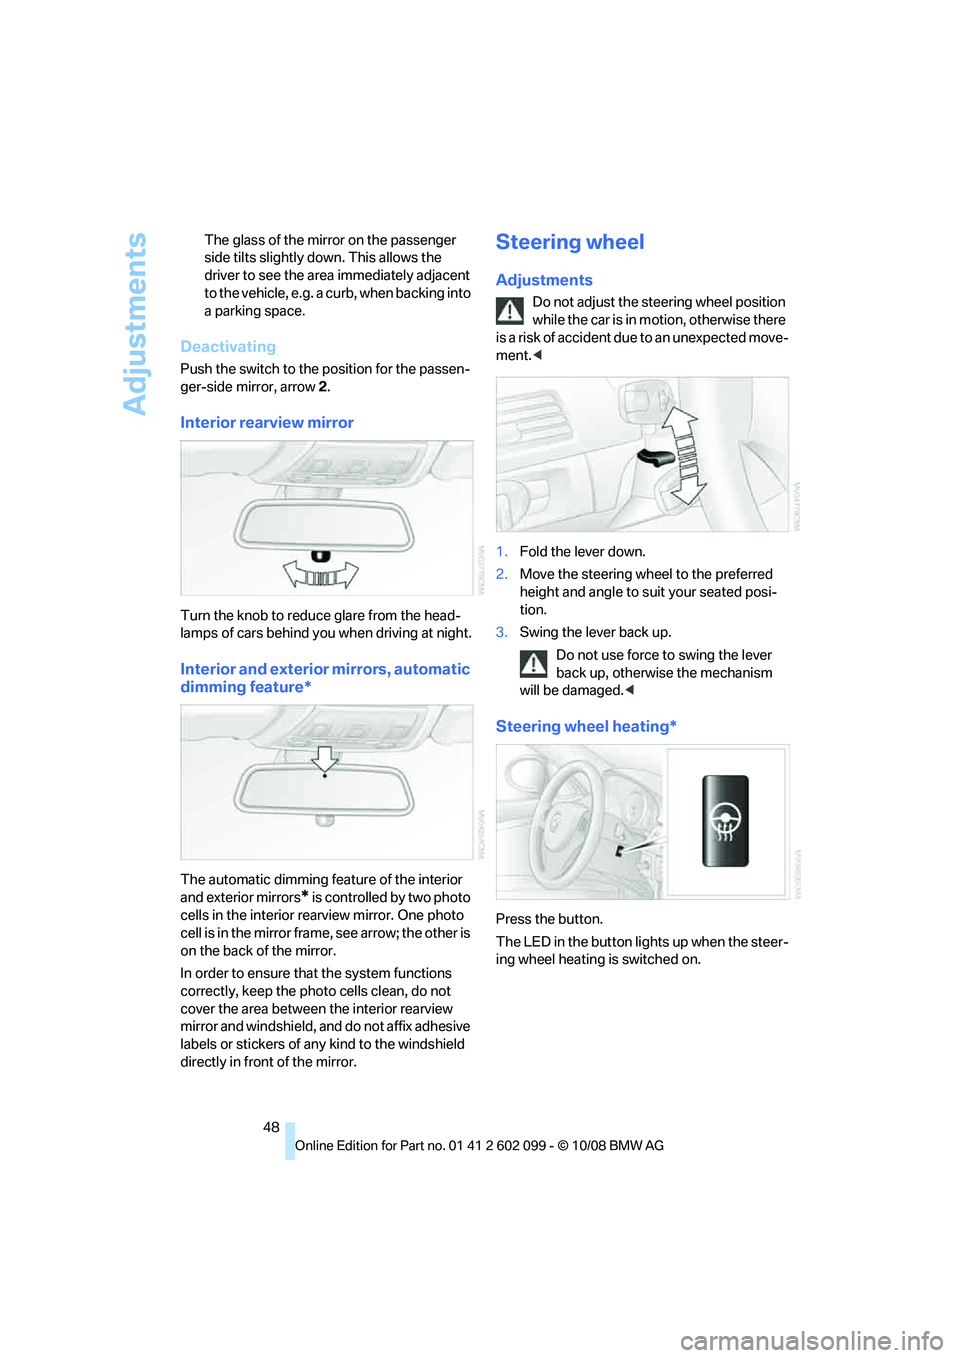
Turn the knob to reduce glare from the head-
lamps of cars behind yo u when driving at night.
Interior and exterior mirrors, automatic
dimming feature*
The automatic dimming fe ature of the interior
and exterior mirrors
* is controlled by two photo
cells in the interior re arview mirror. One photo
cell is in the mirror frame, see arrow; the other is
on the back of the mirror.
In order to ensure that the system functions
correctly, keep the photo cells clean, do not
cover the area between the interior rearview
mirror and windshield, and do not affix adhesive
labels or stickers of an y kind to the windshield
directly in front of the mirror.
Steering wheel
Adjustments
Do not adjust the steering wheel position
while the car is in mo tion, otherwise there
is a risk of accident due to an unexpected move-
ment. <
1. Fold the lever down.
2. Move the steering wheel to the preferred
height and angle to suit your seated posi-
tion.
3. Swing the lever back up.
Do not use force to swing the lever
back up, otherwise the mechanism
will be damaged. <
Steering wheel heating*
Press the button.
The LED in the button lights up when the steer-
ing wheel heating is switched on.
ba8_E9091_cic.book Seite 48 Mittwoch, 29. Oktober 2008 2:59 14
Page 56 of 268
Driving
54
place the transmission in neutral or engage
selector lever position P
and forcefully apply the
parking brake to prevent the car from moving. <
Avoid frequent starting in quick succes-
sion as well as repeated start attempts in
which the engine does no t start. Otherwise, the
fuel is not burned or incompletely burned and
there is a danger of overheating and damaging
the catalytic converter. <
Do not wait for the engine to warm up while the
vehicle remains stationary. Start driving right
away, but at moderate engine speeds.
Manual transmission
Remote control in the ignition lock or, with con-
venient access, inside the vehicle, refer to
page 34.
1. Depress the brake.
2. Depress the clutch and shift to neutral posi-
tion.
3. Press the start/stop button.
The starter operates automatically for a certain
time, and stops automatically as soon as the
engine has started.
Automatic transmission
Remote control in the ignition lock or, with con-
venient access, inside the vehicle, refer to
page 34.
1. Depress the brake.
2. Move the selector lever to position P.
3. Press the start/stop button.
The starter operates automatically for a certain
time, and stops automatically as soon as the
engine has started.
Diesel engine
When the engine is cold and temperatures are
below approx. 32 7/06 , the starting process
may take a little more time due to automatic
preheating. The preheating indicator lamp in
the instrument cluster comes on; at the same
time a message appears on the Control Display.
Switching off the engine
Always take the remote control with you
when you leave the vehicle.
When parking, apply th e parking brake force-
fully, otherwise the vehicle could begin to roll. <
Manual transmission
1.With the car at a standstill, press the start/
stop button.
2. Shift into first gear or reverse.
3. Forcefully apply the parking brake.
4. Removing the remote control from the igni-
tion lock, refer to page 53.
Automatic transmission
1. With the car at a standstill, move the selec-
tor lever to position P.
2. Press the start/stop button.
3. Forcefully apply the parking brake.
4. Removing the remote control from the igni-
tion lock, refer to page 53.
Parking brake
The parking brake is primarily intended to pre-
vent the vehicle from rolling while parked; it
brakes the rear wheels.
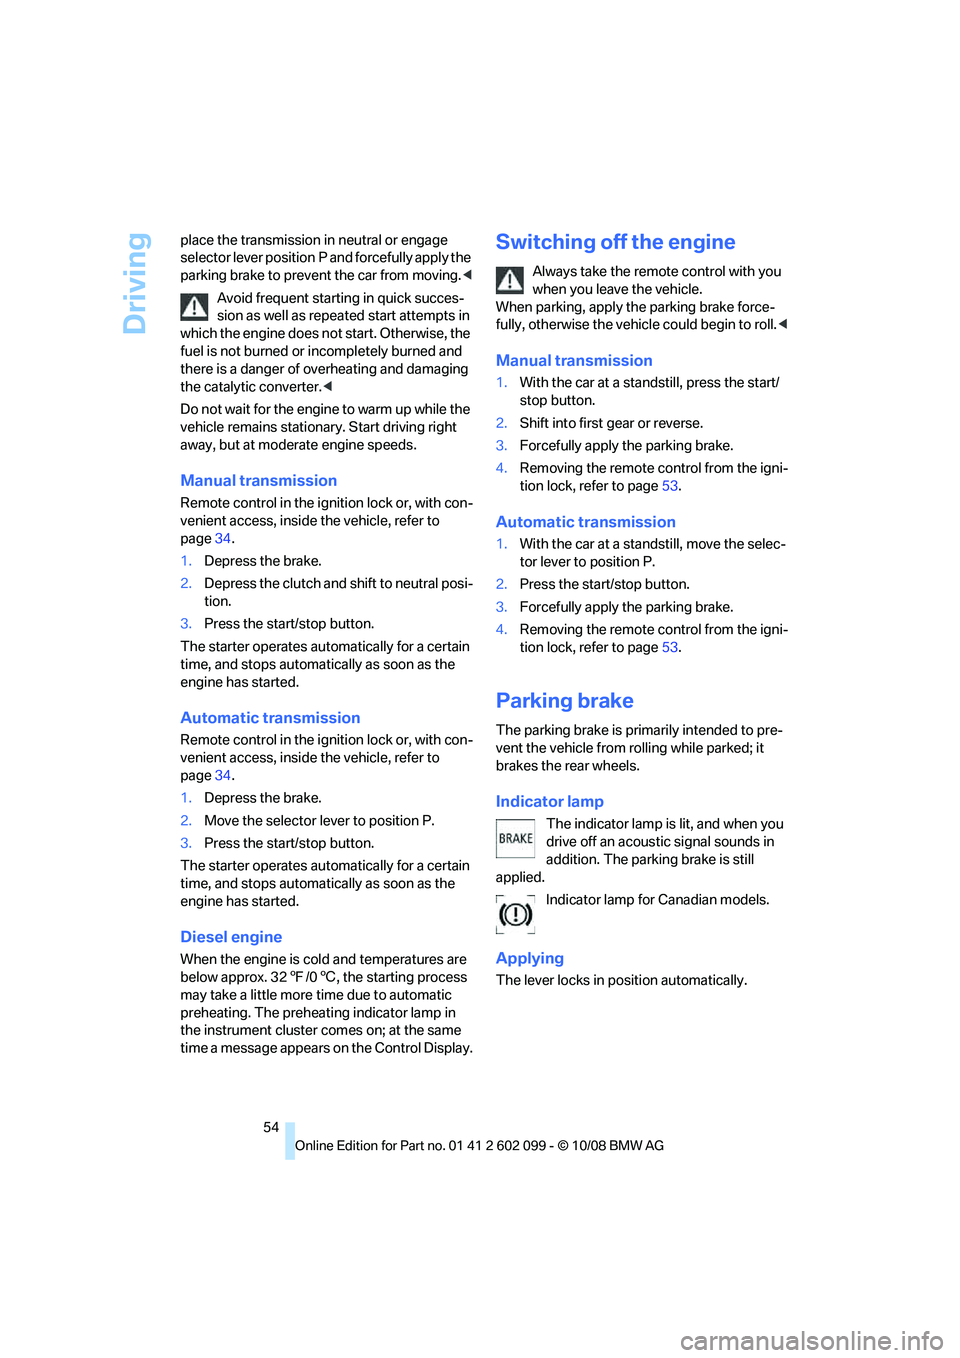
Indicator lamp
The indicator lamp is lit, and when you
drive off an acoustic signal sounds in
addition. The parking brake is still
applied.
Indicator lamp for Canadian models.
Applying
The lever locks in po sition automatically.
ba8_E9091_cic.book Seite 54 Mittwoch, 29. Oktober 2008 2:59 14
Page 57 of 268
Controls
55Reference
At a glance
Driving tips
Communications
Navigation
Entertainment
Mobility
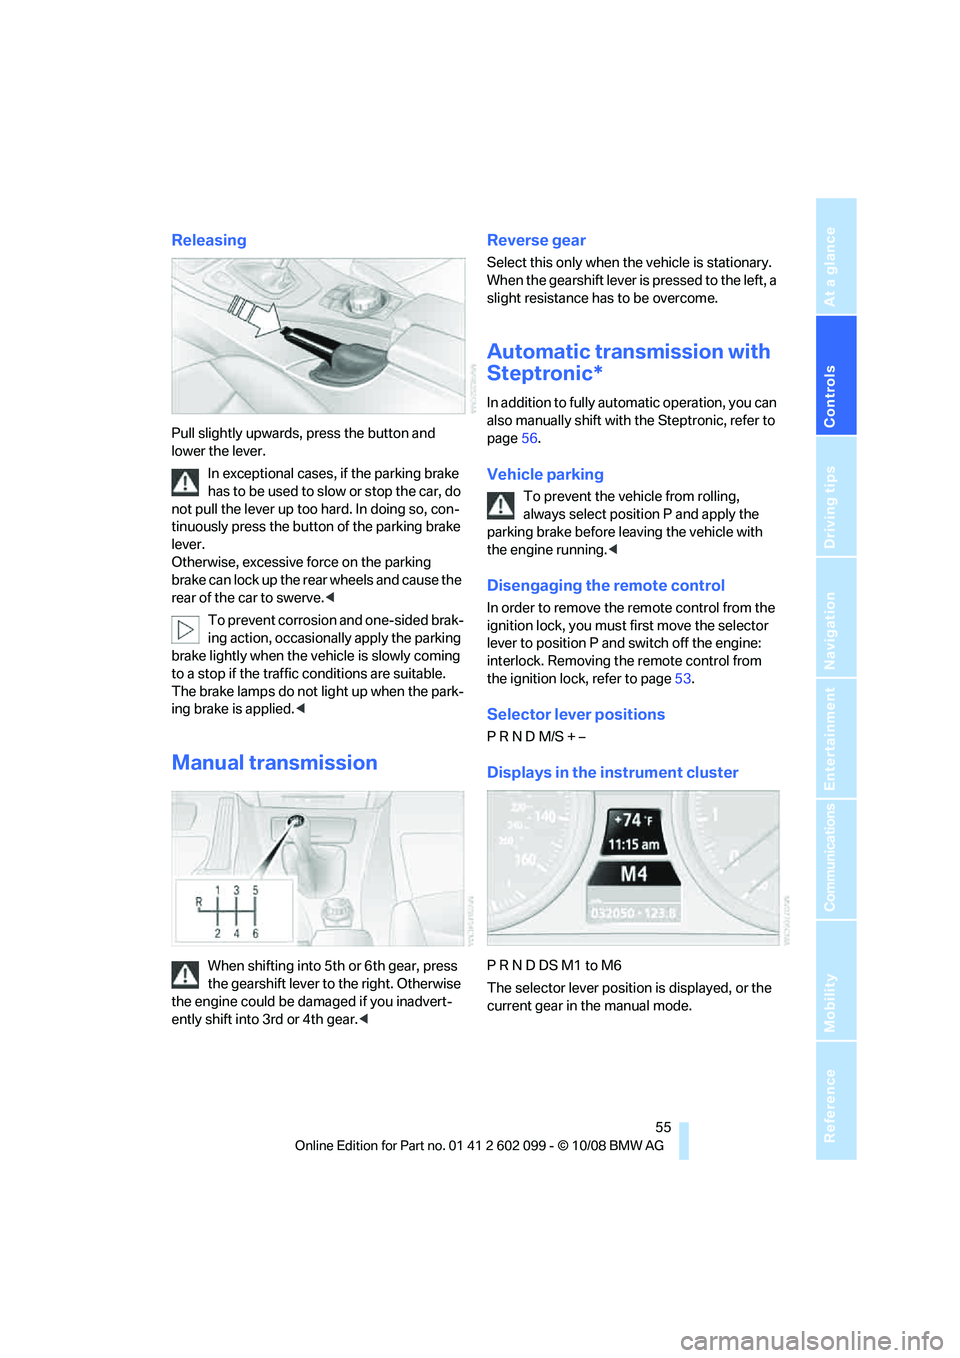
Releasing
Pull slightly upwards, press the button and
lower the lever.In exceptional cases, if the parking brake
has to be used to slow or stop the car, do
not pull the lever up too hard. In doing so, con-
tinuously press the button of the parking brake
lever.
Otherwise, excessive force on the parking
brake can lock up the rear wheels and cause the
rear of the car to swerve. <
To prevent corrosion and one-sided brak-
ing action, occasionally apply the parking
brake lightly when the vehicle is slowly coming
to a stop if the traffic conditions are suitable.
The brake lamps do not light up when the park-
ing brake is applied. <
Manual transmission
When shifting into 5th or 6th gear, press
the gearshift lever to the right. Otherwise
the engine could be da maged if you inadvert-
ently shift into 3rd or 4th gear. <
Reverse gear
Select this only when the vehicle is stationary.
When the gearshift lever is pressed to the left, a
slight resistance has to be overcome.
Automatic transmission with
Steptronic*
In addition to fully automatic operation, you can
also manually shift with the Steptronic, refer to
page 56.
Vehicle parking
To prevent the vehicle from rolling,
always select position P and apply the
parking brake before leaving the vehicle with
the engine running. <
Disengaging the remote control
In order to remove the remote control from the
ignition lock, you must first move the selector
lever to position P and switch off the engine:
interlock. Removing th e remote control from
the ignition lock, refer to page 53.
Selector lever positions
P R N D M/S + –
Displays in the instrument cluster
P R N D DS M1 to M6
The selector lever position is displayed, or the
current gear in the manual mode.
ba8_E9091_cic.book Seite 55 Mittwoch, 29. Oktober 2008 2:59 14
Page 58 of 268
Driving
56
Changing selector lever positions
>With the ignition switched on or the engine
running, the selector lever can be moved
out of position P: interlock.
> Before moving the lever away from P or N
with the vehicle stationary, first depress the
brake; otherwise the selector lever will
refuse to move: shiftlock.
To prevent the vehicle from creeping
after you select a driving position,
depress the brake until you are ready to
start. <
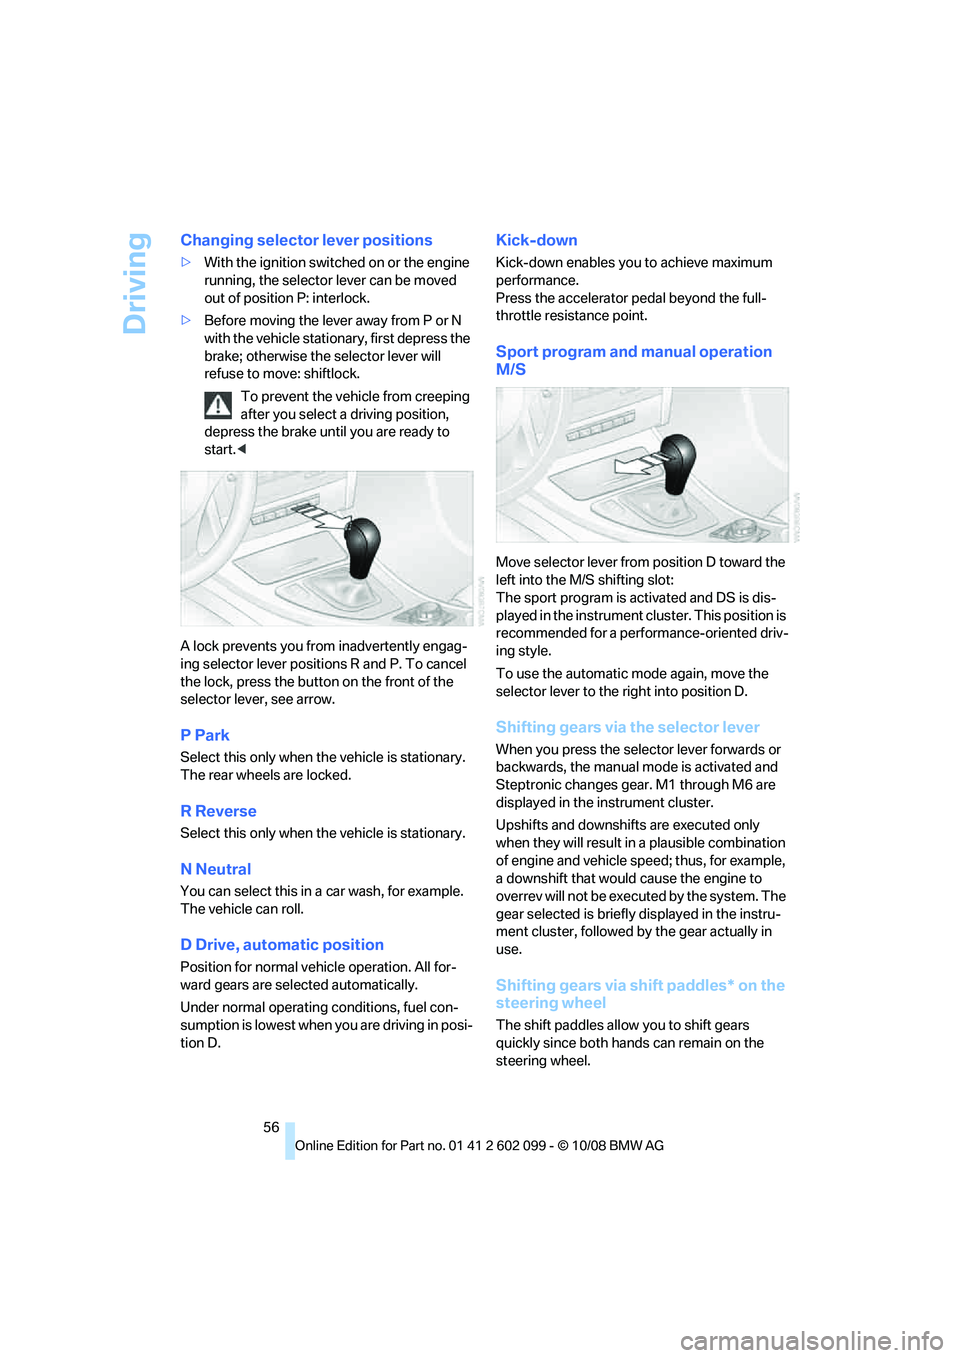
A lock prevents you from inadvertently engag-
ing selector lever positions R and P. To cancel
the lock, press the butto n on the front of the
selector lever, see arrow.
P Park
Select this only when th e vehicle is stationary.
The rear wheels are locked.
R Reverse
Select this only when th e vehicle is stationary.
N Neutral
You can select this in a car wash, for example.
The vehicle can roll.
D Drive, automatic position
Position for normal vehicle operation. All for-
ward gears are sele cted automatically.
Under normal operating conditions, fuel con-
sumption is lowest when you are driving in posi-
tion D.
Kick-down
Kick-down enables you to achieve maximum
performance.
Press the accelerator pedal beyond the full-
throttle resistance point.
Sport program and manual operation
M/S
Move selector lever from position D toward the
left into the M/S shifting slot:
The sport program is activated and DS is dis-
played in the instrument cl uster. This position is
recommended for a performance-oriented driv-
ing style.
To use the automatic mode again, move the
selector lever to the right into position D.
Shifting gears via the selector lever
When you press the select or lever forwards or
backwards, the manual mode is activated and
Steptronic changes gear. M1 through M6 are
displayed in the instrument cluster.
Upshifts and downshifts are executed only
when they will result in a plausible combination
of engine and vehicle speed; thus, for example,
a downshift that would cause the engine to
overrev will not be executed by the system. The
gear selected is briefly displayed in the instru-
ment cluster, followed by the gear actually in
use.
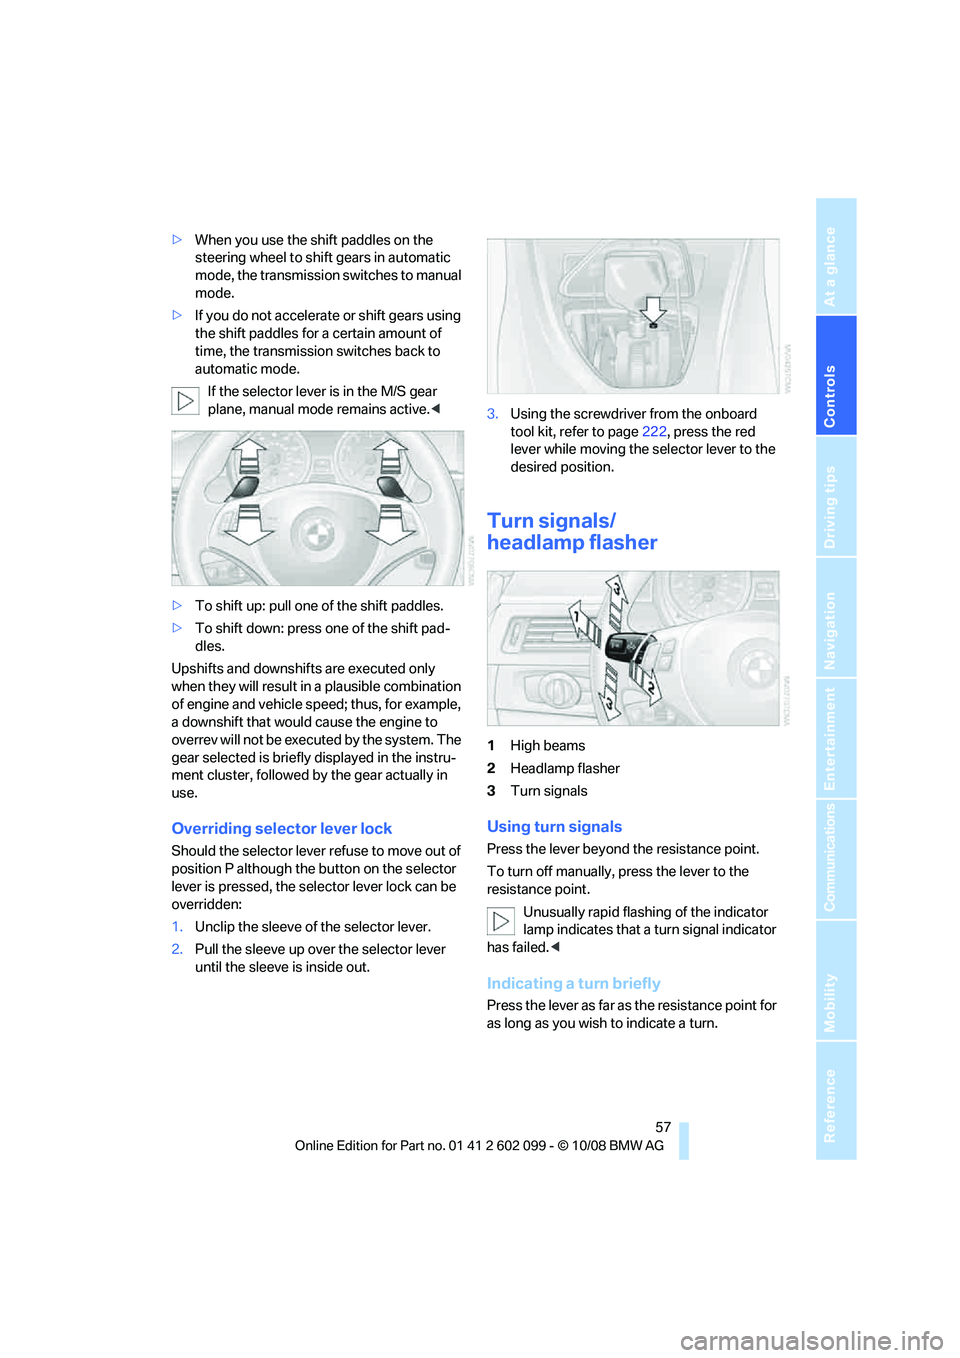
Shifting gears via shift paddles* on the
steering wheel
The shift paddles allo w you to shift gears
quickly since both hands can remain on the
steering wheel.
ba8_E9091_cic.book Seite 56 Mittwoch, 29. Oktober 2008 2:59 14
Page 59 of 268
Controls
57Reference
At a glance
Driving tips
Communications
Navigation
Entertainment
Mobility
>When you use the shift paddles on the
steering wheel to shif t gears in automatic
mode, the transmission switches to manual
mode.
> If you do not accelerate or shift gears using
the shift paddles for a certain amount of
time, the transmission switches back to
automatic mode.
If the selector lever is in the M/S gear
plane, manual mode remains active. <
> To shift up: pull one of the shift paddles.
> To shift down: press one of the shift pad-
dles.
Upshifts and downshifts are executed only
when they will result in a plausible combination
of engine and vehicle speed; thus, for example,
a downshift that would cause the engine to
overrev will not be executed by the system. The
gear selected is briefly displayed in the instru-
ment cluster, followed by the gear actually in
use.
Overriding selector lever lock
Should the selector lever refuse to move out of
position P although the button on the selector
lever is pressed, the sele ctor lever lock can be
overridden:
1. Unclip the sleeve of the selector lever.
2. Pull the sleeve up over the selector lever
until the sleeve is inside out. 3.
Using the screwdriver from the onboard
tool kit, refer to page 222, press the red
lever while moving the selector lever to the
desired position.
Turn signals/
headlamp flasher
1 High beams
2 Headlamp flasher
3 Turn signals
Using turn signals
Press the lever beyond the resistance point.
To turn off manually, press the lever to the
resistance point.
Unusually rapid flashi ng of the indicator
lamp indicates that a turn signal indicator
has failed. <
Indicating a turn briefly
Press the lever as far as the resistance point for
as long as you wish to indicate a turn.
ba8_E9091_cic.book Seite 57 Mittwoch, 29. Oktober 2008 2:59 14
Page 60 of 268
Driving
58
Triple turn signal activation
Press the lever as far as the resistance point.
The turn signals flash three times.
You can activate or deactivate this function.
iDrive, for operating pr inciple refer to page16.
1. "Settings"
2. "Lighting"
3. "Triple turn signal"
Triple turn signal acti vation is activated and
is stored for the remote control currently in use.
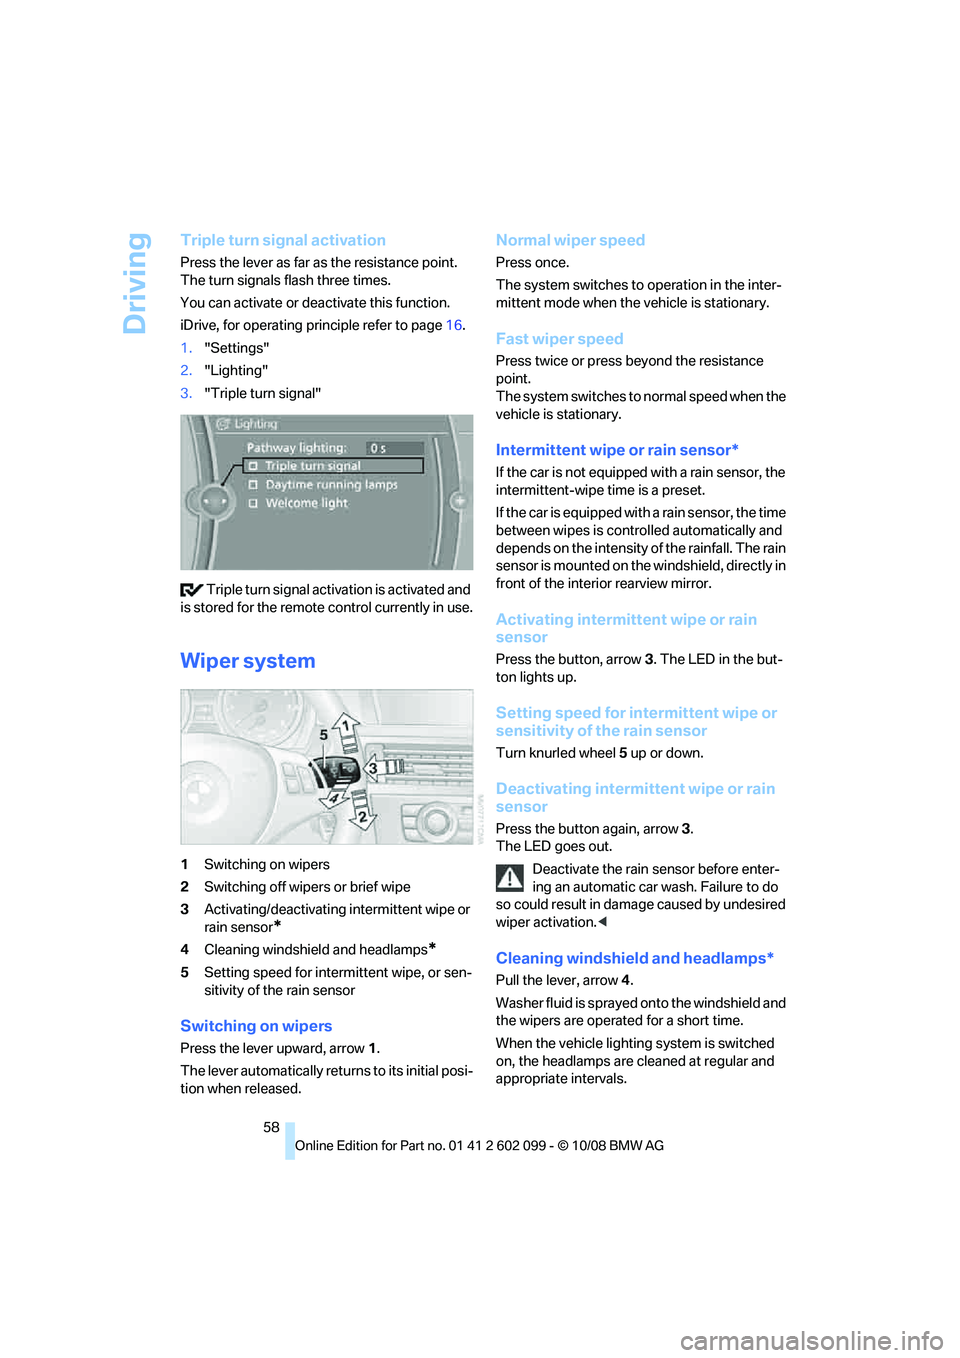
Wiper system
1 Switching on wipers
2 Switching off wipers or brief wipe
3 Activating/deactivating intermittent wipe or
rain sensor
*
4Cleaning windshield and headlamps*
5Setting speed for intermittent wipe, or sen-
sitivity of the rain sensor
Switching on wipers
Press the lever upward, arrow 1.
The lever automatically retu rns to its initial posi-
tion when released.
Normal wiper speed
Press once.
The system switches to operation in the inter-
mittent mode when the vehicle is stationary.
Fast wiper speed
Press twice or press beyond the resistance
point.
The system switches to normal speed when the
vehicle is stationary.
Intermittent wipe or rain sensor*
If the car is not equipped with a rain sensor, the
intermittent-wipe time is a preset.
If the car is equipped with a rain sensor, the time
between wipes is contro lled automatically and
depends on the intensity of the rainfall. The rain
sensor is mounted on the windshield, directly in
front of the interior rearview mirror.
Activating intermitte nt wipe or rain
sensor
Press the button, arrow 3. The LED in the but-
ton lights up.
Setting speed for inte rmittent wipe or
sensitivity of the rain sensor
Turn knurled wheel 5 up or down.
Deactivating intermit tent wipe or rain
sensor
Press the button again, arrow 3.
The LED goes out.
Deactivate the rain sensor before enter-
ing an automatic car wash. Failure to do
so could result in damage caused by undesired
wiper activation. <
Cleaning windshield and headlamps*
Pull the lever, arrow 4.
Washer fluid is sprayed onto the windshield and
the wipers are operated for a short time.
When the vehicle lighting system is switched
on, the headlamps are cleaned at regular and
appropriate intervals.
ba8_E9091_cic.book Seite 58 Mittwoch, 29. Oktober 2008 2:59 14
Page 83 of 268
Controls
81Reference
At a glance
Driving tips
Communications
Navigation
Entertainment
Mobility
can drown out the PDC signal. Therefore,
always drive cautiously, otherwise there is a risk
of personal injury or property damage.<
Driving stability control
systems
Your BMW has a number of systems that help
to maintain the vehicle's stability even in
adverse driving conditions.
Antilock Brake System ABS
ABS prevents locking of the wheels during
braking. Safe steering response is maintained
even during full braking. Active safety is thus
increased.
The ABS is operational every time you start the
engine. Braking safely, refer to page 116.
Electronic brake-force distribution
The system controls the brake pressure in the
rear wheels to ensure stable braking behavior.
Dynamic Brake Control DBC
When you apply the brakes rapidly, this system
automatically produces the maximum braking
force boost and thus help s to achieve the short-
est possible braking distance during full brak-
ing. This system exploits all of the benefits pro-
vided by ABS.
Do not reduce the pressure on the brake for the
duration of the full braking application.
Dynamic Stability Control DSC
DSC prevents the driving wheels from losing
traction when you pull away from rest or accel-
erate. The system also recognizes unstable
driving conditions, for example if the rear of the
car is about to swerve or if momentum is acting
at an angle past the front wheels. In these
cases, DSC helps the ve hicle maintain a safe
course within physical lim its by reducing engine
output and through braking actions at the indi-
vidual wheels.
The laws of physics cannot be repealed,
even with DSC. An appropriate driving style always remains the responsibility of the
driver. Therefore, do not reduce the additional
s a f e t y m a r g i n a g a i n b y t a k i n g r i s k s , a s t h i s c o u l d
result in an accident.
<
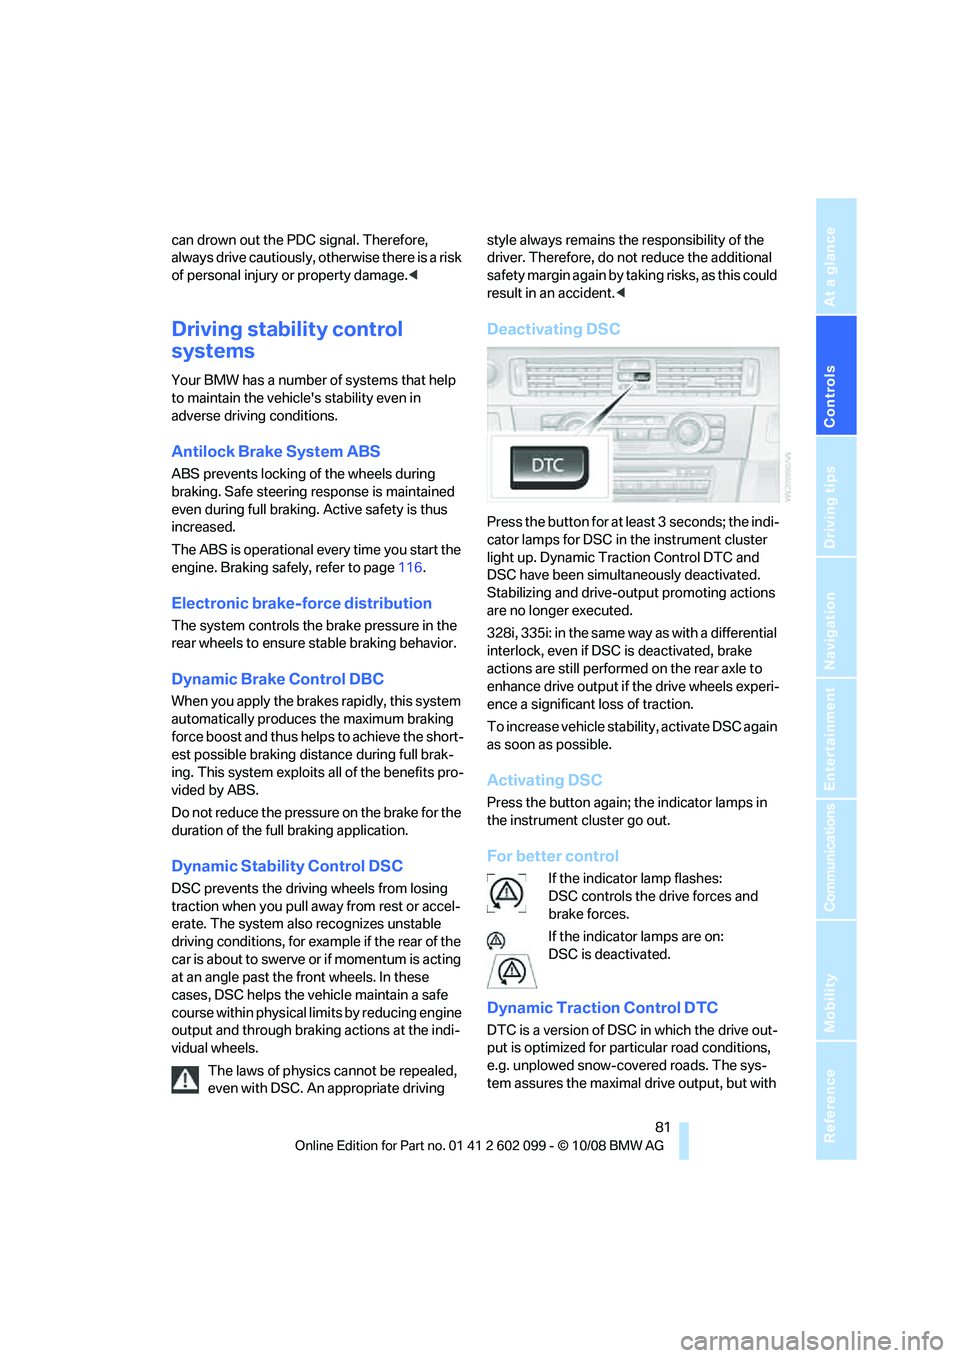
Deactivating DSC
Press the button for at least 3 seconds; the indi-
cator lamps for DSC in the instrument cluster
light up. Dynamic Traction Control DTC and
DSC have been simultaneously deactivated.
Stabilizing and drive-output promoting actions
are no longer executed.
328i, 335i: in the same way as with a differential
interlock, even if DSC is deactivated, brake
actions are still performed on the rear axle to
enhance drive output if the drive wheels experi-
ence a significant loss of traction.
To increase vehicle stability, activate DSC again
as soon as possible.
Activating DSC
Press the button again; the indicator lamps in
the instrument cluster go out.
For better control
If the indicator lamp flashes:
DSC controls the drive forces and
brake forces.
If the indicator lamps are on:
DSC is deactivated.
Dynamic Traction Control DTC
DTC is a version of DSC in which the drive out-
put is optimized for particular road conditions,
e.g. unplowed snow-covered roads. The sys-
tem assures the maximal drive output, but with
ba8_E9091_cic.book Seite 81 Mittwoch, 29. Oktober 2008 2:59 14
Page 84 of 268
Technology for driving comfort and safety
82
reduced driving stability. It is therefore neces-
sary to drive with appropriate caution.
You may find it useful
to briefly activate DTC
under the following sp ecial circumstances:
> When driving uphill on snow-covered roads,
in slush or on unplowed, snow-covered
roads
> When rocking a stuck vehicle free or start-
ing off in deep snow or on loose ground
> When driving with snow chains
Activating DTC
Press the button; the indicator lamps for DTC in
the instrument cluster come on.
For better control
If the indicator lamp flashes:
DTC controls the drive forces and
brake forces.
If the indicator lamps are on:
DTC has been activated.
Deactivating DTC
Press the button again; the DTC indicator
lamps in the instrument cluster go out.
xDrive*
xDrive is your BMW's four-wheel-drive system.
The combined efforts of xDrive and DSC help to
further optimize traction and driving dynamics.
The xDrive four-wheel-drive system distributes
driving power variably to the front and rear axles
depending on the driving situation and road
conditions.
Hill Descent Control HDC*
HDC is a downhill driving assistant that controls
your speed on steep downhill gradients and
makes it even easier to control your BMW's
handling under these conditions. The vehicle
then moves slightly faster than double walking
speed without the driver needing to intervene.
HDC can be activated as long as you are driving
under approx. 20 mph or 35 km/h. When driving
downhill at a speed of under approx. 20 mph or
35 km/h, the vehicle's speed is automatically
reduced to slightly more than double walking
speed and maintained.
Increasing or decreasing speed
By accelerating or brak ing you can change this
speed within a range from approx. 3 to 15 mph,
approx. 5 to 25 km/h.
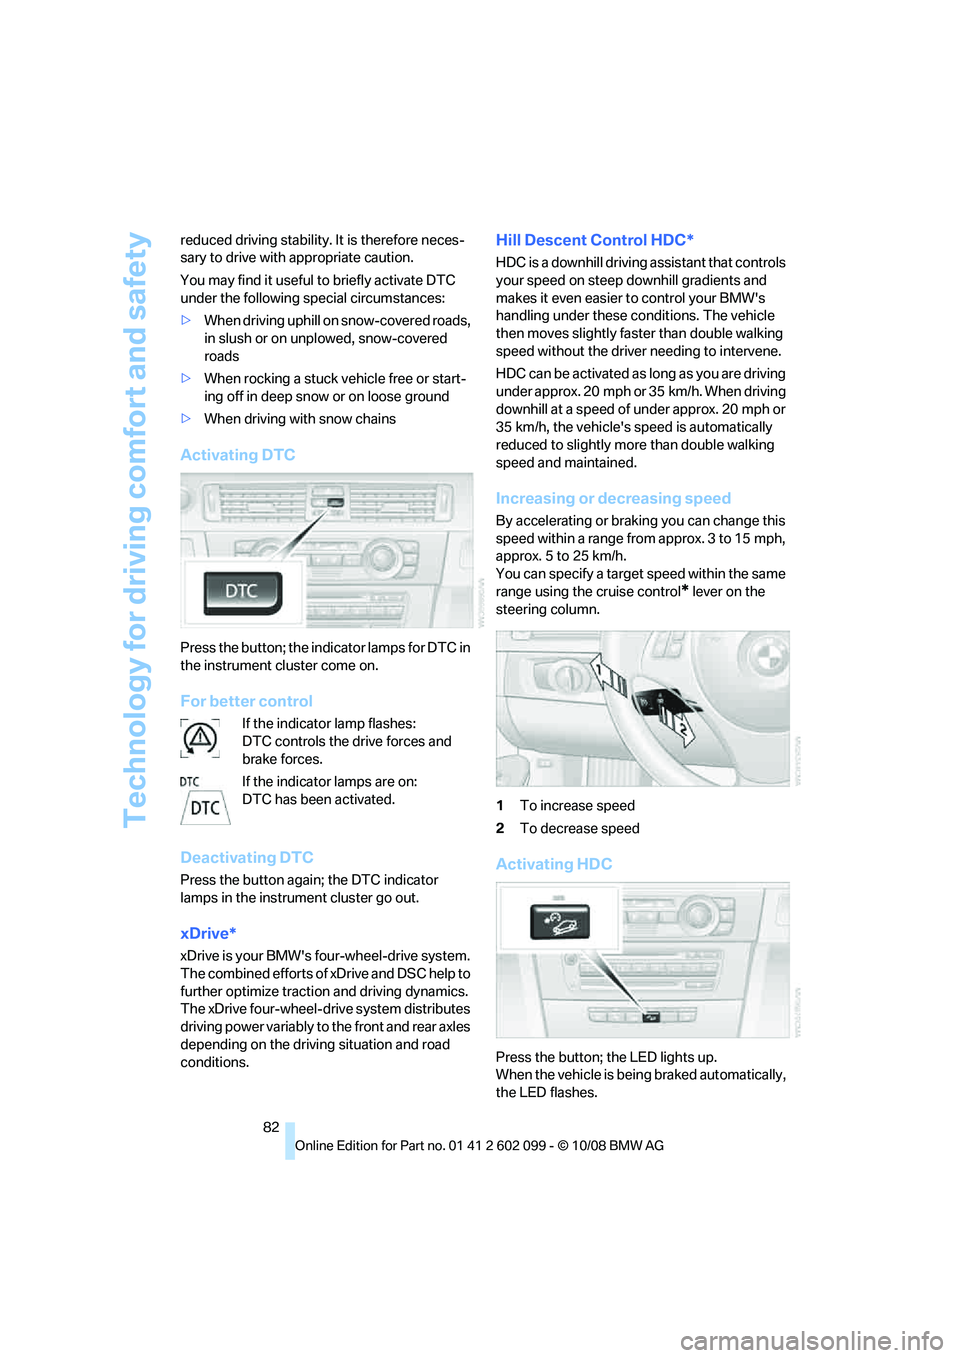
You can specify a target speed within the same
range using the cruise control
* lever on the
steering column.
1 To increase speed
2 To decrease speed
Activating HDC
Press the button; the LED lights up.
When the vehicle is being braked automatically,
the LED flashes.
ba8_E9091_cic.book Seite 82 Mittwoch, 29. Oktober 2008 2:59 14