2008 VOLVO V70 low beam
[x] Cancel search: low beamPage 64 of 274

High beam and turn signal indicators
Function check
All indicator and warning symbols light up in ignition mode II or when the engine is started. When the engine has
started, all the symbols should go out except the parking brake symbol, which only goes out when the brake is
disengaged.
If the engine does not start or if the function check is carried out in ignition mode II , all symbols go out after 5
seconds except the
75 03 Your driving environment
Instruments and controls
symbol for faults in the vehicle's emissions system and the symbol for low oil pressure.
Certain symbols may not have their functions illustrated, depending on the vehicle's equipment.
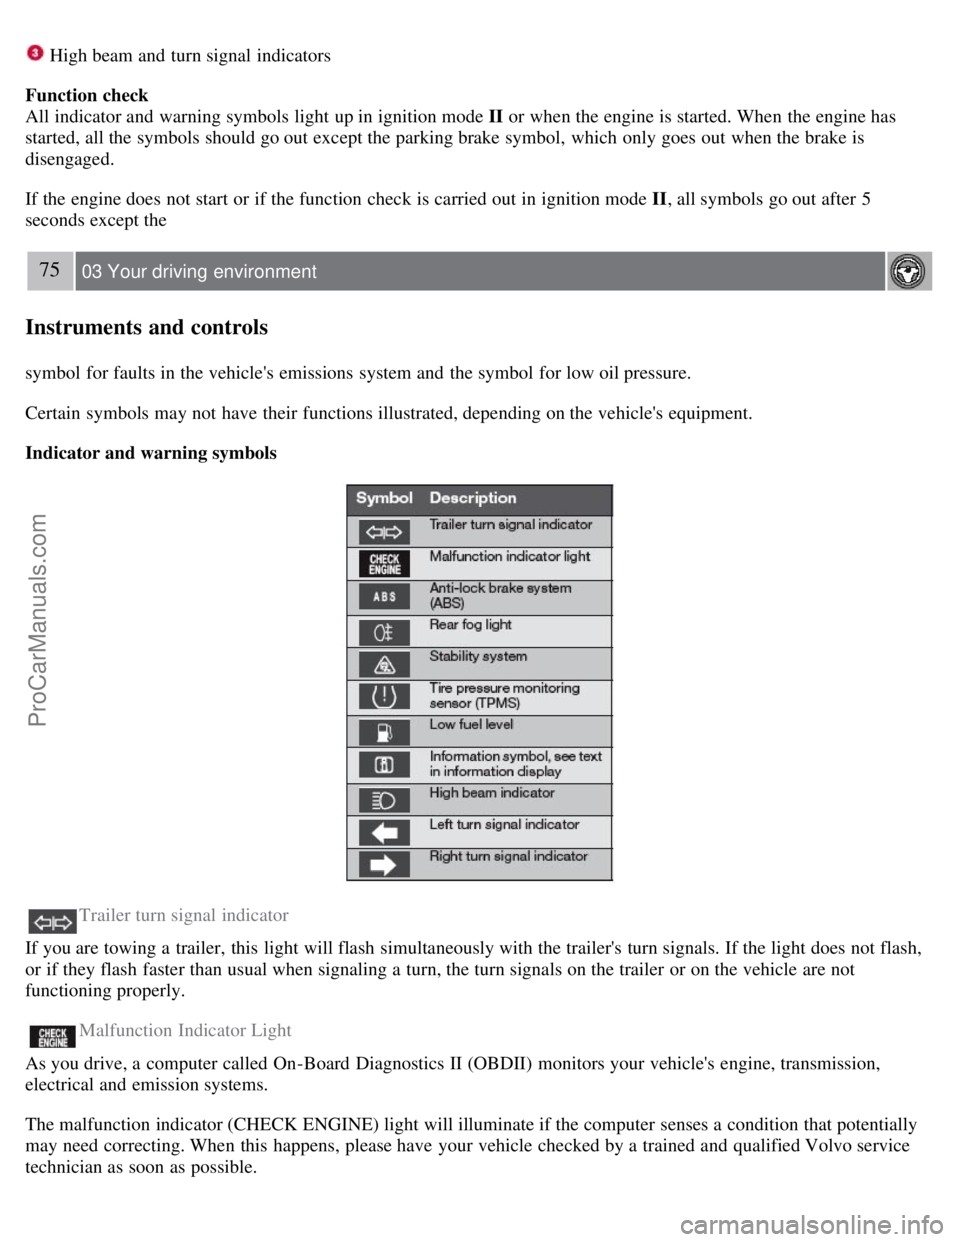
Indicator and warning symbols
Trailer turn signal indicator
If you are towing a trailer, this light will flash simultaneously with the trailer's turn signals. If the light does not flash,
or if they flash faster than usual when signaling a turn, the turn signals on the trailer or on the vehicle are not
functioning properly.
Malfunction Indicator Light
As you drive, a computer called On-Board Diagnostics II (OBDII) monitors your vehicle's engine, transmission,
electrical and emission systems.
The malfunction indicator (CHECK ENGINE) light will illuminate if the computer senses a condition that potentially
may need correcting. When this happens, please have your vehicle checked by a trained and qualified Volvo service
technician as soon as possible.
ProCarManuals.com
Page 65 of 274

A malfunction indicator (CHECK ENGINE) light may have many causes. Sometimes, you may not notice a change in
your car's behavior. Even so, an uncorrected condition could hurt fuel economy, emission controls, and drivability.
Extended driving without correcting the cause could even damage other components in your vehicle.
Canadian models are equipped with this symbol:
Anti-lock Brake System (ABS) warning light
If the warning light comes on, there may be a malfunction in the ABS system (the standard braking system will still
function). Check the system by:
1. Stopping in a safe place and switching off the ignition.
76 03 Your driving environment
Instruments and controls
2. Restart the engine.
3. If the warning light goes off, no further action is required.
If the warning light remains on, the vehicle should be driven to a trained and qualified Volvo service technician for
inspection. See page 115
for additional information.
Canadian models are equipped with this symbol:
Rear fog light
This symbol indicates that the rear fog light (located in the driver's side tail light cluster) is on.
Stability system
This indicator symbol flashes when the DSTC (Dynamic Stability and Traction Control system) is actively working to
stabilize the vehicle. See page 153
for more detailed information.
Tire pressure monitoring system (TPMS) - option
This symbol illuminates to indicate that tire pressure in one or more tires is low. See page 252
for detailed information.
Low fuel level
When this light comes on, there are approximately 2.1 US gallons (8 liters) of fuel remaining in the tank.
Information symbol
The information symbol illuminates and a text message is displayed if a fault is detected in one of the vehicle's
systems. The message can be erased and the symbol can be turned off by pressing the READ button (see page 126
for
information) or this will take place automatically after a short time (the length of time varies, depending on the
function affected).
The information symbol may also illuminate together with other symbols.
High beam indicator
This symbol illuminates when the high beam headlights are on, or if the high beam flash function is used.
ProCarManuals.com
Page 78 of 274

Steering wheel
Horn
Press the steering wheel hub to sound the horn.
89 03 Your driving environment
Lighting
Lighting panel
Thumb wheel for adjusting display and instrument lighting
Rear fog light
Front fog lights
Headlights/parking lights
Instrument lighting
Illumination of the display and instrument lights will vary, depending on ignition mode.
The display lighting is automatically subdued in darkness and the sensitivity is set with the thumb wheel.
The intensity of the instrument lighting is adjusted with the thumb wheel.
High/low beam headlights
ProCarManuals.com
Page 79 of 274

Low beams
When the engine is started, the low beams are activated automatically (daytime running lights) if the headlight control
is in position
or .
Daytime running lights can be deactivated by an authorized Volvo workshop.
NOTE
The use of daytime running lights is mandatory in Canada.
Continuous high beams cannot be activated when the headlight switch is in position or . High beam
flash will function in these positions.
High beam flash
Move the lever toward the steering wheel to position
. The high beams come on until the lever is released.
High/low beam headlights
Continuous high beams
Set the ignition to mode II.
With the light switch in position
, pull the turn signal lever toward the steering wheel to position to toggle
between high and low beams (this also applies on models equipped with the optional Active Bi -Xenon® headlights).
The
symbol illuminates in the instrument panel to indicate that the high beams are on.
90 03 Your driving environment
Lighting
Active Bi -Xenon® Lights (ABL)-option
ProCarManuals.com
Page 81 of 274

Emergency Brake Lights, EBL, activate in the event of sudden braking or if the ABS system is activated. This function
causes an additional taillight on each side of the vehicle to illuminate to help alert vehicles traveling behind.
The EBL function activates if:
The ABS system activates for more than approximately a half second
In the event of sudden braking while the vehicle is moving at speeds above approximately 6 mph (10 km/h)
When the vehicle has come to a stop, the brake lights and additional taillights remain on for as long as the brake pedal
is depressed or until braking force on the vehicle is reduced.
Front fog lights
The front fog lights can be switched on together with high/low beams or the parking lights.
Press the button to switch the fog lights on/off. The light in the button comes on when the fog lights are on.
NOTE
Regulations regarding the use of the front fog lights may vary, depending on where you drive.
92 03 Your driving environment
Lighting
Rear fog light
The single rear fog light is located in the driver's side taillight cluster.
The rear fog light will only function in combination with the high/low beam headlights or the optional front fog lights.
ProCarManuals.com
Page 88 of 274

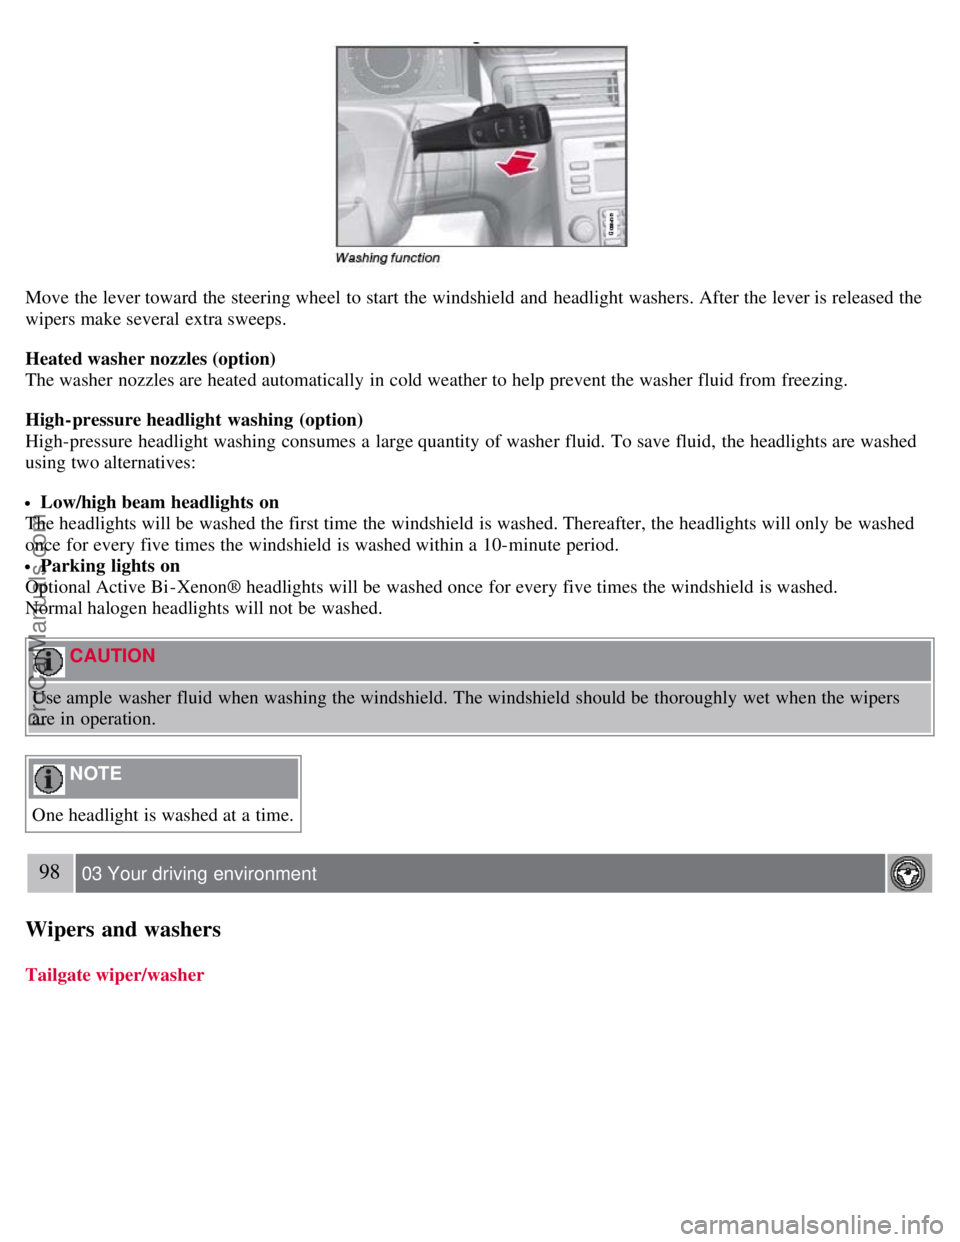
Move the lever toward the steering wheel to start the windshield and headlight washers. After the lever is released the
wipers make several extra sweeps.
Heated washer nozzles (option)
The washer nozzles are heated automatically in cold weather to help prevent the washer fluid from freezing.
High-pressure headlight washing (option)
High-pressure headlight washing consumes a large quantity of washer fluid. To save fluid, the headlights are washed
using two alternatives:
Low/high beam headlights on
The headlights will be washed the first time the windshield is washed. Thereafter, the headlights will only be washed
once for every five times the windshield is washed within a 10-minute period.
Parking lights on
Optional Active Bi -Xenon® headlights will be washed once for every five times the windshield is washed.
Normal halogen headlights will not be washed.
CAUTION
Use ample washer fluid when washing the windshield. The windshield should be thoroughly wet when the wipers
are in operation.
NOTE
One headlight is washed at a time.
98 03 Your driving environment
Wipers and washers
Tailgate wiper/washer
ProCarManuals.com
Page 182 of 274

Check condition of drive belts.
Check state of the battery's charge.
Examine tires carefully (the spare tire as well), and replace those that are worn. Check tire pressures.
The brakes, front wheel alignment, and steering gear should be checked by a trained and qualified Volvo service
technician only.
Check all lights, including high beams.
Reflective warning triangles are legally required in some states/provinces.
Have a word with a trained and qualified Volvo service technician if you intend to drive in countries where it may
be difficult to obtain the correct fuel.
Consider your destination. If you will be driving through an area where snow or ice are likely to occur, consider
snow tires.
Cold weather precautions
If you wish to check your vehicle before the approach of cold weather, the following advice is worth noting:
Make sure that the engine coolant contains 50 percent antifreeze. Any other mixture will reduce freeze protection.
This gives protection against freezing down to - 31°F (-35°C). The use of "recycled" antifreeze is not approved by
Volvo. Different types of antifreeze must not be mixed.
Volvo recommends using only genuine Volvo antifreeze in your vehicle's radiator.
Try to keep the fuel tank well filled - this helps prevent the formation of condensation in the tank. In addition, in
extremely cold weather conditions it is worthwhile to add fuel line de -icer before refueling.
The viscosity of the engine oil is important. Oil with low viscosity (thinner oil) improves cold-weather starting as
well as decreasing fuel consumption while the engine is warming up. For winter use, 5W -30 oil, particularly the
synthetic type, is recommended. Be sure to use good quality oil but do not use cold-weather oil for hard driving or in
warm weather. See page 276
for more information on engine oil.
NOTE
Synthetic oil is not used when the oil is changed at the normal maintenance intervals except at owner request and at
additional charge.
The load placed on the battery is greater during the winter since the windshield wipers, lighting, etc. are used more
often. Moreover, the capacity of the battery decreases as the temperature drops. In very cold weather, a poorly charged
battery can freeze and be damaged. It is therefore advisable to check the state of charge more frequently and spray an
anti-rust oil on the battery posts.
Volvo recommends the use of snow tires on all four wheels for winter driving. See the information on page 259.
To prevent the washer fluid reservoir from freezing, add washer solvents containing antifreeze. This is important
since dirt is often splashed on the windshield during winter driving, requiring the frequent use of the washers and
wipers. Volvo Washer Solvent should be diluted as follows: Down to 14° F (-10° C): 1 part washer solvent and 4 parts
water Down to 5° F (-15° C):
195 05 During your trip
Driving recommendations
1 part washer solvent and 3 parts water Down to 0° F (-18° C): 1 part washer solvent and 2 parts water Down to -18°
F (-28° C): 1 part washer solvent and 1 part water.
Use Volvo Teflon Lock Spray in the locks.
Avoid using de -icing sprays as they can cause damage to the locks.
196 05 During your trip
ProCarManuals.com
Page 213 of 274

4. Lift out the housing and place it on a soft surface to avoid scratching the lens.
5. Replace the defective bulb(s), see page 234
.
Reinserting the headlight housing
1. Plug in the connector until it clicks into place.
2. Reinstall the headlight housing and locking pins. Check that they are correctly inserted. The headlight housing must
be properly inserted and secured in place before the lighting is switched on or the remote key is inserted into the
ignition slot.
3. Check that the lights function properly.
Removing the cover to access the headlights and parking lights
NOTE
Before starting to replace a bulb, see page 228
.
1. Open the retaining clamp by pressing it to the side.
2. Press down the clips on the upper edge of the cover and remove it.
Reinstall the cover in the reverse order.
Low beam, halogen
1. Remove the headlight housing from the vehicle (see the instructions on page 228.
2. Remove the cover over the bulbs.
3. Detach the bulb by pressing the upper section of the retaining spring downward and to the side.
ProCarManuals.com