2008 VOLVO S80 mirror
[x] Cancel search: mirrorPage 105 of 275

107 03 Your driving environment
Starting the engine
Starting the engine
Ignition switch with remote key inserted (see page 80
for more information)
1. Fasten the seat belt.
WARNING
Before starting the engine, check that the seat, steering wheel and mirrors are adjusted properly. Make sure the brake
pedal can be depressed completely. Adjust the seat if necessary.
2. Insert the remote key into the ignition slot. Press the key until it is drawn into the slot
1.
NOTE
The remote key should be inserted into the ignition slot with the key blade end of the remote pointing out and the
key pad facing up. See the illustration on page 80
.
3. Depress the brake pedal
2.
WARNING
An extra mat on the driver's floor can cause the accelerator and/or brake pedal to catch. Check that the movement of
these pedals is not impeded. Not more than one protective floor covering may be used at one time.
4. Press and release the START/STOP ENGINE button. The autostart function will operate the starter motor until the
engine starts.
The starter motor operates for a maximum of 10 seconds. If the engine has not started, repeat the procedure.
1On vehicles with the optional keyless drive, it is only necessary to have a remote control in the passenger's compartment.
2 If the vehicle is moving, it is only necessary to press the START/STOP ENGINE button to start the vehicle.
WARNING
Always remove the remote key from the ignition slot when leaving the vehicle, especially if there are children in
Page 120 of 275
The navigation button can be used instead of ENTER and EXIT when navigating the menu hierarchy. The right arrow
is equal to ENTER and the left arrow to EXIT .
The menu options are numbered and can also be selected directly with the numerical keypad (1-9 only).
123 04 Comfort and driving pleasure
Menus and messages
Menu overview
Car key memory
Seat & mirror positions
Car settings
Fold mirr. when locking (option on certain markets only)
Collision warning settings (option)
Light settings
Lock settings
Parking camera settings (accessory)
Steering force level (option)
Information
Climate settings
Automatic blower adjust
Recirculation timer
Auto. rear defroster
Reset climate settings
Main menu AM
Audio settings
1
Sound stage
Equalizer, front
Equalizer, rear
Auto. volume control
Resets all audio settings.
Page 124 of 275

The temperature sensor for the passenger compartment is located below the climate control panel.
The outside temperature sensor is located on the door mirror.
The humidity sensor (option) is located in the interior rearview mirror.
NOTE
Do not cover or block the sensors with clothing or other objects.
Side windows and moonroof
To ensure that the air conditioning works optimally, the side windows, and the optional moonroof should be closed.
Fog on the inside of the windows
The defroster function should be used to remove fog or mist from the inside of the windows. Keeping the windows
clean with a commercially available window washing spray will also help prevent fogging or misting.
Vents in the parcel shelf
NOTE
The air vents at the rear of the parcel shelf should never be obstructed.
Temporary shut-off of the air conditioning
The air conditioning is momentarily disengaged during full-throttle acceleration or when driving uphill with a trailer.
This may result in a temporary increase in cabin temperature.
Ice and snow
Always keep the air intake grille at the base of the windshield free of snow.
Climate system maintenance
Special tools and equipment are required to maintain and carry out repairs on the climate system. Work of this type
should only be done by a trained and qualified Volvo service technician.
Refrigerant
Volvo cares about the environment. The air conditioning system in your car contains a CFC-free refrigerant - R134a.
This substance
127 04 Comfort and driving pleasure
Climate system
will not deplete the ozone layer. The air conditioning system contains 1.8 lbs (800 g) of R134a. The systems uses PAG
oil.
Passenger compartment filter
Replace the cabin air filter with a new one at the recommended intervals. Please refer to your Warranty and Service
Records Information booklet, or consult a trained and qualified Volvo service technician for these intervals. The filter
should be replaced more often when driving under dirty and dusty conditions. The filter cannot be cleaned and
therefore should always be replaced with a new one.
NOTE
Page 127 of 275
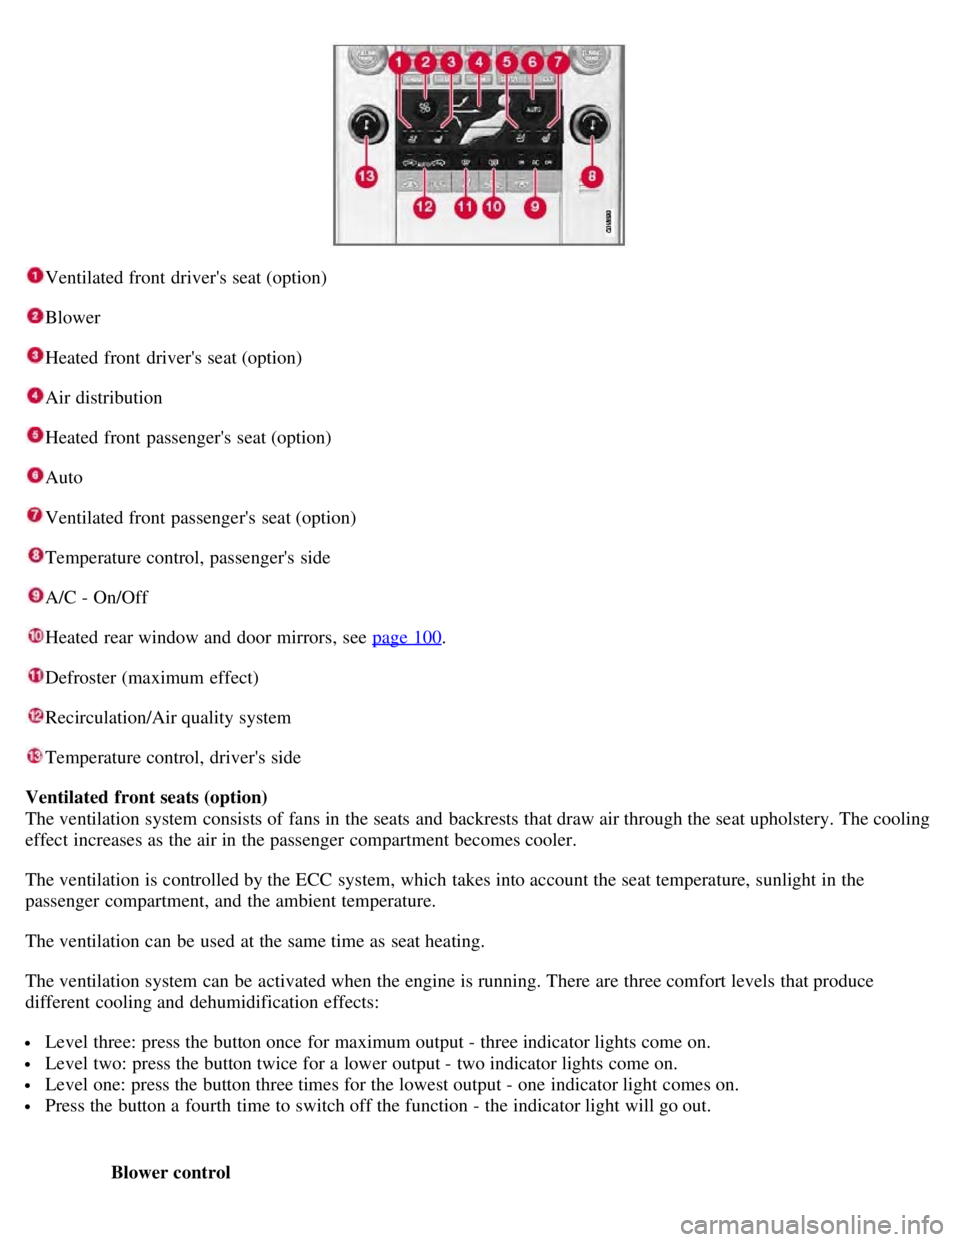
Ventilated front driver's seat (option)
Blower
Heated front driver's seat (option)
Air distribution
Heated front passenger's seat (option)
Auto
Ventilated front passenger's seat (option)
Temperature control, passenger's side
A/C - On/Off
Heated rear window and door mirrors, see page 100.
Defroster (maximum effect)
Recirculation/Air quality system
Temperature control, driver's side
Ventilated front seats (option)
The ventilation system consists of fans in the seats and backrests that draw air through the seat upholstery. The cooling
effect increases as the air in the passenger compartment becomes cooler.
The ventilation is controlled by the ECC system, which takes into account the seat temperature, sunlight in the
passenger compartment, and the ambient temperature.
The ventilation can be used at the same time as seat heating.
The ventilation system can be activated when the engine is running. There are three comfort levels that produce
different cooling and dehumidification effects:
Level three: press the button once for maximum output - three indicator lights come on.
Level two: press the button twice for a lower output - two indicator lights come on.
Level one: press the button three times for the lowest output - one indicator light comes on.
Press the button a fourth time to switch off the function - the indicator light will go out.
Blower control
Page 134 of 275
136 04 Comfort and driving pleasure
Audio system
FM Radio text on/off
CD/CD changer
Random
Disc text on/off
Track information on/off
Audio settings
Sound stage (front/driver/rear)
Auto. volume control (off/low/medium/high)
Sirius satellite radio (option)
Add song to memory
Direct channel entry...
Song seek on/off
Sirius settings
Song memory (show memory list)
Car settings
Fold mirror when locking
137 04 Comfort and driving pleasure
Audio system
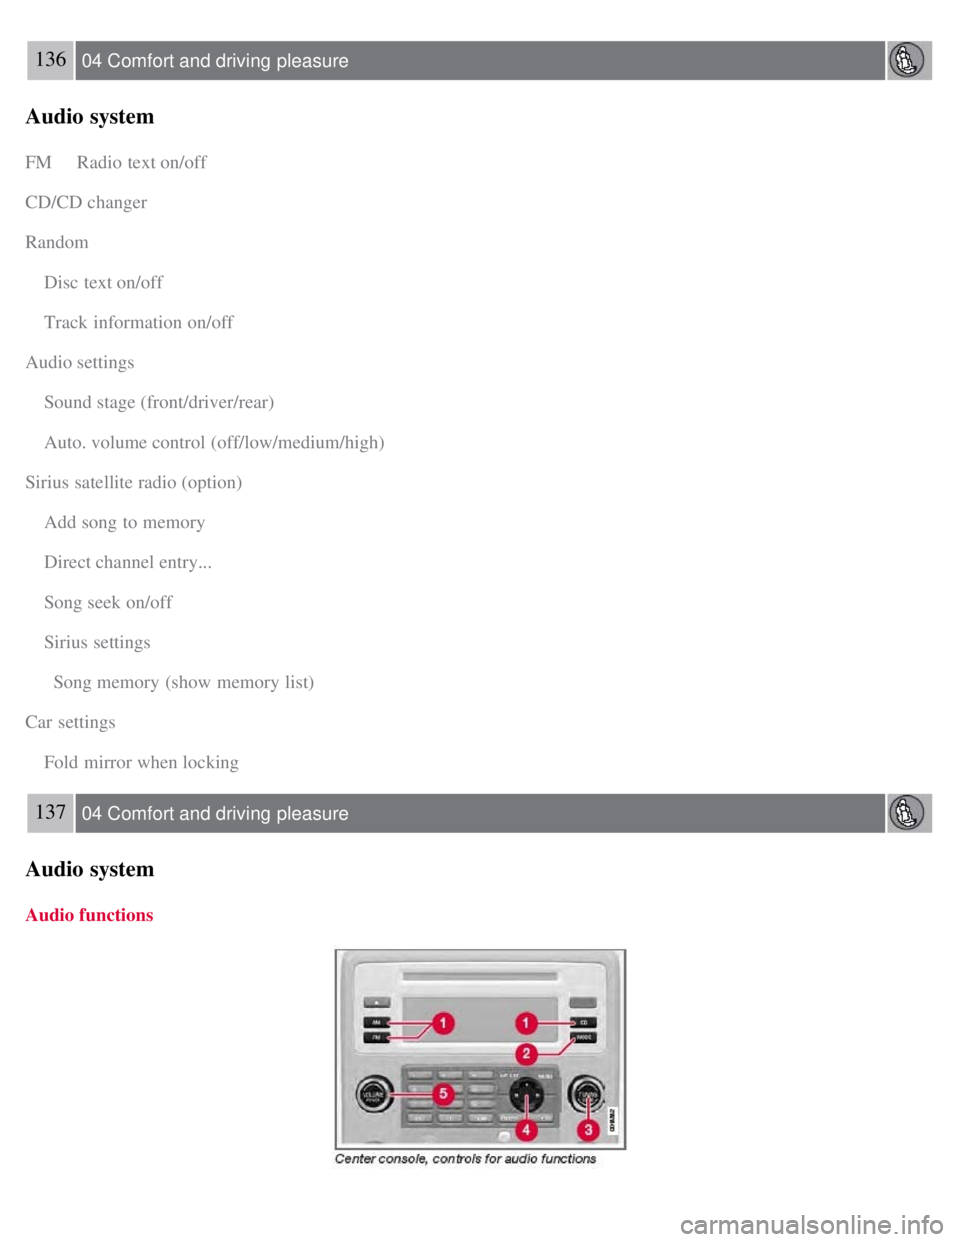
Audio functions
Page 146 of 275
This function provides the driver with an instantaneous conversion of the car's current speed from km/h to mph.
Current speed in km/h (U.S. models only)
This function provides the driver with an instantaneous conversion of the car's current speed from mph to km/h.
Current fuel consumption (Instantaneous)
Current fuel consumption is calculated every second. The information on the display is updated every few seconds.
When the vehicle is stationary, "----" appears on the display.
Average fuel consumption
The average fuel consumption since the last reset. Reset using RESET.
Driving distance on current fuel reserve
The calculation is based on the average fuel consumption over the last 20 miles ( 30 km) and the remaining usable fuel
in the tank. This shows the approximate distance that can be driven with the fuel quantity remaining in the tank. When
the driving distance on the current fuel reserve is less than 12 miles ( 20 km), " ---- miles to empty tank" is shown on
the display.
NOTE
The actual distance that can be driven on the usable fuel remaining in the tank may be influenced by a change in
driving style.
148 04 Comfort and driving pleasure
Trip computer
Resetting
1. Select Average speed or Average fuel consumption .
2. Press and hold RESET for approx. 1 second to reset the selected function. If RESET is kept depressed for at 3 three
seconds, Average speed and Average fuel consumption are reset simultaneously.
149 04 Comfort and driving pleasure
Compass
Operation
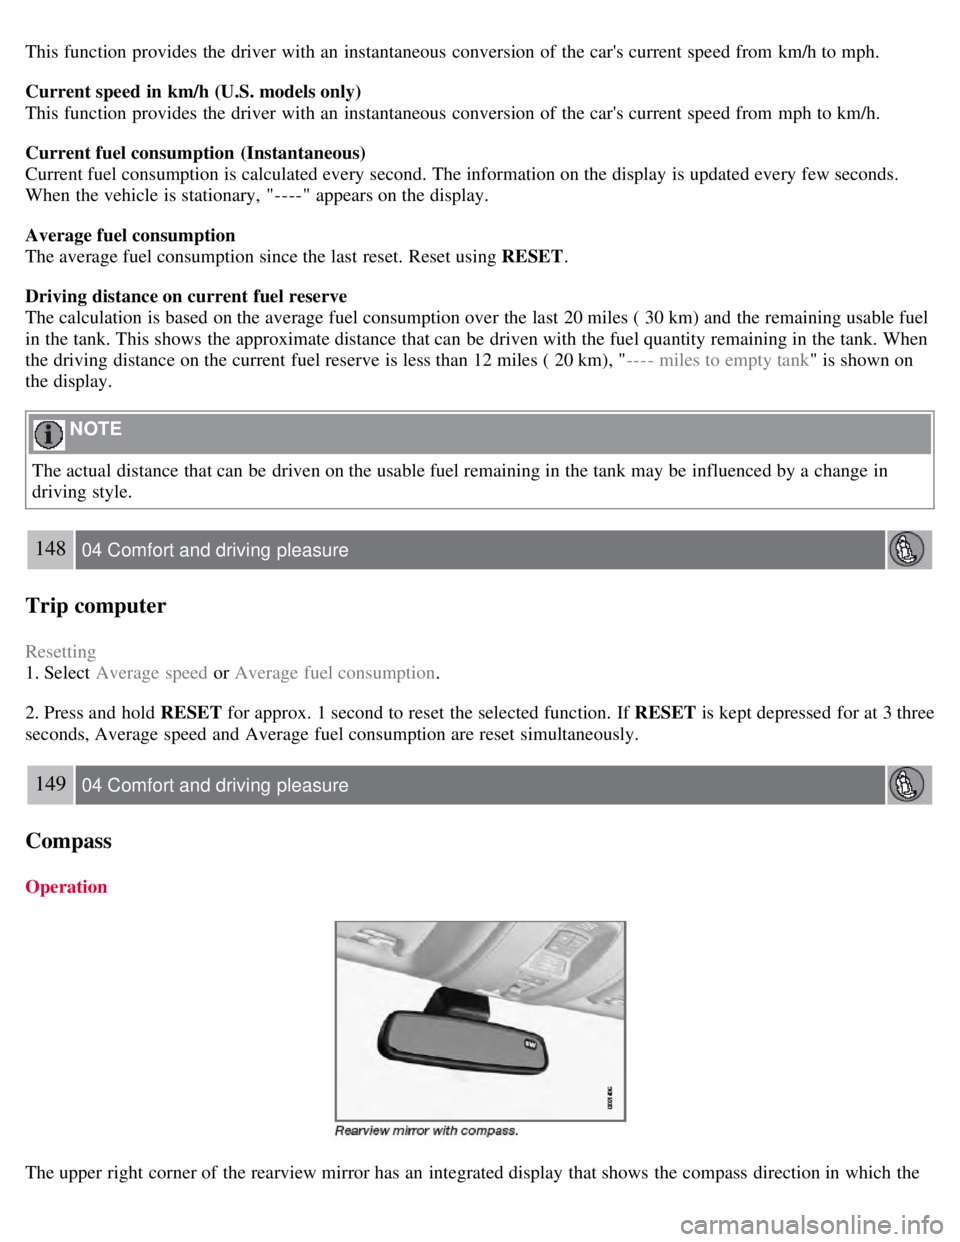
The upper right corner of the rearview mirror has an integrated display that shows the compass direction in which the
Page 147 of 275

vehicle is pointing. Eight different directions are shown with the abbreviations: N (north), NE (north east), E (east), SE
(southeast), S (south), SW (southwest), W (west) and NW (northwest).
The compass is displayed automatically when the vehicle is started or in ignition mode II . To switch the compass
on/off use a pen or similar object and press in the button on the rear side of the mirror.
Calibration
The compass may need to be calibrated if, for example, the vehicle is driven into a new magnetic zone. The characters
CAL are shown in the mirror's display if calibration is necessary.
1. Stop the vehicle in a large open area, away from traffic.
2. Start the vehicle.
3. Using a pen or similar object, press and hold the button on the rear side of mirror until CAL is shown again (after
approx. 6 seconds).
4. Drive as usual. CAL disappears from the display when calibration is complete. Alternative calibration method:
Drive slowly in a circle at a speed of no more than 5 mph (8 km/h) until CAL disappears from the display when
calibration is complete.
Selecting a magnetic zone
The earth is divided into 15 magnetic zones. The correct zone must be selected for the compass to work correctly.
1. Put the ignition in mode II .
2. Using a pen or similar object, press and hold the button on the rear side of mirror for at least 3 seconds. The number
for the current area will be shown.
3. Press the button repeatedly until the number for the required geographic area (1-15) is shown.
Page 175 of 275

NOTE
If the sensors are obstructed by e.g., dirt, snow, or ice, this could result in false warning signals from the park assist
system.
179 04 Comfort and driving pleasure
Blind Spot Information System (option)
Introduction
BLIS camera
Indicator light
BLIS symbol
The Blind Spot Information System (BLIS) is an information system that indicates the presence of another vehicle
moving in the same direction as your vehicle in the sideview mirror's "blind area."
CAUTION
The BLIS system should only be repaired by a trained and qualified Volvo service technician.
WARNING
BLIS is an information system, NOT a warning or safety system.
BLIS does not eliminate the need for you to visually confirm the conditions around you, and the need for you to
turn your head and shoulders to make sure that you can safely change lanes.
As the driver, you have full responsibility for changing lanes in a safe manner.
The system is based on digital camera technology. The cameras are located beneath the side-view mirrors.
When one (or both) of the cameras have detected a vehicle in the blind area (up to approximately 10 ft. (3 meters)
from the side of your vehicle, and up to approximately 31 ft. (9.5 meters) behind the side-view mirror), see the
illustration, the indicator light in the door panel illuminates. The light will glow continuously to alert the driver of the
vehicle in the blind area.
NOTE