2008 VOLVO S60 seat adjustment
[x] Cancel search: seat adjustmentPage 2 of 230

In Canada: Volvo Cars of Canada Corp.
National Customer Service
175 Gordon Baker Road
North York, Ontario M2H 2N7
1-800-663-8255
www.volvocanada.com
2007 © Volvo Car Corporation. All rights reserved.
2 Contents
00 Introduction
General information 6
Volvo and the environment7
Important warnings9
01 Safety
Occupant safety 12
Seat belts14
Supplemental Restraint System16
Front airbags17
Occupant Weight Sensor (OWS)21
Side impact (SIP) airbag25
Volvo Inflatable Curtain (VIC)26
Whiplash Protection System
(WHIPS)28
Child safety
30
Child restraint systems32
Infant seats34
Convertible seats36
Booster cushions39
ISOFIX lower anchors40
Top tether anchors42
Child restraint registration and
recalls43
02 Instruments and control
Instrument overview
46
Instrument panel48
Instrument and warning symbols49
Buttons in the center console54
Steering wheel adjustment56
Lighting panel57
Fuel filler door-unlocking
manually59
Left-side steering wheel lever
60
Right-side steering wheel lever61
Hazard warning flashers, door
mirror defroster63
Trip computer
64
Cruise control66
Parking brake68
12-volt sockets69
Power windows70
Mirrors72
ProCarManuals.com
Page 9 of 230

In Canada: Volvo Cars of Canada Corp.
National Customer Service
175 Gordon Baker Road
North York, Ontario M2H 2N7
1-800-663-8255
www.volvocanada.com
2007 © Volvo Car Corporation. All rights reserved.
2 Contents
00 Introduction
General information 6
Volvo and the environment7
Important warnings9
01 Safety
Occupant safety 12
Seat belts14
Supplemental Restraint System16
Front airbags17
Occupant Weight Sensor (OWS)21
Side impact (SIP) airbag25
Volvo Inflatable Curtain (VIC)26
Whiplash Protection System
(WHIPS)28
Child safety
30
Child restraint systems32
Infant seats34
Convertible seats36
Booster cushions39
ISOFIX lower anchors40
Top tether anchors42
Child restraint registration and
recalls43
02 Instruments and control
Instrument overview
46
Instrument panel48
Instrument and warning symbols49
Buttons in the center console54
Steering wheel adjustment56
Lighting panel57
Fuel filler door-unlocking
manually59
Left-side steering wheel lever
60
Right-side steering wheel lever61
Hazard warning flashers, door
mirror defroster63
Trip computer
64
Cruise control66
Parking brake68
12-volt sockets69
Power windows70
Mirrors72
ProCarManuals.com
Page 70 of 230

After you have adjusted the mirror(s), press the L or R switch again (the LED will go out) to deactivate the adjustment
control.
75 02 Instruments and controls
Mirrors
WARNING
The mirrors should always be adjusted prior to driving. Objects seen in the passenger's side wide -angle door mirror are
closer than they appear to be.
Remote central locking and door mirror memory-option
If you lock the vehicle and later unlock it with the same remote control and open the driver's door, the door mirrors (and
the driver's seat) will automatically move to the position they were in when you left the vehicle. This feature will work in
the same way with all of the remote control transmitters (up to 3) that you use with your vehicle. This feature will not
function if you lock your vehicle with the key.
76 02 Instruments and controls
Power moonroof (option)
To operate the moonroof, turn the ignition key to position I or II, or start the engine. The moonroof can be operated in
two ways:
A. Tilt position
B. Sliding moonroof
A. Tilt position
Open: With the moonroof closed, push up the rear edge of the switch (position 5 in the illustration below).
Close: Pull down and hold the rear edge of the switch (position 6 in the illustration below) until the moonroof has closed
completely.
ProCarManuals.com
Page 85 of 230

2 0 0 8
VOLVO S60
90 04 Interior
Front seats 92
Interior lighting97
Storage compartments99
Rear seat and trunk103
Spare wheel, tools and jack106
91 04 Interior
92 04 Interior
Front seats
Manually adjusted front seats
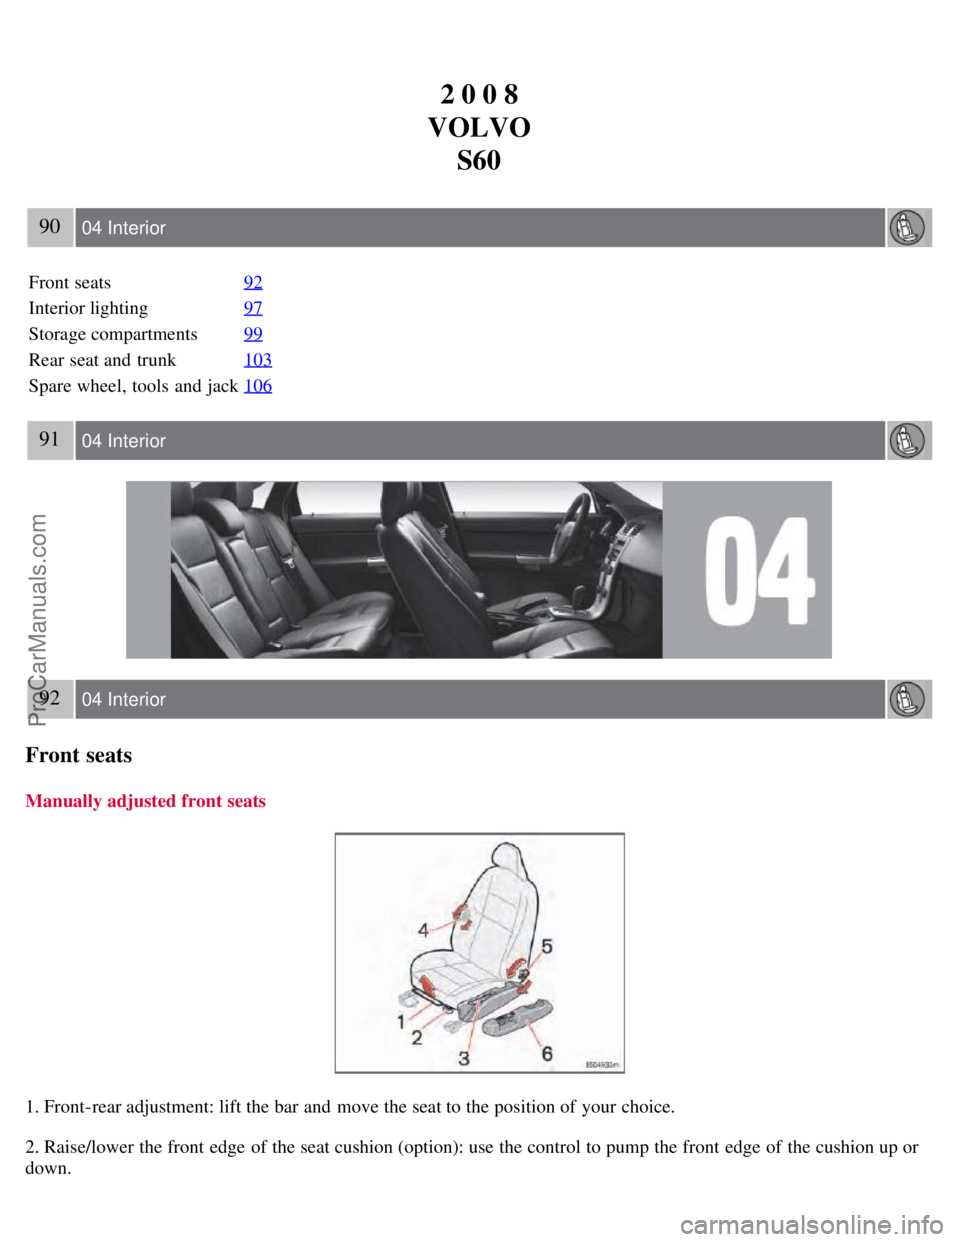
1. Front-rear adjustment: lift the bar and move the seat to the position of your choice.
2. Raise/lower the front edge of the seat cushion (option): use the control to pump the front edge of the cushion up or
down.
ProCarManuals.com
Page 87 of 230

Power seat - (option on certain models)
Operation
Driver's seat: The seat can be adjusted if the ignition key is in position I, II or if the engine is running. It can also be
adjusted as follows with the ignition off:
Within several minutes after the driver's door has been unlocked from the outside, has been opened, and remains
open.
Within a short period if the driver's door has just been closed.
Within a short period if the driver's door has not been opened after the ignition has been switched off.
Passenger seat: The seat can only be adjusted if the ignition key is in position I, II or if the engine is running.
A. Front edge of seat (raise/lower)
B. Front - rear
C. Rear edge of seat (raise/lower)
D. Backrest tilt
Seat adjustment
If your Volvo is equipped with power seats, the following may be adjusted with the two switches at the side of the
seat:
NOTE
The power seats have an overload protector that activates if a seat is blocked by any object. If this occurs, switch off
the ignition (key in position 0) and wait for a short period before operating the seat again.
Emergency stop
If the seat accidentally begins to move, press any of the buttons to stop the seat.
Remote keyless entry system and the driver's seat
The remote control transmitter also controls the position of the electrically operated driver's seat in the following way:
1. Adjust the seat to your preferences.
2. When you leave your vehicle, lock it using the remote control.
ProCarManuals.com
Page 88 of 230

The position of the seat is now stored in the remote control.
Automatic seat adjustment
To move the seat to the position in which you left it:
1. Unlock the driver's door with the same remote control (the one used to lock the doors)
95 04 Interior
Front seats
2. Open the driver's door within 2 minutes.
The driver's seat will automatically move to the position in which you left it.
NOTE
The seat will move to this position even if someone else has moved it to a different seating position and locked the
vehicle with a different remote control.
This feature will work in the same way with all of the remote control transmitters (up to 3) that you use with your
vehicle.
This feature will not function if you lock your vehicle with the key.
WARNING
Because the driver's seat can be adjusted with the ignition off, children should never be left unattended in the
vehicle.
Movement of the seat can be STOPPED at any time by pressing any button on the power seat control panel.
Do not adjust the seat while driving. The seat should be adjusted so that the brake pedal can be depressed fully. In
addition, position the seat as far rearward as comfort and control allow.
The seat rails on the floor must not be obstructed in any way when the seat is in motion.
Programming the memory (option)
Three different seating and door mirror positions can be stored in the driver seat's memory.
The following example explains how button 1 can be programmed. Buttons 2 and 3 can be programmed in the same
way.
ProCarManuals.com
Page 89 of 230

To program (store) a seat position in button 1:
1. Move the seat to the desired position using the seat adjustment controls (see the previous page).
2. Press and hold down the MEM (memory) button.
96 04 Interior
Front seats
3. With the MEM button depressed, press button 1 briefly to store the seat's current position.
To move the seat to the position that it was in when button 1 was programmed:
Press and hold down button 1 until the seat stops moving.
As a safety precaution, the seat will stop automatically if the button is released before the seat has reached the preset
position.
97 04 Interior
Interior lighting
Reading lights and courtesy light
1. Driver's side front reading lamp
2. Courtesy lights
3. Passenger's side front reading lamp
The reading lights can be switched on or off by pressing buttons 1 or 3.
The courtesy lighting (including footwell lighting) can be turned on or off by pressing button 2. This also activates the
automatic function.
ProCarManuals.com
Page 201 of 230

227 10 Audio
Radio functions HU-650/HU-850
Sound settings
Optimal sound reproduction
The audio system is calibrated for optimal sound reproduction through the use of digital signal processing. This
calibration takes into account the speakers, amplifier, cabin acoustics, the seating position of the listener, etc., for each
combination of vehicle and audio system. There is also dynamic calibration that takes into account the setting of the
volume control, radio reception, and the vehicle's speed. The sound settings described in this manual, such as BASS,
TREBLE , and EQUALIZER are only intended to enable the user to adapt sound reproduction to his/her personal
preferences.
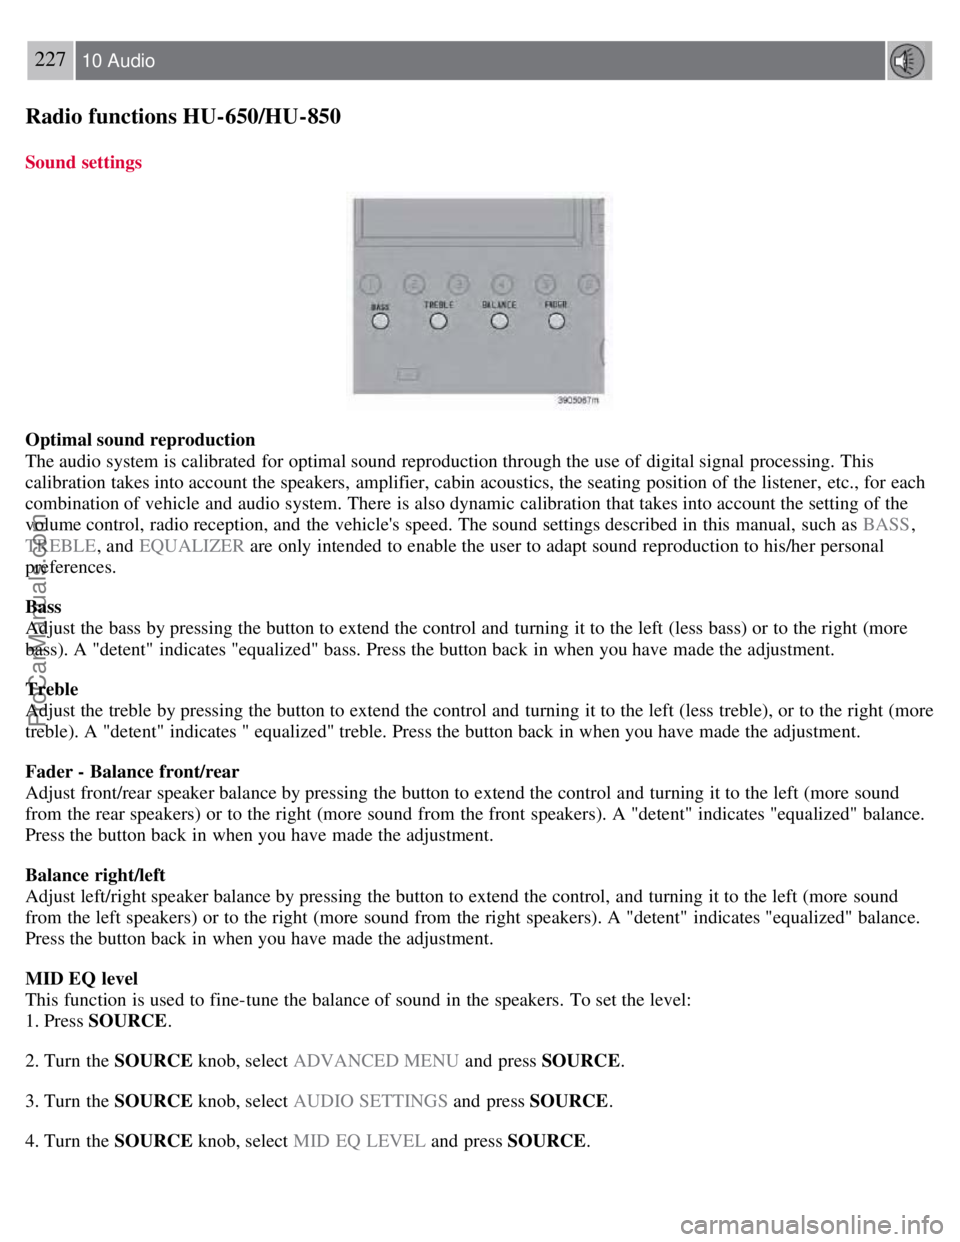
Bass
Adjust the bass by pressing the button to extend the control and turning it to the left (less bass) or to the right (more
bass). A "detent" indicates "equalized" bass. Press the button back in when you have made the adjustment.
Treble
Adjust the treble by pressing the button to extend the control and turning it to the left (less treble), or to the right (more
treble). A "detent" indicates " equalized" treble. Press the button back in when you have made the adjustment.
Fader - Balance front/rear
Adjust front/rear speaker balance by pressing the button to extend the control and turning it to the left (more sound
from the rear speakers) or to the right (more sound from the front speakers). A "detent" indicates "equalized" balance.
Press the button back in when you have made the adjustment.
Balance right/left
Adjust left/right speaker balance by pressing the button to extend the control, and turning it to the left (more sound
from the left speakers) or to the right (more sound from the right speakers). A "detent" indicates "equalized" balance.
Press the button back in when you have made the adjustment.
MID EQ level
This function is used to fine-tune the balance of sound in the speakers. To set the level:
1. Press SOURCE .
2. Turn the SOURCE knob, select ADVANCED MENU and press SOURCE.
3. Turn the SOURCE knob, select AUDIO SETTINGS and press SOURCE.
4. Turn the SOURCE knob, select MID EQ LEVEL and press SOURCE.
ProCarManuals.com