2008 VOLKSWAGEN SCIROCCO passenger seat
[x] Cancel search: passenger seatPage 2 of 138
Downloaded from www.Manualslib.com manuals search engine Table of Conte nts
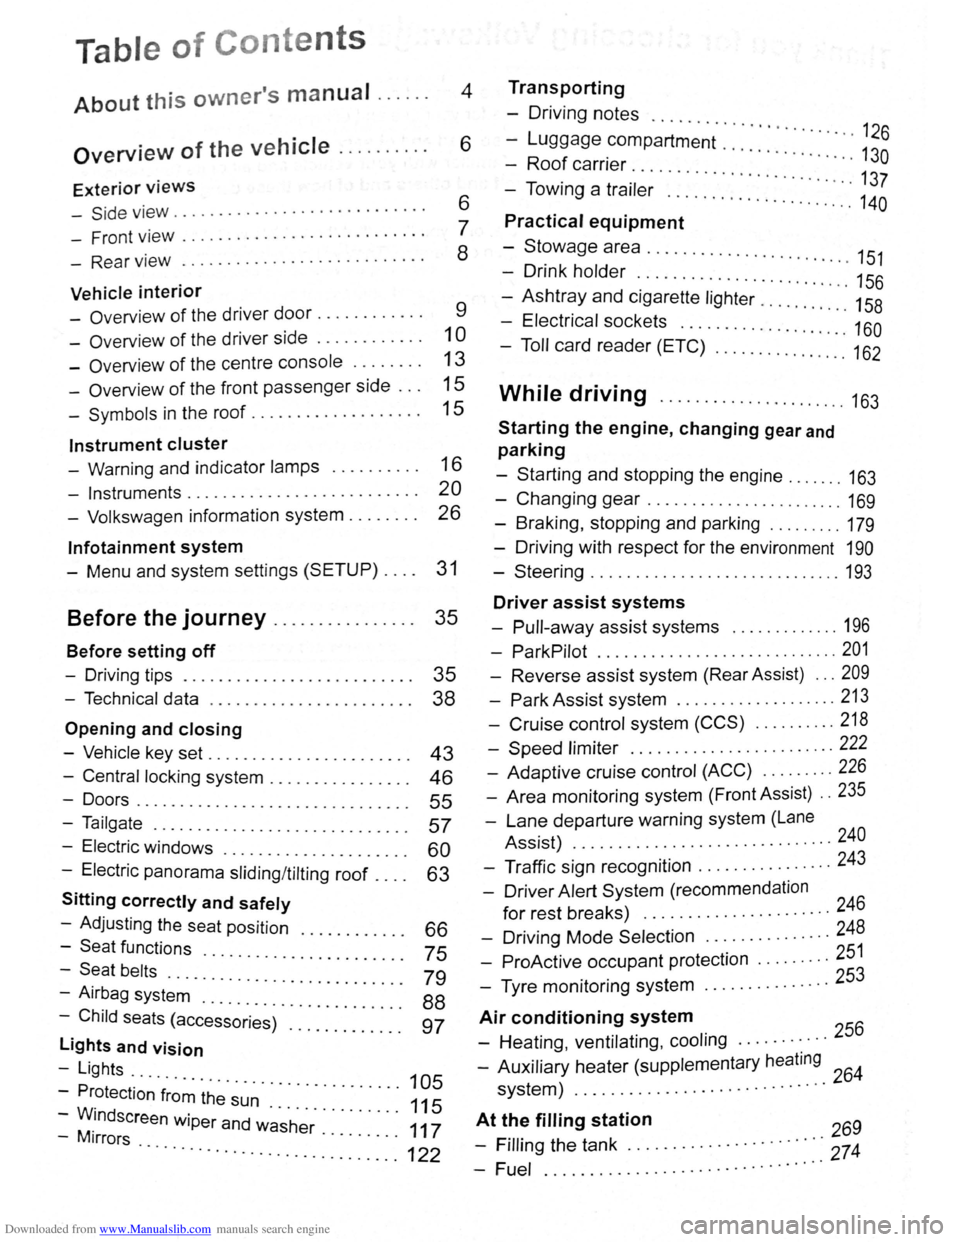
About this owner's manual . . . . . . 4
Overview of the vehicle . . . . . . . . . . 6
Exterior views
-Side v iew . . . . . . . . . . . . . . . . . . . . . . . . . . . . 6
- Front view . . . . . . . . . . . . . . . . . . . . . . . . . . . 7
- Rear view . . . . . . . . . . . . . . . . . . . . . . . . . . . 8
Vehicle interior
- Overview of the driver door........... . 9
-Overv iew of the driver side . . . . . . . . . . . . 1 0
- Overview of the centre console . . . . . . . . 13
- Overview of the front passenger side . . . 15
-Symbols in the roof . . . . . . . . . . . . . . . . . . . 15
Instrument cluster
- Warning and indicator lamps . . . . . . . . . . 16
- Instruments.......................... 20
- Volkswagen information system . . . . . . . . 26
lnfotainment system
- Menu and system settings (SETUP) . . . . 31
Before the journey . . . . . . . . . . . . . . . . 35
Before setting off
- Driving tips . . . . . . . . . . . . . . . . . . . . . . . . . . 35
- Technical data . . . . . . . . . . . . . . . . . . . . . . . 38
Opening and closing
-Vehicle key set . . . . . . . . . . . . . . . . . . . . . . . 43
- Central locking system . . . . . . . . . . . . . . . . 46
-Doors....................... .. . 55
-Tailgate . . . . . . . . . . . . . . . . . . . . . . . . . . . . . 57
- Electric windows . . . . . . . . . . . . . . . . 60
- Electric panorama sliding/tilting roof . : : : : 63
Sitting correctly and safely
- Adjusting the seat position . . . . 66
-Seat functions · · · · · · · · 75 -Seat belts ..... · · · · · · · · · · · · · · · · · ·
- Airbag syst~~ . : : : : · · · · · · · · · · · · · · · 79
-Child seats (access~;;~~)· :::::::::::: : ~~
lights and vision
-Lights ...
- Protection
·f~~~ ~h~· ~~~ · · · · · · · · · · · 105
-WM.indscreen wiper and w~·s·h~r· . . . . . . . . . 111175
-1rrors · · · · · · · .. ............. ...... ........... 122
Transporting
- Driving notes ..........
-Luggage compartment · · · · · · · · · · · · · · 126
-Roof carrier · · · · · · · · · · · · · · · · 130
- Towing a trai·l~; .. ... · · · · · · · · · · · · · · · · · · 137
..... ................. 140
Practical equipment
-Stowage area ........... .. .
- Drink holder
.. · · · · · .. · 151 . . . . . . . . . . . . . . . . . . . . . . . 156
-Ashtray and cigarette lighter ......... : ." 158
- Electrical sockets ........ .. .......... 160
- Toll card reader (ETC) .............. .. 162
While driving ...................... 163
Starting the engine, changing gear and
parking
-Starting and stopping the engine ....... 163
-Changing gear ....................... 169
-Braking , stopping and parking ........ . 179
- Driving with respect for the environment 190
-Steering ............................. 193
Driver assist systems
- Pull-away assist systems ............. 196
- ParkPilot ............................ 201
- Reverse assist system (Rear Assist) ... 209
-Park Assist system ................... 213
-Cruise control system (CCS) .......... 218
-Speed limiter ........ .. .............. 222
- Adaptive cruise control (ACC) ........ . 226
- Area monitoring system (Front Assist) .. 235
-Lane departure warning system (Lane
Assist) .
.......... ................... 240
- Traffic sign recognition ................ 243
- Driver Alert System (recommendation
for rest breaks) ........... ........... 246
- Driving Mode Selection ............... 248
- ProActive occupant protection ..... .... 251
- Tyre monitoring system .. ............. 253
Air conditioning system
- Heating , ventilating, cooling ........... 256
- Auxiliary heater (supplementary heating 64 system) ................. ............ 2
At t~~ filling station 269
- Frllrng the tank ............. · · · · · · ·::: 274
-Fuel ................ .. · · · · · · · · ·· ·
Page 40 of 138
Downloaded from www.Manualslib.com manuals search engine In vehicles without a SAFELOCK
mechanism: closing and locking the doors
(Keyless Exit)
• Close the driver door.
• Touch the locking sensor@ on the outside of
the driver or front passenger door ha ndle once .
The door being used must be closed.
In vehicles with a SAFELOCK mechanism:
closing and locking the doors (Keyless Exit)
• Close the driver door.
• Touch the locking sensor@ on the outside of
the driver or front passenger door handle once .
The car is locked with the SAFELOCK mechan ism
=>page 51 active. The door be ing used must be
closed.
• Touch the locking sensor@ (arrow) on the out
side of the driver or fron t passenger door handle
twice to lock the vehicle without activating the
SAFE LOCK mechanism =>page 51.
Locking and unlocking the tailgate
If the vehicle is locked, the tailgate will be unlocke d
automatically when you open it if a valid vehicle
key is located within the operating range of the tail
gate =>Fig . 30.
Open and close the tailgate as normal
=>page 57.
The tailgate is locked automat ically after it is
closed. This al so applies if a val id vehicle key is lo
cated on the luggage compart ment cover or in the
luggage compartment.
The tailgate will not lock automat ically after closing
if one of the following criteria applies :
• The vehicle is complete ly un locked .
• A valid vehicle key is located near the front or
rear seats in the v ehicle .
Response when locking the vehicle with a
second vehicle key
If a vehicle key is loca ted inside the vehicle, the
vehicle w ill only lock from the outside if a se cond
valid vehicle key is located outside the vehicle,
within the operating range of the Keyless Access
system.
Automatic switch-off of the sensors
If an exterior sensor in one of the door handles on
a locked
vehicle is activated more often than usual ,
e .g.
if branches from a hedge rub against it, the
proxim i
ty sensor will be switched off for a short
t ime .
The sensors are reactivated if any of the following
takes place:
• Some time has passed.
• OR: the vehicle is unlocked using the 0 button
on the vehicle key.
• OR: the tailgate is opened.
• OR: the vehicle is unlocked with the vehicle
key .
Convenience functions
To use convenience closing for all electric win
dows and the electric panorama sliding/tilting roof,
hold a finger on the locking sensor
=>Fig . 31 @on
the outside of the driver or front passenger door
handle for a few seconds until the windows and/or
the electric panorama sliding/tilting r
oof have
closed.
When the sensor on the
door handle is to uched ,
the
door will open in accordance with the settings
activated in the infotainment system using
the~
button, and the~ and (Open ing and closing ) function
buttons
=>page 31.
lt is possible that the sensors in the door han
dles will be activated by a powerful jet of water
or steam if a valid vehicle key is within its oper
ating range at the same time. If at least one
window is open and the sensor@ (arrow) in a
door handle is activated permanently, all win
dows close. lt is possible that all windows will
open if the jet of water or steam is moved away
from the door handle sensor® (arrow) briefly
and then moved back onto it =>page 50, Con
venience functions.
m lt may not be possible to lock or unlock the
L!J vehicle using Keyless Access if the vehicle
battery or battery
in the vehicle key is weak or dis
charged . The vehicle can be locked or unlocked
manually
=>page 339 .
m If there is no valid vehicle key in the vehicle
L!J or if it is not detected , a co rre spond ing dis
play w ill be shown in the instrum ent cluster display.
T his may occur if the vehicle key is obstructed
by
another radio signal or is cov ered by another item,
e .g . an aluminium suitcase or briefcase.
m The function of the door handle sens?rs maY
L!J be limited by dirt, e.g . by salty depos1ts.
Clean the vehi cle as necessary =>page 294 .
m A veh icle with an automatic gearbox c~~ only
Page 46 of 138
Downloaded from www.Manualslib.com manuals search engine Electric windows
Introduction
Thi .h'" t r co nt ins information on the following
'll j· t ":
I' · A WARNING (Continued) ·----""=~·
ning r cl ing the windows elec trically . . 60
• Never leave children or people requiring
assistance alone in the vehicle when the ve
hicle is locked. The windows can no longer
be opened in an emergency.
tric wind ws - functions . . . . . . . . . . . . . . 61
R 1\-b k fun ction f or th e electric windows . . . 61
Additional information and warnings:
• V lk wag n information system ~page 26
• ntr I loc king system :::) page 46
• lnfo tai nm ent system ~page 31
• Always take all vehicle keys with you ev
ery time you leave the vehicle. The windows
can still be operated using the buttons sever
al minutes after the ignition has been switch
ed off, provided that the driver door and front
passenger door are not opened.
A~ WARNING
~-~~------------------·~--------~~~
• When transporting children on the rear
bench seat, the rear electric windows should
always be deactivated using the safety button
so that they cannot be opened or closed.
ltnproper or unsupervised use of the electric
windows can cause serious injuries.
• The electric windows should only be
opened or closed when you are sure that no
body is in their operating area . During sudden rain showers, water can enter
the vehicle interior via open windows and
cause damage
to the vehicle.
Opening or closing the windows electrically
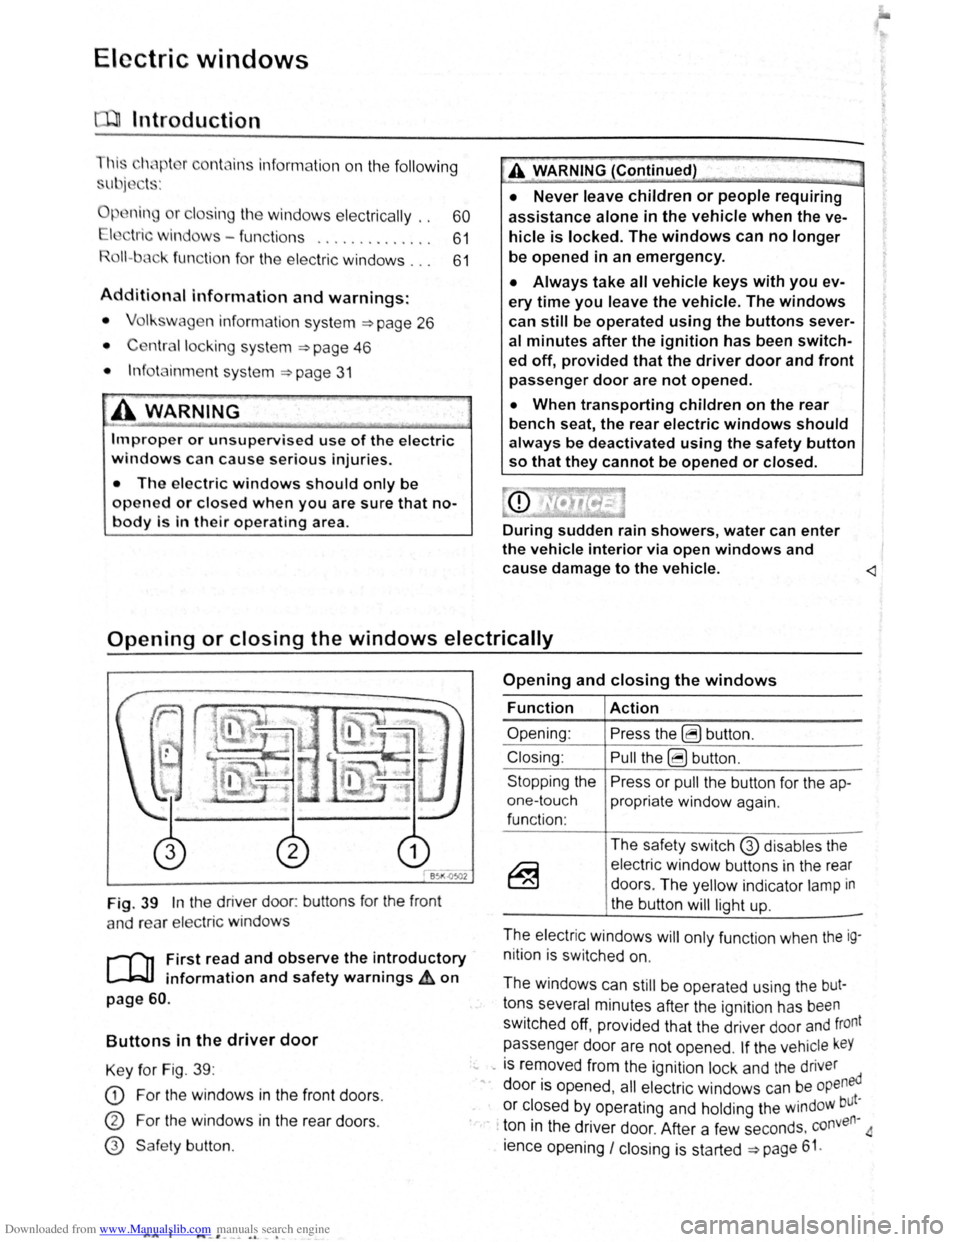
Fig. 39 In the driver door: buttons for the front
a nd rear
elec tric windo ws
r--('n First read and observe the introductory
~ information and safety warnings £ on
page 60.
Buttons in the driver door
Key for Fig. 39 :
CD For the windows in the front doors .
CD For the windows in the rear doors .
@ Safe ty button .
AA l ..._-'. --~ o. -•
Opening and closing the windows
Function
Opening :
Closing:
Stopping the
one-touch
function :
Action
Press the ~ button .
Pull the ~ button .
Press or
pull the button for the ap
propriate window again.
The safety switch
G) disables the
electric window buttons in the rear
doors . The yellow indicator
lamp in
the button
will light up.
-
The electric windows will only function when the ig
nition is switched on.
The windows can
still be operated using the but
tons several minutes after the ignition has been
switched off, provided that the driver door and front
passenger door are not opened .
If the vehicle keY
... -is removed from the ignition lock and the driver
" door is opened , all electric windows can be opened
or closed by operating and holding the windoW but~
· · ton in the driver door. After a few seconds . conven
ience opening
I closing is started ~page 61.
Page 47 of 138
Downloaded from www.Manualslib.com manuals search engine lcctrlc windows-functions
lr .. t r ,nd nd obsorv the Introductory
lnf rmotl n nn d 1 fety warnings~ on
n - t uc h opening ond closing
11 t ur.11 p n ln a n d cl sing mnk s it possib le
t fully p n n
butt on , do n t h v t o e h Id do wn to do this .
r
o n -touch closing: pull th button fo r th e ap
pr prl1 l window up brl fly Into the s co nd posi
tion.
or ono-touch opening: pr ss the bu tto n for the
ppr prl1t wind w down bri fly Into the seco nd
p
s lti n .
Stopping the one-touch function: press or pull
lh
bu tt n f r the appropri te window again.
R
estoring one-touch opening and closing
On - touc h op ning and closing is deac tiv a te d if
th v hi 'I batt ery has been disconnec ted or dis
c h
rg d whil e the wind ow s were not fully closed.
The fun ction will ha ve to be reset.
• Cl s all windows and doors .
• Swi tc h on the ignit ion .
• Pull up the bu tton for the window and hold it in
thi s posi tion for longer than 2 sec onds .
• Let go of the bu tton then pull it up aga in and
ho ld i t in this position . On e-to uch opening and
c los ing is
now ready for operation .
The one -to uch function can be res tored for individ
u
I windows or for several wind ow s a t th e same
tim e.
Convenience opening and closing
The windows ca n be opened and clos ed from out
side
t11e v e hi cle using the vehicle key :
• Press and hold the locking or unlocking button
o n the
ve hi cle k e y. All electr ic windows will be ei
ther opened or closed.
•
To interrupt this function , let go of the locking or
unlo cking button .
During co
nveni ence closing , the windows and the
elec tric panorama sliding/tilting roof close .
A varie ty of setti ngs re lated to window operation
can be made and adjusted using the @) button
and the
G and (open and close ) function buttons
~page 31.
A WARNING
Improper or unsupervised use of the electric
windows can cause serious injuries.
• The electric windows should only be
opened or closed when you are sure that no
body is in their operating area.
• Never leave children or people requiring
assistance alone in the vehicle when the ve
hicle is locked. The windows can no longer
be opened in an emergency.
• Always take all vehicle keys with you ev
ery time you leave the vehicle. The windows
can still be operated using the buttons sever
al minutes after the ignition has been switch
ed off, provided that the driver door and front
passenger door are not opened.
• When transporting children on the rear
bench seat, the rear electric windows should
always be deactivated using the safety button
so that they cannot be opened or closed.
r::l One-touch opening and closing and the roii
L!J back function will not work if there is a fault in
the
electric windows . Proceed to a qualified work-
shop . ~
Roll-back function for the electric windows
r-('n First read and observe the i~troductory
l.-W.I information and safety warnmgs A on
page 60.
The roll -b ac k function for the electric windows can
reduce the risk
of injuri es when the windows are
closing => ,&. If the one- touch closing function for a
wind ow
does not work beca use it is stiff or is being
obs tructe d the
window will autom atically open I
again.
• Check to see why the window has not closed.
• Try to close the window again. ..,..
Opening and closing 61
Page 52 of 138
Downloaded from www.Manualslib.com manuals search engine ~emoving and fitting head restraints
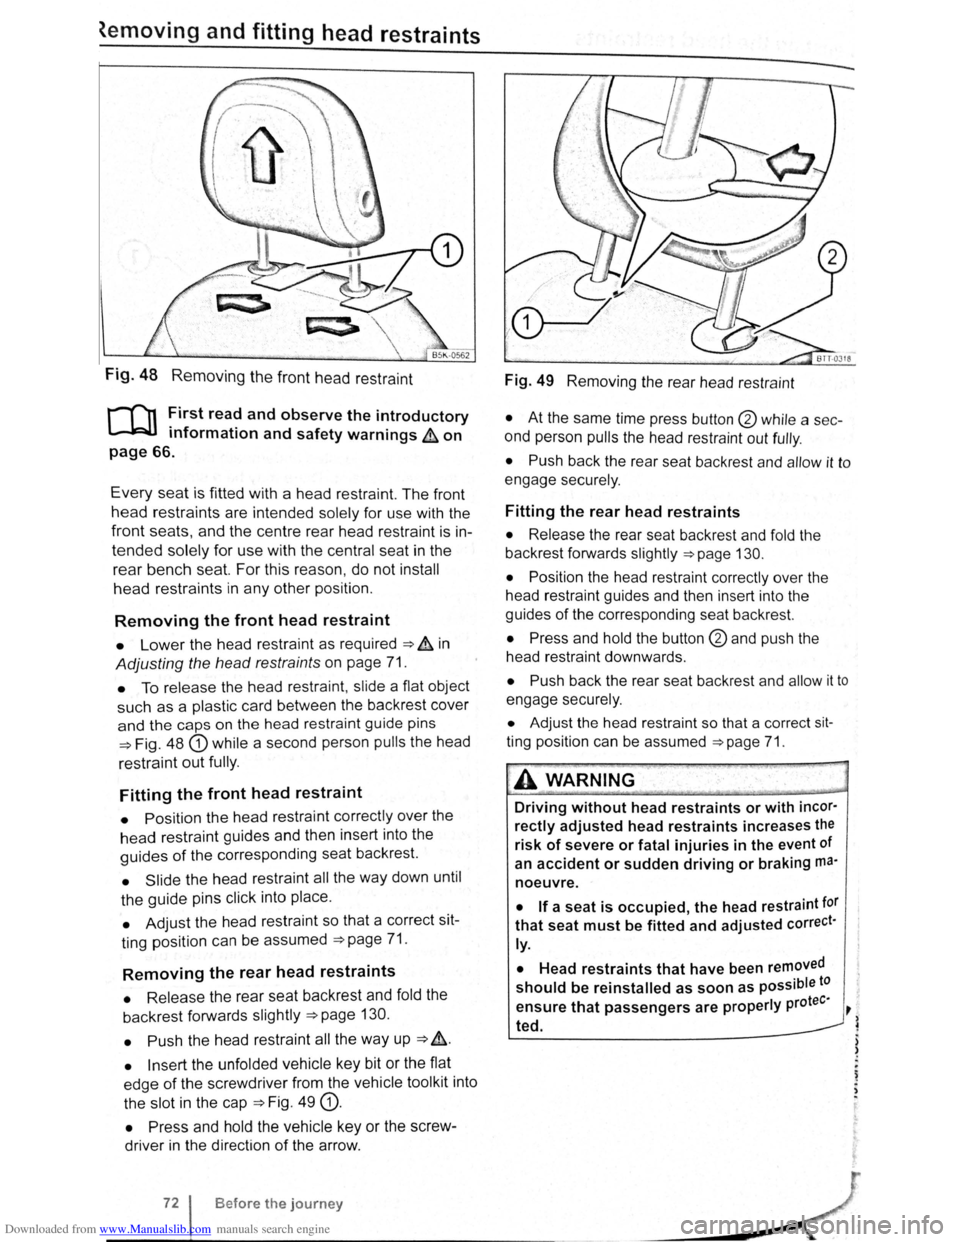
Fig. 48 Removing the front head restraint
r-f'n First read and observe the introductory
L-lcJJ information and safety warnings & on
page 66.
Every seat is fitted with a head restraint. The front
head restraints are intended solely for use with the
front seats, and the centre rear head restra int is in
tended solely for use with the central seat in the
rear bench seat. For this reason , do not install
head restraints in any other position.
Removing the front head restraint
• Lower the head restraint as required ===> & in
Adjusting the head restraints on page 71.
• To release the head restraint , slide a flat object
such as a plas tic card between the backrest cover
and the caps on the head restraint guide pins
===>Fig. 48 G) while a second person pulls the head
restraint
out fully .
Fitting the front head restraint
• Position the head restraint correctly over the
head restraint guides and then insert into the
guides of the corresponding seat backrest.
• Slide the head restraint all the way down until
the guide pins click into place .
• Adjust the head restraint so that a correct sit
ting position can be assumed
===>page 71.
Removing the rear head restraints
• Release the rear seat backrest and fold the
backrest forwards slightly
===>page 130.
• Push
the head restraint all the way up ===> &.
• Insert the unfolded vehicle key bit or the flat
edge
of the screwdriver from the vehicle tool kit into
the slot in the cap
===>Fig. 49 G).
• Press and hold the vehicle key or the screw
driver in the direction
of the arrow .
Before the journey
Fig. 49 Removing the rear head restraint
• At the same time press button @ while a sec
ond person
pulls the head restraint out fully .
• Push back the rear seat backrest and allow it to
engage securely .
Fitting the rear head restraints
• Release the rear seat backrest and fold the
backrest forwards slightly
===>page 130.
• Position
the head restraint correctly over the
head restraint guides and then insert into the
guides
of the corresponding seat backrest.
• Press and hold the button @and push the
head restraint downwards .
• Push back the rear seat backrest and allow it to
engage securely.
• Adjust the head restraint so that a correct sit
ting position can be assumed ===>page 71.
A WARNING .
Driving without head restraints or with incor·
rectly adjusted head restraints increases the
risk of severe or fatal injuries in the event of
an
accident or sudden driving or braking ma·
noeuvre.
• If a seat is occupied, the head restraint tor
that seat must be fitted and adjusted correct·
ly.
•
Head restraints that have been removed
should be reinstalled as soon as possible to
tee· ensure that passengers are properly pro ~
~ ted.
) )
.
~ . ,
Page 55 of 138
Downloaded from www.Manualslib.com manuals search engine Seat functions
[ Introduction
1 hi · chnptor contnins inforrnntion o n th e follo wing
sub wrts :
'" t dt ll 'nting . . . . . . . . . . . . . . . . . . . . . . . . . . . 75
8dl.k nm~S<. g fun ction . . . . . . . . . . . . . . . . . . . 76
F lldm .. th front Pt ~seng r s n t bac kres t
ft.)rWflrd.. . . . . . . . . . . . . . . . . . . . . . . . . . . . . . . . 77
Additiona l inforn1ation and warnings:
• Adjus ting the s t1t po sitio n ;;. page 66
• S at b Its -:-pag e 79
• Airbrtg sys te m => pag e 88
• Child s ts (accessories ) ::::>page 97
• Ex t rior mirr ors =-> pflge 1 22
• Arr condi tio ning ->page 256
Seat heating
c.:.:..J L.:..J L..:..l
BAJ -0013
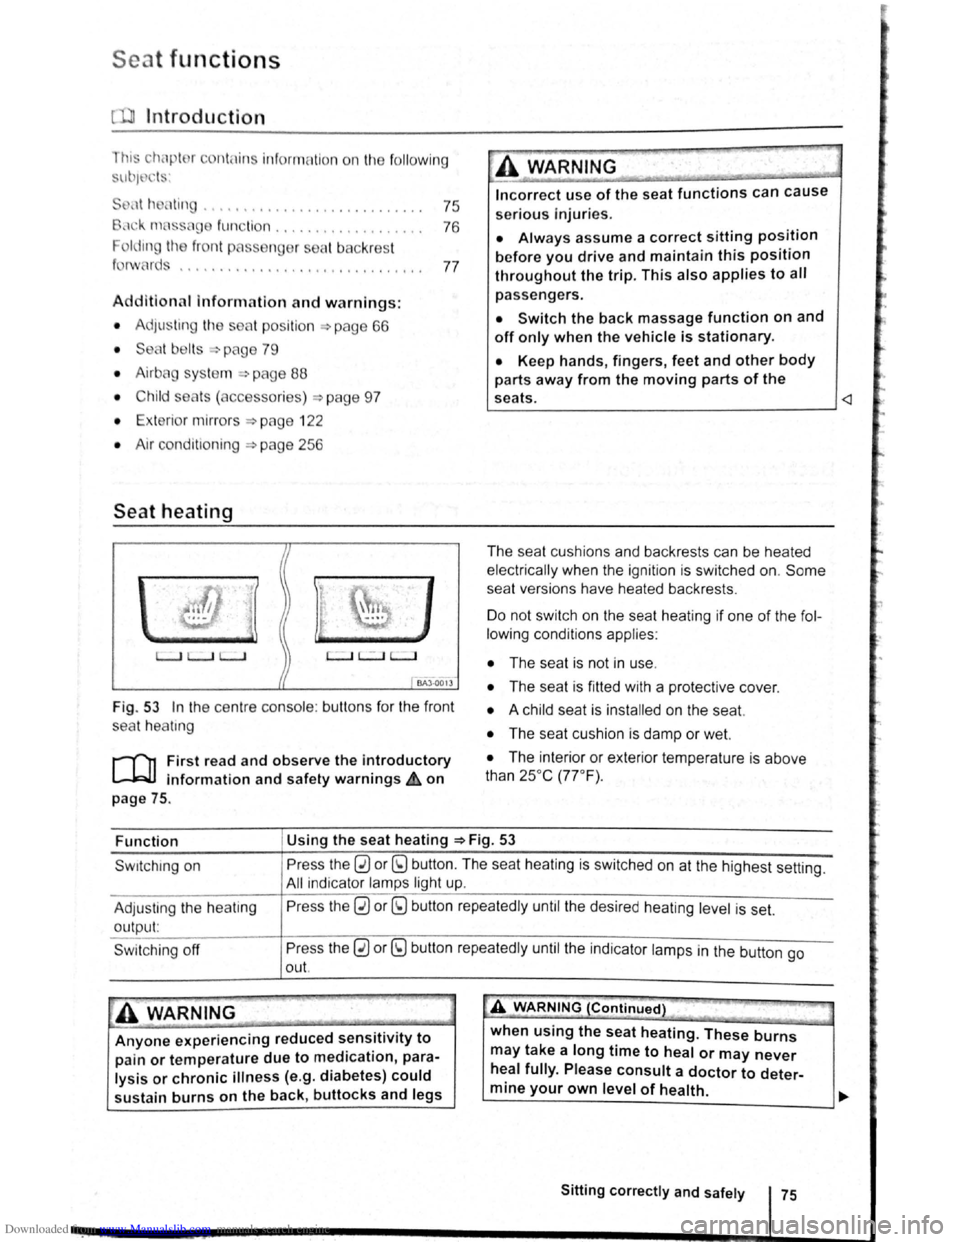
Fig . 53 In the ce ntre conso le : butt ons for the front
sea t
hea trng
i""""fl1 First read and observe the introductory
L-...lr::JJ information and safety warnings £ on
page
75.
Incorrect use of the seat functions can cause
serious Injuries.
• Always assume a correct sitting position
before you drive and maintain this position
throughout the trip. This also applies to all
passengers.
• Switch the back massage function on and
off only when the vehicle is stationary.
• Keep hands , fingers, feet and other body
parts away from the moving parts of the
seats.
elec trical ly when the ignition is switched on.
Some
seat ve rsions have heated backrests .
Do not switc h on the seat heating if one of the fol
lowing conditions applies:
• The seat is not in u se.
• The seat is fitted with a protect ive cover.
• A chi ld seat is installed on the seat.
• The seat cushion is damp or wet.
• The interior or exterior tempera ture is above
than 25oc (77 °F) .
Function Using
the seat heating ::::>Fig. 53
Swrtching on
Adjus ting
the heating
output:
Swi tchi ng off
Press the 0 or (9 button. The seat heating is switched on at the highest setting.
All indicato r l amps light up.
Pre ss the
0 or (9 button repeatedly until the desired heating level is set.
Press the
0 or (9 button repeatedly until the ind ica tor lamps in the button go
out.
~A WARNING (Continued) " ._..~~1 ~...... -~.~. ~-~ ~----J
Anyone experiencing reduced sensitivity to
pain or temperature due to medication, para
lysis or chronic illness (e.g. diabetes) could
sustain burns on the back, buttocks and legs when
using the
seat heating. These burns
may take a long time to heal or may never
heal fully. Please consult a doctor to deter
mine your own level of health.
~--------------~--------~~
Sitting correctly and safely 75
Page 56 of 138
Downloaded from www.Manualslib.com manuals search engine Folding the front passenger seat backrest forwards
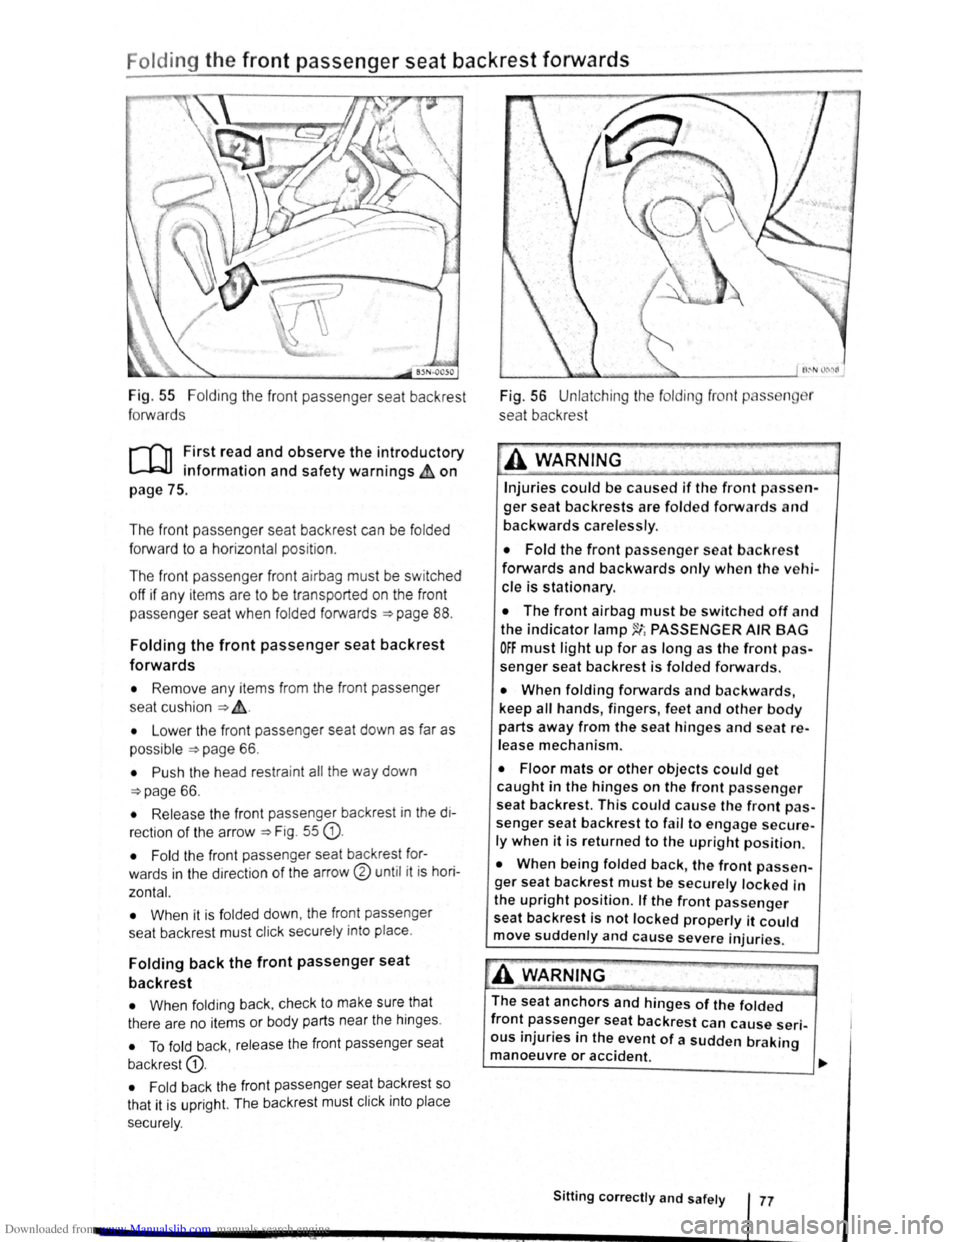
Fig. 55 Folding the front passenger seat backrest
forwards
r-('n First read and observe the introductory
l-.b1.l information and safety warnings~ on
page
75 .
The front passenger seat backrest can be
folded
forward to a horizontal position .
The
fron t pass enge r front airbag must be switched
off if any it e ms are to be transported on the front
p asse nger seat when
folded forwards ~page 88.
Folding the front passenger seat backrest
forwards
• Remove any items from the front passenger
seat cu shio n
~ ~-
• Lower the front passenger seat down as far as
possible
~page 66 .
• Push the head restra int all the way down
~page 66.
• Release the front passenger backrest in the di
rection
of the arrow ~Fig. 55 G).
• Fold the front passe nger seat backrest for
wards
in the dir ec tion of the arrow® until it is hori
zontal.
•
When it is fol ded down , the front passenger
sea t backrest must click securely into place .
Folding back the front passenger seat
backrest
• When foldi ng back , check to make sure that
there are no items or body parts near the hinges .
• To fold back , release the front passenger seat
backrest
G).
• Fold back the front passenger seat backrest so
that it is upr
ight. The backrest must click into place
sec urely .
Fig. 56 Unlatching the fo lding front p ss n r
seat backrest
A WARNING '·
Injuries could be caused if the front passen
ger seat backrests are folded forwards and
backwards carelessly .
• Fold the front passenger seat backres t
forwards and backwards only when the vehi
cle is stationary.
• The front airbag must be switched off and
the indicator lamp~~ PASSENGER AIR BAG
OFF must light up for as long as the front pas
senger seat backrest is folded forwards.
• When folding forwards and backwards,
keep
all hands , fingers , feet and other body
parts away from the seat hinges and seat re
lease mechanism.
• Floor mats or other objects could get
caught in the hinges on the front passenger
seat backrest. This could cause the front pas
senger seat backrest to fail to engage secure
ly when it is returned to the upright position.
• When being folded back, the front passen
ger seat backrest
must be securely locked in
the
upright position. If the front passenger
seat backrest is not locked properly it could
move suddenly and cause severe injuries.
A WARNING
The seat anchors and hinges of the folded
front passenger seat backrest can cause seri
ous injuries in the event of a sudden braking
manoeuvre or accident.
~------------------------~~
Sitting correctly and safely 77
Page 136 of 138
Downloaded from www.Manualslib.com manuals search engine First aid kit, warning triangle and fire extinguisher
r-~-~-~3
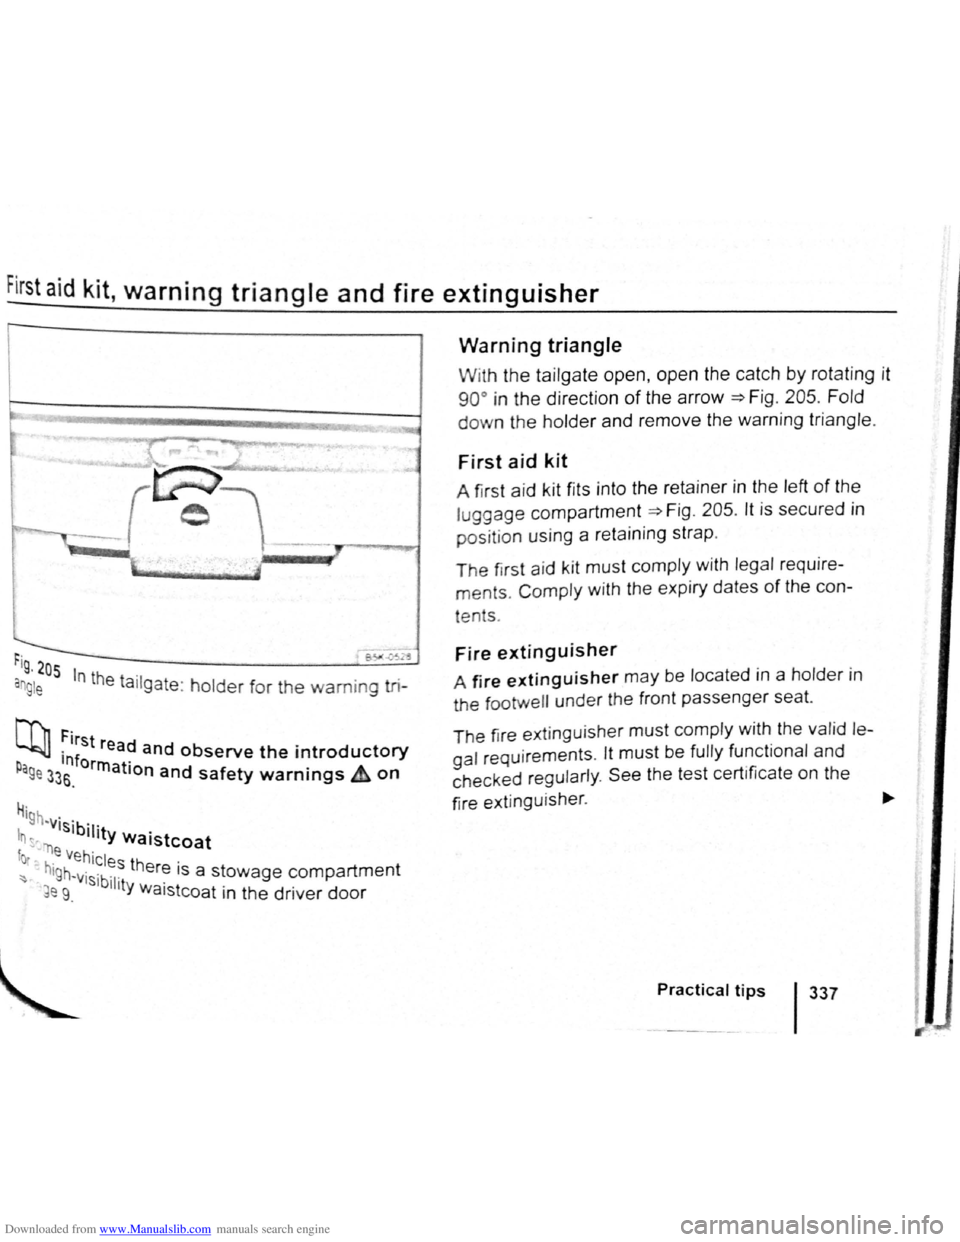
rig , 205
an g le In the ta ilgate : holder for the warning tri-
N'l, First re d L..bJJ ·1nf a and observe the introductory p orrn r age 33s. a IOn and safety warnings & on
H· '9h -visib· .
In ~-"r) '11ty Waistcoat
fot .e Vehicles th .
~ hlgh~visibl er~ 1s a stowage compartment
~e 9. 11ty Waistcoat in the driver door
Warning triangle
With the tailgate open, open the catch by rotat ing it
90° in the direction of the arrow =>F ig . 205 . Fold
down the holder and remove the warning triangle.
First aid kit
A first aid k it fits into the retainer in the left of the
luggage compartment =>Fig . 205 . lt is secured in
positio n using a reta ining strap .
The first aid k it must comply with legal require
ments. Comply with the expiry dates of the con-
tents .
Fire extinguisher
A fire extinguisher may be located in a holder i n
the tootwell under the front passenger seat.
T he fir e ext inguisher
must comply with the valid le
gal requirements . lt must be fully functional and
c h ecked regul
arly . See the test certificate on the
fire e
xtinguisher . ~
Practical tips 1337