2008 SUZUKI SX4 child lock
[x] Cancel search: child lockPage 33 of 278
2-20
BEFORE DRIVING
80J21-03E
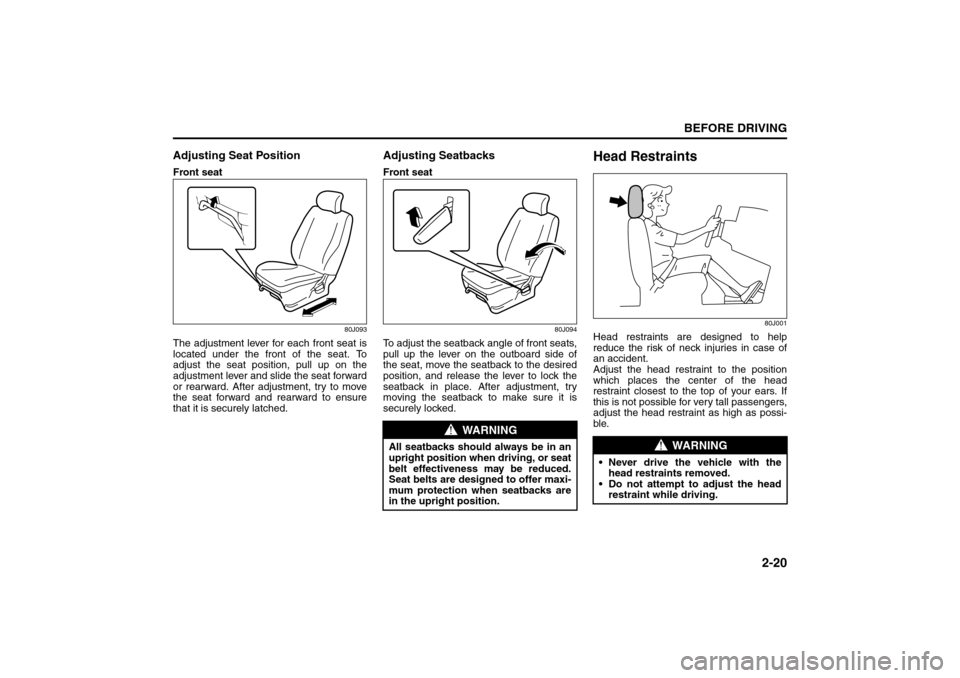
Adjusting Seat PositionFront seat
80J093
The adjustment lever for each front seat is
located under the front of the seat. To
adjust the seat position, pull up on the
adjustment lever and slide the seat forward
or rearward. After adjustment, try to move
the seat forward and rearward to ensure
that it is securely latched.
Adjusting SeatbacksFront seat
80J094
To adjust the seatback angle of front seats,
pull up the lever on the outboard side of
the seat, move the seatback to the desired
position, and release the lever to lock the
seatback in place. After adjustment, try
moving the seatback to make sure it is
securely locked.
Head Restraints
80J001
Head restraints are designed to help
reduce the risk of neck injuries in case of
an accident.
Adjust the head restraint to the position
which places the center of the head
restraint closest to the top of your ears. If
this is not possible for very tall passengers,
adjust the head restraint as high as possi-
ble.
WARNING
All seatbacks should always be in an
upright position when driving, or seat
belt effectiveness may be reduced.
Seat belts are designed to offer maxi-
mum protection when seatbacks are
in the upright position.
WARNING
Never drive the vehicle with the
head restraints removed.
Do not attempt to adjust the head
restraint while driving.
Seat Belts and Child Restraint Systems: 3
Page 37 of 278
2-24
BEFORE DRIVING
80J21-03E
Lap-Shoulder BeltEmergency Locking Retractor (ELR)
The seat belt has an emergency locking
retractor (ELR), which is designed to lock
the seat belt only during a sudden stop or
impact. It also may lock if you pull the belt
across your body very quickly. If this hap-
pens, let the belt go back to unlock it, then
pull the belt across your body more slowly.
Automatic Locking Retractor (ALR)
The front passenger’s seat belt and the
rear seat belts have emergency locking
retractors (ELRs) that can be temporarily
converted to function as automatic locking
retractors (ALRs). The ALR mode should
be used if you need to secure a child
restraint system in the seat. Refer to the
“Child Restraint Systems” section for
details.Safety reminder
60A038
60A040
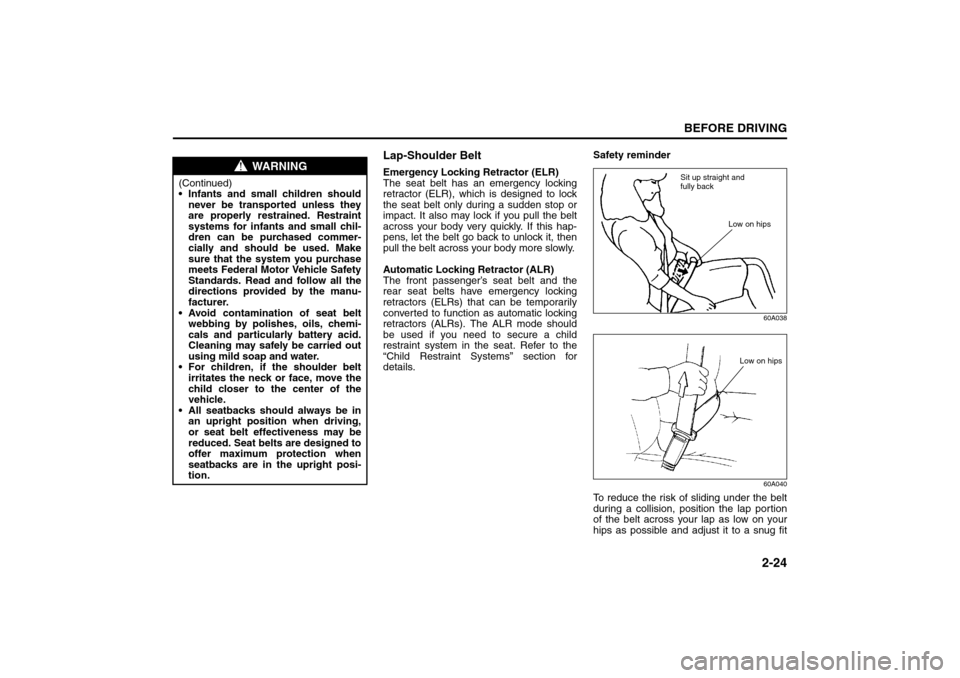
To reduce the risk of sliding under the belt
during a collision, position the lap portion
of the belt across your lap as low on your
hips as possible and adjust it to a snug fit
WARNING
(Continued)
Infants and small children should
never be transported unless they
are properly restrained. Restraint
systems for infants and small chil-
dren can be purchased commer-
cially and should be used. Make
sure that the system you purchase
meets Federal Motor Vehicle Safety
Standards. Read and follow all the
directions provided by the manu-
facturer.
Avoid contamination of seat belt
webbing by polishes, oils, chemi-
cals and particularly battery acid.
Cleaning may safely be carried out
using mild soap and water.
For children, if the shoulder belt
irritates the neck or face, move the
child closer to the center of the
vehicle.
All seatbacks should always be in
an upright position when driving,
or seat belt effectiveness may be
reduced. Seat belts are designed to
offer maximum protection when
seatbacks are in the upright posi-
tion.
Sit up straight and
fully back
Low on hips
Low on hips
Seat Belts and Child Restraint Systems: 3
Page 41 of 278
2-28
BEFORE DRIVING
80J21-03E
Front passenger’s seat belt reminder
The front passenger’s seat belt reminder
will activate only when there is a passen-
ger sitting in the front seat. In some situa-
tions, however, such as when you place
heavy objects in the front seat, the seat
belt reminder can be activated as if there
were a passenger present. The front pas-
senger’s seat belt reminder works in the
same manner as the driver’s seat belt
reminder, except that it is not activated
until 10 seconds after the ignition switch is
turned to the “ON” position.
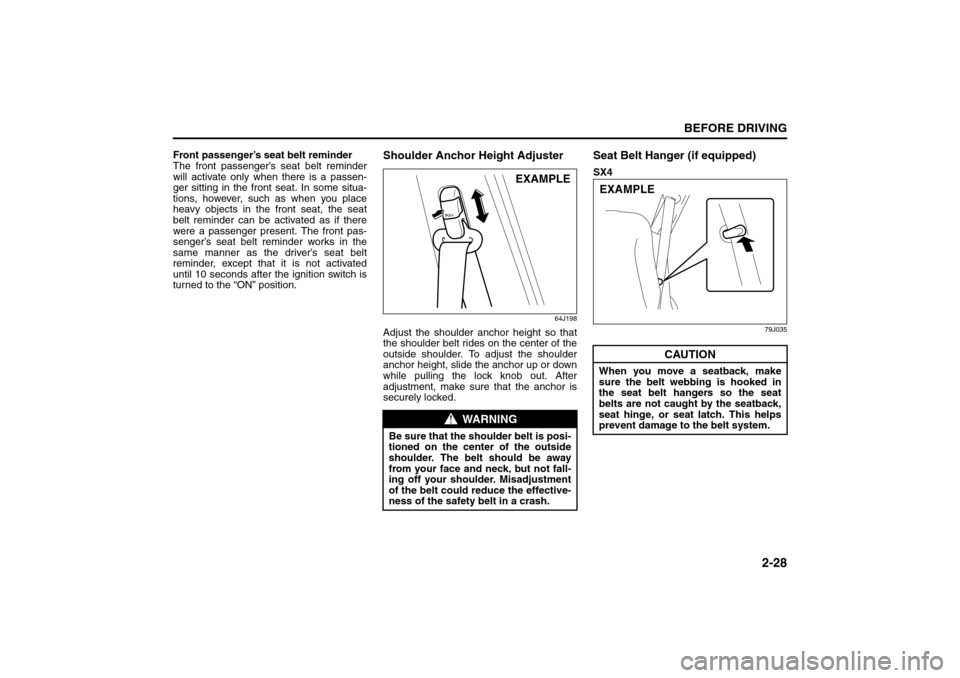
Shoulder Anchor Height Adjuster
64J198
Adjust the shoulder anchor height so that
the shoulder belt rides on the center of the
outside shoulder. To adjust the shoulder
anchor height, slide the anchor up or down
while pulling the lock knob out. After
adjustment, make sure that the anchor is
securely locked.
Seat Belt Hanger (if equipped)SX4
79J035
WARNING
Be sure that the shoulder belt is posi-
tioned on the center of the outside
shoulder. The belt should be away
from your face and neck, but not fall-
ing off your shoulder. Misadjustment
of the belt could reduce the effective-
ness of the safety belt in a crash.
EXAMPLE
CAUTION
When you move a seatback, make
sure the belt webbing is hooked in
the seat belt hangers so the seat
belts are not caught by the seatback,
seat hinge, or seat latch. This helps
prevent damage to the belt system.EXAMPLE
Seat Belts and Child Restraint Systems: 3
Page 45 of 278
2-32
BEFORE DRIVING
80J21-03E
83E035
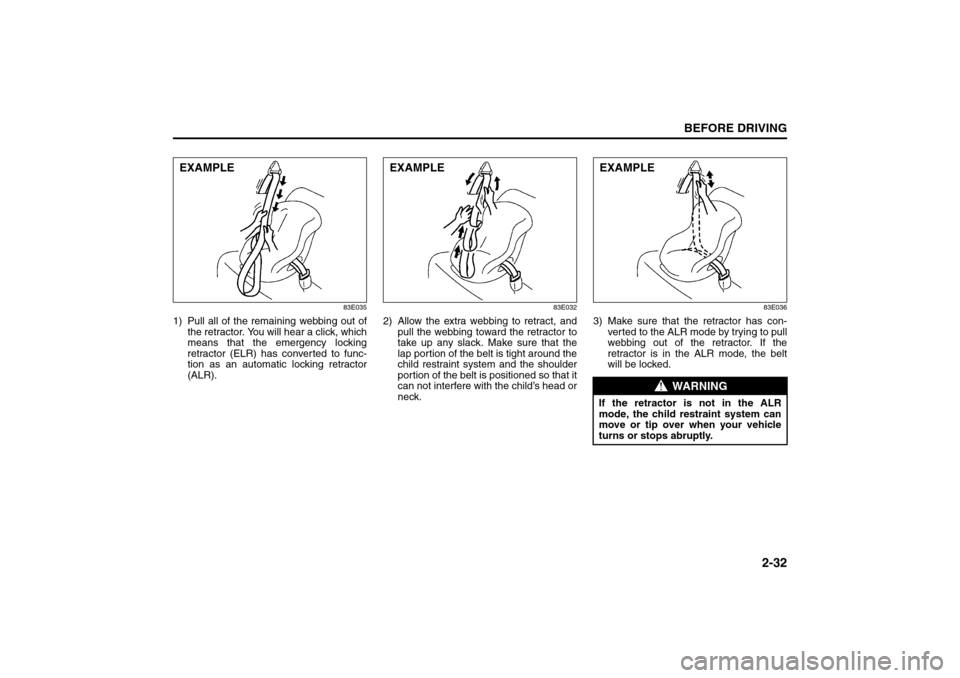
1) Pull all of the remaining webbing out of
the retractor. You will hear a click, which
means that the emergency locking
retractor (ELR) has converted to func-
tion as an automatic locking retractor
(ALR).
83E032
2) Allow the extra webbing to retract, and
pull the webbing toward the retractor to
take up any slack. Make sure that the
lap portion of the belt is tight around the
child restraint system and the shoulder
portion of the belt is positioned so that it
can not interfere with the child’s head or
neck.
83E036
3) Make sure that the retractor has con-
ver ted to the ALR mode by trying to pull
webbing out of the retractor. If the
retractor is in the ALR mode, the belt
will be locked.
EXAMPLE
EXAMPLE
WARNING
If the retractor is not in the ALR
mode, the child restraint system can
move or tip over when your vehicle
turns or stops abruptly.EXAMPLE
Seat Belts and Child Restraint Systems: 3
Page 53 of 278
2-40
BEFORE DRIVING
80J21-03E
The driver and all passengers must be
properly restrained by wearing seat belts
at all times, whether or not a pretensioner
is equipped at their seating position, to
minimize the risk of severe injury or death
in the event of a crash. Sit fully back in the
seat; sit up straight; do not lean forward or
sideways. Adjust the belt so the lap portion
of the belt is worn low across the pelvis,
not across the waist. Please refer to the
“Seat Adjustment” section and the instruc-
tions and precautions about the seat belts
in this “Seat Belts and Child Restraint Sys-
tems” section for details on proper seat
and seat belt adjustments.
Please note that the pretensioners along
with the front air bags will activate only in
severe frontal collisions. They are not
designed to activate in rear impacts, side
impacts, rollovers or minor frontal colli-
sions. The pretensioners can be activated
only once. If the pretensioners are acti-
vated (that is, if the front air bags are acti-
vated), have the pretensioner system
serviced by an authorized SUZUKI dealer
as soon as possible.
If the AIR BAG light on the instrument clus-
ter does not blink or come on briefly when
the ignition switch is turned to the “ON”
position, stays on for more than 10 sec-
onds, or comes on while driving, the pre-
tensioner system or the air bag system
may not work properly. Have both systems
inspected by an authorized SUZUKI dealer
as soon as possible.Service on or around the pretensioner sys-
tem components or wiring must be per-
formed only by an authorized SUZUKI
dealer who is specially trained. Improper
service could result in unintended activa-
tion of pretensioners or could render the
pretensioner inoperative. Either of these
two conditions may result in personal
injury.
To prevent damage or unintended activa-
tion of the pretensioners, be sure the bat-
tery is disconnected and the ignition switch
has been in the “LOCK” position for at least
90 seconds before performing any electri-
cal service work on your SUZUKI. Do not
touch pretensioner system components or
wiring. The wires are wrapped with yellow
tape or yellow tubing, and the couplers are
yellow. When scrapping your SUZUKI, ask
your SUZUKI dealer, body repair shop or
scrap yard for assistance.
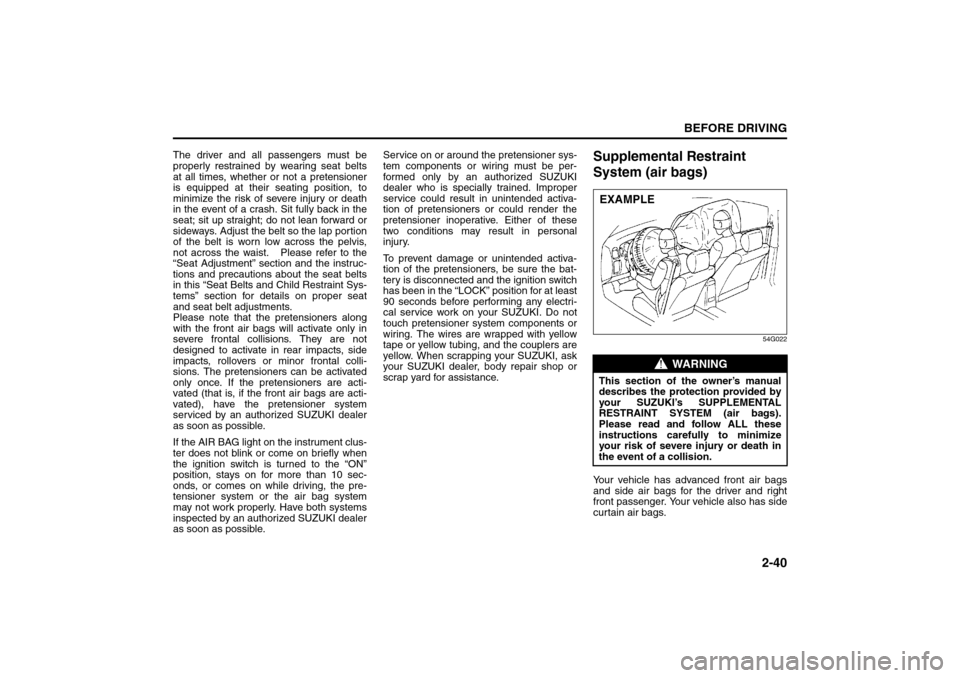
Supplemental Restraint
System (air bags)
54G022
Your vehicle has advanced front air bags
and side air bags for the driver and right
front passenger. Your vehicle also has side
curtain air bags.
WARNING
This section of the owner’s manual
describes the protection provided by
your SUZUKI’s SUPPLEMENTAL
RESTRAINT SYSTEM (air bags).
Please read and follow ALL these
instructions carefully to minimize
your risk of severe injury or death in
the event of a collision.EXAMPLE
Supplemental Restraint System (advanced air bags):
3, 9, 12
Page 69 of 278

3-4
STEERING COLUMN CONTROLS
80J21-03E
62J083
If the gearshift lever can not be shifted out
of “P” (Park) in the normal way, removing
the cover (1) and pushing the release but-
ton using a key or some other flat end
object with the key in the “ON” or “ACC”
position will permit movement of the gear-
shift lever out of “P” (see “If You Can Not
Shift Automatic Transaxle Gearshift Lever
Out of “P” (PARK)” in the INDEX). The
gearshift lever can be moved back to “P”
without pushing the release button.
To release the steering lock, insert the key
or use the keyless start system and turn
the ignition switch clockwise to one of the
other positions. If you have trouble turning
the key to unlock the steering, try turning
the steering wheel slightly to the right or
left while turning the key.
81A297S
(1)
WARNING
For manual transaxle vehicles,
never remove the ignition key while
the vehicle is moving. The steering
wheel will lock and you will not be
able to steer the vehicle.
Always remove the ignition key
when leaving the vehicle even if a
short time. Also do not leave chil-
dren or pets alone in a parked vehi-
cle. Unattended children could
cause accidental movement of the
vehicle or could tamper with power
windows. Children or pets could
suffer from heatstroke in warm or
hot weather, which could result in
severe injury or even death.
CAUTION
Do not turn the starter motor for
more than 15 seconds at a time. If
the engine does not start, wait 15
seconds before trying again. If the
engine does not start after several
attempts, check the fuel and igni-
tion systems or consult your
SUZUKI dealer.
Do not leave the ignition switch in
the “ON” position if the engine is
not running or the battery will dis-
charge.
Lighting/Turn Signal Control Lever: 8
Windshield Wiper and Washer Lever: 8
Page 190 of 278
9-1INSPECTION AND MAINTENANCE
80J21-03E
60A187S
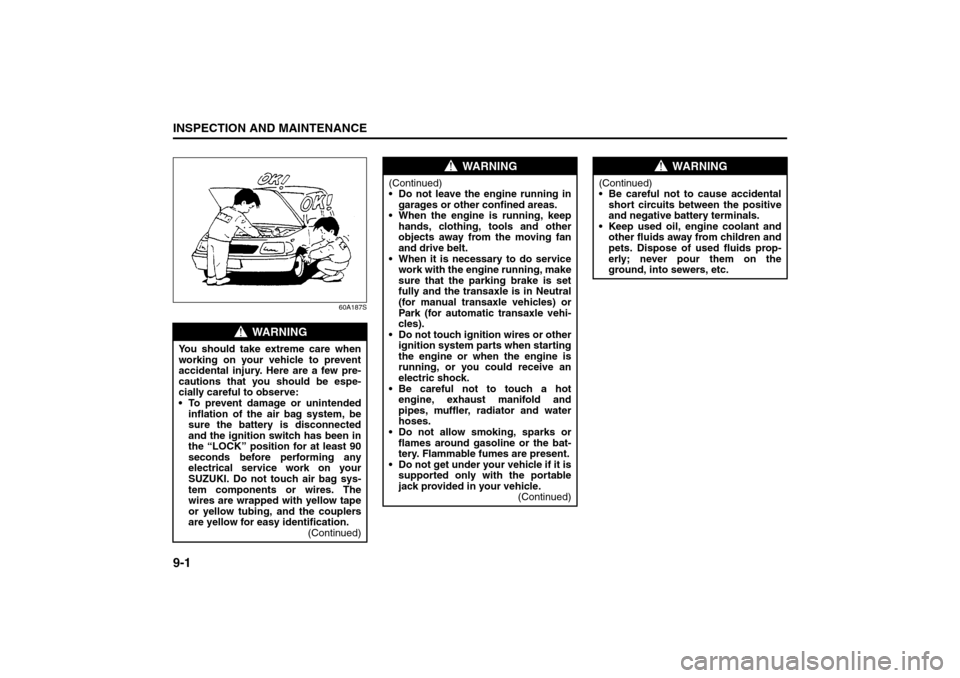
WARNING
You should take extreme care when
working on your vehicle to prevent
accidental injury. Here are a few pre-
cautions that you should be espe-
cially careful to observe:
To prevent damage or unintended
inflation of the air bag system, be
sure the battery is disconnected
and the ignition switch has been in
the “LOCK” position for at least 90
seconds before performing any
electrical service work on your
SUZUKI. Do not touch air bag sys-
tem components or wires. The
wires are wrapped with yellow tape
or yellow tubing, and the couplers
are yellow for easy identification.
(Continued)
WARNING
(Continued)
Do not leave the engine running in
garages or other confined areas.
When the engine is running, keep
hands, clothing, tools and other
objects away from the moving fan
and drive belt.
When it is necessary to do service
work with the engine running, make
sure that the parking brake is set
fully and the transaxle is in Neutral
(for manual transaxle vehicles) or
Park (for automatic transaxle vehi-
cles).
Do not touch ignition wires or other
ignition system parts when starting
the engine or when the engine is
running, or you could receive an
electric shock.
Be careful not to touch a hot
engine, exhaust manifold and
pipes, muffler, radiator and water
hoses.
Do not allow smoking, sparks or
flames around gasoline or the bat-
tery. Flammable fumes are present.
Do not get under your vehicle if it is
supported only with the portable
jack provided in your vehicle.
(Continued)
WARNING
(Continued)
Be careful not to cause accidental
short circuits between the positive
and negative battery terminals.
Keep used oil, engine coolant and
other fluids away from children and
pets. Dispose of used fluids prop-
erly; never pour them on the
ground, into sewers, etc.
Page 271 of 278
15-1
INDEX
15
80J21-03E
INDEXSymbols“CRUISE” Indicator Light...................................................... 4-8
“ESP OFF” Indicator Light ........................................... 4-6, 6-14
“ESP OFF” Switch ............................................................... 4-13
“ESP” (Electronic Stability Program) Warning Light ......... 4-5
“ESP” Warning Light ........................................................... 6-13
“PASS AIRBAG OFF” Indicator .......................................... 4-20
“SET” Indicator Light ............................................................ 4-8Numerics2WD/i-AWD (intelligent All Wheel Drive) Switch ............... 4-14
4-Speed Automatic Transaxle .............................................. 6-5AA/T Selector Position Indicator .......................................... 4-10
Accelerator Pedal .................................................................. 5-2
Accessory Socket ................................................................ 5-11
Adding Coolant .................................................................... 9-18
Adjusting Seat Position ...................................................... 2-20
Adjusting Seatbacks ........................................................... 2-20
AIR BAG Light ........................................................................ 4-7
Air Cleaner............................................................................ 9-19
Air Conditioning System ..................................................... 9-48
All Seat Belts ........................................................................ 2-25
Anti-Lock Brake System (ABS) .......................................... 6-10
Anti-Lock Brake System (ABS) Warning Light ................... 4-5
Anti-Lock Braking System (ABS) ....................................... 6-12
Assist Grips............................................................................ 5-9
Audio Systems ..................................................................... 4-32
Automatic Heating and Air Conditioning System
(Climate Control).................................................................. 4-28Automatic Locking Retractor (ALR) ................................... 2-24
Automatic Transaxle Fluid .................................................. 9-16
BBasic Operations.................................................................. 4-35
Battery ................................................................................... 9-35
Brake Assist System............................................................ 6-10
Brake Fluid............................................................................ 9-21
Brake Pedal.................................................................... 5-2, 9-22
Brake System Warning Light ................................................ 4-4
Brakes ................................................................................... 9-21
Braking .................................................................................... 6-9
Break-In ................................................................................. 6-18
Bulb Replacement ................................................................ 9-39CCatalytic Converter .............................................................. 6-19
Changing Engine Oil and Filter........................................... 9-12
Changing Wheels ................................................................. 9-31
Charging Light........................................................................ 4-6
Child Lock System (rear doors) .......................................... 2-13
Child Restraint Systems ...................................................... 2-29
Cigarette Lighter and Ashtray............................................. 4-16
Clock ..................................................................................... 4-17
Clutch Pedal .................................................................. 5-2, 9-24
Compact Spare Tire ............................................................. 9-30
Coolant Level Check ............................................................ 9-18
Coolant Replacement .......................................................... 9-18
Corrosion Prevention .......................................................... 11-1
Cruise Control ........................................................................ 3-9
Cup Holder and Storage Area ............................................. 5-11DDaily Inspection Checklist..................................................... 6-1