2008 SUZUKI SX4 mirror
[x] Cancel search: mirrorPage 13 of 278
BEFORE DRIVING
2
80J21-03E
60G404
BEFORE DRIVINGKeys ...................................................................................... 2-1
Door Locks .......................................................................... 2-1
Windows .............................................................................. 2-16
Mirrors .................................................................................. 2-18
Seat Adjustment .................................................................. 2-19
Head Restraints ................................................................... 2-20
Seat Belts and Child Restraint Systems ........................... 2-22
Supplemental Restraint System (air bags) ....................... 2-40
Page 23 of 278
2-10
BEFORE DRIVING
80J21-03E
1. For USA
This device complies with Part 15 of the
FCC Rules. Operation is subject to the fol-
lowing two conditions:
1) This device may not cause harmful
interference, and
2) This device must accept any interfer-
ence received, including interference
that may cause undesired operation.
NOTE:
Changes or modifications not expressly
approved by the party responsible for com-
pliance could void the user’s authority to
operate the equipment.
2. For Canada
This device complies with Industry Canada
Standard RSS-210. Operation is subject to
the following two conditions:
1) This device may not cause interference,
and
2) This device must accept any interfer-
ence, including interference that may
cause undesired operation of the
device.
The term “IC:” before the certification/reg-
istration number only signifies that the
Industry Canada technical specifications
were met.Keyless Entry System Transmitter
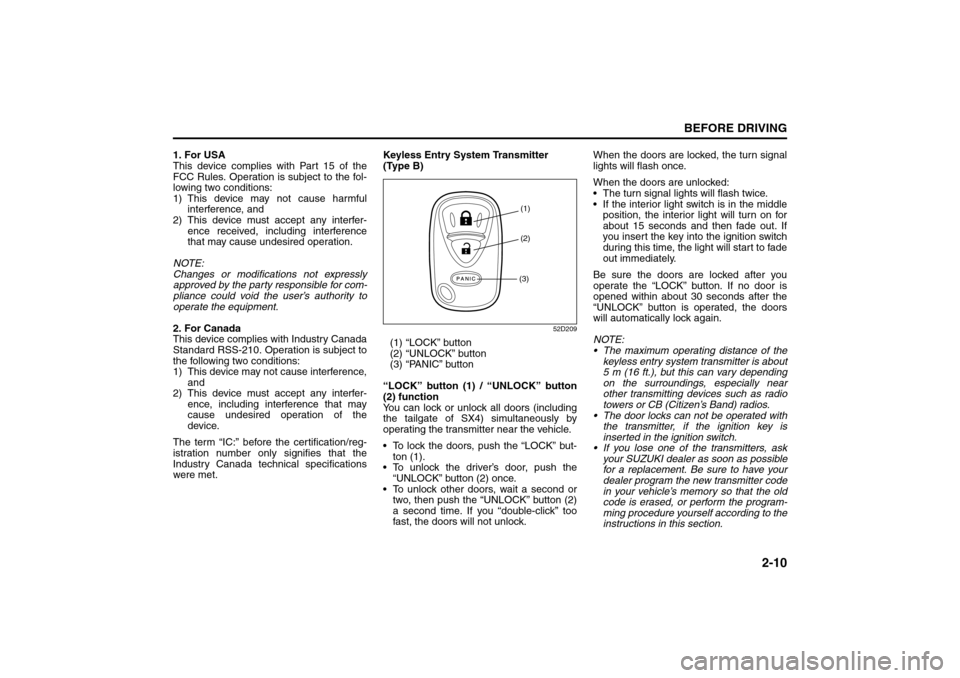
(Type B)
52D209
(1) “LOCK” button
(2) “UNLOCK” button
(3) “PANIC” button
“LOCK” button (1) / “UNLOCK” button
(2) function
You can lock or unlock all doors (including
the tailgate of SX4) simultaneously by
operating the transmitter near the vehicle.
To lock the doors, push the “LOCK” but-
ton (1).
To unlock the driver’s door, push the
“UNLOCK” button (2) once.
To unlock other doors, wait a second or
two, then push the “UNLOCK” button (2)
a second time. If you “double-click” too
fast, the doors will not unlock.When the doors are locked, the turn signal
lights will flash once.
When the doors are unlocked:
The turn signal lights will flash twice.
If the interior light switch is in the middle
position, the interior light will turn on for
about 15 seconds and then fade out. If
you insert the key into the ignition switch
during this time, the light will start to fade
out immediately.
Be sure the doors are locked after you
operate the “LOCK” button. If no door is
opened within about 30 seconds after the
“UNLOCK” button is operated, the doors
will automatically lock again.
NOTE:
The maximum operating distance of the
keyless entry system transmitter is about
5 m (16 ft.), but this can vary depending
on the surroundings, especially near
other transmitting devices such as radio
towers or CB (Citizen’s Band) radios.
The door locks can not be operated with
the transmitter, if the ignition key is
inserted in the ignition switch.
If you lose one of the transmitters, ask
your SUZUKI dealer as soon as possible
for a replacement. Be sure to have your
dealer program the new transmitter code
in your vehicle’s memory so that the old
code is erased, or perform the program-
ming procedure yourself according to the
instructions in this section.
(1)
(2)
(3)
Windows: 3, 8
Mirrors: 3, 8
Page 24 of 278

2-11BEFORE DRIVING
80J21-03E
“PANIC” button (3) function
This function is to get the attention of oth-
ers.
Press the “PANIC” button (3) for more than
1 second. The headlights and taillights will
blink for about 30 seconds. Also, the horn
will sound intermittently for about 30 sec-
onds at the same time.
To cancel the “PANIC” mode, press any
button (PANIC, LOCK or UNLOCK) on the
transmitter. You can also insert the key in
the ignition switch and turn to the “ON”
position to cancel the “PANIC” mode.
NOTE:
The “PANIC” button function will not acti-
vate when the key is in the ignition switch.Replacement of the battery
If the transmitter becomes unreliable,
replace the battery.
To replace the battery of the transmitter:
52D210
1) Put the edge of a coin or a flat blade
screw driver in the slot of the transmitter
and pry it open.
52D211
2) Replace the battery (1) (Lithium disc-
type CR2025 or equivalent) so its + ter-
minal faces the “+” mark of the transmit-
ter.
3) Close the transmitter firmly.
4) Make sure the door locks can be oper-
ated with the transmitter.
5) Dispose of the used battery properly
according to applicable rules or regula-
tions. Do not dispose of lithium batter-
ies with ordinary household trash.
CAUTION
The transmitter is a sensitive elec-
tronic instrument. To avoid damaging
the transmitter:
Do not expose it to impacts, mois-
ture or high temperature such as by
leaving it on the dashboard under
direct sunlight.
Keep the transmitter away from
magnetic objects such as a televi-
sion.
WARNING
Swallowing a lithium battery may
cause serious internal injury. Do not
allow anyone to swallow a lithium
battery. Keep lithium batteries away
from children and pets. If swallowed,
contact a physician immediately.
(1)
Mirrors: 3, 8
Seat Adjustment: 3
Page 31 of 278
2-18
BEFORE DRIVING
80J21-03E
52LM012
NOTE:
The rear door windows are not designed to
open fully. They can be opened about 2/3
of the way down.
NOTE:
If you drive with one of the rear windows
open, you may hear a loud sound caused
by air vibration. To reduce the sound, open
the driver’s or front passenger’s window, or
narrow the rear window opening.
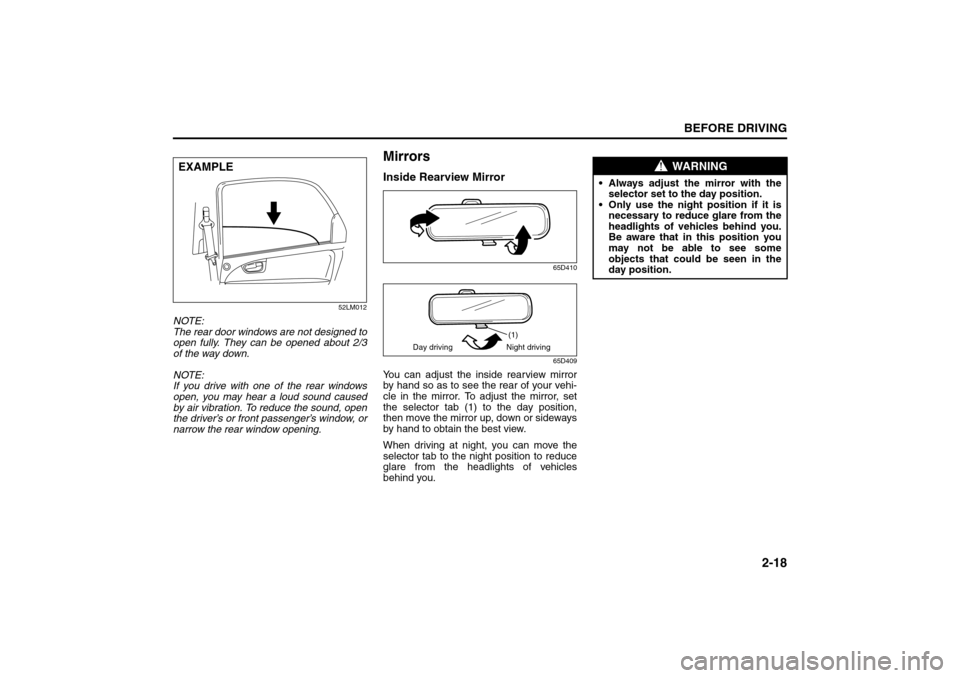
MirrorsInside Rearview Mirror
65D410
65D409
You can adjust the inside rearview mirror
by hand so as to see the rear of your vehi-
cle in the mirror. To adjust the mirror, set
the selector tab (1) to the day position,
then move the mirror up, down or sideways
by hand to obtain the best view.
When driving at night, you can move the
selector tab to the night position to reduce
glare from the headlights of vehicles
behind you.
EXAMPLE
(1)
Day driving Night driving
WARNING
Always adjust the mirror with the
selector set to the day position.
Only use the night position if it is
necessary to reduce glare from the
headlights of vehicles behind you.
Be aware that in this position you
may not be able to see some
objects that could be seen in the
day position.
Seat Belts and Child Restraint Systems: 3
Page 32 of 278
2-19BEFORE DRIVING
80J21-03E
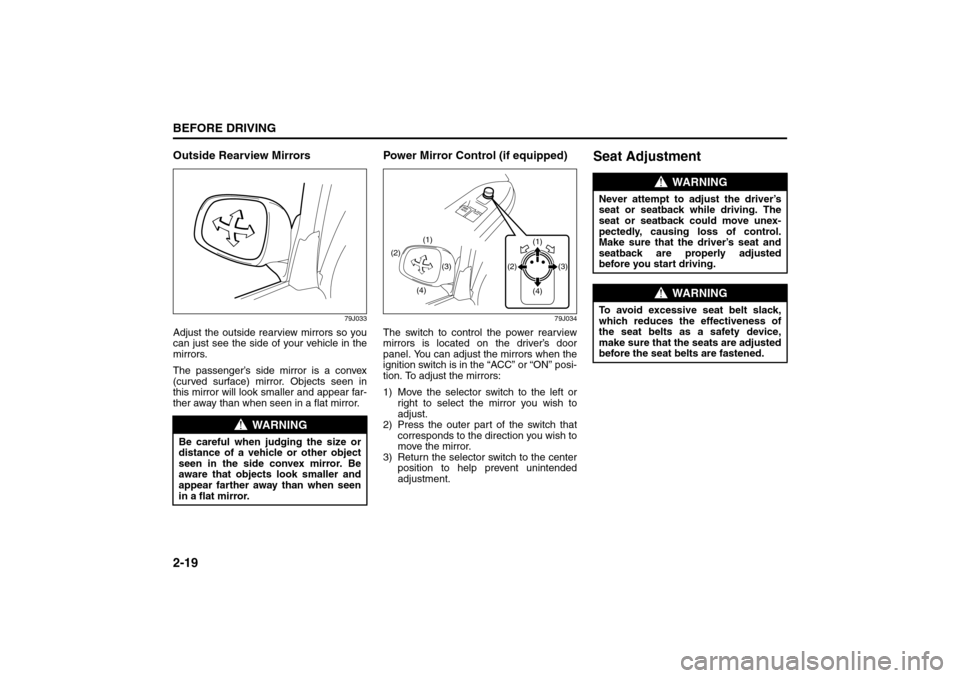
Outside Rearview Mirrors
79J033
Adjust the outside rearview mirrors so you
can just see the side of your vehicle in the
mirrors.
The passenger’s side mirror is a convex
(curved surface) mirror. Objects seen in
this mirror will look smaller and appear far-
ther away than when seen in a flat mirror.
Power Mirror Control (if equipped)
79J034
The switch to control the power rearview
mirrors is located on the driver’s door
panel. You can adjust the mirrors when the
ignition switch is in the “ACC” or “ON” posi-
tion. To adjust the mirrors:
1) Move the selector switch to the left or
right to select the mirror you wish to
adjust.
2) Press the outer part of the switch that
corresponds to the direction you wish to
move the mirror.
3) Return the selector switch to the center
position to help prevent unintended
adjustment.
Seat Adjustment
WARNING
Be careful when judging the size or
distance of a vehicle or other object
seen in the side convex mirror. Be
aware that objects look smaller and
appear farther away than when seen
in a flat mirror.
(2)
(4)(3) (1)
(1)
(3) (2)
(4)
WARNING
Never attempt to adjust the driver’s
seat or seatback while driving. The
seat or seatback could move unex-
pectedly, causing loss of control.
Make sure that the driver’s seat and
seatback are properly adjusted
before you start driving.
WARNING
To avoid excessive seat belt slack,
which reduces the effectiveness of
the seat belts as a safety device,
make sure that the seats are adjusted
before the seat belts are fastened.
Seat Belts and Child Restraint Systems: 3
Page 77 of 278
INSTRUMENT PANEL
4
80J21-03E
60G406
INSTRUMENT PANELInstrument Panel ................................................................. 4-1
Instrument Cluster .............................................................. 4-2
Warning and Indicator Lights ............................................ 4-3
A/T Selector Position Indicator (if equipped) ................... 4-10
Speedometer/Odometer/Trip meter ................................... 4-11
Tachometer .......................................................................... 4-12
Fuel Gauge ........................................................................... 4-12
Temperature Gauge ............................................................ 4-13
Hazard Warning Switch ...................................................... 4-13
“ESP OFF” Switch (if equipped) ........................................ 4-13
Instrument Light Brightness Control ................................ 4-14
2WD/i-AWD (intelligent All Wheel Drive) Switch
(if equipped) ......................................................................... 4-14
Heated Rear Window and Heated Outside Rearview
Mirrors (if equipped) Switch ............................................... 4-15
Fog Light Switch (if equipped) ........................................... 4-16
Cigarette Lighter and Ashtray (if equipped) ..................... 4-16
Information Display ............................................................. 4-17
Glove Box ............................................................................ 4-20
Heating and Air Conditioning System ............................... 4-21
Audio Systems .................................................................... 4-32
Page 88 of 278

4-11INSTRUMENT PANEL
80J21-03E
Speedometer/Odometer/Trip
meter
80J032
(1) Speedometer
(2) Odometer/Trip meter
(3) Indication selector knob
Speedometer
The speedometer indicates vehicle speed
in MPH.
Odometer/Trip meter
When the ignition switch is turned to “ON”,
the display shows the odometer or trip
meter. The odometer records the total dis-
tance the vehicle has been driven. The trip
meter can be used to measure the dis-
tance traveled on short trips or between
fuel stops.
65D603
When the ignition switch is turned to “ON”
with the lighting switch is in the “OFF” posi-
tion, the display shows three types of indi-
cation; odometer (A), trip meter A (B) and
trip meter B (C). Push the selector knob (3)
quickly to switch the indication among the
three.
You can use the two trip meters (A and B)
independently.
80J057
Hold in the selector knob for about 2 sec-
onds to reset the trip meter to zero.
(2)
(3)
(1)
EXAMPLE
CAUTION
Keep track of your odometer reading
and check the maintenance schedule
regularly for required services.
Increased wear or damage to certain
parts can result from failure to per-
form required services at the proper
mileage intervals.
(3) (A) (B)
(C)
About 2 seconds
(3)
Outside Rearview Mirrors Defroster Switch:
Fog Light Switch: 8
Cigarette Lighter and Ashtray: 3, 8
Page 92 of 278
4-15INSTRUMENT PANEL
80J21-03E
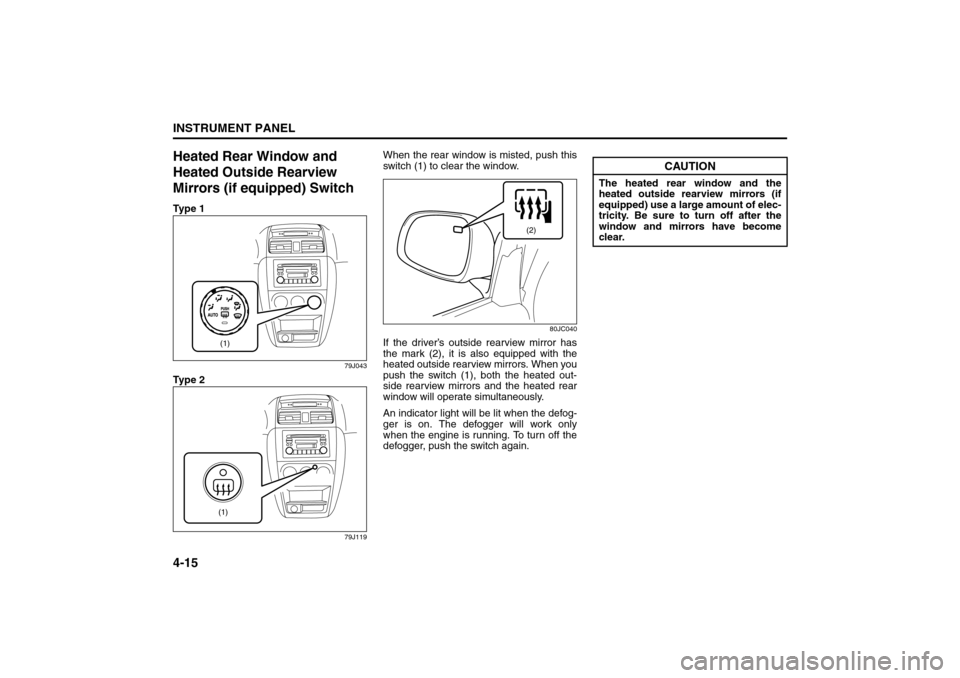
Heated Rear Window and
Heated Outside Rearview
Mirrors (if equipped) SwitchTy p e 1
79J043
Ty p e 2
79J119
When the rear window is misted, push this
switch (1) to clear the window.
80JC040
If the driver’s outside rearview mirror has
the mark (2), it is also equipped with the
heated outside rearview mirrors. When you
push the switch (1), both the heated out-
side rearview mirrors and the heated rear
window will operate simultaneously.
An indicator light will be lit when the defog-
ger is on. The defogger will work only
when the engine is running. To turn off the
defogger, push the switch again.
(1)(1)
(2)
CAUTION
The heated rear window and the
heated outside rearview mirrors (if
equipped) use a large amount of elec-
tricity. Be sure to turn off after the
window and mirrors have become
clear.
Heating and Air Conditioning System: 4