2008 SUZUKI GRAND VITARA ECU
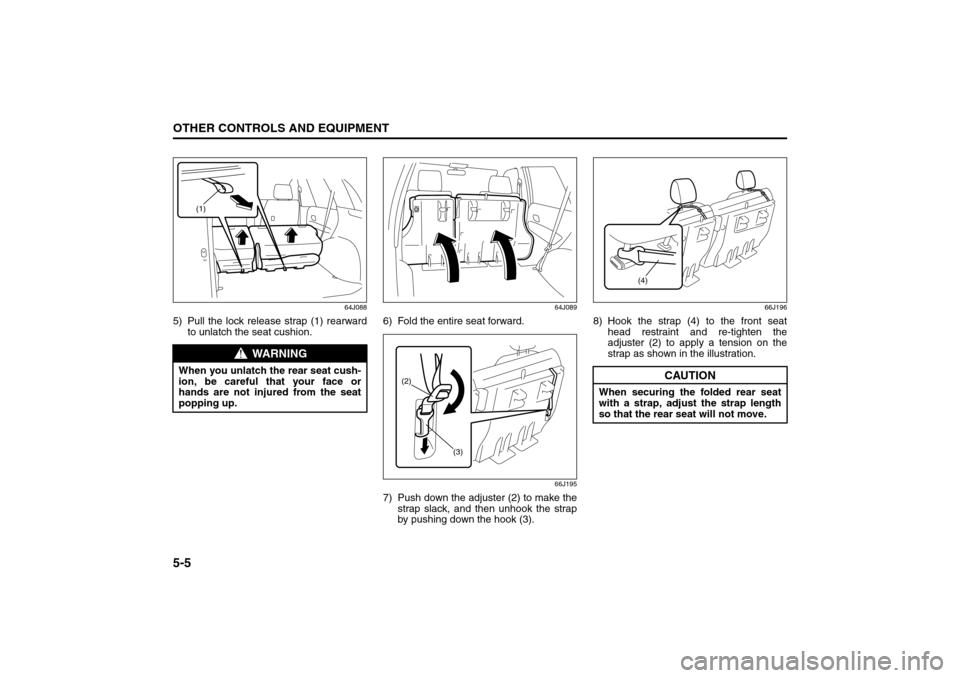
[x] Cancel search: ECUPage 48 of 290

2-35BEFORE DRIVING
66J22-03E
not attach the top strap to the luggage
restraint loops (if equipped).
86G032
4) When routing the top strap, be sure to
pass it between the head restraint and
the rear seatback as shown. (Refer to
“Head Restraints” section for details onhow to raise or lower the head
restraint.)
5) Make sure that cargo does not interfere
with routing of the top strap.
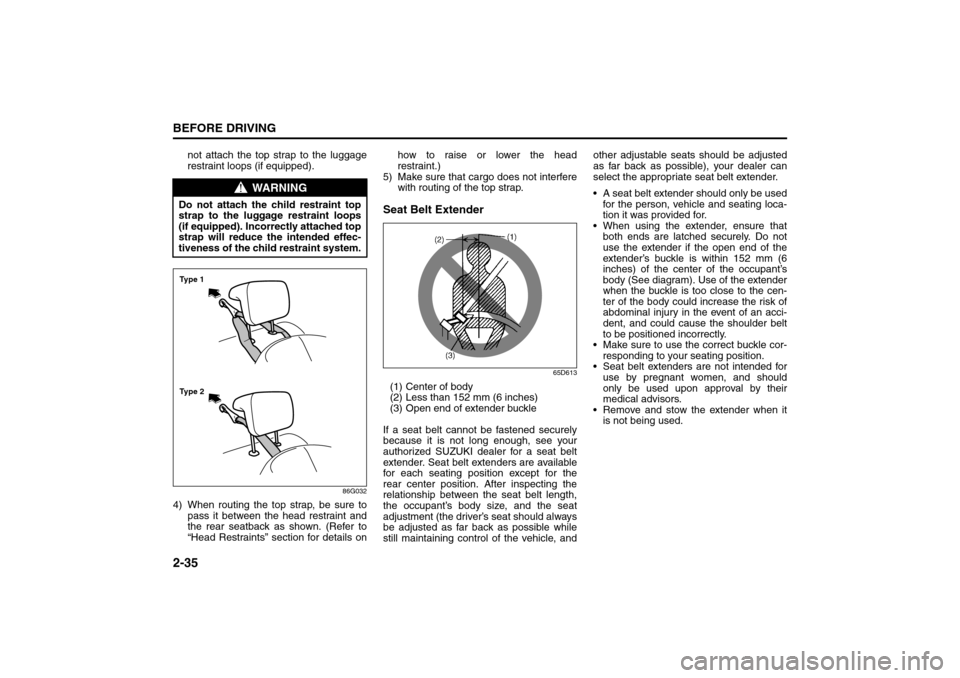
Seat Belt Extender
65D613
(1) Center of body
(2) Less than 152 mm (6 inches)
(3) Open end of extender buckle
If a seat belt cannot be fastened securely
because it is not long enough, see your
authorized SUZUKI dealer for a seat belt
extender. Seat belt extenders are available
for each seating position except for the
rear center position. After inspecting the
relationship between the seat belt length,
the occupant’s body size, and the seat
adjustment (the driver’s seat should always
be adjusted as far back as possible while
still maintaining control of the vehicle, andother adjustable seats should be adjusted
as far back as possible), your dealer can
select the appropriate seat belt extender.
A seat belt extender should only be used
for the person, vehicle and seating loca-
tion it was provided for.
When using the extender, ensure that
both ends are latched securely. Do not
use the extender if the open end of the
extender’s buckle is within 152 mm (6
inches) of the center of the occupant’s
body (See diagram). Use of the extender
when the buckle is too close to the cen-
ter of the body could increase the risk of
abdominal injury in the event of an acci-
dent, and could cause the shoulder belt
to be positioned incorrectly.
Make sure to use the correct buckle cor-
responding to your seating position.
Seat belt extenders are not intended for
use by pregnant women, and should
only be used upon approval by their
medical advisors.
Remove and stow the extender when it
is not being used.
WARNING
Do not attach the child restraint top
strap to the luggage restraint loops
(if equipped). Incorrectly attached top
strap will reduce the intended effec-
tiveness of the child restraint system.Ty p e 2 Ty p e 1
Seat Belts and Child Restraint Systems: 14
Page 56 of 290

2-43BEFORE DRIVING
66J22-03E
bag will not deploy and the seat belt pre-
tensioner will not operate.
If you have secured a child in the front pas-
senger seat in a forward-facing child
restraint system or booster seat and the
“PASS AIR BAG OFF” indicator light is not
on, turn the vehicle off, remove the child
restraint or booster seat from the vehicle
and reinstall it following the child restraint
or booster seat manufacturer’s directions.
Also refer to “Seat Belts and Child
Restraint Systems” in this section. If, after
reinstalling the child restraint and restart-
ing the vehicle, the “PASS AIR BAG OFF”
indicator is still not lit, check to make sure
that the vehicle’s seatback is not pressing
the child restraint into the seat cushion. If
this happens, slightly recline the vehicle’s
seatback and adjust the seat cushion if
possible. Also make sure the child restraint
is not trapped under the vehicle head
restraint. If this happens, adjust the head
restraint. If the “PASS AIR BAG OFF” indi-
cator is still not on, secure the child in the
child restraint or booster seat in a rear seat
position in the vehicle and check with your
dealer.
65D607
According to accident statistics, children
are safer when properly restrained in rear
seating positions than in front seating posi-
tions. Whenever possible, SUZUKI recom-
mends you install child restraints in the
rear seat.
The front passenger sensing system is
designed to enable the front passenger’sfront air bag when the system senses a
properly-seated adult in the front passen-
ger’s seat. When the passenger sensing
system has allowed the air bag to be
enabled, the “PASS AIR BAG OFF” indica-
tor will remain off to remind you that the air
bag is active.
If a person of adult size is sitting in the
front passenger’s seat and the “PASS AIR
BAG OFF” indicator comes on, it could be
because that person isn’t sitting properly in
the seat. If this happens, unfasten the seat
belts, sit upright in the center of the seat
with the seatback nearly vertical and your
legs outstretched, and refasten the seat
belt.
52D258
When seated as shown in the above illus-
tration, the front passenger sensing sys-
tem senses a properly-seated occupant
and enables the air bag.
WARNING
Do not install a rear-facing child
restraint in the front passenger’s
seat. If the passenger’s front air bag
inflates, a child in a rear-facing child
restraint could be seriously injured.
The back of a rear-facing child
restraint would be too close to the
inflating air bag.
Supplemental Restraint System (air bags): 3, 9, 12
Page 71 of 290

3-10
STEERING COLUMN CONTROLS
66J22-03E
Tilt Steering Lock Lever
64J037
The release lever is located under the
steering column. To adjust the steering
wheel height:
1) Pull up the lock lever to unlock the
steering column.
2) Adjust the steering wheel to the desired
height and lock the steering column by
pulling down the lock lever.
3) Try moving the steering wheel up and
down to make sure it is securely locked
in position.
Cruise Control (if equipped)
66J192
The cruise control system allows you to
maintain a steady speed without keeping
your foot on the accelerator pedal. The
controls for operating the cruise control
system are on the steering wheel. You can
use the cruise control system at speeds of
about 40 km/h (25 mph) or higher.
52D113
When you push the “ON/OFF” switch, the
system is on and a “CRUISE” indicator
light on the instrument cluster will be on.
65D474
When the vehicle’s speed is controlled by
the cruise control system, a “SET” indica-
tor light on the instrument cluster will be
on.
WARNING
Never attempt to adjust the steering
wheel height while the vehicle is
moving or you could lose control of
the vehicle.
UNLOCK
EXAMPLELOCK
WARNING
To help avoid loss of vehicle control,
do not use the cruise control system
when driving in heavy traffic, on slip-
pery or winding roads, or on steep
downgrades.
Tilt Steering Lock Lever: 6
Cruise Control: 7, 8
Page 92 of 290

4-17INSTRUMENT PANEL
66J22-03E
Transfer Switch (if equipped)
66J168
The transfer switch is located on the center
of the instrument panel.
For details on how to use this switch, refer
to “Using the Transfer Switch” in the
“OPERATING YOUR VEHICLE” section.
Glove Box
64J065
To open the glove box, pull the latch lever.
To close it, push the lid until it latches
securely. If a lock is equipped on the latch
lever, lock the glove box by inserting the
key and turning it clockwise and unlock the
glove box by turning the key counterclock-
wise.
Information Display
66J198
(1) Clock
(2) Thermometer
(3) Instantaneous fuel consumption/Aver-
age fuel consumption/Driving range
(4) “H” button
(5) “M” button
(6) “DISP” button
(7) Freezing mark
WARNING
Never drive with the glove box lid
open. It could cause injury if an acci-
dent occurs.UNLOCK
LOCK
(4)
(2)
(1)
(3)
(5)
(6)
(7)
EXAMPLE
“ESP OFF” Switch:
Transfer Switch:
Glove Box: 3
Page 96 of 290

4-21INSTRUMENT PANEL
66J22-03E
Theft Deterrent Light
66J249
This light will blink with the ignition switch
in the “OFF” or “ACC” position. The blink-
ing light is intended to deter theft by lead-
ing others to believe that the vehicle is
equipped with a security system.EXAMPLE
Automatic Heating and Air Conditioning System
(Climate Control)Air Outlet (front)
66J250
1
1
2
2
3 3
5 5
5 54
EXAMPLE
Heating and Air Conditioning System: 4
Page 132 of 290

5-1OTHER CONTROLS AND EQUIPMENT
66J22-03E
Parking Brake Lever
64J081
(1) To set
(2) To release
(3) To release
The parking brake lever is located between
the seats. To set the parking brake, hold
the brake pedal down and pull the parking
brake lever all the way up. To release the
parking brake, hold the brake pedal down,
pull up slightly on the parking brake lever,
push the button on the end of the lever
with your thumb and lower the lever to its
original position.
For automatic transmission vehicles,
always set the parking brake before mov-
ing the gearshift lever to the “P” (Park)
position. If you park on an incline and shift
into “P” before you set the parking brake,
the weight of the vehicle may make it diffi-cult to shift out of “P” when you are ready
to drive the vehicle. When preparing to
drive the vehicle, move the gearshift lever
out of the “P” position before releasing the
parking brake.
PedalsManual transmission
64J082
Automatic transmission
64J083
EXAMPLE
(2)
(3)(1)
WARNING
Never drive your vehicle with the
parking brake set: rear brake effec-
tiveness can be reduced from over-
heating, brake life may be
shortened or permanent brake
damage may result.
If the parking brake does not hold
the vehicle securely or does not
fully release, have your vehicle
inspected immediately by an autho-
rized SUZUKI dealer.
WARNING
Always set the parking brake fully
before leaving your vehicle or it may
roll, causing injury or damage. When
parking, make sure the gearshift
lever for manual transmission vehi-
cles is in 1st gear or “R” (Reverse)
and the gearshift lever for automatic
transmission vehicles is in “P”
(Park). Never leave the transfer lever
in “N” (Neutral) when you are parked.
Remember, even though the trans-
mission is in gear or in Park, you
must set the parking brake fully.
(1)(2)(3)
EXAMPLE
(2)(3)
EXAMPLE
Parking Brake Lever: 6
Pedals: 6
Page 136 of 290

5-5OTHER CONTROLS AND EQUIPMENT
66J22-03E
64J088
5) Pull the lock release strap (1) rearward
to unlatch the seat cushion.
64J089
6) Fold the entire seat forward.
66J195
7) Push down the adjuster (2) to make the
strap slack, and then unhook the strap
by pushing down the hook (3).
66J196
8) Hook the strap (4) to the front seat
head restraint and re-tighten the
adjuster (2) to apply a tension on the
strap as shown in the illustration.
WARNING
When you unlatch the rear seat cush-
ion, be careful that your face or
hands are not injured from the seat
popping up.
(1)
(2)
(3)
CAUTION
When securing the folded rear seat
with a strap, adjust the strap length
so that the rear seat will not move.
(4)
Folding Seats: 14
Page 137 of 290

5-6
OTHER CONTROLS AND EQUIPMENT
66J22-03E
To return the seat to the normal position,
follow the procedure below.
64J175
1) Unhook the strap from the head
restraint and stow the strap to the back
of the seat cushion.
64J091
2) Pull down the seat cushion until it locks
into place.
64J092
3) Raise the seatback until it locks into
place.
After returning the seat, try moving the
seat and seatback to make sure they are
securely latched.
WARNING
Luggage or other cargo should be
stowed in the luggage compartment
with the rear seat in an upright posi-
tion, whenever possible. If you need
to carry cargo in the passenger com-
partment with the rear seat back
folded forward, be sure to secure the
cargo or it may be thrown about,
causing injury. Never pile cargo
higher than the seatbacks.
WARNING
When returning the rear seat cushion
to the normal position, be careful that
your finger is not caught between the
lock and the floor.
CAUTION
When returning the rear seat cush-
ion to the normal position, make
sure that there is nothing around
the striker. This prevents the seat
cushion from being locked
securely.
When returning the rear seat cush-
ion to the normal position, make
sure that there is nothing under the
seat cushion. This prevents dam-
age to the seat cushion.
Folding Seats: 14