2008 SUBARU OUTBACK automatic transmission
[x] Cancel search: automatic transmissionPage 286 of 444
&Parking brake
CAUTION
Never drive while the parking brake
is set because this will cause un-
necessary wear on the brake lin-
ings. Before starting to drive, always
make sure that the parking brake
has been fully released.
To set the parking brake, press the brake
pedal firmly and hold it down while fully
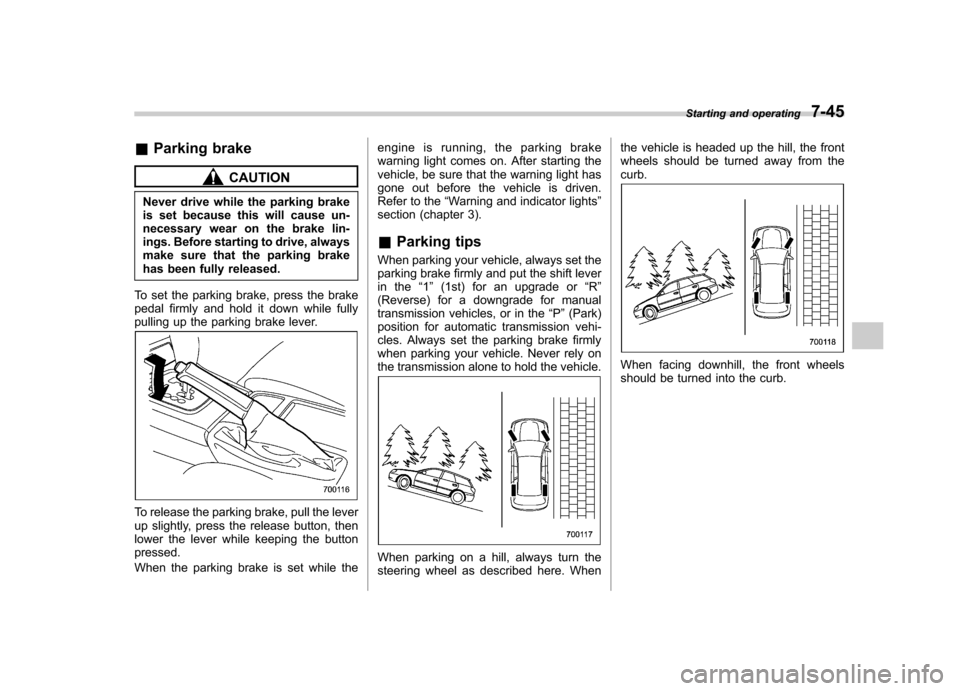
pulling up the parking brake lever.
To release the parking brake, pull the lever
up slightly, press the release button, then
lower the lever while keeping the buttonpressed.
When the parking brake is set while the engine is running, the parking brake
warning light comes on. After starting the
vehicle, be sure that the warning light has
gone out before the vehicle is driven.
Refer to the
“Warning and indicator lights ”
section (chapter 3).
& Parking tips
When parking your vehicle, always set the
parking brake firmly and put the shift lever
in the “1 ” (1st) for an upgrade or “R ”
(Reverse) for a downgrade for manual
transmission vehicles, or in the “P ”(Park)
position for automatic transmission vehi-
cles. Always set the parking brake firmly
when parking your vehicle. Never rely on
the transmission alone to hold the vehicle.
When parking on a hill, always turn the
steering wheel as described here. When the vehicle is headed up the hill, the front
wheels should be turned away from thecurb.
When facing downhill, the front wheels
should be turned into the curb.
Starting and operating
7-45
Page 288 of 444
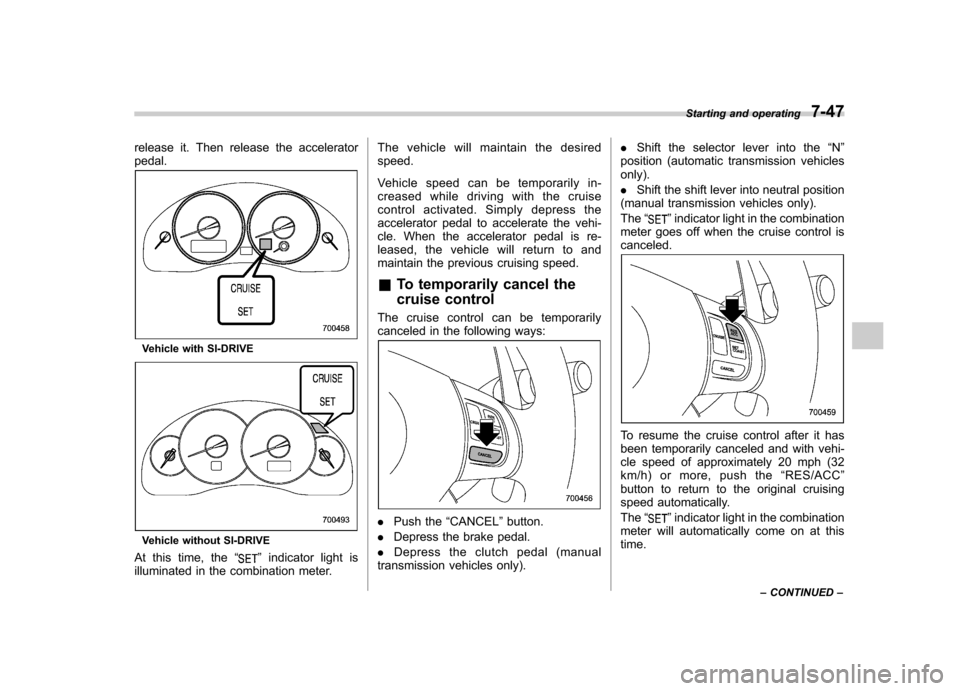
release it. Then release the accelerator pedal.
Vehicle with SI-DRIVE
Vehicle without SI-DRIVE
At this time, the “
”indicator light is
illuminated in the combination meter. The vehicle will maintain the desired speed.
Vehicle speed can be temporarily in-
creased while driving with the cruise
control activated. Simply depress the
accelerator pedal to accelerate the vehi-
cle. When the accelerator pedal is re-
leased, the vehicle will return to and
maintain the previous cruising speed.
& To temporarily cancel the
cruise control
The cruise control can be temporarily
canceled in the following ways:
. Push the “CANCEL ”button.
. Depress the brake pedal.
. Depress the clutch pedal (manual
transmission vehicles only). .
Shift the selector lever into the “N ”
position (automatic transmission vehicles only). . Shift the shift lever into neutral position
(manual transmission vehicles only).The “
”indicator light in the combination
meter goes off when the cruise control is canceled.
To resume the cruise control after it has
been temporarily canceled and with vehi-
cle speed of approximately 20 mph (32
km/h) or more, push the “RES/ACC ”
button to return to the original cruising
speed automatically. The “
”indicator light in the combination
meter will automatically come on at this time. Starting and operating
7-47
– CONTINUED –
Page 300 of 444
used previously, purge the old fluid from
the piping between the reservoir tank and
washer nozzles by operating the washer
for a certain period of time. Otherwise, if
the concentration of the fluid remaining in
thepipingistoolowfortheoutside
temperature, it may freeze and block thenozzles.
CAUTION
Adjust the washer fluid concentra-
tion appropriately for the outside
temperature. If the concentration is
inappropriate, sprayed washer fluid
may freeze on the windshield and
obstruct your view, and the fluid
may freeze in the reservoir tank.
! Before driving your vehicle
Before entering the vehicle, remove any
snow or ice from your shoes because that
could make the pedals slippery anddangerous.
While warming up the vehicle before
driving, check that the accelerator pedal,
brake pedal, and all other controls operate
smoothly.
Clear away ice and snow that has
accumulated under the fenders to avoid
making steering difficult. During severe winter driving, stop when and where it is
safe to do so and check under the fenders
periodically. !
Parking in cold weather
WARNING
Snow can trap dangerous exhaust
gases under your vehicle. Keep
snow clear of the exhaust pipe and
from around your vehicle if you park
the vehicle in snow with the enginerunning.
Do not use the parking brake when
parking for long periods in cold weather
since it could freeze in that position.
Instead, observe the following.
1. Place the shift lever in “1 ” or “R ” for
manual transmission vehicles, and in “P ”
for automatic transmission vehicles.
2. Use tire stops under the tires to
prevent the vehicle from moving.
When the vehicle is parked in snow or
when it snows, raise the wiper blades off
the glass to prevent damage to them.
When the vehicle has been left parked
after use on roads heavily covered with
snow, or has been left parked during a
snowstorm, icing may develop on the
brake system, which could cause poor braking action. Check for snow or ice
buildup on the suspension, disc brakes
and brake hoses underneath the vehicle.
If there is caked snow or ice, remove it,
being careful not to damage the disc
brakes and brake hoses and ABS har-ness. !
Refueling in cold weather
To help prevent moisture from forming in
the fuel system and the risk of its freezing,
use of an antifreeze additive in the fuel
tank is recommended during cold weather.
Use only additives that are specifically
designed for this purpose. When an
antifreeze additive is used, its effect lasts
longer if the tank is refilled whenever the
fuel level reaches half empty.
If your SUBARU is not going to be used
for an extended period, it is best to have
the fuel tank filled to capacity. & Driving on snowy and icy roads
WARNING
Do not use the cruise control on
slippery roads such as snowy or icy
roads. This may cause loss of
vehicle control. Driving tips
8-9
– CONTINUED –
Page 304 of 444
since this may result in dangerous hand-
ling characteristics. When you choose a
tire, make sure that there is enough
clearance between the tire and vehicle
body.
Remember to drive with care at all times
regardless of the type of tires on yourvehicle. &Tire chains
CAUTION
Tire chains cannot be used on any
tires for your Legacy and Outback
because of lack of clearance be-
tween the tires and vehicle body.
Driving on snowy grades or icy roads may
require the use of tire chains, in which
case put the chains on the front wheels
only. Use only SAE class S type chains
that are of the correct size for your tires so
as not to damage the vehicle body orsuspension.
When driving with tire chains, drive at
speeds below 19 mph (30 km/h). When a
temporary spare tire is on a front wheel,
replace the temporary spare tire with the
rear tire on the same side of the vehicle,
and then fit chains on the front tires.
Always use the utmost care when driving with tire chains
–overconfidence because
you are driving with tire chains could
easily lead to a serious accident.
& Rocking the vehicle
If you must rock the vehicle to free it from
snow, sand, or mud, depress the accel-
erator pedal slightly and move the selector
lever back and forth between “D ”and “R ”
repeatedly. Do not race the engine. For
the best possible traction, avoid spinning
the wheels when trying to free the vehicle.
When the road surface is extremely
slippery, you can obtain better traction by
starting the vehicle with the transmission
in 2nd than 1st (both for MT and AT).
Refer to the “Automatic transmission –4-
speed ”and “Automatic transmission –5-
speed ”section in chapter 7 for information
on holding the transmission in 2nd posi- tion. Loading your vehicle
WARNING
Never allow passengers to ride on a
folded rear seatback, in the trunk or
in the cargo area. Doing so may
result in serious injury.
WARNING
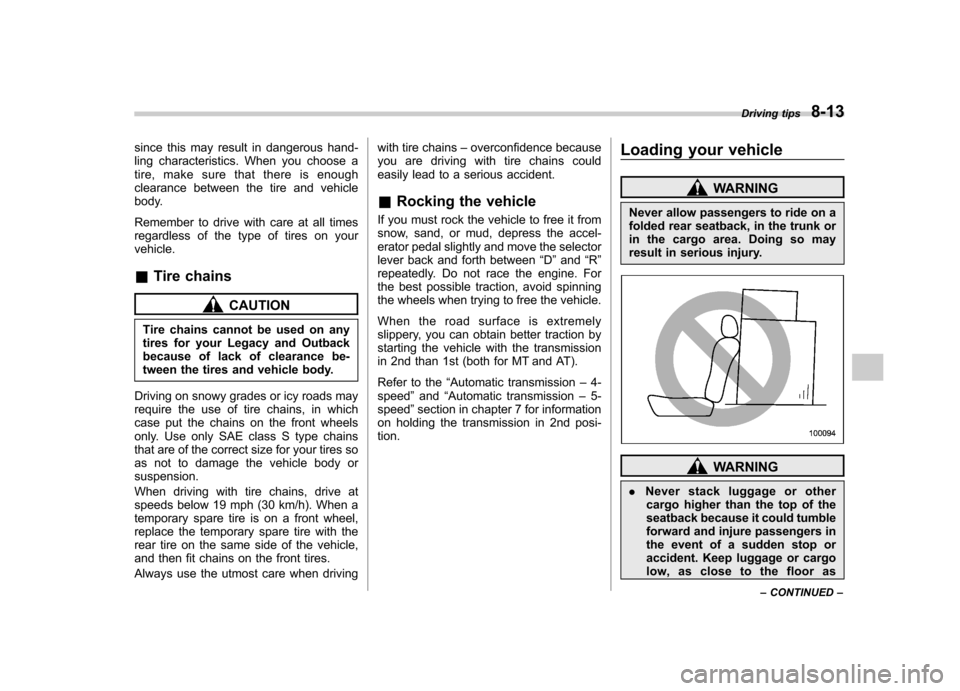
. Never stack luggage or other
cargo higher than the top of the
seatback because it could tumble
forward and injure passengers in
the event of a sudden stop or
accident. Keep luggage or cargo
low, as close to the floor as Driving tips
8-13
– CONTINUED –
Page 320 of 444

!Driving on grades
. Before going down a steep hill, slow
down and shift into lower gear (if neces-
sary, use 1st gear) in order to utilize the
engine braking effect and prevent over-
heating of your vehicle ’s brakes. Do not
make sudden downshifts. . When driving uphill in hot weather, the
air conditioner may turn off automatically
to protect the engine from overheating. . When driving uphill in hot weather, pay
attention to the water temperature gauge
pointer (for all vehicles) and AT OIL TEMP
warning light (for AT models) since the
engine and transmission are relatively
prone to overheating under these condi-
tions. If the water temperature gauge
pointer approaches the OVERHEAT zone
or the AT OIL TEMP warning light illumi-
nates, immediately switch off the air
conditioner and stop the vehicle at the
nearest safe place. Refer to the “Engine
overheating ”section in chapter 9, and
“ Warning and indicator lights ”section in
chapter 3. NOTE
With AT models, the temperature of
engine coolant is less likely to rise to
the OVERHEAT zone in the “D ” posi-
tion than in the manual mode position. . If your vehicle has an automatic trans- mission, avoid using the accelerator pedal
to stay stationary on an uphill slope
instead of using the parking brake or foot
brake. That may cause the transmission
fluid to overheat. !
Parking on a grade
Always block the wheels under both
vehicle and trailer when parking. Apply
the parking brake firmly. You should not
park on a hill or slope. But if parking on a
hill or slope cannot be avoided, you
should take the following steps:
1. Apply the brakes and hold the pedal down.
2. Have someone place wheel blocks
under both the vehicle and trailer wheels.
3. When the wheel blocks are in place,
release the regular brakes slowly until the
blocks absorb the load.
4. Apply the regular brakes and then
apply the parking brake; slowly release
the regular brakes.
5. Shift into 1st or reverse gear (manual
transmission) or “P ” (automatic transmis-
sion) and shut off the engine. Driving tips
8-29
Page 323 of 444

CAUTION
Never use any temporary spare tire
other than the original. Using other
sizes may result in severe mechan-
ical damage to the drive train of yourvehicle.
The temporary spare tire is smaller and
lighter than a conventional tire and is
designed for emergency use only. Re-
move the temporary spare tire and re-
install the conventional tire as soon as
possible because the spare tire is de-
signed only for temporary use.
Check the inflation pressure of the tem-
porary spare tire periodically to keep the
tire ready for use. The correct pressure is
60 psi (420 kPa, 4.2 kgf/cm
2) .
When using the temporary spare tire, note
the following. . Do not exceed 50 mph (80 km/h).
. Do not put a tire chain on the temporary
spare tire. Because of the smaller tire size,
a tire chain will not fit properly. . Do not use two or more temporary
spare tires at the same time.. Do not drive over obstacles. This tire
has a smaller diameter, so road clearance
is reduced.
1) Tread wear indicator bar
2) Indicator location mark
. When the wear indicator appears on
the tread, replace the tire. . The temporary spare tire must be used
only on a rear wheel. If a front wheel tire
gets punctured, replace the wheel with a
rear wheel and install the temporary spare
tire in place of the removed rear wheel.NOTE
If your vehicle is an AWD type with an
automatic transmission but is neither a
Turbo model nor a 3.0-liter model,
deactivate its All-Wheel-Drive capabil-
ity as follows: Before driving your
vehicle with the temporary spare tire,
putasparefuseinsidetheFWD
connector located in the engine com-
partment and confirm that the “
”
warning light comes on. The All-Wheel-
Drive capability of the vehicle has now
been deactivated. After re-installing the
conventional tire, remove the spare
fuse from the FWD connector in order
to reactivate All-Wheel Drive. In case of emergency
9-3
Page 324 of 444
9-4In case of emergency
Flat tires
If you have a flat tire while driving, never
brake suddenly; keep driving straight
ahead while gradually reducing speed.
Then slowly pull off the road to a safeplace. &Changing a flat tire
WARNING
. Do not jack up the vehicle on an
incline or a loose road surface.
The jack can come out of the
jacking point or sink into the
ground and this can result in a
severe accident.
. Use only the jack provided with
your vehicle. The jack supplied
with the vehicle is designed only
for changing a tire. Never get
under the vehicle while support-
ing the vehicle with this jack. .
Always turn off the engine before
raising the flat tire off the ground
using the jack. Never swing or
push the vehicle supported with
the jack. The jack can come out
of the jacking point due to a jolt
and this can result in a severeaccident.
1. Park on a hard, level surface, when-
ever possible, then stop the engine.
2. Set the parking brake securely and
shift a manual transmission vehicle in
reverse or an automatic transmission
vehicle in the “P ”(Park) position.
3. Turn on the hazard warning flasher
and have everyone get out of the vehicle.
4. Put wheel blocks at the front and rear
of the tire diagonally opposite the flat tire.
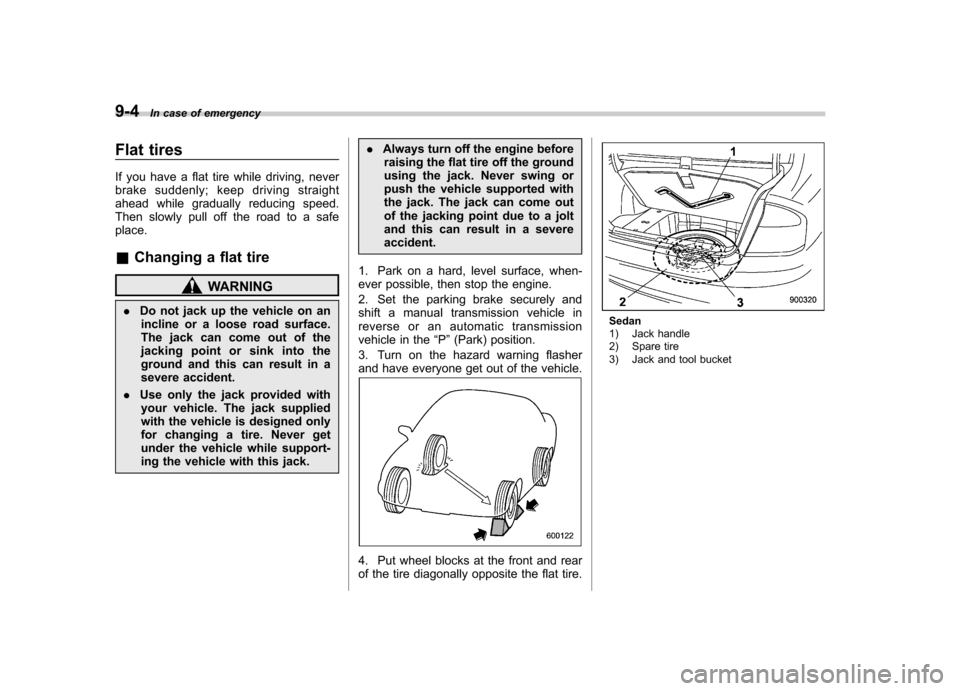
Sedan
1) Jack handle
2) Spare tire
3) Jack and tool bucket
Page 337 of 444
WARNING
Use the rear tie-down hooks only for
downward anchoring. If they are
used to anchor the vehicle in any
other direction, cables may slip off
the hooks, possibly causing a dan-
gerous situation.
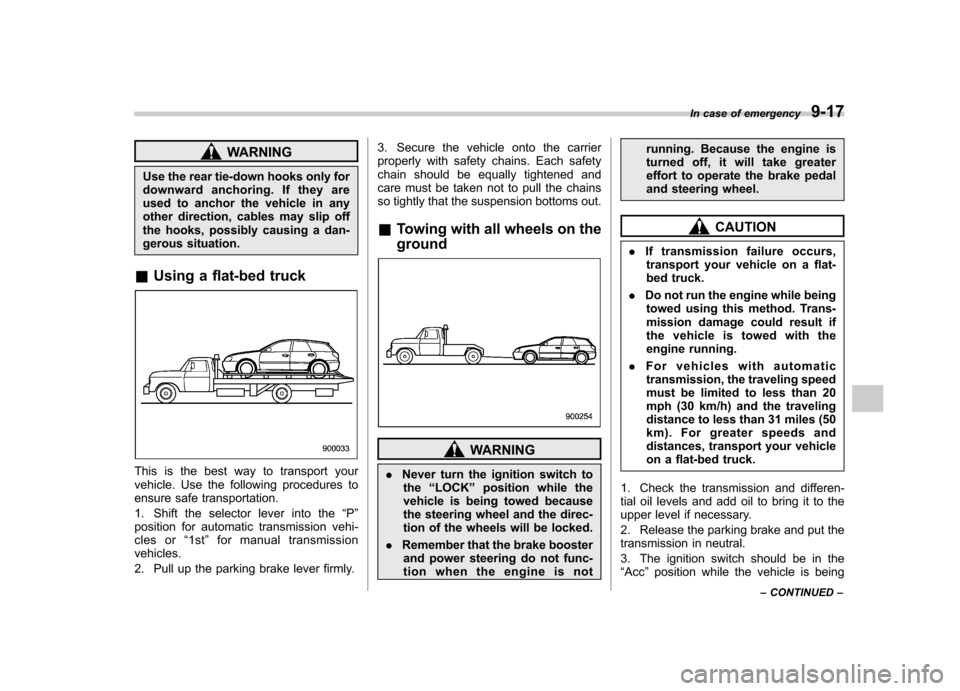
& Using a flat-bed truck
This is the best way to transport your
vehicle. Use the following procedures to
ensure safe transportation.
1. Shift the selector lever into the “P ”
position for automatic transmission vehi-
cles or “1st ”for manual transmission
vehicles.
2. Pull up the parking brake lever firmly. 3. Secure the vehicle onto the carrier
properly with safety chains. Each safety
chain should be equally tightened and
care must be taken not to pull the chains
so tightly that the suspension bottoms out. &
Towing with all wheels on the ground
WARNING
. Never turn the ignition switch to
the “LOCK ”position while the
vehicle is being towed because
the steering wheel and the direc-
tion of the wheels will be locked.
. Remember that the brake booster
and power steering do not func-
tion when the engine is not running. Because the engine is
turned off, it will take greater
effort to operate the brake pedal
and steering wheel.
CAUTION
. If transmission failure occurs,
transport your vehicle on a flat-
bed truck.
. Do not run the engine while being
towed using this method. Trans-
mission damage could result if
the vehicle is towed with the
engine running.
. For vehicles with automatic
transmission, the traveling speed
must be limited to less than 20
mph (30 km/h) and the traveling
distance to less than 31 miles (50
km). For greater speeds and
distances, transport your vehicle
on a flat-bed truck.
1. Check the transmission and differen-
tial oil levels and add oil to bring it to the
upper level if necessary.
2. Release the parking brake and put the
transmission in neutral.
3. The ignition switch should be in the “ Acc ”position while the vehicle is being In case of emergency
9-17
– CONTINUED –