2008 SKODA OCTAVIA fuel consumption
[x] Cancel search: fuel consumptionPage 68 of 304

Lights and Visibility67
Using the systemSafetyDriving TipsGeneral MaintenanceBreakdown assistanceTechnical Data
Front door warning light*
The warning light is located in the door trim panel below ⇒fig. 64 .
The warning light goes on every time the door is opened. The light goes out about
10 minutes after opening the door in order to avoid discharging the battery of the
vehicle.
There is a reflector installed on some vehicles instead of the warning light.
Luggage compartment light*
The lighting comes on automatically when the boot lid is opened. The luggage
compartment lighting will switch off agai n automatically if the boot lid remains
open for more than about 30 minutes.
Entry lighting*
The lighting is positioned on the bottom edge of the exterior mirror.
The light beam is directed towards the entry area of the front door.
The light comes on after the doors have been locked or on opening the boot lid. The
light goes out after switching on the ignition or up to 30 seconds after closing all the
doors, the bonnet and the boot lid. If a door, the bonnet or the boot lid remains open, the light goes out within 2
minutes if the ignition is switched off.
WARNING
If the entry light comes on, do not touch its cover - risk of burns!
Visibility
Rear window heater
– You can switch the rear window heater
on or off by pressing the switch
⇒ fig. 65 - the indicator light in the switch comes on or goes out.
The rear window heater only oper ates when the engine is running.
The rear window heater switches off automatically after 10 minutes.
For the sake of the environment
You should switch off the rear window heater as soon as the rear window is clear.
The reduced current consumption will have a favourable effect on fuel economy
⇒ page 205, “Saving electricity”.
Fig. 64 Front door: Warning
light
Fig. 65 Switch for rear
window heater
20A5Facelift.book Page 67 Saturday, September 6, 2008 2:13 PM
Page 94 of 304

Seats and Stowage93
Using the systemSafetyDriving TipsGeneral MaintenanceBreakdown assistanceTechnical Data
Installing
– Position the net partition housing in to the mounts of the seat backrest.
– Push the net partition housing in the opposite direction of arrow as far as the stop.
– Fold the rear seats back in to its original position.
The roof rack*
Description
Pay attention to the following points if you wish to transport luggage or other items
on the roof of your vehicle:
•A special roof luggage rack system was developed for the vehicle, that is why
you should only use a roof luggage rack which has been released for use by Škoda
Auto a.s.
•The base carrier is the basis for a comple te roof luggage rack system. Separate
additional holders are required for safety reasons for transporting luggage, bikes,
surfboards, skis and boats.
•The basic version of the roof luggage ra ck system and further components are
obtainable as accessories from Škoda Service Partners.
Caution
•If you use other roof rack systems or if the roof bars are not properly fitted, then
any damage which may result to your ca r is not covered by the warranty agree-
ments. It is therefore essential to pay attention to the fitting instructions supplied
with the roof luggage rack system.
•On models fitted with a power sliding/tilting roof, ensure that the opened
sliding/tilting roof does not strike any items of luggage transported on the roof.
•Ensure that the opened boot lid do es not collide with the roof load.
For the sake of the environment
The increased aerodynamic drag results in a higher fuel consumption. One should
therefore take off the roof bar system after use.
Note
A roof rail is obtainable from a specialist garage if hasn't been fitted onto an estate
car at the works, which carries out the professional fitting.
Lashing points (Octavia)
Fitting
– Insert the attachment points of the roof rack into the mounts of the
body so that the pins of the attach ment points grasp into the holes of
the body.
Note
•Pay attention to the information regarding assembly and disassembly in the
attached instructions.
•If you have any questions, please contact a specialist garage.
•The figure is not valid for an estate car.
A1
Fig. 106 Attachment points
for base roof carrier
20A5Facelift.book Page 93 Saturday, September 6, 2008 2:13 PM
Page 115 of 304
Heating and air conditioning system
114
Recirculated air mode
In recirculated air mode air is sucked out of the interior of the vehicle
and then fed back into the interior.
Recirculated air mode prevents polluted air outside the vehicle from
getting into the vehicle, for example when driving through a tunnel or
when standing in a traffic jam.
Switching recirculated air mode on
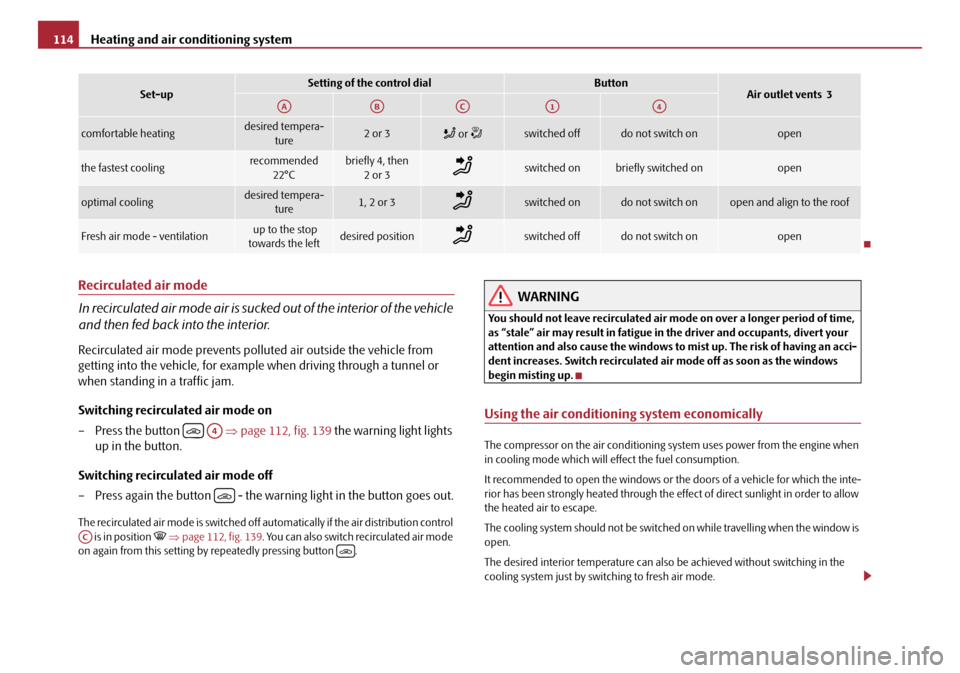
– Press the button ⇒page 112, fig. 139 the warning light lights
up in the button.
Switching recirculated air mode off
– Press again the button - the warning light in the button goes out.
The recirculated air mode is switched off au tomatically if the air distribution control
is in position ⇒ page 112, fig. 139 . You can also switch recirculated air mode
on again from this setting by repeatedly pressing button .
WARNING
You should not leave recirculated air mode on over a longer period of time,
as “stale” air may result in fatigue in the driver and occupants, divert your
attention and also cause the windows to mist up. The risk of having an acci-
dent increases. Switch recirculated air mode off as soon as the windows
begin misting up.
Using the air conditioning system economically
The compressor on the air conditioning system uses power from the engine when
in cooling mode which will effect the fuel consumption.
It recommended to open the windows or the doors of a vehicle for which the inte-
rior has been strongly heated through the effect of direct sunlight in order to allow
the heated air to escape.
The cooling system should not be switched on while travelling when the window is
open.
The desired interior temperature can also be achieved without switching in the
cooling system just by switching to fresh air mode.
comfortable heatingdesired tempera-
ture2 or 3 or switched offdo not switch onopen
the fastest coolingrecommended
22°Cbriefly 4, then 2or 3switched onbriefly switched onopen
optimal coolingdesired tempera- ture1, 2 or 3switched ondo not switch onopen and align to the roof
Fresh air mode - ventilation up to the stop
towards the leftdesired positionswitched offdo not switch onopen
Set-upSetting of the control dialButtonAir outlet vents 3AAABACA1A4
A4
AC
20A5Facelift.book Page 114 Saturday, September 6, 2008 2:13 PM
Page 121 of 304

Heating and air conditioning system
120
WARNING
•The auxiliary heating must never be op erated in closed rooms - risk of
poisoning!
•The auxiliary heating must not be running during refueling - risk of fire.
•The exhaust pipe of the auxiliary heating is located on the underside of
the vehicle. Therefore do not place the vehicle, if you wish to operate the
auxiliary heating, in such a way that the exhaust gases of the auxiliary
heating can come easily into contact with inflammable materials (e.g. dry
grass) or easily inflammable substances (e.g. fuel run out).
Note
•If the auxiliary heating runs, the fuel consumption comes from the vehicle tank.
Therefore the auxiliary heating should not be operated, if there is very little fuel in
the tank.
•The exhaust pipe of the auxiliary heating, which is located on the underside of
the vehicle, must not be clogged and the exhaust flow must not be blocked.
•If the auxiliary heating and ventilation is running, the vehicle battery discharges.
If the auxiliary heating and ventilation has been operated several times over a
longer period, the vehicle must be driven a few kilometers in order to recharge the
vehicle battery.
•The auxiliary heating only switches the bl ower on, if it has achieved a coolant
temperature of approx. 50 °C.
•At low outside temperatures, this can resu lt in a formation of water vapour in
the area of the engine compartment. This is quite normal and is not an operating
problem.
•After switching off the auxiliary heatin g, the coolant pump runs for a short
period.
•The auxiliary heating and ventilation does not switch on or comes on, if the
vehicle battery indicates a low loading state.
•The auxiliary heating (auxiliary heating) does not switch on, if the following was
shown in the information display or before switching off the ignition: Please
refuel! .
•When driving, the auxiliary heating can only be switched on, if the exterior
temperature is lower than 5 °C.
•The air inlet in front of the windscreen must be free of ice, snow or leaves in
order to ensure that the auxili ary heating operates properly.
•So that warm air can flow into the vehi cle interior after switching on the auxil-
iary heating, you must maintain the te mperature normally selected by you (we
recommend 22°C). It is recommended to put the air flow in the position
.
•On vehicles with DPF (diesel particle filter) the warm coolant heats up the
engine.
Using the system
So that the auxiliary heating (auxiliary heating and ventilation) func-
tions according to your expectations, it is necessary to carry out the
basic setting before its programming.
Basic setting
– On the information display, select from the Main menu the menu
point Setup (settings).
– From the menu Settings select Aux. heating (auxiliary heating).
– In the menu Aux. heating (auxiliary heating) ⇒ fig. 141 select the
menu point Weekday and set the current day.
Fig. 141 Information
display: Aux. Heating (auxil-
iary heating)
20A5Facelift.book Page 120 Saturday, September 6, 2008 2:13 PM
Page 126 of 304

Starting-off and Driving125
Using the systemSafetyDriving TipsGeneral MaintenanceBreakdown assistanceTechnical Data
Ignition lock
Petrol engines
- ignition switched off, engine off, the steering can be locked.
- ignition switched on
- start engine
Diesel engines - interruption of fuel supply, ignition switched off, engine off, the steering can
be locked.
- heating glow plugs on, ignition switched on
•You should not switch on any major elec trical components during the heating
period otherwise the vehicle batter y will be drained unnecessarily.
- start engine
Applies to all models:
Position
To lock the steering , with the ignition key withdrawn, turn the steering wheel until
the steering locking pin is heard to engage. You should always lock the steering as
a general rule if you leave your vehicle. This acts as a deterrent against possible theft
of your vehicle ⇒.
Position Move the steering wheel back and forward
a little if the ignition key cannot, or
cannot easily be turned into this position, in order to release the steering lock.
Position
The engine is started in this position. At the same time switched on low beam or
main beam or other electrical compon ents with major power consumption are
briefly switched off. The ignition key moves back into position when one
releases the key.
The ignition key must be turned back into position each time before starting the
engine again. The starter repeat lock in th e ignition lock prevents the starter being
engaged when the engine is ru nning and thus getting damaged.
Ignition key withdrawal lock (automatic gearbox)
You can only withdraw the ignition key after switching off the ignition if the selector
lever is in position P .
WARNING
•When driving, the ignition key must always be in the position (igni-
tion switched on) without the engine running. This position is indicated by
the warning lights coming on. If this is not the case, it could result in unex-
pected locking of the steering wheel - risk of accident!
•Only remove the ignition key from the ignition lock when the vehicle has
come to a standstill (put on the handbrake or select the selector lever posi-
tion P). The steering lock can enga ge immediately - risk of accident!
•Always withdraw the ignition key if you are going to leave the vehicle,
even for a short time. This is particularly important if children are left in the
vehicle. The children might otherwise star t the engine or switch on electrical
equipment (e.g. power windows) - risk of accident or injury!
Fig. 146 Ignition lock posi-
tions
A1
A2
A3
A1
A2
A3
A1
A2
A3
A2
A1
A2
20A5Facelift.book Page 125 Saturday, September 6, 2008 2:13 PM
Page 135 of 304

Automatic gearbox
134
Automatic gearbox
Automatic gearbox*
Information for driving with the 6-speed automatic gearbox*
Your car is equipped with a conventional 6-speed automatic
gearbox.
The maximum speed is reached in the 5th gear. The 6th gear serves as an
economic driving programme, which is intended to reduce the fuel
consumption. Shifting up and down through the gears is performed auto-
matically. You can also, however, switch the gearbox over into the
Tiptronic mode . This mode makes it possible for you to also shift gears
manually ⇒page 138.
Starting-off and Driving
– Depress the brake pedal fully and keep it depressed.
– Press the Shiftlock button (button in handle of the selector lever),
move the selector lever into the desired position, e.g. D ⇒ page 136,
and then release the Shiftlock button.
– Wait a moment until the gearbox has shifted (a slight engagement nudge can be felt).
– Release the brake pedal and depress the accelerator ⇒.
Stopping for a short time
– The selector lever position N does not have to be selected when stop-
ping just for a short time, such as at a cross roads. It is absolutely suffi-
cient to hold the stopped vehicle st ationary by depressing the foot
brake. The engine can, however, be allowed just to idle. Parking
– Depress the brake pedal and hold it depressed.
– Apply the handbrake firmly.
– Press and Shiftlock button in the
selector lever, move the selector
lever to P and then release the Shiftlock button.The engine can only be started when the selector lever is in position P or N
⇒ page 126.
It is sufficient to engage selector lever position P when parking on a flat surface.
When parking on a slope you should first apply the handbrake firmly and then
move the selector lever into position P. This is to ensure that there is no excessive
pressure acting on the lock mechanism and that it is easier to subsequently move
the selector lever out of position P.
If the selector lever position N is selected by accident wh ile driving it is first neces-
sary to release pressure on the accelerato r pedal and wait for idling speed of the
engine to be reached before engaging a drive position in the selector lever.
WARNING
•Do not depress the accelerator when changing the position of the
selector lever if the car is stationary and the engine is running - risk of acci-
dent!
•Never move the selector lever into position R or P when driving - risk of
an accident!
•When the engine is running and the vehicle is stationary, it is necessary
to hold the car with the brake pedal in all the positions of the selector lever
(except P and N) since the power transmission is never completely inter-
rupted, also not when the engine is idling - the vehicle "creeps".
20A5Facelift.book Page 134 Saturday, September 6, 2008 2:13 PM
Page 139 of 304

Automatic gearbox
138
Dynamic shift programme
The automatic gearbox of your vehicle is controlled electronically. Shifting up and
down through the gears is performed auto matically on the basis of pre-defined
driving programmes.
Adopting a moderate style of driving will cause the gearbox to select the most
economical driving programme. Shifting up into a higher gear as soon as possible
and shifting down as late as possible will have a favourable effect on your fuel
consumption.
Adopting a sporty style of driving with rapid movements of the accelerator pedal
combined with sharp acceleration and frequent changes in speed, exploiting the
top speed of the car or depressing the a ccelerator pedal (kickdown function), will
cause the gearbox to switch over to this style of driving and shift down earlier with
frequent changes in gears in comparison to the moderate style of driving.
Selecting the most appropriate driving programme for the particular style of driving
is a continuous process. Irrespective of this it is, however, possible to switch or shift
down into a dynamic shift programme by depressing the accelerator rapidly. The
gearbox shifts down into a lower gear matc hing the speed of the car and this allows
you to accelerate rapidly (e.g. when ov ertaking) without having to depress the
accelerator pedal fully into the kickdown range. The original programme will be
reactivated to match your part icular style of driving once the gearbox has shifted up
again.
When driving in hilly regions, the gears are selected to match uphill and downhill
sections. This avoids the gearbox frequently shifting up and down when negotiating
an uphill stretch. When driving downhill, it is possible to shift down into the
Tiptronic position, in order to exploit the engine brake torque.
Tiptronic
The Tiptronic allows the driver to also shift gears manually.
The selector lever position you have engaged is indicated in the informa-
tion display of the instrument cluster together with the engaged gear
⇒fig. 156 .
Switching over to manual shifting
– Push the selector lever to the right out of position D. After switching
over, the current engaged gear is indicated in the display.
Fig. 155 Selector lever:
Manual shifting of gears
Fig. 156 Information
display: Manual shifting of
gears
20A5Facelift.book Page 138 Saturday, September 6, 2008 2:13 PM
Page 203 of 304

Driving and the Environment
202
Catalytic converter
Proper operation of the emission co ntrol system (catalytic converter)
is of major significance for drivin g your vehicle in an environmen-
tally conscious way.
Please refer to the following guidelines:
– For vehicles with petrol engine only refuel with unleaded petrol
⇒ page 219, “Grades of petrol”.
– Never run the fuel tank completely empty.
– Do not switch off the ignition while you are driving the vehicle.
– Do not pour too much oil into the engine ⇒page 228, “Replenishing
engine oil”.
– Do not tow-start the vehicle over a distance of more than 50 metres
⇒ page 253, “Tow-starting and towing vehicle”.
If you drive your vehi cle in a country in which unleade d petrol is not available, you
must have the catalytic converter replaced later when driving the vehicle into a
country in which use of a cata lytic converter is mandatory.
WARNING
•In view of the high temperatures which may be produced in the catalytic
converter, one should always park a vehicle in such a way that the catalytic
converter cannot come into contact with easily flammable materials below
the vehicle - a risk of fire!
•Never use additional underbody protection or corrosion-protection
agents for the exhaust pipes, catalyti c converters or heat shields. Such
substances might ignite when driving - risk of fire!
Caution
•Vehicles fitted with catalytic converter should neve r be allowed to let the fuel
tank to run completely empty. An irregular fuel supply can result in poor ignition or misfiring. Unburnt fuel may get into the exhaust system and damage the catalytic
converter.
•Filling the tank even only once with le
aded petrol will result in the catalytic
converter being destroyed.
•If you detect misfiring, a drop in perf ormance or irregular engine running when
driving, reduce your speed immediately and have the vehicle inspected by the
nearest specialist garage. The symptoms described may be caused by a fault in the
ignition system. Unburnt fuel may get in to the exhaust system and damage the
catalytic converter.
For the sake of the environment
Even if the exhaust system is operating properly, a sulphur-like exhaust odour may
be produced under certain operating condit ions of the engine. This depends on the
sulphur content of the fuel. It is often su fficient to refuel with unleaded premium-
grade petrol of a different brand or at a different filling station.
Driving in an economical and environmentally
conscious manner
General
Your personal style of driving is a major factor.
Your fuel consumption, any pollution of the environmental and the wear-and-tear
to the engine, brakes and tyres, depend essentially on three factors:
•your personal style of driving,
•the conditions under which your vehicle is operated,
•technical aspects.
You can easily improve your fuel economy by 10 - 15 percent by driving in an
economical way with foresight. This section is intended to provide you with a
number of tips on how to protect the en vironment and at the same time save
money.
20A5Facelift.book Page 202 Saturday, September 6, 2008 2:13 PM