2008 Seat Ibiza 5D ESP
[x] Cancel search: ESPPage 167 of 260
Your vehicle maintenance and cleaning165
Safety First
Operating instructions
Practical tips
Te c h n i c a l D a t a
Vehicle exterior maintenanceAutomatic car washing tunnelThe vehicle paintwork is so durable that the car can normally be washed
without problems in an automatic car washing tunnel. However, the paint-
work wear depends to a large extent, on the kind of the car washing tunnel,
the brushes used, its water filtering and the type of cleaning and preservative
products.
Before going through a car wash, be sure to take the usual precautions such
as closing the windows and sunroof. There is nothing to note apart from that.
If the vehicle has special accessories such as spoilers or a roof carrier or two-
way radio aerial, etc., it is advisable to consult the car washing tunnel oper-
ator.
After washing, the brakes could hesitate to respond as the brake discs and
pads could be wet, or even frozen in winter. “Dry” the brakes by braking
several times.
WARNING
Water, ice and salt on the brakes can reduce braking efficiency. Risk of acci-
dent.
Caution
Before putting the vehicle through the ca r washing tunnel, do not tighten the
aerial if it is folded because it can be damaged.
Washing by handVe hicle washing
– First soften the dirt with plenty of water and rinse it off.
– Clea n yo ur ve hicle fro m to p to bo ttom with a soft spo nge , a g love or a brush. Use very light pressure.
– Rinse the sponge or glove often with clean water.
– Special car shampoo should only be used for very stubborn dirt.
– Clean the wheels, sill panels etc. until last with a different sponge or glove.
– Rinse the vehicle thoroughly with water.
– Dry your vehicle surface gently with a chamois leather.
–When temperature is cold, dry the rubber seals and its surfaces
to prevent them from freezing. Apply silicone spray to the rubber
seals.
After washing
– Directly after washing, avoid sudden and sharp braking. “Dry” the brakes by braking several times.
WARNING
•
Wash your car with the ignition switched off.
•
Protect your hands and arms from cuts on sharp metal edges when
cleaning the underbody, the inside of the wheel housings etc. Risk of
injury.
Ibiza250_angles Seite 165 Dienstag, 5. August 2008 1:11 13
Page 173 of 260
Your vehicle maintenance and cleaning171
Safety First
Operating instructions
Practical tips
Te c h n i c a l D a t a
Vehicle interior maintenancePlastic parts and dash panel cleaning– Use a clean, damp cloth to clean plastic parts and the dash
panel.
– If this does not provide satisfactory results, use a special solvent-free plastic cleaning product.
WARNING
Never clean the dash panel and the airbag module surface with cleansers
containing solvents. Solvents cause th e surface to become porous. If the
airbag triggered, disintegrating plastic parts could cause substantial inju-
ries.
Caution
Cleaning products which contain solvents will damage the material.Wooden trim cleaning*– Clean the wooden trim with a water-moistened clean cloth.
– If this does not provide satisfactory results, use a gentle soap
solution.
CautionCleaning products which contain solvents will damage the material.
Cloth seat covers and fabric trim cleaningCloth seat covers and fabric trim on the doors, headlining etc. can be cleaned
with a special interior cleanser or with dry foam and a soft brush.Leather cleaning*Normal cleaning
– Moisten a cotton or woollen cloth with water and wipe over the leather surfaces.
Cleaning stubborn stains
– More stubborn dirt can be removed using a mild soap solution (pure liquid soap; two tablespoons diluted in one litre of water)
and a cloth.
– Do not let the water soak through the leather or soak into the seams.
– Then wipe off with a soft, dry cloth.
Leather maintenance
– The leather should be treated twice a year with a special leather- care product, available in your Authorised Service Centre.
– Apply these products very sparingly.
– Then wipe off with a soft, dry cloth.SEAT does everything possible to preserve the genuine qualities of this
natural product. Due to the natural properties of the specially selected hides
Ibiza250_angles Seite 171 Dienstag, 5. August 2008 1:11 13
Page 175 of 260
Accessories, parts replacement and modifications173
Safety First
Operating instructions
Practical tips
Te c h n i c a l D a t a
Accessories, parts replacement and modificationsAccessories and spare partsAlways consult an Authorised Service Centre before
purchasing accessories and parts.Your vehicle is designed to offer a high standard of active and passive safety.
Before purchasing accessories and parts, and before making technical
changes to your car, we recommend you to consult your Authorised Service
Centre.
SEAT dealerships will be happy to provide you with the latest information
about the use, legal requirements and recommendations from the manufac-
turer regarding accessories and parts.
We recommend you to use only SEAT Approved Accessories
® and SEAT
Approved Spare Parts
®. This way, SEAT can guarantee that the product in
question is suitable, reliable and safe. SEAT Authorised Service Centres have
the necessary experience and facilities to ensure that parts are correctly and
professionally installed.
Despite a continuous observation of the market, SEAT is not able to assess
the reliability, safety and suitability of those parts SEAT has not approved. For
this reason, SEAT cannot assume resp onsibility for any non-genuine parts
used, even if these parts have been approved by an official testing agency or
are covered by an official approval certificate.
Any equipment subsequently installed which has a direct effect on the
vehicle and/or the way it is driven (e.g. cruise control system or electronically-
controlled suspension) must be approved by SEAT and bear the e mark (the
European Union's authorisation symbol).
If any additional electrical components are fitted so that they do not serve to
control the vehicle itself (for instance a refrigerator box, laptop or ventilator fan, etc.), then they must bear the
CE mark (European Union manufacturer
conformity declaration).
WARNING
Accessories, for example telephone holders or drink holders, should never
be fitted on the covers of, or within the working range of the airbags. Other-
wise, there is a danger of injury if the airbag is triggered in an accident.Technical modificationsModifications must always be carried out according to our
specifications.Unauthorised modifications to the electr onic components or software in the
vehicle may cause malfunctions. Due to the way the electronic components
are linked together in networks, other indirect systems may be affected by the
faults. This can seriously impair safety, lead to excessive wear of compo-
nents, and also invalidate your vehicle registration documents.
SEAT Authorised Service Centres cannot be held liable for any damage
caused by modifications and/or work incorrectly performed.
For this reason, we recommend you that all work should be performed by an
Authorised Service Centre using genuine and SEAT
® approved parts and
accessories .
Ibiza250_angles Seite 173 Dienstag, 5. August 2008 1:11 13
Page 181 of 260
Checking and refilling levels179
Safety First
Operating instructions
Practical tips
Te c h n i c a l D a t a
−
Insert the fuel nozzle into the mouth of the canister as far as
possible.
− If the spare fuel canister is made of metal, the filling nozzle must be
in contact with the canister during filling. This helps prevent an electro-
static charge building up.
− Never spill fuel in the vehicle or in the luggage compartment. Fuel
vapours are explosive. Danger of death.
Caution
•
Fuel spills should be removed from the paintwork immediately.
•
Never run the tank completely dry. An irregular fuel supply could cause
misfiring. As a result, unburnt fuel co uld enter the catalytic converter and
cause damage.For the sake of the environment
Do not try to put in more fuel after the automatic filler nozzle has switched off;
this may cause the fuel to overflow if it becomes warm.PetrolPetrol types
The correct petrol types are listed on a sticker inside the fuel
tank flap.Only unleaded petrol, corresponding to the standard DIN EN 228 , may be
used for vehicles with catalytic conv erters (EN = “European Standard”). Fuel types are differentiated by the
octane rating, e.g: 91, 95, 98 RON (RON
= “Regulation Octane Number, unit for determining the knock resistance of
petrol”). You may use petrol with a higher octane number than the one recom-
mended for your engine. However, this has no advantage in terms of fuel
consumption and engine power.
Caution
•
Even one tankful of leaded fuel would permanently impair the efficiency
of the catalytic converter.
•
High engine speed and full throttle can damage the engine when using
petrol with an octane rating lower than the correct grade for the engine.For the sake of the environment
Just one full tank of leaded fuel would seriously impair the efficiency of the
catalytic converter.Petrol additives
Petrol additives improve the quality of the petrol.The quality of the petrol influences running behaviour, performance and
service life of the engine. For this reason, you should use good quality petrol
containing additives. These additives will help to prevent corrosion, keep the
fuel system clean and prevent deposits from building up in the engine.
If good quality petrol with additives is not available or engine problems occur,
the required additives must be added during refuelling.
WARNING (continued)
Ibiza250_angles Seite 179 Dienstag, 5. August 2008 1:11 13
Page 182 of 260
Checking and refilling levels
180DieselDiesel*Diesel fuel must correspond to DIN EN 590 (EN = “European standard”). It
must have a cetane number (CN) of at least 51. The cetane number indicates
the ignition quality of the diesel fuel.
Notes on filling with fuel ⇒page 178.Biodiesel*The biodiesel fuel must comply with the DIN EN 14.214 (FAME) Standard.•
Biodiesel is a methylester obtained from rapeseed oil.
•
DIN is a German abbreviation for “ Deutsches Institut für Normung e.V.”,
the German standards institute.
•
EN means E uropean Norm.
•
FAME is the English abbreviation “ Fatty Acid Methyl Ester”
Your Authorised Service Centre can also be consulted to know if the vehicle
has been prepared for biodiesel use.
Things to note about RME fuel (biodiesel)
•
The performance of a vehicle using biodiesel maybe somewhat reduced.
•
Fuel consumption of a vehicle using biodiesel may be slightly higher.
•
RME fuel can be used in winter at temperatures down to approx. -10°C.
•
At outside temperatures below -10°C, we recommend using winter diesel
fuel.
•
Your vehicle is designe d to be refuelled with up to a maximum of 7%
blended biodiesel.
Caution
•
RME fuel can damage the fuel system in vehicles which are not suitably
adjusted.
•
If you decide to use biodiesel in your vehicle, please use only RME fuel
which is DIN E 14,214 compliant.
•
If you use biodiesel that does not me et the required standard, the fuel
filter could become clogged.Note
•
In case of low exterior temperatures and a fuel biodiesel percentage of
higher than 50%, an increase in gas emission may occur during operation of
the independent heating.
•
The fuel filter may become clogged when fuel is changed to biodiesel. For
this reason, we recommend you that, when having run 300 or 400 km after a
fuel change, the fuel filter change must also be done. Also note the instruc-
tions in the Inspection and Maintenance plan.
•
If the vehicle is to remain parked for more than about two weeks, we
recommend filling the fuel tank with biodiesel and driving about 50 km in
order to avoid damage to the injection system.
Winter driving
Diesel can thicken in winter.Winter-grade diesel
When using “summer-grade diesel fuel”, difficulties may be experienced
under 0°C temperatures because the fuel thickens due to wax separation. For
this reason, “winter-grade diesel fuel” is available in some countries during
the cold months. It can be used at temperatures as low as -22°C.
Ibiza250_angles Seite 180 Dienstag, 5. August 2008 1:11 13
Page 188 of 260
Checking and refilling levels
186
NoteBefore a long trip, we recommend findin g an engine oil that conforms to the
corresponding VW specifications and keeping it in the vehicle. This way, the
correct engine oil will always be available for a top-up if needed.Checking the engine oil level
The engine oil dipstick indicates the level of the oil.Checking oil level
– Park the vehicle in a horizontal position.
– Briefly run the engine at idle speed until the service temperature is reached then stop.
– Wait two minutes. – Pull out the dipstick. Wipe the dipstick with a clean cloth and
insert it again, pushing it in as far as it will go.
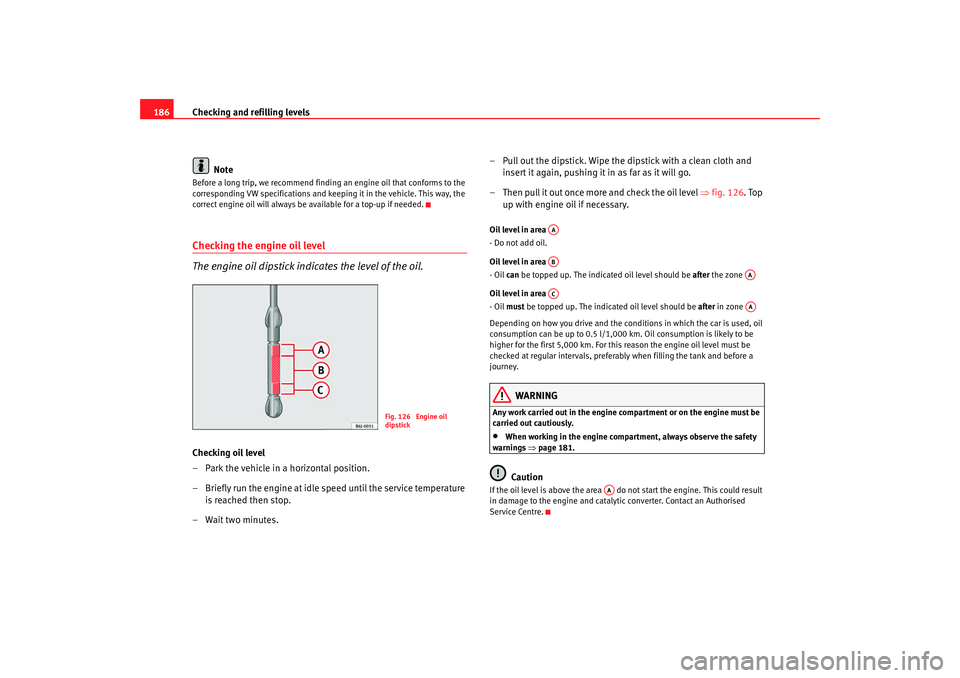
– Then pull it out once more and check the oil level ⇒fig. 126. Top
up with engine oil if necessary.
Oil level in area
- Do not add oil.
Oil level in area
- Oil can be topped up. The indicated oil level should be after the zone
Oil level in area
- Oil must be topped up. The indicated oil level should be after in zone
Depending on how you drive and the conditions in which the car is used, oil
consumption can be up to 0.5 l/1,000 km. Oil consumption is likely to be
higher for the first 5,000 km. For this re ason the engine oil level must be
checked at regular intervals, preferably when filling the tank and before a
journey.
WARNING
Any work carried out in the engine compartment or on the engine must be
carried out cautiously.•
When working in the engine compartment, always observe the safety
warnings ⇒page 181.Caution
If the oil level is above the area do not start the engine. This could result
in damage to the engine and catalytic converter. Contact an Authorised
Service Centre.
Fig. 126 Engine oil
dipstick
AAAB
AA
AC
AA
AA
Ibiza250_angles Seite 186 Dienstag, 5. August 2008 1:11 13
Page 189 of 260
Checking and refilling levels187
Safety First
Operating instructions
Practical tips
Te c h n i c a l D a t a
Topping up engine oil
Top up gradually with small quantities of oil.
Before opening the bonnet, read and observe the warnings ⇒ in
“Safety instructions on working in the engine compartment” on
page 181.
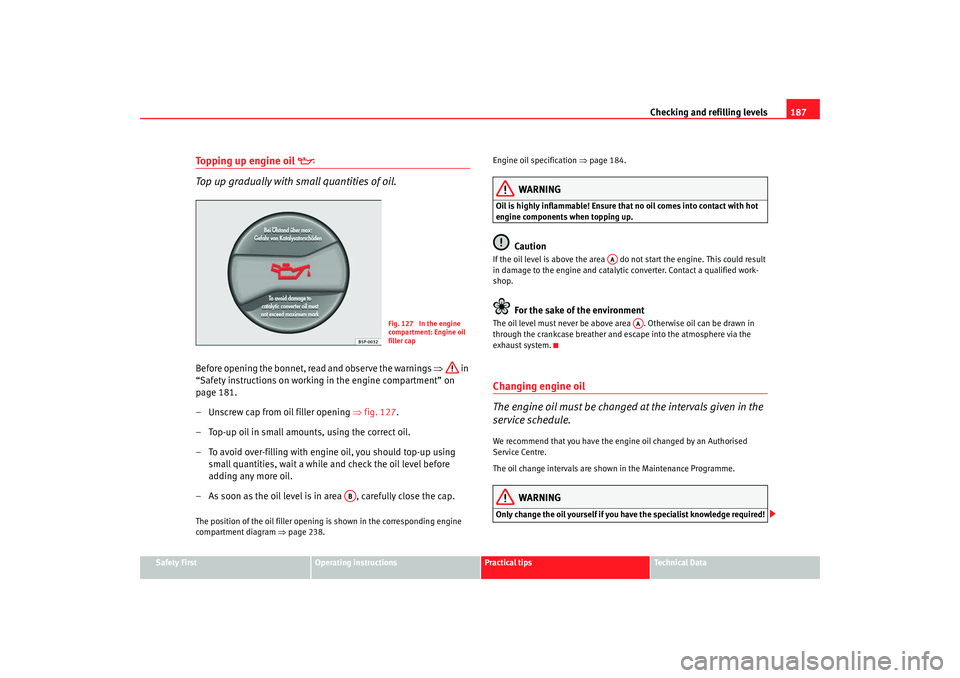
– Unscrew cap from oil filler opening ⇒fig. 127.
– Top-up oil in small amounts, using the correct oil.
– To avoid over-filling with engine oil, you should top-up using small quantities, wait a while and check the oil level before
adding any more oil.
– As soon as the oil level is in area , carefully close the cap.The position of the oil filler opening is shown in the corresponding engine
compartment diagram ⇒page 238. Engine oil specification
⇒page 184.
WARNING
Oil is highly inflammable! Ensure that no oil comes into contact with hot
engine components when topping up.
Caution
If the oil level is above the area do not start the engine. This could result
in damage to the engine and catalytic converter. Contact a qualified work-
shop.
For the sake of the environment
The oil level must never be above area . Otherwise oil can be drawn in
through the crankcase breather and escape into the atmosphere via the
exhaust system.Changing engine oil
The engine oil must be changed at the intervals given in the
service schedule.We recommend that you have the engine oil changed by an Authorised
Service Centre.
The oil change intervals are shown in the Maintenance Programme.
WARNING
Only change the oil yourself if you have the specialist knowledge required!
Fig. 127 In the engine
compartment: Engine oil
filler cap
AB
AA
AA
Ibiza250_angles Seite 187 Dienstag, 5. August 2008 1:11 13
Page 191 of 260
Checking and refilling levels189
Safety First
Operating instructions
Practical tips
Te c h n i c a l D a t a
Caution
•
Other additives may give considerably inferior corrosion protection. The
resulting corrosion in the cooling system can lead to a loss of coolant,
causing serious damage to the engine.
•
If additive G12++ is not available, t his can be mixed with G12+, bearing in
mind that the protection against corrosion will be reduced.
Checking the coolant level and topping up
The correct coolant level is important for fault-free func-
tioning of the engine cooling system.Before opening the bonnet, read and observe the warnings ⇒ in
“Safety instructions on working in the engine compartment” on
page 181. Opening the coolant expansion tank
– Switch off the engine and allow it to cool.
– To prevent scalding, cover the cap on the expansion tank with a
thick cloth and carefully unscrew the cap ⇒.
Checking coolant level
– Look into the open coolant expansion tank and read off the coolant level.
– If the level is below the “MIN” mark, top up with coolant.
Topping up coolant
–Only use new coolant.
– Do not fill above the “MAX” mark.
Closing the coolant expansion tank
–Screw the cap on again tightly.
The position of the coolant expansion reservoir is shown in the corresponding
engine compartment diagram ⇒page 238.
Ensure the coolant conforms to the required specifications. Do not use a
different type of additive if coolant ad ditive G 12++ is not available. In this
case use only water and bring the coolant concentration back up to the
correct level as soon as possible by topping up with the specified additive.
Always top up with new coolant.
Do not fill above the “MAX” mark. Otherwise the excess coolant will be forced
out of the cooling system when the engine is hot.
The additive G 12++ can be mixed with the G 12+ in any proportion.
Fig. 128 In the engine
compartment: Coolant
expansion tank cap
Ibiza250_angles Seite 189 Dienstag, 5. August 2008 1:11 13