2008 PONTIAC TORRENT oil level
[x] Cancel search: oil levelPage 171 of 434

RANGE
Press the trip/fuel button until RANGE displays. This
display shows the approximate number of remaining
miles (mi) or kilometers (km) the vehicle can be driven
without refueling.
The fuel range estimate is based on an average of
the vehicle’s fuel economy over recent driving history
and the amount of fuel remaining in the fuel tank.
This estimate will change if driving conditions change.
For example, if driving in traffic and making frequent
stops, this display may read one number, but if
the vehicle is driven on a freeway, the number may
change even though the same amount of fuel is in the
fuel tank. This is because different driving conditions
produce different fuel economies. Generally, freeway
driving produces better fuel economy than city driving.
If your vehicle is low on fuel, the FUEL LEVEL LOW
message will be displayed. See “FUEL LEVEL LOW”
underDIC Warnings and Messages on page 3-52
for more information.
Blank Display
This display shows no information.
Vehicle Information Menu Items
T
(Vehicle Information):Press this button to scroll
through the following displays:
OIL LIFE
Press the vehicle information button until OIL LIFE
REMAINING displays. This display shows an estimate of
the oil’s remaining useful life. If you see 99% OIL LIFE
REMAINING on the display, that means 99% of the
current oil life remains. The engine oil life system will alert
you to change the oil on a schedule consistent with your
driving conditions.
When the remaining oil life is low, the CHANGE
ENGINE OIL SOON message will appear on the
display along with the Change Engine Oil Light on
the instrument panel cluster. See “CHANGE ENGINE
OIL SOON” underDIC Warnings and Messages
on page 3-52andChange Engine Oil Light on
page 3-40. You should change the oil as soon as
possible. SeeEngine Oil on page 5-15. In addition
to the engine oil life system monitoring the oil life,
additional maintenance is recommended in the
Maintenance Schedule in this manual. SeeScheduled
Maintenance on page 6-4for more information.
3-47
Page 252 of 434

Other Rainy Weather Tips
Besides slowing down, other wet weather driving tips
include:
Allow extra following distance.
Pass with caution.
Keep windshield wiping equipment in good shape.
Keep the windshield washer �uid reservoir �lled.
Have good tires with proper tread depth. SeeTires
on page 5-52.
Before Leaving on a Long Trip
To prepare your vehicle for a long trip, consider having
it serviced by your dealer/retailer before departing.
Things to check on your own include:
Windshield Washer Fluid:Reservoir full? Windows
clean — inside and outside?
Wiper Blades:In good shape?
Fuel, Engine Oil, Other Fluids:All levels checked?
Lamps:Do they all work and are lenses clean?
Tires:Are treads good? Are tires in�ated to
recommended pressure?
Weather and Maps:Safe to travel? Have up-to-date
maps?
Highway Hypnosis
Always be alert and pay attention to your surroundings
while driving. If you become tired or sleepy, �nd a
safe place to park your vehicle and rest.
Other driving tips include:
Keep the vehicle well ventilated.
Keep interior temperature cool.
Keep your eyes moving — scan the road ahead
and to the sides.
Check the rearview mirror and vehicle instruments
often.
4-16
Page 291 of 434

A. Engine Air Cleaner/Filter. SeeEngine Air
Cleaner/Filter on page 5-20.
B. Power Steering Fluid Reservoir (Out of View). See
Power Steering Fluid on page 5-32.
C. Engine Oil Fill Cap (Out of View). See “When to Add
Engine Oil” underEngine Oil on page 5-15.
D. Engine Oil Dipstick. See “Checking Engine Oil”
underEngine Oil on page 5-15.
E. Brake Fluid Reservoir. See “Brake Fluid” under
Brakes on page 5-34.
F. Underhood Fuse Block. SeeEngine Compartment
Fuse Block on page 5-102.
G. Remote Positive (+) Terminal. SeeJump Starting on
page 5-38.
H. Engine Coolant Recovery Tank. SeeCooling System
on page 5-27.
I. Windshield Washer Fluid Reservoir. See “Adding
Washer Fluid” underWindshield Washer Fluid
on page 5-33.Engine Oil
Checking Engine Oil
It is a good idea to check the engine oil every time you
get fuel. In order to get an accurate reading, the oil
must be warm and the vehicle must be on level ground.
The engine oil dipstick handle is a yellow loop. See
Engine Compartment Overview on page 5-12for
the location of the engine oil dipstick.
1. Turn off the engine and give the oil several minutes
to drain back into the oil pan. If you do not do this,
the oil dipstick might not show the actual level.
2. Pull out the dipstick and clean it with a paper towel
or cloth, then push it back in all the way. Remove it
again, keeping the tip down, and check the level.
5-15
Page 292 of 434

When to Add Engine Oil
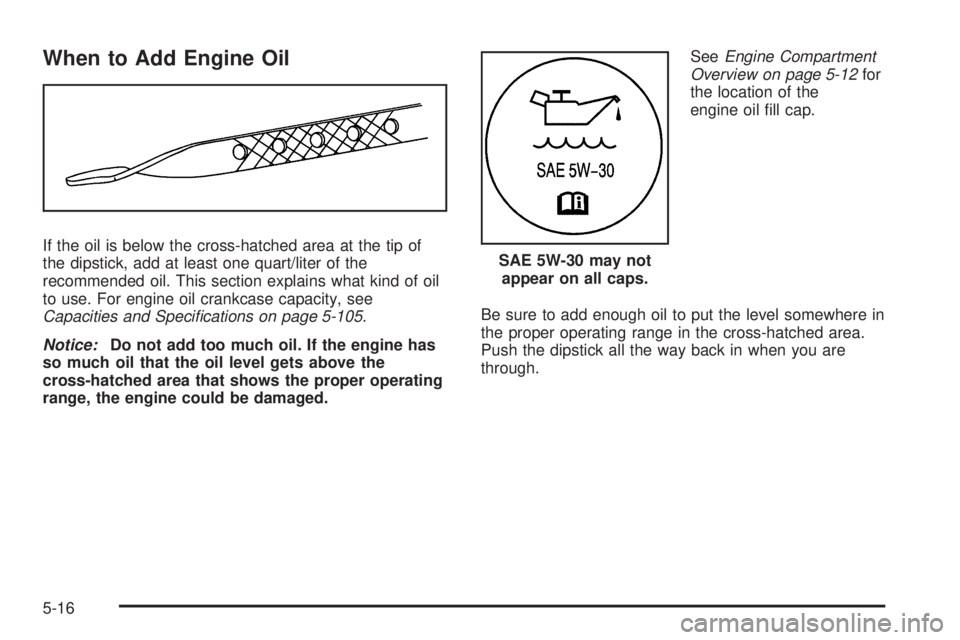
If the oil is below the cross-hatched area at the tip of
the dipstick, add at least one quart/liter of the
recommended oil. This section explains what kind of oil
to use. For engine oil crankcase capacity, see
Capacities and Specifications on page 5-105.
Notice:Do not add too much oil. If the engine has
so much oil that the oil level gets above the
cross-hatched area that shows the proper operating
range, the engine could be damaged.SeeEngine Compartment
Overview on page 5-12for
the location of the
engine oil �ll cap.
Be sure to add enough oil to put the level somewhere in
the proper operating range in the cross-hatched area.
Push the dipstick all the way back in when you are
through.SAE 5W-30 may not
appear on all caps.
5-16
Page 294 of 434

Look for this information on the oil container, and use
only those oils that are identi�ed as meeting GM
Standard GM6094M and have the starburst symbol on
the front of the oil container.
Notice:Use only engine oil identi�ed as meeting
GM Standard GM6094M and showing the American
Petroleum Institute Certi�ed For Gasoline Engines
starburst symbol. Failure to use the recommended
oil can result in engine damage not covered by
your warranty.
Engine Oil Additives
Do not add anything to the oil. The recommended oils
with the starburst symbol that meet GM Standard
GM6094M are all you need for good performance and
engine protection.
Engine Oil Life System
When to Change Engine Oil
Your vehicle has a computer system that lets you know
when to change the engine oil and �lter. This is based on
engine revolutions and engine temperature, and not on
mileage. Based on driving conditions, the mileage at
which an oil change will be indicated can vary
considerably. For the oil life system to work properly, you
must reset the system every time the oil is changed.When the system has calculated that oil life has been
diminished, it will indicate that an oil change is
necessary. A change engine oil light and a CHANGE
ENGINE OIL SOON message will come on. Change the
oil as soon as possible within the next 600 miles
(1 000 km). It is possible that, if you are driving under
the best conditions, the oil life system might not indicate
that an oil change is necessary for over a year.
However, the engine oil and �lter must be changed at
least once a year and at this time the system must
be reset. Your dealer/retailer has trained service people
who will perform this work using genuine parts and
reset the system. It is also important to check the oil
regularly and keep it at the proper level.
If the system is ever reset accidentally, you must
change the oil at 3,000 miles (5 000 km) since the last
oil change. Remember to reset the oil life system
whenever the oil is changed.
5-18
Page 298 of 434

Automatic Transmission Fluid
It is not necessary to check the transmission �uid level.
A transmission �uid leak is the only reason for �uid
loss. If a leak occurs, take your vehicle to the
dealer/retailer and have it repaired as soon as possible.
Change the �uid and �lter at the intervals listed in
Additional Required Services on page 6-6, and be sure
to use the transmission �uid listed inRecommended
Fluids and Lubricants on page 6-12.
Notice:Use of the incorrect automatic transmission
�uid may damage your vehicle, and the damages
may not be covered by your warranty. Always
use the automatic transmission �uid listed in
Recommended Fluids and Lubricants on page 6-12.
For the 3.6L engine, the transmission �uid will not
reach the end of the dipstick unless the transmission is
at operating temperature. If you need to check the
transmission �uid level, please take your vehicle to your
dealer/retailer.
Engine Coolant
The cooling system in your vehicle is �lled with
DEX-COOL®engine coolant. This coolant is designed to
remain in your vehicle for �ve years or 150,000 miles
(240 000 km), whichever occurs �rst, if you add only
DEX-COOL
®extended life coolant.
The following explains your cooling system and how to
add coolant when it is low. If you have a problem
with engine overheating, seeEngine Overheating on
page 5-25.
A 50/50 mixture of clean, drinkable water and
DEX-COOL
®coolant will:
Give freezing protection down to−34°F (−37°C).
Give boiling protection up to 265°F (129°C).
Protect against rust and corrosion.
Help keep the proper engine temperature.
Let the warning lights and gages work as they
should.
Notice:Using coolant other than DEX-COOL
®may
cause premature engine, heater core, or radiator
corrosion. In addition, the engine coolant may
require changing sooner, at the �rst maintenance
service after each 30,000 miles (50 000 km) or
24 months, whichever occurs �rst. Any repairs would
not be covered by your warranty. Always use
DEX-COOL
®(silicate-free) coolant in your vehicle.
5-22
Page 303 of 434

Cooling System
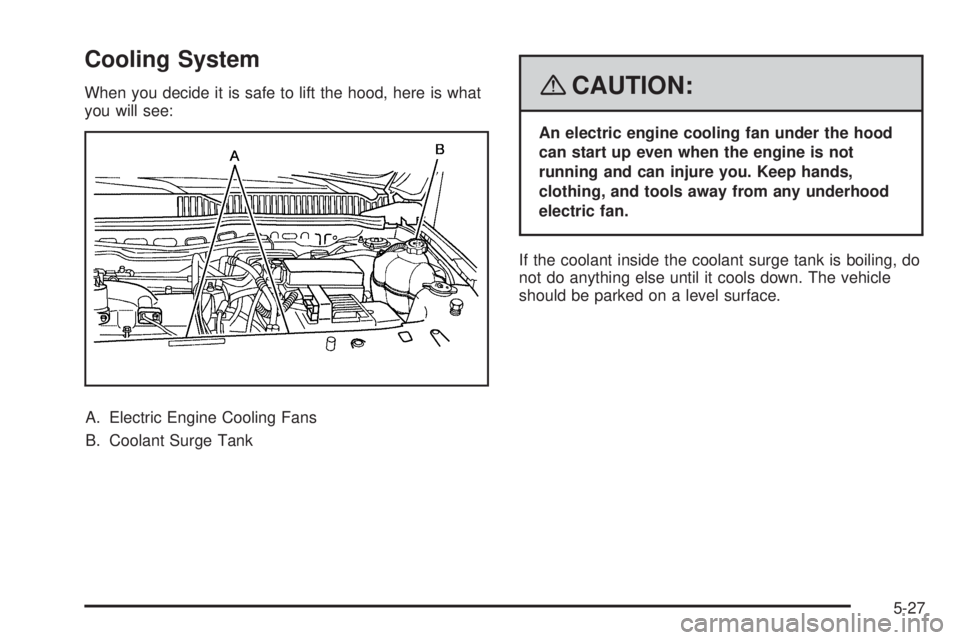
When you decide it is safe to lift the hood, here is what
you will see:
A. Electric Engine Cooling Fans
B. Coolant Surge Tank{CAUTION:
An electric engine cooling fan under the hood
can start up even when the engine is not
running and can injure you. Keep hands,
clothing, and tools away from any underhood
electric fan.
If the coolant inside the coolant surge tank is boiling, do
not do anything else until it cools down. The vehicle
should be parked on a level surface.
5-27
Page 381 of 434

Capacities and Speci�cations
The following approximate capacities are given in English and metric conversions. SeeRecommended Fluids and
Lubricants on page 6-12for more information.
ApplicationCapacities
English Metric
Air Conditioning Refrigerant R134aFor the air conditioning system refrigerant charge
amount, see the refrigerant caution label located
under the hood. See your dealer for more
information.
Cooling System
3.4L V6 Engine 10.5 qt 9.9 L
3.6L V6 Engine 12.5 qt 11.1 L
Engine Oil with Filter
3.4L V6 Engine 4.0 qt 3.8 L
3.6L V6 Engine 5.5 qt 5.2 L
Fuel Tank
Front-Wheel Drive 20.5 gal 77.6 L
All-Wheel Drive 16.6 gal 62.8 L
Transmission Fluid
Automatic 5-Speed AF33 Transmission 4.1 qt 3.9 L
Automatic 6-Speed 6T70 Transmission 9.5 qt 9.0 L
Wheel Nut Torque 100 lb ft 140Y
All capacities are approximate. When adding, be sure to �ll to the approximate level, as recommended in this
manual. Recheck �uid level after �lling.
5-105