2008 PONTIAC TORRENT charging
[x] Cancel search: chargingPage 111 of 434

Shifting Out of PARK (P)
This vehicle is equipped with an electronic shift lock
release system. The shift lock release is designed to:
Prevent ignition key removal unless the shift
lever is in PARK (P) with the shift lever button fully
released, and
Prevent movement of the shift lever out of
PARK (P), unless the ignition is in ON/RUN or
ACC/ACCESSORY and the regular brake pedal is
applied.
The shift lock release is always functional except in the
case of an uncharged or low voltage (less than 9 volt)
battery.
If your vehicle has an uncharged battery or a battery
with low voltage, try charging or jump starting the
battery. SeeJump Starting on page 5-38for more
information.
To shift out of PARK (P) use the following:
1. Apply the brake pedal.
2. Then press the shift lever button.
3. Move the shift lever to the desired position.If you still are unable to shift out of PARK (P):
1. Fully release the shift lever button.
2. While holding down the brake pedal, press the shift
lever button again.
3. Move the shift lever to the desired position.
If you still cannot move the shift lever from PARK (P),
consult your dealer/retailer or a professional towing
service.
Parking Over Things That Burn
{CAUTION:
Things that can burn could touch hot exhaust
parts under your vehicle and ignite. Do not
park over papers, leaves, dry grass, or other
things that can burn.
2-35
Page 125 of 434

Instrument Panel Overview...............................3-4
Hazard Warning Flashers................................3-6
Other Warning Devices...................................3-6
Horn.............................................................3-6
Tilt Wheel.....................................................3-7
Turn Signal/Multifunction Lever.........................3-7
Turn and Lane-Change Signals........................3-8
Headlamp High/Low-Beam Changer..................3-8
Flash-to-Pass.................................................3-9
Windshield Wipers..........................................3-9
Windshield Washer.......................................3-10
Rear Window Wiper/Washer...........................3-11
Cruise Control..............................................3-11
Headlamps..................................................3-14
Headlamps on Reminder................................3-14
Daytime Running Lamps (DRL).......................3-15
Automatic Headlamp System..........................3-15
Fog Lamps..................................................3-16
Instrument Panel Brightness...........................3-16
Dome Lamp.................................................3-17
Entry Lighting...............................................3-17
Map Lamps.................................................3-17
Cargo Lamp.................................................3-18
Electric Power Management...........................3-18
Battery Run-Down Protection..........................3-19
Accessory Power Outlet(s).............................3-19
Ashtray(s) and Cigarette Lighter......................3-20Climate Controls............................................3-20
Climate Control System.................................3-20
Outlet Adjustment.........................................3-24
Passenger Compartment Air Filter...................3-24
Warning Lights, Gages, and Indicators............3-26
Instrument Panel Cluster................................3-27
Speedometer and Odometer...........................3-28
Trip Odometer..............................................3-28
Tachometer.................................................3-28
Safety Belt Reminders...................................3-28
Airbag Readiness Light..................................3-29
Passenger Airbag Status Indicator...................3-30
Charging System Light..................................3-32
Brake System Warning Light..........................3-33
Antilock Brake System Warning Light...............3-34
Traction Control System (TCS)
Warning Light...........................................3-34
Engine Coolant Temperature Warning Light......3-35
Engine Coolant Temperature Gage..................3-35
Tire Pressure Light.......................................3-36
Malfunction Indicator Lamp.............................3-36
Oil Pressure Light.........................................3-39
Change Engine Oil Light................................3-40
Security Light...............................................3-40
Fog Lamp Light............................................3-40
Cruise Control Light......................................3-41
Section 3 Instrument Panel
3-1
Page 142 of 434

Cargo Lamp
The cargo lamp is located over the rear compartment,
and is controlled by the dome lamp. SeeDome Lamp on
page 3-17.
Electric Power Management
The vehicle has Electric Power Management (EPM) that
estimates the battery’s temperature and state of
charge. It then adjusts the voltage for best performance
and extended life of the battery.
When the battery’s state of charge is low, the voltage is
raised slightly to quickly put the charge back in. When
the state of charge is high, the voltage is lowered slightly
to prevent overcharging. If the vehicle has a voltmeter
gage or a voltage display on the Driver Information
Center (DIC), you may see the voltage move up
or down. This is normal. If there is a problem, an alert
will be displayed.
The battery can be discharged at idle if the electrical
loads are very high. This is true for all vehicles.
This is because the generator (alternator) may not
be spinning fast enough at idle to produce all the
power that is needed for very high electrical loads.A high electrical load occurs when several of the
following loads are on: headlamps, high beams, fog
lamps, rear window defogger, climate control fan at high
speed, heated seats, engine cooling fans, trailer
loads, and loads plugged into accessory power outlets.
EPM works to prevent excessive discharge of the
battery. It does this by balancing the generator’s output
and the vehicle’s electrical needs. It can increase
engine idle speed to generate more power, whenever
needed. It can temporarily reduce the power demands of
some accessories.
Normally, these actions occur in steps or levels, without
being noticeable. In rare cases at the highest levels
of corrective action, this action may be noticeable to
the driver. If so, a Driver Information Center (DIC)
message might be displayed, such as Battery Saver
Active or Service Battery Charging System. If this
message is displayed, it is recommended that the
driver reduce the electrical loads as much as possible.
SeeDIC Warnings and Messages on page 3-52.
3-18
Page 156 of 434

If, after several seconds, both status indicator lights
remain on, or if there are no lights at all, there may be a
problem with the lights or the passenger sensing
system. See your dealer/retailer for service.
{CAUTION:
If the airbag readiness light in the instrument
panel cluster ever comes on and stays on, it
means that something may be wrong with the
airbag system. If this ever happens, have the
vehicle serviced promptly, because an
adult-size person sitting in the right front
passenger’s seat may not have the protection
of the airbag(s). SeeAirbag Readiness Light
on page 3-29for more on this, including
important safety information.
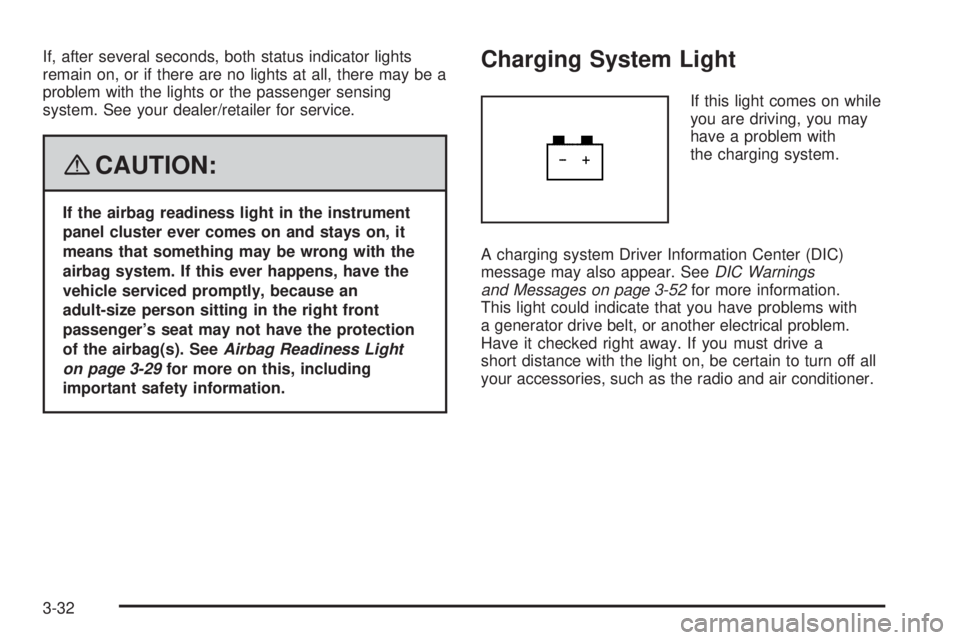
Charging System Light
If this light comes on while
you are driving, you may
have a problem with
the charging system.
A charging system Driver Information Center (DIC)
message may also appear. SeeDIC Warnings
and Messages on page 3-52for more information.
This light could indicate that you have problems with
a generator drive belt, or another electrical problem.
Have it checked right away. If you must drive a
short distance with the light on, be certain to turn off all
your accessories, such as the radio and air conditioner.
3-32
Page 172 of 434

Remember, you must reset the OIL LIFE yourself
after each oil change. It will not reset itself. Also, be
careful not to reset the OIL LIFE accidentally at any
time other than when the oil has just been changed.
It cannot be reset accurately until the next oil change.
To reset the engine oil life system, seeEngine Oil
Life System on page 5-18.
UNITS
Press the vehicle information button until UNITS
displays. This display allows you to select between
English or Metric units of measurement. Once in this
display, press the set/reset button to select between
ENGLISH or METRIC units.
FRONT TIRES or REAR TIRES
The pressure for each tire can be viewed in the DIC.
The tire pressure will be shown in either pounds per
square inch (psi) or kilopascals (kPa). Press the vehicle
information button until the DIC displays FRONT TIRES
PSI (kPa) LF ## RF ##. Press the vehicle information
button again until the DIC displays REAR TIRES
PSI (kPa) LR ## RR ##.If a low or high tire pressure condition is detected by
the system while driving, a message advising you
to check the pressure in a speci�c tire will appear in
the display. SeeInflation - Tire Pressure on page 5-59
andDIC Warnings and Messages on page 3-52for
more information.
If the tire pressure display shows dashes instead of
a value, there may be a problem with your vehicle. If this
consistently occurs, see your dealer/retailer for service.
BATTERY
Press the vehicle information button until BATTERY
displays. This display shows the current battery voltage.
If the voltage is normal, the display will show NORMAL.
If the voltage is low or high, the display will show
LOW or HIGH. Your vehicle’s charging system regulates
voltage based on the state of the battery. The battery
voltage may �uctuate when viewing this information
on the DIC. This is normal. SeeCharging System Light
on page 3-32for more information.
If there is a problem with the battery charging system,
the DIC will display SERVICE BATTERY CHARGING
SYSTEM. See “SERVICE BATTERY CHARGING
SYSTEM” underDIC Warnings and Messages on
page 3-52. Also, seeElectric Power Management
on page 3-18for more information.
3-48
Page 176 of 434

DIC Warnings and Messages
Messages are displayed on the DIC to notify the driver
that the status of the vehicle has changed and that
some action may be needed by the driver to correct
the condition. Multiple messages may appear one after
another.
Some messages may not require immediate action,
but you can press the set/reset button to acknowledge
that you received the messages and to clear them
from the display. Pressing any of the DIC buttons
also acknowledge and clear any messages.
Some messages cannot be cleared from the DIC
display because they are more urgent. These messages
require action before they can be cleared. You should
take any messages that appear on the display seriously
and remember that clearing the messages will only
make the messages disappear, not correct the problem.
The following are the possible messages that can be
displayed and some information about them.
ALL WHEEL DRIVE OFF
If your vehicle has the All-Wheel Drive (AWD) system,
this message displays along with the All-Wheel Drive
Disabled light when the rear drive system is overheating.
This message turns off when the rear drive system cools
down. If the warning message stays on for a while, you
need to reset the warning message. To reset the warning
message, turn the ignition off and then back on again.
If the message stays on, see your dealer/retailer right
away. SeeAll-Wheel Drive (AWD) System on page 4-8
andAll-Wheel Drive Disabled Light on page 3-42for
more information.
BATTERY SAVER ACTIVE
This message displays when the charging system
detects that the battery is being drained. You may notice
that the vehicle attempts to reduce the drain for you by
turning off accessories, such as interior fans, rear
defogger, and heated seats. Turn off all accessories.
If the vehicle is not running, start and run the engine for
at least 10 minutes to allow the battery to recharge. If the
engine is running and the condition persists, see your
dealer/retailer. SeeElectric Power Management on
page 3-18for more information.
3-52
Page 181 of 434

SERVICE BATTERY CHARGING
SYSTEM
This message displays when there is a problem with the
generator and battery charging systems. Driving with
this problem could drain the vehicle’s battery. Turn off all
unnecessary accessories. Stop and turn off the vehicle
as soon as it is safe to do so. Have the electrical
system checked by your dealer/retailer immediately.
Connecting a battery charger to your vehicle while the
ignition is in any position other than LOCK/OFF may
cause this message to appear. If you need to charge
your vehicle, make sure that the key is in LOCK/OFF
or out of the ignition during charging.
SERVICE BRAKE SYSTEM
This message displays and a chime sounds when the
brake �uid level is low. The brake system warning
light also appears on the instrument panel cluster when
this message appears on the DIC. SeeBrake System
Warning Light on page 3-33. Have the brake system
serviced by your dealer/retailer as soon as possible.
SERVICE POWER STEERING
On some vehicles, this message displays when a
problem is detected with the power steering system.
When this message is displayed, you may notice that
the effort required to steer the vehicle increases or feels
heavier, but you will still be able to steer the vehicle. Have
your vehicle serviced by your dealer/retailer immediately.
SERVICE STABILITRAK
This message displays if there has been a problem
detected with the StabiliTrak®System. A warning light
also appears on the instrument panel cluster. See
Traction Control System (TCS) Warning Light on
page 3-34. SeeStabiliTrak
®System on page 4-7
for more information.
If this message turns on while you are driving, pull
off the road as soon as possible and stop carefully.
Try resetting the system by turning the ignition off and
then back on. If this message still stays on or turns back
on again while you are driving, your vehicle needs
service. Have the StabiliTrak
®System inspected by
your dealer/retailer as soon as possible.
3-57
Page 422 of 434

Audio System(s).............................................3-71
Automatic Headlamp System............................3-15
Automatic Transmission
Fluid..........................................................5-22
Operation...........................................2-25, 2-28
B
Battery..........................................................5-37
Electric Power Management..........................3-18
Run-Down Protection...................................3-19
Brake
Emergencies................................................ 4-6
Brakes..........................................................5-34
System Warning Light..................................3-33
Braking........................................................... 4-4
Braking in Emergencies..................................... 4-6
Break-In, New Vehicle.....................................2-20
Bulb Replacement...........................................5-47
Halogen Bulbs............................................5-47
Headlamp Aiming........................................5-46
Headlamps, Front Turn Signal, Sidemarker,
and Parking Lamps..................................5-47
License Plate Lamps....................................5-50
Replacement Bulbs......................................5-50
Taillamps, Turn Signal, Stoplamps and
Back-up Lamps........................................5-49
Buying New Tires...........................................5-70
C
Calibration.....................................................3-49
California Fuel.................................................. 5-6
California Perchlorate Materials Requirements....... 5-4
California Proposition 65 Warning....................... 5-4
Canadian Owners................................................ ii
Capacities and Speci�cations..........................5-105
Carbon Monoxide...........................2-36, 4-18, 4-32
Care of
Safety Belts................................................5-92
Cargo Lamp...................................................3-18
CD, MP3 ...............................................3-90, 3-95
Center Console Storage Area...........................2-43
Chains, Tire...................................................5-75
Charging System Light....................................3-32
Check
Engine Light...............................................3-36
Checking Things Under the Hood......................5-10
Chemical Paint Spotting...................................5-96
Child Restraints
Child Restraint Systems...............................1-37
Infants and Young Children...........................1-34
Lower Anchors and Tethers for Children..........1-42
Older Children.............................................1-31
Securing a Child Restraint in a Rear Seat
Position..................................................1-50
Securing a Child Restraint in the Right Front
Seat Position...........................................1-52
Where to Put the Restraint...........................1-40
2