2008 PONTIAC TORRENT key
[x] Cancel search: keyPage 193 of 434

With Date Display
Single CD (MP3) or a Single CD
and DVD (MP3) Player
These radios have aH(clock) button for setting the
time and date.
To set the time and date, follow these instructions:
1. Turn the radio on.
2. Press the
Hbutton and the HR, MIN, MM, DD,
YYYY (hour, minute, month, day, and year)
displays.
3. Press the pushbutton located under any one of
the labels that you want to change. Every time
the pushbutton is pressed again, the time or
the date if selected, increases by one.
Another way to increase the time or date, is to
press the right SEEK arrow or
\FWD (forward)
button.
To decrease, press the left SEEK arrow
or
sREV (reverse) button. You can also turn
the
f(tune) knob, located on the upper right side
of the radio, to adjust the selected setting.The date does not automatically display. To see the
date press the
H(clock) button while the radio is
on. The date with display times out after a few seconds
and goes back to the normal radio and time display.
To change the time default setting from 12 hour to
24 hour, press the
Hbutton and then the pushbutton
located under the forward arrow label. Once the
time 12H and 24H are displayed, press the pushbutton
located under the desired option to select the default.
Press the
Hbutton again to apply the selected default,
or let the screen time out.
Radio with Six-Disc CD (MP3)
This type of radio has a MENU button instead of
the
Hbutton to set the time and date.
To set the time and date, follow these instructions:
1. Turn the ignition key to ACC/ACCESSORY
or ON/RUN. Press the
Oknob, located in
the center of the radio, to turn the radio on.
2. Press the MENU button. Once the clock option is
displayed.
3. Press the pushbutton located under that label.
The HR, MIN, MM, DD, YYYY displays.
3-69
Page 211 of 434

DVD-A (Audio) Display Buttons
Once a DVD-A is inserted, a radio display menu
shows several tag options for DVD playing. Press the
pushbuttons located under any desired tag option during
DVD playback. See the tag options listed below for more
information.
The rear seat operator navigates the DVD-A menus
and controls through the remote control. See “Remote
Control”, underRear Seat Entertainment (RSE) System
on page 3-101for more information. The Video Screen
does not automatically power on when the DVD-A is
inserted into the DVD slot. It must be manually turned on
by the rear seat occupant through the remote control
power button.
r/j(Play/Pause):Press either play or pause
displayed on the radio system, to toggle between pausing
or restarting playback of a DVD. If the forward arrow is
showing on the display, the system is in pause mode.
If the pause icon is showing on the display, the system
is in playback mode.
qGroupr:Press to cycle through musical
groupings on the DVD-A disc.Nav (Navigate):Press to display directional arrows for
navigating through the menus.
e(Audio Stream):Press to cycle through audio
steam formats located on DVD-A disc. There is not
any type of noti�cation for the customer to see through
the radio display, but video screen has a text �eld
that shows audio stream changing.
Inserting a Disc
To play a disc, gently insert the disc, with the label side
up, into the loading slot. The DVD player might not accept
some paper labeled media. The player starts loading the
disc into the system and display “Loading Disc” on the
radio display. At the same time, the radio displays a
softkey menu of option(s). Some discs automatically
play the movie while others default to the softkey menu
display which requires the Play, Enter, or Navigation
softkeys to be pressed (either by softkey or by the rear
seat passenger using the remote control).
Loading a disc into the system, depending on media
type and format, ranges from 5 to 20 seconds for a CD,
and up to 30 seconds for a DVD.
3-87
Page 221 of 434

Order of Play
Tracks recorded to the CD-R or CD-RW are played in
the following order:
Play begins from the �rst track in the �rst playlist
and continues sequentially through all tracks in
each playlist. When the last track of the last playlist
has played, play continues from the �rst track of
the �rst playlist.
Play begins from the �rst track in the �rst folder
and continues sequentially through all tracks in each
folder. When the last track of the last folder has
played, play continues from the �rst track of the
�rst folder.
When play enters a new folder, the display does not
automatically show the new folder name unless you have
chosen the folder mode as the default display. The new
track name displays.
File System and Naming
The song name that displays is the song name that is
contained in the ID3 tag. If the song name is not present
in the ID3 tag, then the radio displays the �le name
without the extension (such as .mp3) as the track name.
Track names longer than 32 characters or four pages
are shortened. Parts of words on the last page of
text and the extension of the �lename does not display.
Preprogrammed Playlists
Preprogrammed playlists that were created using
WinAmp™, MusicMatch™, or Real Jukebox™ software
can be accessed, however, they cannot be edited
using the radio. These playlists are treated as special
folders containing compressed audio song �les.
Playing an MP3 (In Either the DVD or
CD Slot)
Insert a CD-R or CD-RW partway into either the top or
bottom slot, label side up. The player pulls it in, and
the CD-R or CD-RW should begin playing.
Depending on the format of the disc, a softkey menu
appears and allow navigation of the disc. The menu
reads left to right as RDM (Randomize song play order),
a Folder icon with left and right arrows (to move up or
down through available folders), a PL tag if the disc
has a Playlist available, and a Music Navigator tag.
If a Playlist tag is shown, toggling this key brings up a
Folder softkey only or the menu as previously described.
If the ignition or radio is turned off with a CD-R or
CD-RW in the player, it stays in the player. When the
ignition or radio is turned on, the CD-R or CD-RW starts
to play where it stopped, if it was the last selected
audio source.
As each new track starts to play, the track number and
song title displays.
3-97
Page 231 of 434

When the DVD is playing, depending on the radio, you
might be able to do slow play by pressing the play/pause
button then pressing the fast forward button. The DVD
continues playing in a slow play mode. You can also,
depending on the radio, perform reverse slow play by
pressing the play/pause button and then pressing the
fast reverse button. To cancel slow play mode, press this
button.
t(Previous Track/Chapter):Press this button
to return to the start of the current track or chapter.
Press this button again to go to the previous track
or chapter. This button might not work when the DVD
is playing the copyright information or the previews.
u(Next Track/Chapter):Press this button to go to
the beginning of the next chapter or track. This button
might not work when the DVD is playing the copyright
information or the previews.
r(Fast Reverse):Press this button to fast reverse
the DVD or CD. To stop fast reversing a DVD video,
press the play/pause button. To stop fast reversing a
DVD audio or CD, release the fast reverse button.
This button might not work when the DVD is playing
the copyright information or the previews.
[(Fast Forward):Press this button to fast forward
the DVD or CD. To stop fast forwarding a DVD video,
press the play/pause button. To stop fast forwarding a
DVD audio or CD, release the fast forward button. This
button might not work when the DVD is playing the
copyright information or the previews.
e(Audio):Press this button to change audio tracks
on DVDs that have this feature when the DVD is playing.
The format and content of this function vary for each disc.
{(Subtitles):Press this button to turn ON/OFF
subtitles and to move through subtitle options when a
DVD is playing. The format and content of this function
vary for each disc.
AUX (Auxiliary):Press this button to switch the system
between the DVD player and an auxiliary source.
d(Camera):Press this button to change camera
angles on DVDs that have this feature when a DVD is
playing. The format and content of this function vary
for each disc.
1 through 0 (Numeric Keypad):The numeric keypad
provides the capability of direct chapter or track
number selection.
3-107
Page 265 of 434

To tow your vehicle from the front with all four wheels
on the ground:
1. Position the vehicle to tow and then secure it.
2. Turn the ignition to LOCK/OFF.
3. Set the parking brake.
4. Turn the ignition to ACC/ACCESSORY.
5. Shift your transmission to NEUTRAL (N).
6. To prevent your battery from draining while the
vehicle is being towed, disconnect the vehicle’s
battery. Contact your dealer/retailer for more
information on the battery disconnection procedure.
7. Release the parking brake.Notice:If you tow your vehicle without performing
each of the steps listed under “Dinghy Towing,”
you could damage the automatic transmission. Be
sure to follow all steps of the dinghy towing
procedure prior to and after towing your vehicle.
Notice:If you exceed 65 mph (105 km/h) while
towing your vehicle, it could be damaged. Never
exceed 65 mph (105 km/h) while towing your vehicle.
Once you have reached your destination:
1. Set the parking brake.
2. Put the vehicle in PARK (P).
3. Re-connect the vehicle’s battery. Contact your
dealer/retailer for more information on the battery
connection procedure.
4. Turn the ignition key to LOCK/OFF and remove the
key from the ignition.
Notice:Don’t tow a vehicle with the front drive
wheels on the ground if one of the front tires is a
compact spare tire. Towing with two different
tire sizes on the front of the vehicle can cause
severe damage to the transmission.
4-29
Page 266 of 434

Dolly Towing (Vehicles with
5-speed Transmission)
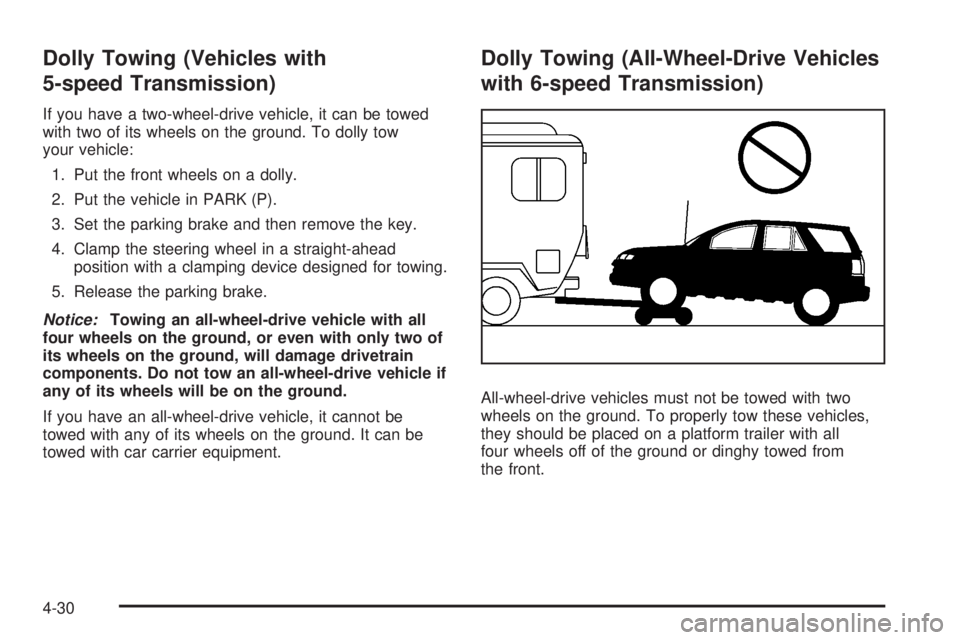
If you have a two-wheel-drive vehicle, it can be towed
with two of its wheels on the ground. To dolly tow
your vehicle:
1. Put the front wheels on a dolly.
2. Put the vehicle in PARK (P).
3. Set the parking brake and then remove the key.
4. Clamp the steering wheel in a straight-ahead
position with a clamping device designed for towing.
5. Release the parking brake.
Notice:Towing an all-wheel-drive vehicle with all
four wheels on the ground, or even with only two of
its wheels on the ground, will damage drivetrain
components. Do not tow an all-wheel-drive vehicle if
any of its wheels will be on the ground.
If you have an all-wheel-drive vehicle, it cannot be
towed with any of its wheels on the ground. It can be
towed with car carrier equipment.
Dolly Towing (All-Wheel-Drive Vehicles
with 6-speed Transmission)
All-wheel-drive vehicles must not be towed with two
wheels on the ground. To properly tow these vehicles,
they should be placed on a platform trailer with all
four wheels off of the ground or dinghy towed from
the front.
4-30
Page 267 of 434

Dolly Towing (Front-Wheel-Drive
Vehicles with 6-speed Transmission)
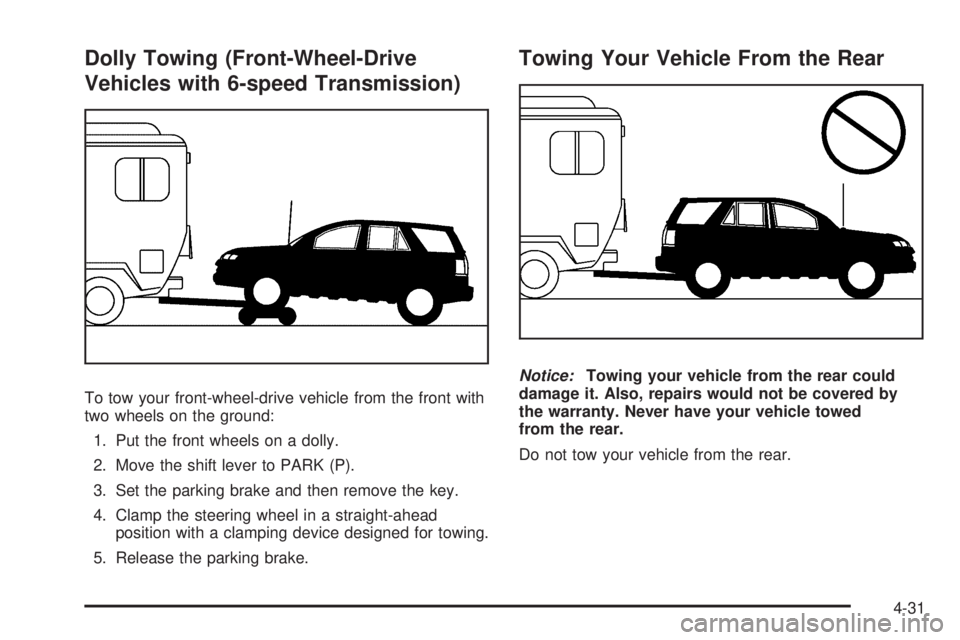
To tow your front-wheel-drive vehicle from the front with
two wheels on the ground:
1. Put the front wheels on a dolly.
2. Move the shift lever to PARK (P).
3. Set the parking brake and then remove the key.
4. Clamp the steering wheel in a straight-ahead
position with a clamping device designed for towing.
5. Release the parking brake.
Towing Your Vehicle From the Rear
Notice:Towing your vehicle from the rear could
damage it. Also, repairs would not be covered by
the warranty. Never have your vehicle towed
from the rear.
Do not tow your vehicle from the rear.
4-31
Page 280 of 434

California Proposition 65 Warning
Most motor vehicles, including this one, contain and/or
emit chemicals known to the State of California to
cause cancer and birth defects or other reproductive
harm. Engine exhaust, many parts and systems
(including some inside the vehicle), many �uids, and
some component wear by-products contain and/or emit
these chemicals.
California Perchlorate Materials
Requirements
Certain types of automotive applications, such as airbag
initiators, seat belt pretensioners, and lithium batteries
contained in remote keyless entry transmitters, may
contain perchlorate materials. Special handling may be
necessary. For additional information, see
www.dtsc.ca.gov/hazardouswaste/perchlorate.
Doing Your Own Service Work
{CAUTION:
You can be injured and your vehicle could be
damaged if you try to do service work on a
vehicle without knowing enough about it.
Be sure you have sufficient knowledge,
experience, the proper replacement parts,
and tools before you attempt any vehicle
maintenance task.
Be sure to use the proper nuts, bolts, and
other fasteners. English and metric
fasteners can be easily confused. If you
use the wrong fasteners, parts can later
break or fall off. You could be hurt.
If you want to do some of your own service work, you
should use the proper service manual. It tells you much
more about how to service your vehicle than this manual
can. To order the proper service manual, seeService
Publications Ordering Information on page 7-16.
Your vehicle has an airbag system. Before attempting to
do your own service work, seeServicing Your
Airbag-Equipped Vehicle on page 1-69.
5-4