2008 NISSAN XTERRA lock
[x] Cancel search: lockPage 134 of 320

FUEL-FILLER CAP
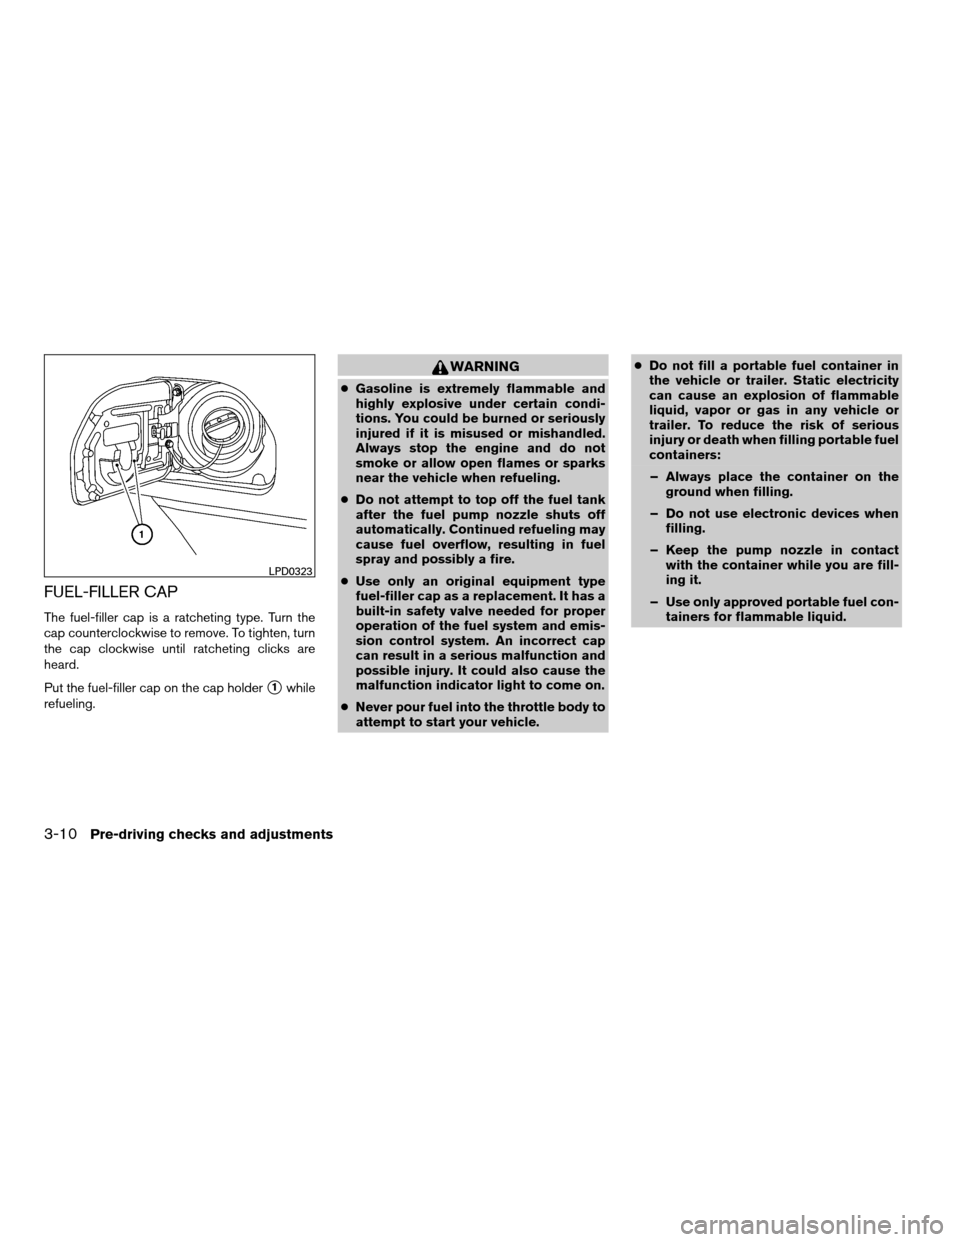
The fuel-filler cap is a ratcheting type. Turn the
cap counterclockwise to remove. To tighten, turn
the cap clockwise until ratcheting clicks are
heard.
Put the fuel-filler cap on the cap holder
s1while
refueling.
WARNING
cGasoline is extremely flammable and
highly explosive under certain condi-
tions. You could be burned or seriously
injured if it is misused or mishandled.
Always stop the engine and do not
smoke or allow open flames or sparks
near the vehicle when refueling.
cDo not attempt to top off the fuel tank
after the fuel pump nozzle shuts off
automatically. Continued refueling may
cause fuel overflow, resulting in fuel
spray and possibly a fire.
cUse only an original equipment type
fuel-filler cap as a replacement. It has a
built-in safety valve needed for proper
operation of the fuel system and emis-
sion control system. An incorrect cap
can result in a serious malfunction and
possible injury. It could also cause the
malfunction indicator light to come on.
cNever pour fuel into the throttle body to
attempt to start your vehicle.cDo not fill a portable fuel container in
the vehicle or trailer. Static electricity
can cause an explosion of flammable
liquid, vapor or gas in any vehicle or
trailer. To reduce the risk of serious
injury or death when filling portable fuel
containers:
– Always place the container on the
ground when filling.
– Do not use electronic devices when
filling.
– Keep the pump nozzle in contact
with the container while you are fill-
ing it.
– Use only approved portable fuel con-
tainers for flammable liquid.
LPD0323
3-10Pre-driving checks and adjustments
ZREVIEW COPYÐ2008 Xterra(xtr)
Owners ManualÐUSA_English(nna)
06/26/07Ðdebbie
X
Page 135 of 320

CAUTION
cIf fuel is spilled on the vehicle body,
flush it away with water to avoid paint
damage.
cTighten until the fuel-filler cap clicks.
Failure to tighten the fuel-filler cap
properly may cause the
Mal-
function Indicator Light (MIL) to illumi-
nate. If the
light illuminates be-
cause the fuel-filler cap is loose or
missing, tighten or install the cap and
continue to drive the vehicle.
The
light should turn off after a
few driving trips. If the
light
does not turn off after a few driving
trips, have the vehicle inspected by a
NISSAN dealer.
cFor additional information, see the
“Malfunction Indicator Light (MIL)” in
the “Instruments and Controls” section
earlier in this manual.TILT OPERATION
WARNING
Do not adjust the steering wheel while
driving. You could lose control of your
vehicle and cause an accident.
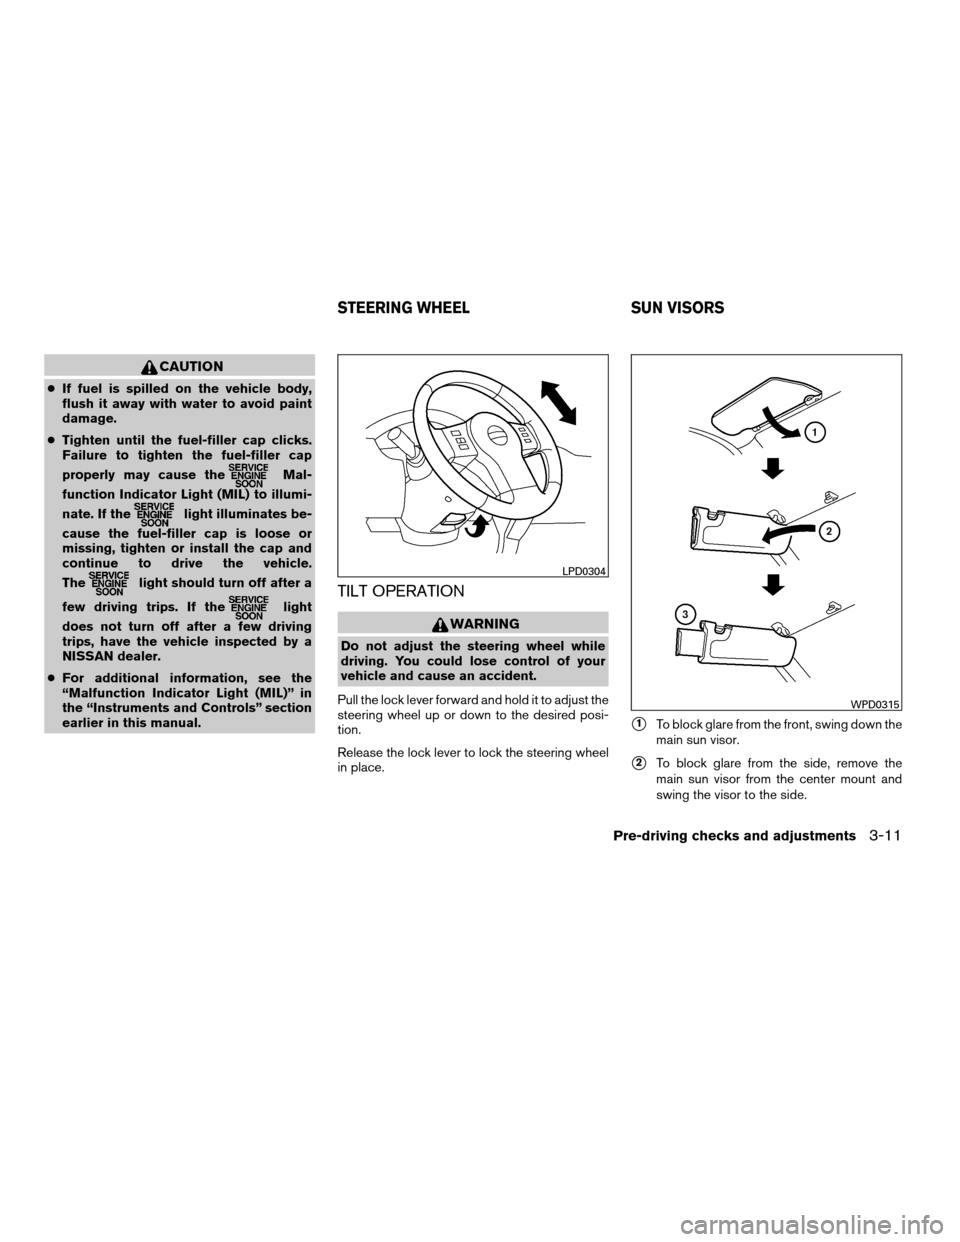
Pull the lock lever forward and hold it to adjust the
steering wheel up or down to the desired posi-
tion.
Release the lock lever to lock the steering wheel
in place.
s1To block glare from the front, swing down the
main sun visor.
s2To block glare from the side, remove the
main sun visor from the center mount and
swing the visor to the side.
LPD0304
WPD0315
STEERING WHEEL SUN VISORS
Pre-driving checks and adjustments3-11
ZREVIEW COPYÐ2008 Xterra(xtr)
Owners ManualÐUSA_English(nna)
06/26/07Ðdebbie
X
Page 149 of 320

SATELLITE RADIO RECEPTION (if so
equipped)
When the satellite radio is first installed or the
battery has been replaced, the satellite radio may
not work properly. This is not a malfunction. Wait
more than 10 minutes with satellite radio ON and
the vehicle outside of any metal or large building
for satellite radio to receive all of the necessary
data.
No satellite radio reception is available and “NO
SAT” is displayed when the SAT band option is
selected unless optional satellite receiver and
antenna are installed and an XMTsatellite radio
service subscription is active. Satellite radio can
only be installed in vehicles that were factory
pre-wired for satellite radio. Satellite radio is not
available in Alaska, Hawaii and Guam.
Satellite radio performance may be affected if
cargo carried on the roof blocks the satellite radio
signal.
If possible, do not put cargo over the satellite
antenna.
A build up of ice on the satellite radio antenna can
affect satellite radio performance. Remove the
ice to restore satellite radio reception
AUDIO OPERATION PRECAUTIONSCompact disc (CD) player
CAUTION
cDo not force a compact disc into the CD
insert slot. This could damage the CD
and/or CD changer/player.
cTrying to load a CD with the CD door
closed could damage the CD and/or CD
changer.
cOnly one CD can be loaded into the CD
player at a time.
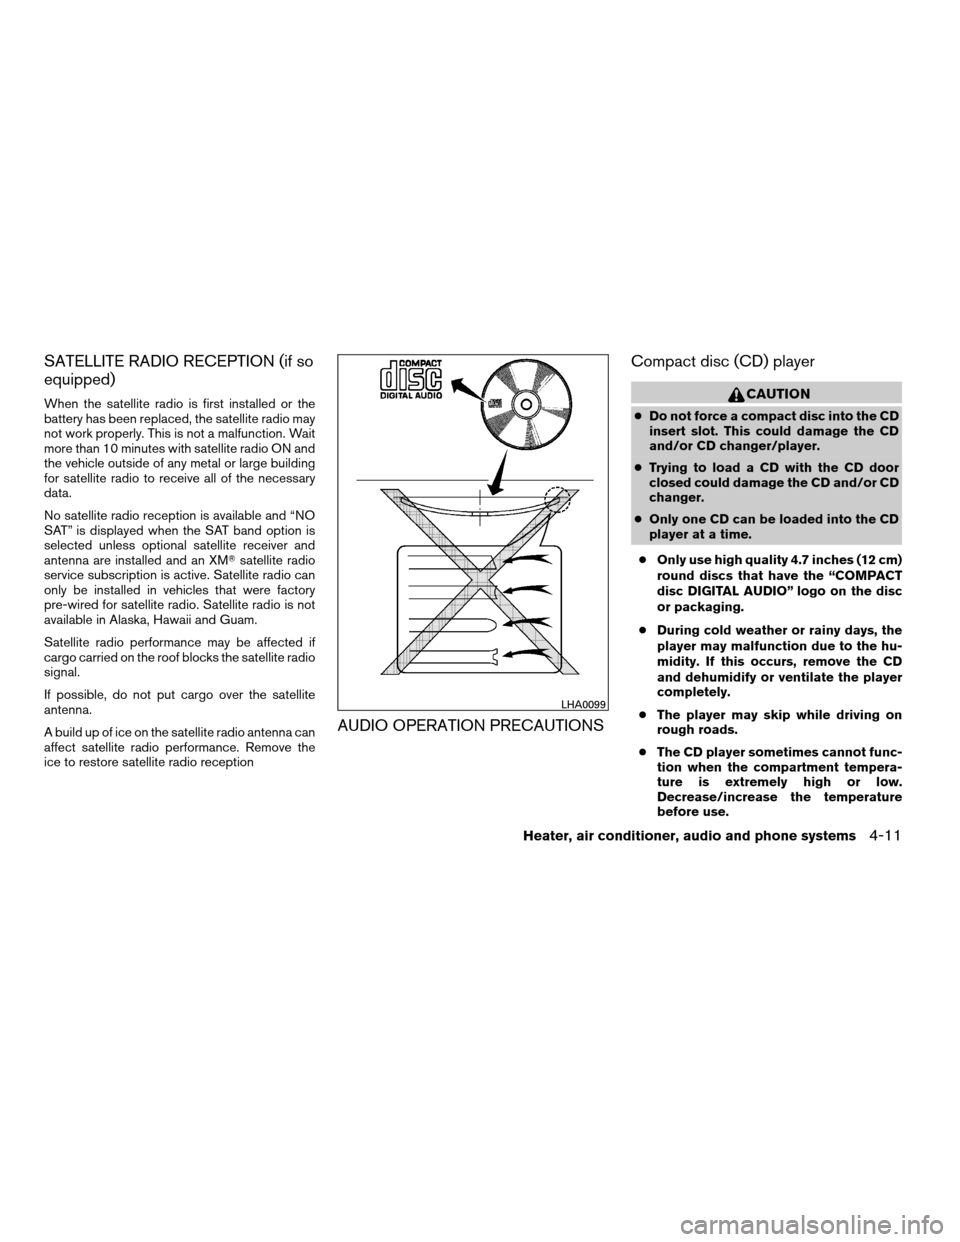
cOnly use high quality 4.7 inches (12 cm)
round discs that have the “COMPACT
disc DIGITAL AUDIO” logo on the disc
or packaging.
cDuring cold weather or rainy days, the
player may malfunction due to the hu-
midity. If this occurs, remove the CD
and dehumidify or ventilate the player
completely.
cThe player may skip while driving on
rough roads.
cThe CD player sometimes cannot func-
tion when the compartment tempera-
ture is extremely high or low.
Decrease/increase the temperature
before use.
LHA0099
Heater, air conditioner, audio and phone systems4-11
ZREVIEW COPYÐ2008 Xterra(xtr)
Owners ManualÐUSA_English(nna)
06/26/07Ðdebbie
X
Page 155 of 320

level. You can also use the SEEK/TRACK button
to adjust Fader and Balance modes. Fader ad-
justs the sound level between the front and rear
speakers and Balance adjusts the sound be-
tween the right and left speakers.
Once you have adjusted the sound quality to the
desired level, press the AUDIO button repeatedly
until the radio or CD display reappears. Other-
wise, the radio or CD display will automatically
reappear after about 7 seconds.
Clock set
1. Press and hold the MENU button until it
beeps (for more than 2 seconds) to enter the
clock set mode.
2. The hours will start flashing. Press the
SEEK/TRACK button
orto ad-
just the hours.
3. Press the MENU button until the radio beeps
to switch to the minute adjustment.
4. The minutes will start flashing. Press the
SEEK/TRACK button
orto ad-
just the minutes.
5. Press the MENU button again to exit the
clock set mode.
The display will return to the regular clock display
after 7 seconds, or press the MENU button again
to return to the regular clock display.
FM/AM radio operation
FM/AM band select:
Pressing the BAND button will change the band
as follows:
AMÃ!FM
When the BAND button is pressed while the
ignition switch is in the ACC or ON position, the
radio will come on at the station last played.
If a compact disc is playing when the BAND
button is pressed, the compact disc will auto-
matically be turned off and the last radio station
played will come on.
The FM stereo indicator, ST, illuminates during
FM stereo reception. When the stereo broadcast
signal is weak, the radio automatically changes
from stereo to monaural reception.
MENU button:
Press the MENU button while the radio is playing
to change the tuning mode as follows:
SEEK tuning mode!TUNE mode!SCAN
tuning mode
TUNE and SCAN are shown in the display win-
dow for each mode. No icon is displayed for
SEEK tuning.
SEEK tuning
While in SEEK tuning mode, press the
SEEK/TRACK button
orfor less
than 1.5 seconds. SEEK tuning begins from low
to high frequencies or high to low frequencies,
depending on which button is pressed, and stops
at the next broadcasting station. Press the
button, once the highest broadcasting station is
reached, the radio continues in the SEEK mode
at the lowest broadcasting station. Press
the
button, once the lowest broadcasting
station is reached, the radio continues in the
SEEK mode at the highest broadcasting station.
Manual tuning
While in TUNE mode, press the SEEK/TRACK
button
orfor manual tuning. Press
and hold the SEEK/TRACK button
orto move quickly through the channels.
SCAN tuning
While in SCAN tuning mode, press and hold the
SEEK/TRACK button
orfor more
than 1.5 seconds.
Scan tuning begins from low to high frequencies
or high to low frequencies, depending on which
SEEK/TRACK button
oris pressed.
scan tuning stops at each broadcasting station
Heater, air conditioner, audio and phone systems4-17
ZREVIEW COPYÐ2008 Xterra(xtr)
Owners ManualÐUSA_English(nna)
06/26/07Ðdebbie
X
Page 158 of 320

1. PRESET A·B·C button
2. Display screen
3. DISP/CLOCK button
4. SEEK/TRACK button
5. CD button
6. RADIO button*7. AUX button
8. SCAN RPT button
9. CAT FOLDER button
10.
LOAD button
11. CD insert slot
12.
CD eject button13. PWR/VOL control knob
14. Station and CD select (1 – 6) buttons
15. AUDIO and TUNE button
*No satellite radio reception is available
when the RADIO button is pressed to
access satellite radio stations unless
optional satellite receiver and antenna
are installed and an XMTsatellite radio
service subscription is active. Satellite
radio can only be installed in vehicles
that were factory pre-wired for satellite
radio. Satellite radio is not available in
Alaska, Hawaii and Guam.
FM/AM/SAT RADIO WITH
COMPACT DISC (CD) CHANGER
For all operation precautions, see9Audio opera-
tion precautions9earlier in this section.
No satellite radio reception is available when the
RADIO button is pressed to access satellite radio
stations unless optional satellite receiver and an-
tenna are installed and an XMTsatellite radio
service subscription is active. Satellite radio can
only be installed in vehicles that were factory
pre-wired for satellite radio. Satellite radio is not
available in Alaska, Hawaii and Guam.
WHA0735
4-20Heater, air conditioner, audio and phone systems
ZREVIEW COPYÐ2008 Xterra(xtr)
Owners ManualÐUSA_English(nna)
06/26/07Ðdebbie
X
Page 159 of 320

Audio main operation
POWER/VOLUME control:
Turn the ignition key to ACC or ON, and then
press the PWR/VOL control knob while the sys-
tem is off to call up the mode (radio or CD) which
was playing immediately before the system was
turned off.
To turn the system off, press the PWR/VOL con-
trol knob.
Turn the PWR/VOL control knob to adjust the
volume.
This vehicle may be equipped with Speed Sen-
sitive Volume (SSV) for audio. The audio volume
changes as the driving speed changes.
AUDIO knob (Bass, Treble, Fade and Bal-
ance):
Press the AUDIO knob to change the mode as
follows:
Bass!Treble!Fade!Balance
To adjust Bass, Treble, Fade and Balance, press
the AUDIO knob until the desired mode appears
in the display. Turn the Tuning knob to adjust
Bass and Treble to the desired level. You can also
use the Tuning knob to adjust Fader and Balance
modes. Fader adjusts the sound level betweenthe front and rear speakers and Balance adjusts
the sound between the right and left speakers.
Once you have adjusted the sound quality to the
desired level, press the AUDIO knob repeatedly
until the radio or CD display reappears. Other-
wise, the radio or CD display will automatically
reappear after about 10 seconds.
Clock set
1. Press the DISP/CLOCK button until it
beeps (>1.5 seconds) .
2. The hours will start flashing. Press the CAT
FOLDER
orbutton or SEEK
TRACKorbutton to adjust the
hours.
3. Press the DISP/CLOCK button again to
switch to the minute adjustment.
4. Press the CAT FOLDER
orbutton or SEEK TRACKorbutton to adjust the minutes.
5. Press the DISP/CLOCK button again to exit
the clock set mode.
The display will return to the regular clock display
after 7 seconds, or you may press the
DISP/CLOCK button again to return to the regu-
lar clock display.DISP (display) button:
This DISP (display) button will show text about
MP3, SAT or CD information in the audio display.
CD display mode
To change the text displayed while playing a CD
with text, press the DISP button. The DISP button
will allow you to scroll through CD text as follows:
Disc titleÃ!Track title.
To change the default display mode, press the
AUDIO knob repeatedly until DISPLAY MODE
appears on the display, then rotate the knob to
select the following display modes: Disc number
Ã!Folder number.
Once the display mode is selected, press the
AUDIO knob again to store the setting. If the
AUDIO knob is not pressed within 8 seconds, the
display will refresh with the last selected display
mode setting.
cTrack title mode displays the title of the se-
lected CD track.
cDisc title mode displays the title of the CD
being played.
cTrack number mode displays the number
selected disc and the track that is currently
being played on the disk.
Heater, air conditioner, audio and phone systems4-21
ZREVIEW COPYÐ2008 Xterra(xtr)
Owners ManualÐUSA_English(nna)
06/26/07Ðdebbie
X
Page 165 of 320

Next/Previous track (CD):
Push the tuning switch
orfor less
than 1.5 seconds to return to the beginning of the
present track or skip to the next track. Push
several times to skip back or skip through tracks.
Change disc (CD) (if so equipped):
Push the SEEK tuning switch
orfor
more than 1.5 seconds to change the playing
disc up or down.
ANTENNA
The antenna cannot be shortened, but can be
removed. When you need to remove the antenna,
turn the antenna rod counterclockwise.
To install the antenna rod, turn the antenna clock-
wise. Tighten the antenna rod to specification
using a suitable tool such as an open-end
wrench. The antenna rod tightening specification
is 2.0 – 2.6 N·m (18 – 23 in-lb) . Do not use pliers
to tighten the antenna as they can leave marks on
the antenna surface. The antenna rod cannot be
hand tightened to the proper specification.
CAUTION
Always properly tighten the antenna rod
during installation or the antenna rod may
break during vehicle operation.When installing a CB, ham radio or car phone in
your NISSAN, be sure to observe the following
precautions, otherwise the new equipment may
adversely affect the engine control system and
other electronic parts.
WARNING
cA cellular telephone should not be used
while driving so full attention may be
given to vehicle operation. Some juris-
dictions prohibit the use of cellular tele-
phones while driving.
cIf you must make a call while your ve-
hicle is in motion, the hands free cellu-
lar phone operational mode (if so
equipped) is highly recommended. Ex-
ercise extreme caution at all times so
full attention may be given to vehicle
operation.
cIf a conversation in a moving vehicle
requires you to take notes, pull off the
road to a safe location and stop your
vehicle before doing so.
CAUTION
cKeep the antenna as far away as pos-
sible from the electronic control
modules.
cKeep the antenna wire more than 8 in
(20 cm) away from the electronic con-
trol system harnesses. Do not route the
antenna wire next to any harness.
cAdjust the antenna standing-wave ratio
as recommended by the manufacturer.
cConnect the ground wire from the CB
radio chassis to the body.
cFor details, consult a NISSAN dealer.
cDo not ground electrical accessories
directly to the battery terminal. Doing
so, will bypass the variable voltage con-
trol system and the vehicle battery may
not charge completely. Refer to “Vari-
able voltage control system” in the
“Maintenance and do-it-yourself” sec-
tion later in this manual.
cUse electrical accessories with the en-
gine running to avoid discharging the
vehicle battery.
CAR PHONE OR CB RADIO
Heater, air conditioner, audio and phone systems4-27
ZREVIEW COPYÐ2008 Xterra(xtr)
Owners ManualÐUSA_English(nna)
06/26/07Ðdebbie
X
Page 167 of 320

module when the ignition switch is turned to the
ON position with the paired cellular phone turned
on and carried in the vehicle.
You can register up to 5 different BluetoothT
cellular phones to the in-vehicle phone module.
However, you can talk on only one cellular phone
at a time.
Before using the BluetoothTHands-Free Phone
System, refer to the following notes.
cSet up the wireless connection between a
cellular phone and the in-vehicle phone
module before using the hands-free phone
system.
cSome BluetoothTenabled cellular phones
may not be recognized by the in-vehicle
phone module. Please visit
www.nissanusa.com/bluetooth for a recom-
mended phone list and pairing.
cYou will not be able to use a hands-free
phone under the following conditions:
– Your vehicle is outside of the cellular ser-
vice area.
– Your vehicle is in an area where it is
difficult to receive a cellular signal; such
as in a tunnel, in an underground parking
garage, near a tall building or in a moun-
tainous area.– Your cellular phone is locked to prevent it
from being dialed.
cWhen the radio wave condition is not ideal
or ambient sound is too loud, it may be
difficult to hear the other person’s voice dur-
ing a call.
cDo not place the cellular phone in an area
surrounded by metal or far away from the
in-vehicle phone module to prevent tone
quality degradation and wireless connection
disruption.
cWhile a cellular phone is connected through
the BluetoothTwireless connection, the bat-
tery power of the cellular phone may dis-
charge quicker than usual. The BluetoothT
Hands-Free Phone System cannot charge
cellular phones.
cIf the hands-free phone system seems to be
malfunctioning, see “Troubleshooting guide”
later in this section. You can also visit
www.nissanusa.com/bluetooth for trouble-
shooting help.
cSome cellular phones or other devices may
cause interference or a buzzing noise to
come from the audio system speakers. Stor-
ing the device in a different location may
reduce or eliminate the noise.cRefer to the cellular phone Owner’s Manual
regarding the telephone charges, cellular
phone antenna and body, etc.
This device complies with Part 15 of the
FCC Rules. Operation is subject to the fol-
lowing two conditions: (1) this device may
not cause harmful interference, and (2) this
device must accept any interference re-
ceived, including interference that may
cause undesired operation.
FCC Radiation Exposure Statement:
This equipment complies with FCC radiation ex-
posure limits set forth for an uncontrolled envi-
ronment. This equipment should be installed and
operated with minimum distance of 8 inches (20
cm) between the radiator and your body. This
Transmitter must not be co-located or operating
in conjunction with any other antenna or transmit-
ter.
USING THE SYSTEM
The NISSAN Voice Recognition system allows
hands-free operation of the BluetoothTPhone
System.
If the vehicle is in motion, some commands may
not be available so full attention may be given to
vehicle operation.
Heater, air conditioner, audio and phone systems4-29
ZREVIEW COPYÐ2008 Xterra(xtr)
Owners ManualÐUSA_English(nna)
06/26/07Ðdebbie
X