2008 NISSAN XTERRA 4WD
[x] Cancel search: 4WDPage 206 of 320
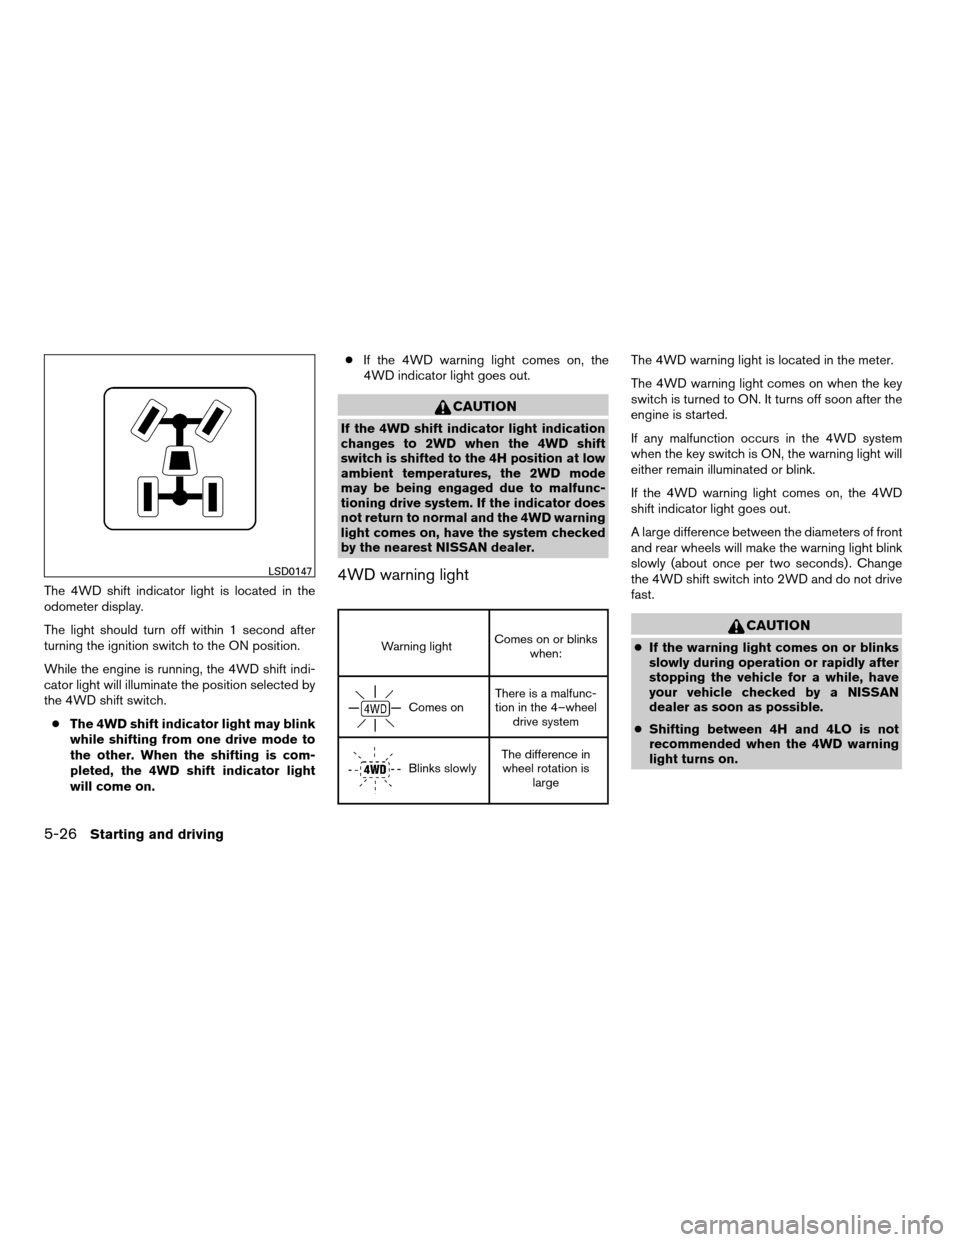
The 4WD shift indicator light is located in the
odometer display.
The light should turn off within 1 second after
turning the ignition switch to the ON position.
While the engine is running, the 4WD shift indi-
cator light will illuminate the position selected by
the 4WD shift switch.
cThe 4WD shift indicator light may blink
while shifting from one drive mode to
the other. When the shifting is com-
pleted, the 4WD shift indicator light
will come on.cIf the 4WD warning light comes on, the
4WD indicator light goes out.
CAUTION
If the 4WD shift indicator light indication
changes to 2WD when the 4WD shift
switch is shifted to the 4H position at low
ambient temperatures, the 2WD mode
may be being engaged due to malfunc-
tioning drive system. If the indicator does
not return to normal and the 4WD warning
light comes on, have the system checked
by the nearest NISSAN dealer.
4WD warning light
Warning lightComes on or blinks
when:
Comes onThere is a malfunc-
tion in the 4–wheel
drive system
Blinks slowlyThe difference in
wheel rotation is
large
The 4WD warning light is located in the meter.
The 4WD warning light comes on when the key
switch is turned to ON. It turns off soon after the
engine is started.
If any malfunction occurs in the 4WD system
when the key switch is ON, the warning light will
either remain illuminated or blink.
If the 4WD warning light comes on, the 4WD
shift indicator light goes out.
A large difference between the diameters of front
and rear wheels will make the warning light blink
slowly (about once per two seconds) . Change
the 4WD shift switch into 2WD and do not drive
fast.
CAUTION
cIf the warning light comes on or blinks
slowly during operation or rapidly after
stopping the vehicle for a while, have
your vehicle checked by a NISSAN
dealer as soon as possible.
cShifting between 4H and 4LO is not
recommended when the 4WD warning
light turns on.
LSD0147
5-26Starting and driving
ZREVIEW COPYÐ2008 Xterra(xtr)
Owners ManualÐUSA_English(nna)
06/26/07Ðdebbie
X
Page 207 of 320
cWhen the warning light comes on, the
2WD mode may be engaged even if the
4WD shift switch is in 4H. Be especially
careful when driving. If corresponding
parts are malfunctioning, the 4WD
mode will not be engaged even if the
4WD shift switch is shifted.
cDo not drive the vehicle in the 4H or 4LO
position on dry hard surface roads. Driv-
ing on dry, hard surfaces in 4H or 4LO
may cause unnecessary noise, tire wear
and increased fuel consumption.
If the 4WD warning light turns on when
you are driving on dry hard surface
roads:
– in the 4H position, shift the 4WD shift
switch to 2WD.
– in the 4LO position for automatic
transmission vehicles, stop the ve-
hicle and shift the transmission se-
lector to the N position with the
brake pedal depressed and shift the
4WD shift switch to 2WD.– in the 4LO position for manual trans-
mission vehicles, stop the vehicle
and shift the transmission shift lever
to the N position with the clutch
pedal depressed and shift the 4WD
shift switch to 2WD.
cIf the warning light is still on after the
above operation, have your vehicle
checked by a NISSAN dealer as soon as
possible.
cThe transfer case may be damaged if
you continue driving with the warning
light blinking slowly.The E-Lock system can provide additional trac-
tion and should only be used when a vehicle has
become or is becoming stuck. This system oper-
ates by electronically “locking” the two rear drive
wheels together, allowing them to turn at the
same speed. The system is used when it is not
possible to free a stuck vehicle even when using
the 4LO position (4 wheel drive vehicles) .
When added traction is required, activate the
E-Lock system by pushing the switch ON. See
“Electronic Locking Rear Differential (E-Lock)
system switch” in the “Instruments and Controls”
section. Once the system fully engages, the indi-
cator light in the instrument panel will remain ON.
When the system is activated, both rear wheels
will engage, providing added traction.
The rear wheels may momentarily slip or move to
engage the system, and the system will only
engage up to approximately 4 MPH (7 km/h) .
Once the vehicle is free, the system should be
turned OFF and driving resumed.
The Anti-Lock Brake (ABS) system is disabled
and the ABS light illuminates when the E-Lock
system is ON. Also, the Vehicle Dynamic Control
(VDC) system is disabled and the VDC light
illuminates when the E-Lock system is ON.
ELECTRONIC LOCKING REAR
DIFFERENTIAL (E-Lock) SYSTEM (if
so equipped)
Starting and driving5-27
ZREVIEW COPYÐ2008 Xterra(xtr)
Owners ManualÐUSA_English(nna)
06/26/07Ðdebbie
X
Page 212 of 320
pedal. This is normal and does not indicate a
malfunction. If the computer senses a malfunc-
tion, it switches the ABS off and illuminates the
ABS warning light on the instrument panel. The
brake system then operates normally, but without
anti-lock assistance.
If the ABS warning light illuminates during the
self-test or while driving, have the vehicle
checked by a NISSAN dealer.cABLS is a form of traction control using
sensors from the Anti-lock Brake System
(ABS) to transfer power from a slipping drive
wheel to a wheel with more traction. The
ABLS system applies braking to the slipping
wheel, which helps redirect power to an-
other wheel.
cOn 4WD models the ABLS system operates
in both 4H and 4LO modes. If 4WD mode is
engaged, the ABLS system will operate for
both drive axles. On 2WD vehicles, the
ABLS system operates on the drive axle
only.
cThe ABLS system is always ON unless the
system detects brake pad overheating. If
high brake pad temperature is detected, it
will turn OFF, but normal brake function will
continue. ABLS will function even when the
VDC system (if so equipped) is turned OFF.
WARNING
The ABLS system provides increased trac-
tion, but will not prevent accidents due to
abrupt steering operation or by careless
driving or dangerous driving practices.
Reduce vehicle speed and be especially
careful when driving and cornering on
slippery surfaces, and always drive
carefully.When accelerating or driving on slippery sur-
faces, the tires may spin or slide. With the Vehicle
Dynamic Control (VDC) system, sensors detect
these movements and control the braking and
engine output to help improve vehicle stability.
cWhen the Vehicle Dynamic Control (VDC)
system is operating, theSLIPindicator in
the instrument panel blinks.
cIf the 4WD transfer case is shifted into 4LO
the
indicator light will come on and
the VDC system will be turned off. See
“Transfer case shifting procedures” earlier in
this section.
cIf the SLIP indicator blinks, the road condi-
tions are slippery. Be sure to adjust your
speed and driving to these conditions. See
“Slip indicator light”, and “Vehicle Dynamic
Control (VDC) off indicator light” in the “In-
struments and controls” section.
If the battery is removed or discharged, the Trac-
tion Control System may be disabled and the
SLIPand
indicator lights will not turn off
after 2 seconds when the ignition switch is turned
to the ON position.
Perform the following procedure to reset the
system:
cStart the engine and set the steering wheel
in the straight forward position.
ACTIVE BRAKE LIMITED SLIP (ABLS)
SYSTEM (if so equipped)VEHICLE DYNAMIC CONTROL (VDC)
SYSTEM
5-32Starting and driving
ZREVIEW COPYÐ2008 Xterra(xtr)
Owners ManualÐUSA_English(nna)
06/26/07Ðdebbie
X
Page 231 of 320
Four-wheel drive models
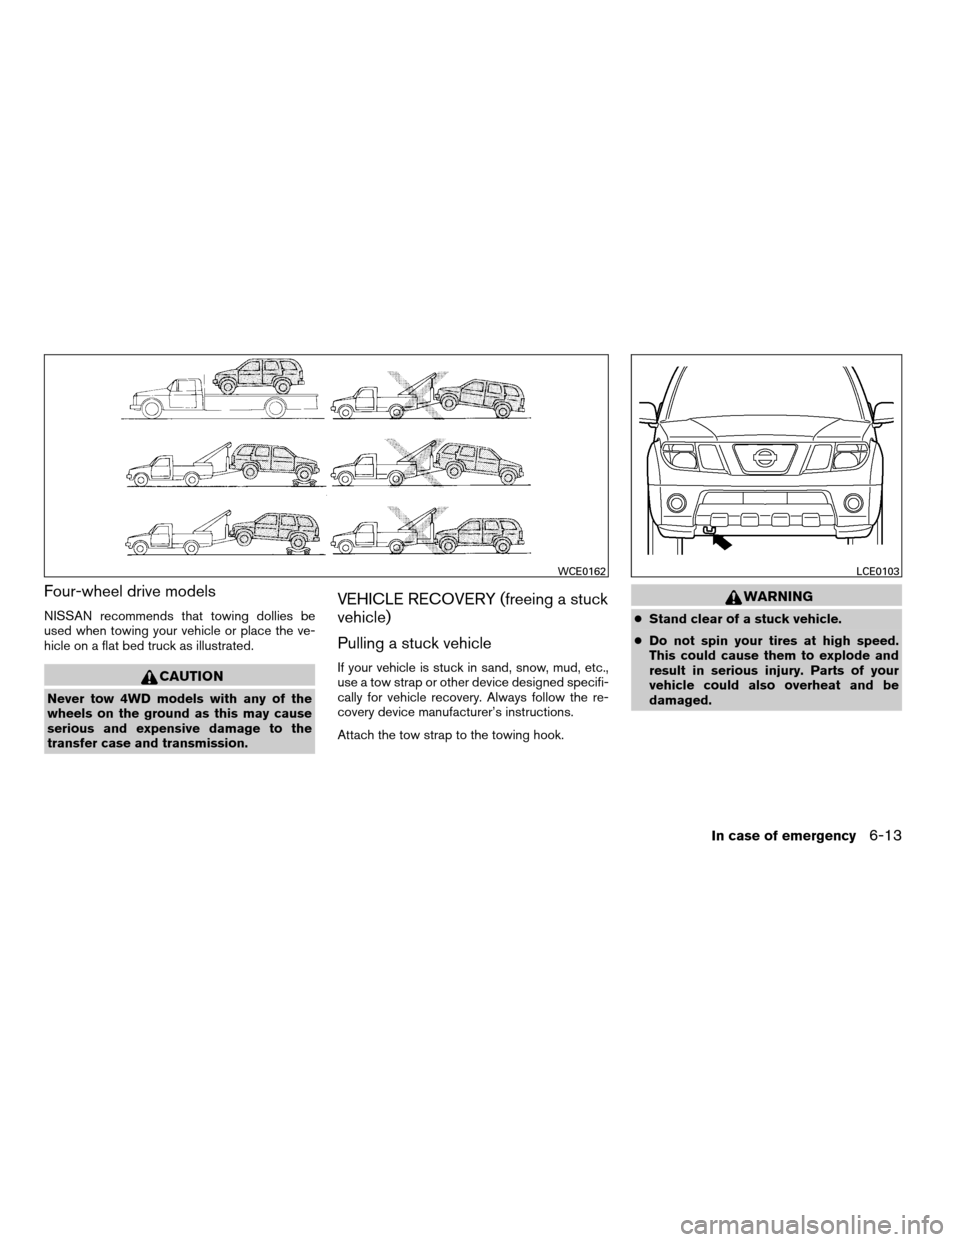
NISSAN recommends that towing dollies be
used when towing your vehicle or place the ve-
hicle on a flat bed truck as illustrated.
CAUTION
Never tow 4WD models with any of the
wheels on the ground as this may cause
serious and expensive damage to the
transfer case and transmission.
VEHICLE RECOVERY (freeing a stuck
vehicle)
Pulling a stuck vehicle
If your vehicle is stuck in sand, snow, mud, etc.,
use a tow strap or other device designed specifi-
cally for vehicle recovery. Always follow the re-
covery device manufacturer’s instructions.
Attach the tow strap to the towing hook.
WARNING
cStand clear of a stuck vehicle.
cDo not spin your tires at high speed.
This could cause them to explode and
result in serious injury. Parts of your
vehicle could also overheat and be
damaged.
WCE0162LCE0103
In case of emergency6-13
ZREVIEW COPYÐ2008 Xterra(xtr)
Owners ManualÐUSA_English(nna)
06/26/07Ðdebbie
X
Page 253 of 320
CAUTION
cDo not ground accessories directly to
the battery terminal. Doing so will by-
pass the variable voltage control sys-
tem and the vehicle battery may not
charge completely.
cUse electrical accessories with the en-
gine running to avoid discharging the
vehicle battery.
Your vehicle is equipped with a variable voltage
control system. This system measures the
amount of electrical discharge from the battery
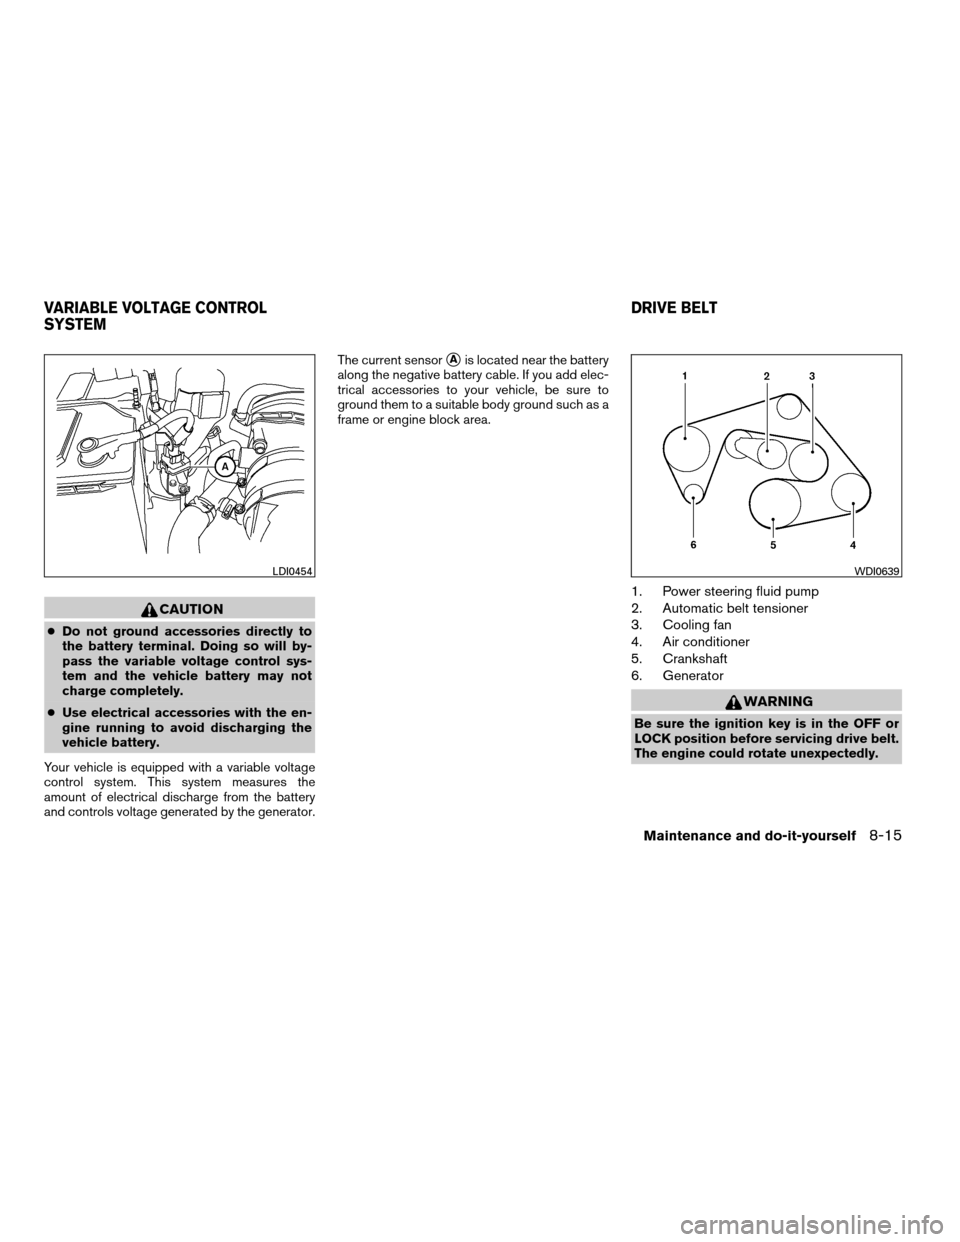
and controls voltage generated by the generator.The current sensor
sAis located near the battery
along the negative battery cable. If you add elec-
trical accessories to your vehicle, be sure to
ground them to a suitable body ground such as a
frame or engine block area.
1. Power steering fluid pump
2. Automatic belt tensioner
3. Cooling fan
4. Air conditioner
5. Crankshaft
6. Generator
WARNING
Be sure the ignition key is in the OFF or
LOCK position before servicing drive belt.
The engine could rotate unexpectedly.
LDI0454WDI0639
VARIABLE VOLTAGE CONTROL
SYSTEMDRIVE BELT
Maintenance and do-it-yourself8-15
ZREVIEW COPYÐ2008 Xterra(xtr)
Owners ManualÐUSA_English(nna)
06/26/07Ðdebbie
X
Page 280 of 320

The following are approximate capacities. The actual refill capacities may be a little different. When refilling, follow the procedure
described in the “Maintenance and do-it-yourself” section to determine the proper refill capacity.
Capacity (Approximate) Recommended Fluids and Lubricants
US measure Imp measure Liter
Fuel 21 1/8gal 17-5/8 gal 80 Unleaded gasoline with an octane rating of at least 87 AKI (RON 91) *1
Engine oil *7
Drain and Refill
With oil filter change 5-3/8 qt 4-1/2 qt 5.1
• Engine oil with API Certification Mark *2
• Viscosity SAE 5W-30
Without oil filter change 5-1/8 qt 4-1/4 qt 4.8
Cooling system
With reservoir
2-3/4 gal 2-1/4 gal 10.2 50% Genuine NISSAN Long Life Antifreeze/Coolant or equivalent
50% Demineralized or distilled water
Manual transmission gear oil 2WD 4-1/4 qt 3-1/2 qt 3.98 Genuine NISSAN Manual Transmission Fluid (MTF) HQ Multi 75W-85 or API GL-4, Vis-
cosity SAE 75W-85 or 75W-90
4WD 4-3/8 qt 3-5/8 qt 4.18
Automatic transmission fluid Refill to the proper level according to the in-
structions in the “Maintenance and do-it-
yourself” section.Genuine NISSAN Matic J ATF *3
Power steering fluid (PSF)Genuine NISSAN PSF or equivalent.*4
Brake and clutch fluidGenuine NISSAN Super Heavy Duty Brake Fluid *5 or equivalent DOT 3
Multi-purpose grease — — — NLGI No. 2 (Lithium Soap base)
Air conditioning system refrigerant — — — HFC-134a (R-134a)*6
Air conditioning system oil — — — NISSAN A/C System Oil Type R or equivalent*6
Transfer fluid — — — Genuine NISSAN Matic D ATF (Continental U.S. and Alaska) or Canada NISSAN Auto-
matic Transmission Fluid or equivalent (if available)
Front final drive oil — — — Genuine NISSAN Differential Oil Hypoid Super GL-5 80W-90 or API GL-5 SAE
80W-90, *8,
Rear final drive oil
Except 6 speed MT and 5 speed AT 4X4 O/R vehicles — — — API GL-5 synthetic 75W-90 gear oil or equivalent, *9
6 speed MT and 5 speed AT 4X4 O/R vehicles only — — — API GL-5 synthetic 75W-140 gear oil or equivalent, *9
Windshield washer fluid (shared between front and rear wipers) 1-1/4 gal 1 gal 4.5 Genuine NISSAN Windshield Washer Concentrate Cleaner & Antifreezeor equivalent
*1: For further details, see “Fuel recommendation.”
*2: For further details, see “Engine oil and oil filter recommendations.”
*3: Using automatic transmission fluid other than Genuine NISSAN Matic J ATF will cause deterioration in driveability and automatic transmission durability, and may damage the automatic transmission,
which is not covered by the NISSAN new vehicle limited warranty.
*4: Canada, NISSAN Automatic Transmission Fluid or, DEXRON™ VI type ATF may also be used.
*5: Available in mainland USA through your NISSAN dealer.
*6: For further details, see “Air conditioner specification label.”
*7: For further details, see “Changing engine oil.”
*8: For hot climates, viscosity SAE 90 is suitable for ambient temperatures above 0°C (32°F) .
*9: See your NISSAN dealer for service.
CAPACITIES AND RECOMMENDED
FUEL/LUBRICANTS
9-2Technical and consumer information
ZREVIEW COPYÐ2008 Xterra(xtr)
Owners ManualÐUSA_English(nna)
06/26/07Ðdebbie
X
Page 299 of 320
Remember to keep trailer tongue weight be-
tween 10 - 15% of the trailer weight. If the tongue
load becomes excessive, rearrange the cargo to
obtain the proper tongue load. Do not exceed the
10 - 15% tongue weight specification even if the
calculated available tongue weight is greater
than 15%. If the calculated tongue weight is less
than 10% , reduce the total trailer weight to
match the available tongue weight.
Always verify that available capacities are within
the required ratings.
Trailer frontal area
CAUTION
Exceeding the maximum trailer frontal
area specification may exceed the towing
capacity of the vehicle. This may affect the
towing performance and lead to vehicle
damage.
The trailer frontal area affects the towing load of a
trailer. The frontal area is the total area of the
vehicle and trailer that is affected by air resis-
tance while towing. Do not exceed the maximum
trailer frontal area specification shown in the
9Towing Load/Specification” chart. The frontal
area can be determined by multiplying the width
of the trailer by the height of the trailer. For
example, a trailer that is 8 feet wide by 6 feet tall
has a trailer frontal area of 48 square feet.
TOWING LOAD/SPECIFICATION
US & CAN
2WD 4WD
Towing Capac-
ity*15,000 lb.
(2268 kg)5,000 lb.
(2268 kg)
Tongue Load500 lb.
(227 kg)500 lb.
(227 kg)
Gross Com-
bined Weight
Rating9,658 lb.
(4,380 kg)9,658 lb.
(4,380 kg)
Maximum trailer
frontal area60 sq ft (5.52 sq meters)
*1: The towing capacity values are calculated
assuming a base vehicle with driver and any
options required to achieve the rating. Additional
passengers, cargo and/or optional equipment
will add weight to the vehicle and reduce your
vehicle’s maximum towing capacity.
TOWING SAFETY
Trailer hitch
Your vehicle may be equipped with an optional
trailer tow package. The trailer tow package in-
cludes a receiver-type frame mounted hitch. This
hitch is rated for the maximum towing capacity ofthis vehicle when the proper towing equipment is
used. Choose a proper ball mount and hitch ball
that is rated for the trailer to be towed. Genuine
Nissan ball mounts and hitch balls are available
from your NISSAN dealer.
If your vehicle is not equipped with the optional
trailer tow package, check the towing capacity of
your bumper hitch or receiver-type frame
mounted hitch. Choose a proper hitch for your
vehicle and trailer. A genuine Nissan trailer hitch
is available from your NISSAN dealer. Make sure
the trailer hitch is securely attached to the vehicle
to help avoid personal injury or property damage
due to sway caused by crosswinds, rough road
surfaces or passing trucks.
WARNING
Trailer hitch components have specific
weight ratings. Your vehicle may be ca-
pable of towing a trailer heavier than the
weight rating of the hitch components.
Never exceed the weight rating of the
hitch components. Doing so can cause
serious personal injury or property
damage.
Technical and consumer information9-21
ZREVIEW COPYÐ2008 Xterra(xtr)
Owners ManualÐUSA_English(nna)
06/26/07Ðdebbie
X
Page 303 of 320
cAlways secure items in the trailer to prevent
load shift while driving.
cLock the trailer hitch coupler with a pin or
lock to prevent the coupler from inadvert-
ently becoming unlatched.
cAvoid abrupt starts, acceleration or stops.
cAvoid sharp turns or lane changes.
cAlways drive your vehicle at a moderate
speed.
cWhen backing up, hold the bottom of the
steering wheel with one hand. Move your
hand in the direction in which you want the
trailer to go. Make small corrections and
back up slowly. If possible, have someone
guide you when you are backing up.
Always block the wheels on both vehicle and
trailer when parking. Parking on a slope is not
recommended; however, if you must do so:
CAUTION
If you move the shift selector lever to the P
(Park) position before blocking the
wheels and applying the parking brake,
transmission damage could occur.
1. Apply and hold the brake pedal.2. Have someone place blocks on the downhill
side of the vehicle and trailer wheels.
3. After the wheel blocks are in place, slowly
release the brake pedal until the blocks ab-
sorb the vehicle load.
4. Apply the parking brake.
5. Shift the transmission into P (Park) .
6. Make sure the
indicator light (if so
equipped) indicates the transfer case is in
4H, 4L, or 2H and that the ATP light is off. If
the
indicator light is flashing, or the
ATP light is ON, make sure the transmission
is in P (Park) (AT) and turn the 4WD switch
to 2WD or 4H. See9Automatic transmission
park warning light9in the9Instruments and
controls9section and9Using four wheel
drive9in the9Starting and driving9section.
7. Turn off the engine.
To drive away:
1. Start the vehicle.
2. Apply and hold the brake pedal.
3. Shift the transmission into gear.
4. Release the parking brake.
5. Drive slowly until the vehicle and trailer are
clear from the blocks.6. Apply and hold the brake pedal.
7. Have someone retrieve and store the blocks.
cWhen going down a hill, shift into a lower
gear and use the engine braking effect.
When going up a long grade, downshift the
transmission to a lower gear and reduce
speed to reduce chances of engine over-
loading and/or overheating. However, for
long steep grades, do not stay in 1st gear
when driving above 35 MPH (56 km/h) or
2nd gear when driving above 58 MPH (93
km/h) .
cIf the engine coolant rises to an extremely
high temperature when the air conditioner
system is on, turn off the air conditioner.
Coolant heat can be additionally vented by
opening the windows, switching the fan
control to high and setting the temperature
control to the HOT position.
cTrailer towing requires more fuel than normal
circumstances.
cAvoid towing a trailer for your vehicle’s first
500 miles (805 km) .
cFor the first 500 miles (805 km) that you do
tow, do not drive over 50 MPH (80 km/h) .
Technical and consumer information9-25
ZREVIEW COPYÐ2008 Xterra(xtr)
Owners ManualÐUSA_English(nna)
06/26/07Ðdebbie
X