2008 NISSAN XTERRA child lock
[x] Cancel search: child lockPage 55 of 320
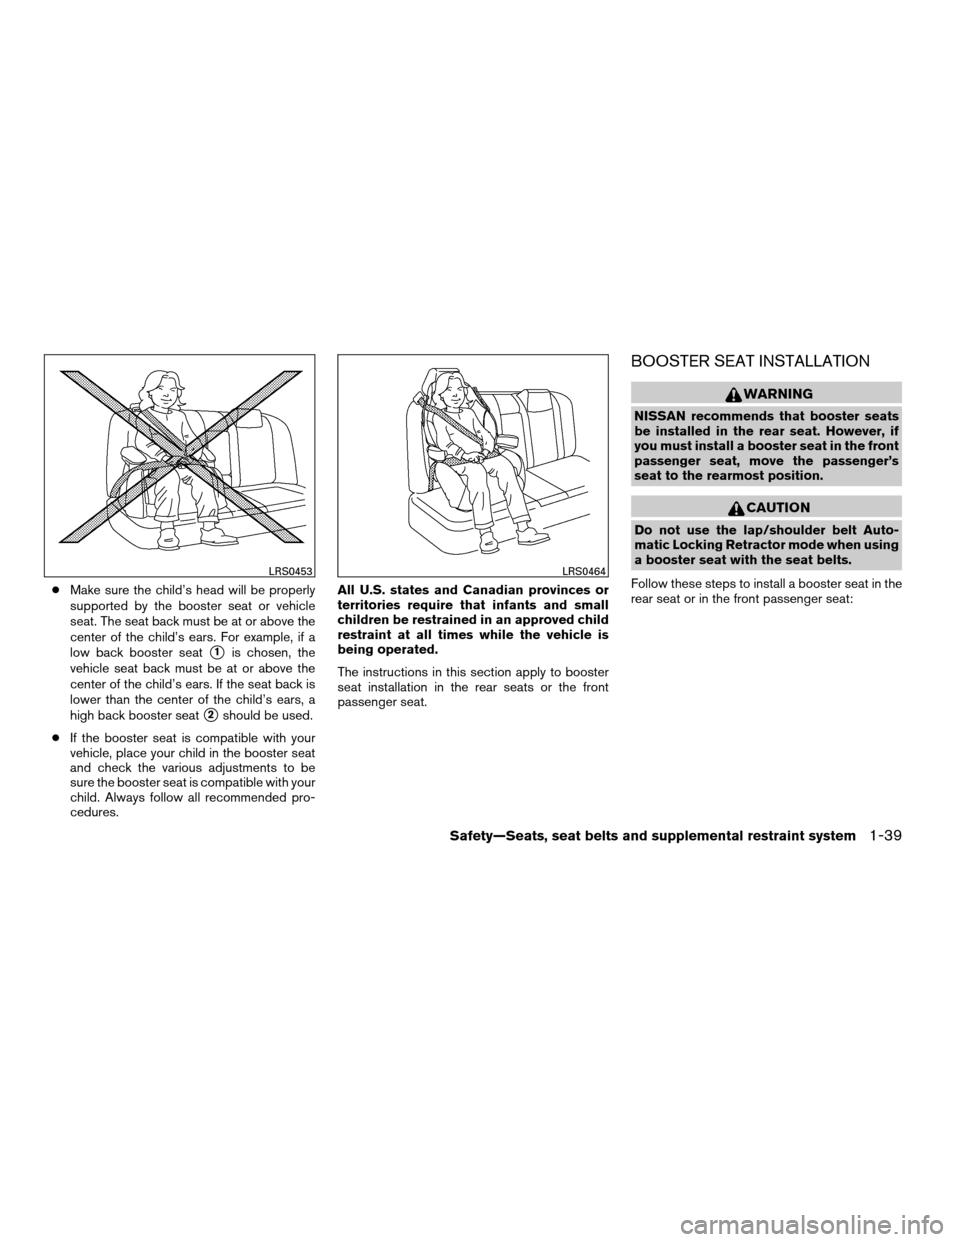
cMake sure the child’s head will be properly
supported by the booster seat or vehicle
seat. The seat back must be at or above the
center of the child’s ears. For example, if a
low back booster seat
s1is chosen, the
vehicle seat back must be at or above the
center of the child’s ears. If the seat back is
lower than the center of the child’s ears, a
high back booster seat
s2should be used.
cIf the booster seat is compatible with your
vehicle, place your child in the booster seat
and check the various adjustments to be
sure the booster seat is compatible with your
child. Always follow all recommended pro-
cedures.All U.S. states and Canadian provinces or
territories require that infants and small
children be restrained in an approved child
restraint at all times while the vehicle is
being operated.
The instructions in this section apply to booster
seat installation in the rear seats or the front
passenger seat.
BOOSTER SEAT INSTALLATION
WARNING
NISSAN recommends that booster seats
be installed in the rear seat. However, if
you must install a booster seat in the front
passenger seat, move the passenger’s
seat to the rearmost position.
CAUTION
Do not use the lap/shoulder belt Auto-
matic Locking Retractor mode when using
a booster seat with the seat belts.
Follow these steps to install a booster seat in the
rear seat or in the front passenger seat:
LRS0453LRS0464
Safety—Seats, seat belts and supplemental restraint system1-39
ZREVIEW COPYÐ2008 Xterra(xtr)
Owners ManualÐUSA_English(nna)
06/26/07Ðdebbie
X
Page 67 of 320
Front passenger air bag and status light
WARNING
The front passenger air bag is designed to
automatically turn OFF under some con-
ditions. Read this section carefully to
learn how it operates. Proper use of the
seat, seat belt and child restraints is nec-
essary for most effective protection. Fail-
ure to follow all instructions in this
manual concerning the use of seats, seat
belts and child restraints can increase the
risk or severity of injury in an accident.Status light
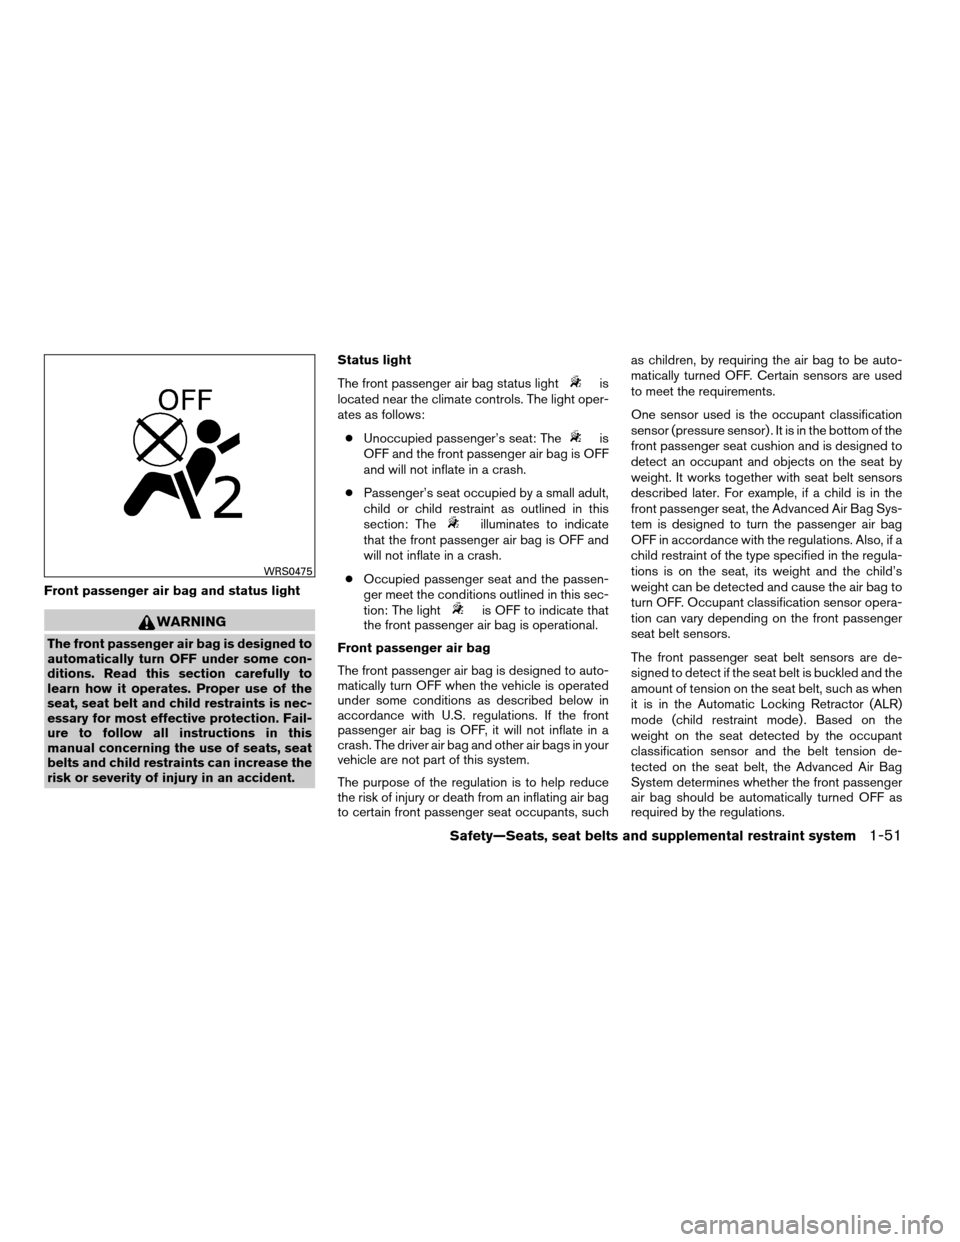
The front passenger air bag status light
is
located near the climate controls. The light oper-
ates as follows:
cUnoccupied passenger’s seat: The
is
OFF and the front passenger air bag is OFF
and will not inflate in a crash.
cPassenger’s seat occupied by a small adult,
child or child restraint as outlined in this
section: The
illuminates to indicate
that the front passenger air bag is OFF and
will not inflate in a crash.
cOccupied passenger seat and the passen-
ger meet the conditions outlined in this sec-
tion: The light
is OFF to indicate that
the front passenger air bag is operational.
Front passenger air bag
The front passenger air bag is designed to auto-
matically turn OFF when the vehicle is operated
under some conditions as described below in
accordance with U.S. regulations. If the front
passenger air bag is OFF, it will not inflate in a
crash. The driver air bag and other air bags in your
vehicle are not part of this system.
The purpose of the regulation is to help reduce
the risk of injury or death from an inflating air bag
to certain front passenger seat occupants, suchas children, by requiring the air bag to be auto-
matically turned OFF. Certain sensors are used
to meet the requirements.
One sensor used is the occupant classification
sensor (pressure sensor) . It is in the bottom of the
front passenger seat cushion and is designed to
detect an occupant and objects on the seat by
weight. It works together with seat belt sensors
described later. For example, if a child is in the
front passenger seat, the Advanced Air Bag Sys-
tem is designed to turn the passenger air bag
OFF in accordance with the regulations. Also, if a
child restraint of the type specified in the regula-
tions is on the seat, its weight and the child’s
weight can be detected and cause the air bag to
turn OFF. Occupant classification sensor opera-
tion can vary depending on the front passenger
seat belt sensors.
The front passenger seat belt sensors are de-
signed to detect if the seat belt is buckled and the
amount of tension on the seat belt, such as when
it is in the Automatic Locking Retractor (ALR)
mode (child restraint mode) . Based on the
weight on the seat detected by the occupant
classification sensor and the belt tension de-
tected on the seat belt, the Advanced Air Bag
System determines whether the front passenger
air bag should be automatically turned OFF as
required by the regulations.
WRS0475
Safety—Seats, seat belts and supplemental restraint system1-51
ZREVIEW COPYÐ2008 Xterra(xtr)
Owners ManualÐUSA_English(nna)
06/26/07Ðdebbie
X
Page 120 of 320
POWER WINDOWS
WARNING
cMake sure that all passengers have
their hands, etc. inside the vehicle while
it is in motion and before closing the
windows. Use the window lock switch
to prevent unexpected use of the power
windows.
cDo not leave children unattended inside
the vehicle. They could unknowingly ac-
tivate switches or controls and become
trapped in a window. Unattended chil-
dren could become involved in serious
accidents.
The power windows operate when the ignition
switch is in the ON position, or for about 45
seconds after the ignition switch is turned to the
OFF position. If the driver’s or passenger’s door
is opened during this period of about 45 sec-
onds, power to the windows is canceled.
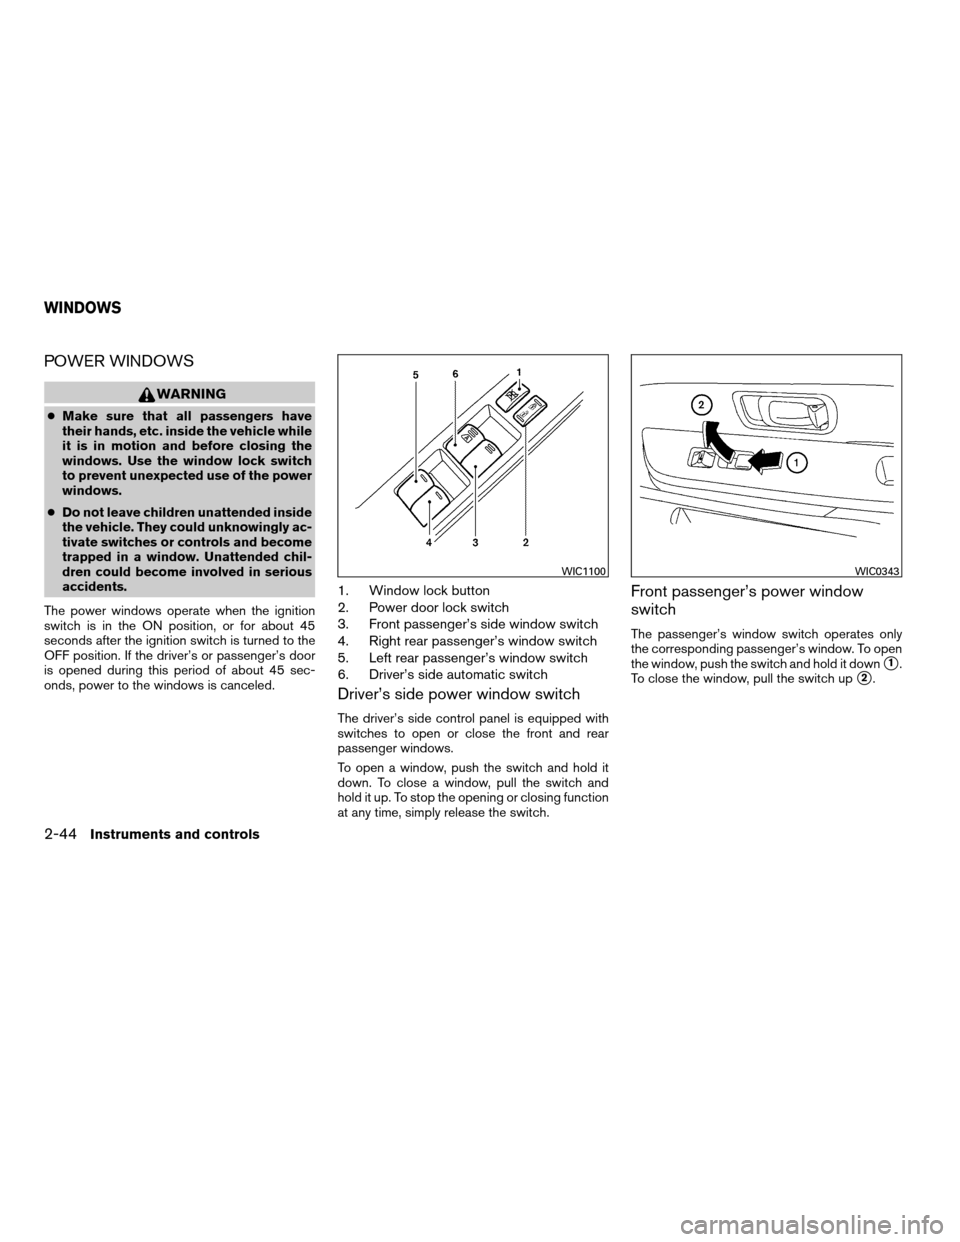
1. Window lock button
2. Power door lock switch
3. Front passenger’s side window switch
4. Right rear passenger’s window switch
5. Left rear passenger’s window switch
6. Driver’s side automatic switch
Driver’s side power window switch
The driver’s side control panel is equipped with
switches to open or close the front and rear
passenger windows.
To open a window, push the switch and hold it
down. To close a window, pull the switch and
hold it up. To stop the opening or closing function
at any time, simply release the switch.
Front passenger’s power window
switch
The passenger’s window switch operates only
the corresponding passenger’s window. To open
the window, push the switch and hold it down
s1.
To close the window, pull the switch up
s2.
WIC1100WIC0343
WINDOWS
2-44Instruments and controls
ZREVIEW COPYÐ2008 Xterra(xtr)
Owners ManualÐUSA_English(nna)
06/26/07Ðdebbie
X
Page 125 of 320

3 Pre-driving checks and adjustments
Keys .............................................3-2
NISSAN vehicle immobilizer system keys
(if so equipped)................................3-2
Doors............................................3-3
Locking with key................................3-3
Locking with inside lock knob....................3-4
Locking with power door lock switch
(if so equipped)................................3-4
Child safety rear door lock.......................3-5
Remote keyless entry system (if so equipped).........3-5
How to use remote keyless entry system..........3-6
Hood............................................3-8
Lift gate..........................................3-9Fuel-filler door....................................3-9
Opening the fuel-filler lid........................3-9
Fuel-filler cap.................................3-10
Steering wheel...................................3-11
Tilt operation..................................3-11
Sun visors.......................................3-11
Vanity mirrors (if so equipped)...................3-12
Mirrors..........................................3-12
Rearview mirror...............................3-12
Automatic anti-glare rearview mirror
(if so equipped)...............................3-13
Outside mirrors...............................3-13
ZREVIEW COPYÐ2008 Xterra(xtr)
Owners ManualÐUSA_English(nna)
06/26/07Ðdebbie
X
Page 127 of 320
WARNING
cAlways have the doors locked while
driving. Along with the use of seat belts,
this provides greater safety in the event
of an accident by helping to prevent
persons from being thrown from the
vehicle. This also helps keep children
and others from unintentionally open-
ing the doors, and will help keep out
intruders.
cBefore opening any door, always look
for and avoid oncoming traffic.
cDo not leave children unattended inside
the vehicle. They could unknowingly ac-
tivate switches or controls. Unattended
children could become involved in seri-
ous accidents.
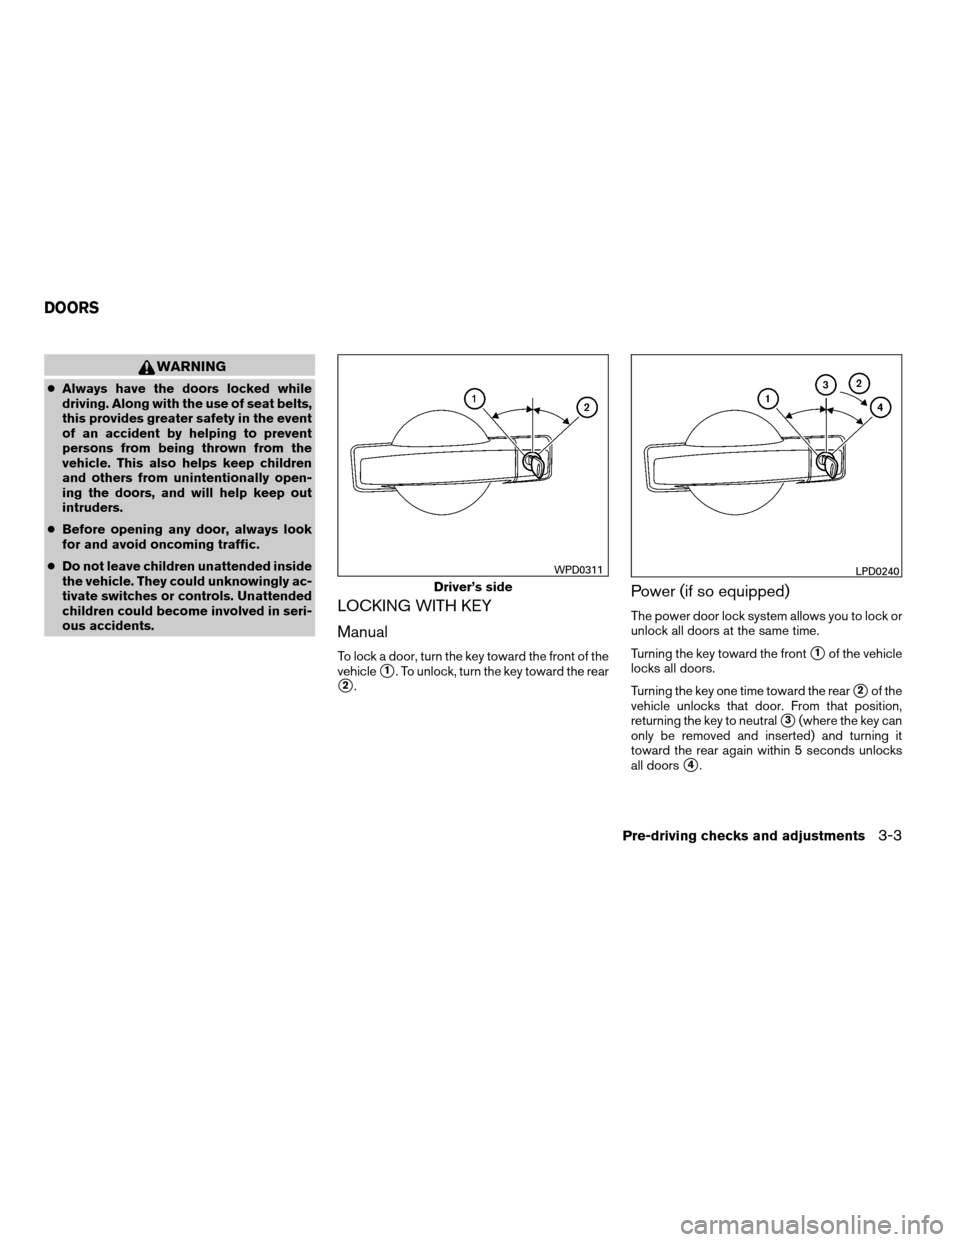
LOCKING WITH KEY
Manual
To lock a door, turn the key toward the front of the
vehicle
s1. To unlock, turn the key toward the rear
s2.
Power (if so equipped)
The power door lock system allows you to lock or
unlock all doors at the same time.
Turning the key toward the front
s1of the vehicle
locks all doors.
Turning the key one time toward the rear
s2of the
vehicle unlocks that door. From that position,
returning the key to neutral
s3(where the key can
only be removed and inserted) and turning it
toward the rear again within 5 seconds unlocks
all doors
s4.
Driver’s side
WPD0311LPD0240
DOORS
Pre-driving checks and adjustments3-3
ZREVIEW COPYÐ2008 Xterra(xtr)
Owners ManualÐUSA_English(nna)
06/26/07Ðdebbie
X
Page 129 of 320
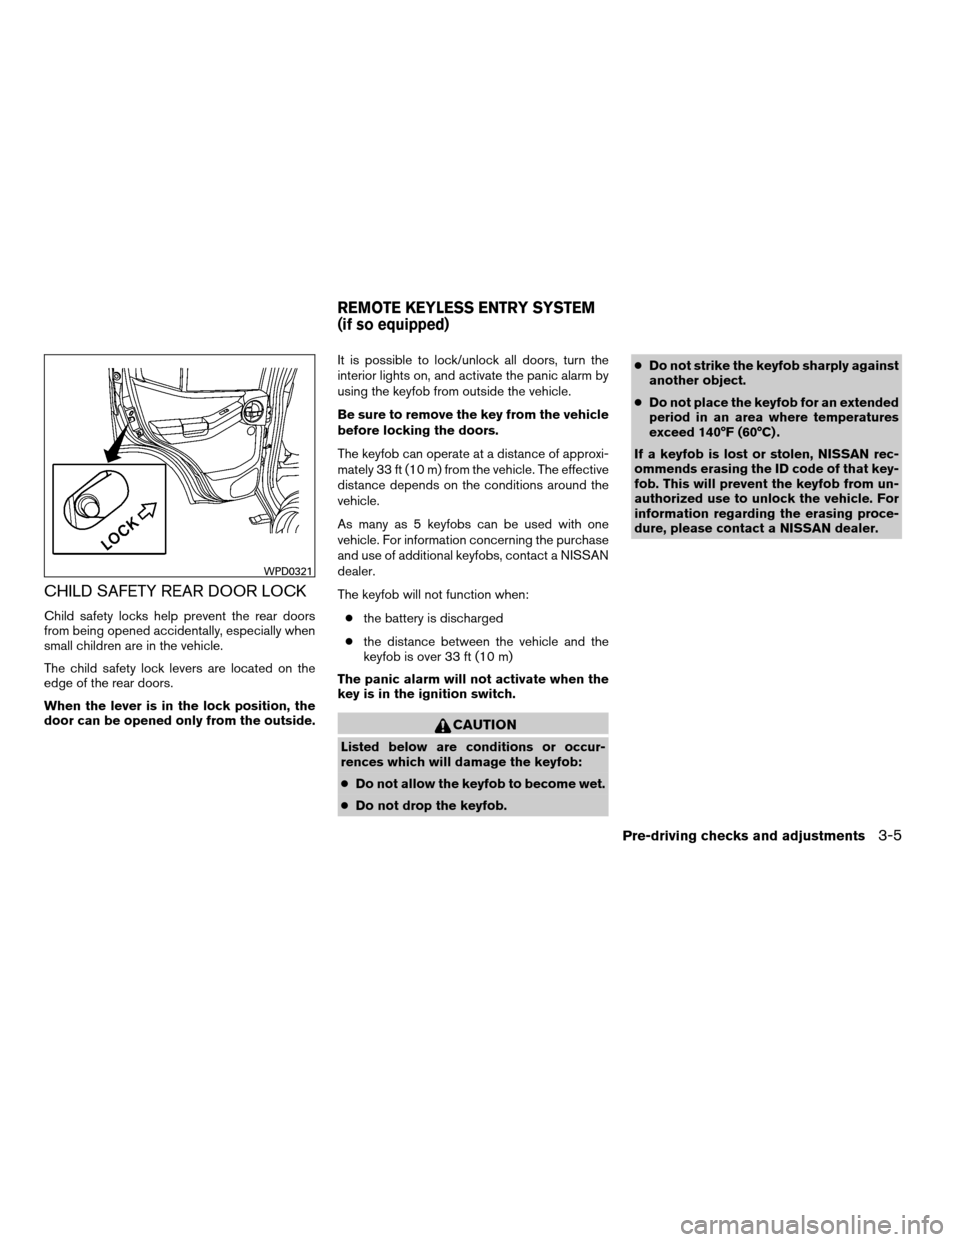
CHILD SAFETY REAR DOOR LOCK
Child safety locks help prevent the rear doors
from being opened accidentally, especially when
small children are in the vehicle.
The child safety lock levers are located on the
edge of the rear doors.
When the lever is in the lock position, the
door can be opened only from the outside.It is possible to lock/unlock all doors, turn the
interior lights on, and activate the panic alarm by
using the keyfob from outside the vehicle.
Be sure to remove the key from the vehicle
before locking the doors.
The keyfob can operate at a distance of approxi-
mately 33 ft (10 m) from the vehicle. The effective
distance depends on the conditions around the
vehicle.
As many as 5 keyfobs can be used with one
vehicle. For information concerning the purchase
and use of additional keyfobs, contact a NISSAN
dealer.
The keyfob will not function when:
cthe battery is discharged
cthe distance between the vehicle and the
keyfob is over 33 ft (10 m)
The panic alarm will not activate when the
key is in the ignition switch.
CAUTION
Listed below are conditions or occur-
rences which will damage the keyfob:
cDo not allow the keyfob to become wet.
cDo not drop the keyfob.cDo not strike the keyfob sharply against
another object.
cDo not place the keyfob for an extended
period in an area where temperatures
exceed 140°F (60°C) .
If a keyfob is lost or stolen, NISSAN rec-
ommends erasing the ID code of that key-
fob. This will prevent the keyfob from un-
authorized use to unlock the vehicle. For
information regarding the erasing proce-
dure, please contact a NISSAN dealer.
WPD0321
REMOTE KEYLESS ENTRY SYSTEM
(if so equipped)
Pre-driving checks and adjustments3-5
ZREVIEW COPYÐ2008 Xterra(xtr)
Owners ManualÐUSA_English(nna)
06/26/07Ðdebbie
X
Page 209 of 320
WARNING
cDo not stop or park the vehicle over
flammable materials such as dry grass,
waste paper or rags. They may ignite
and cause a fire.
cSafe parking procedures require that
both the parking brake be set and the
transmission placed into P (Park) for
automatic transmission models or in an
appropriate gear for manual transmis-
sion models. Failure to do so could
cause the vehicle to move unexpectedly
or roll away and result in an accident.
Make sure the shift lever has beenpushed as far forward as it can go and
cannot be moved without depressing
the foot brake pedal.
cNever leave the engine running while
the vehicle is unattended.
cDo not leave children unattended inside
the vehicle. They could unknowingly ac-
tivate switches or controls. Unattended
children could become involved in seri-
ous accidents.
1. Firmly apply the parking brake.
2.Manual transmission models:Place the shift lever in the R (Reverse) posi-
tion. When parking on an uphill grade, place
the shift lever in 1st gear.
Automatic transmission models:
Move the shift selector lever to the P (Park)
position.
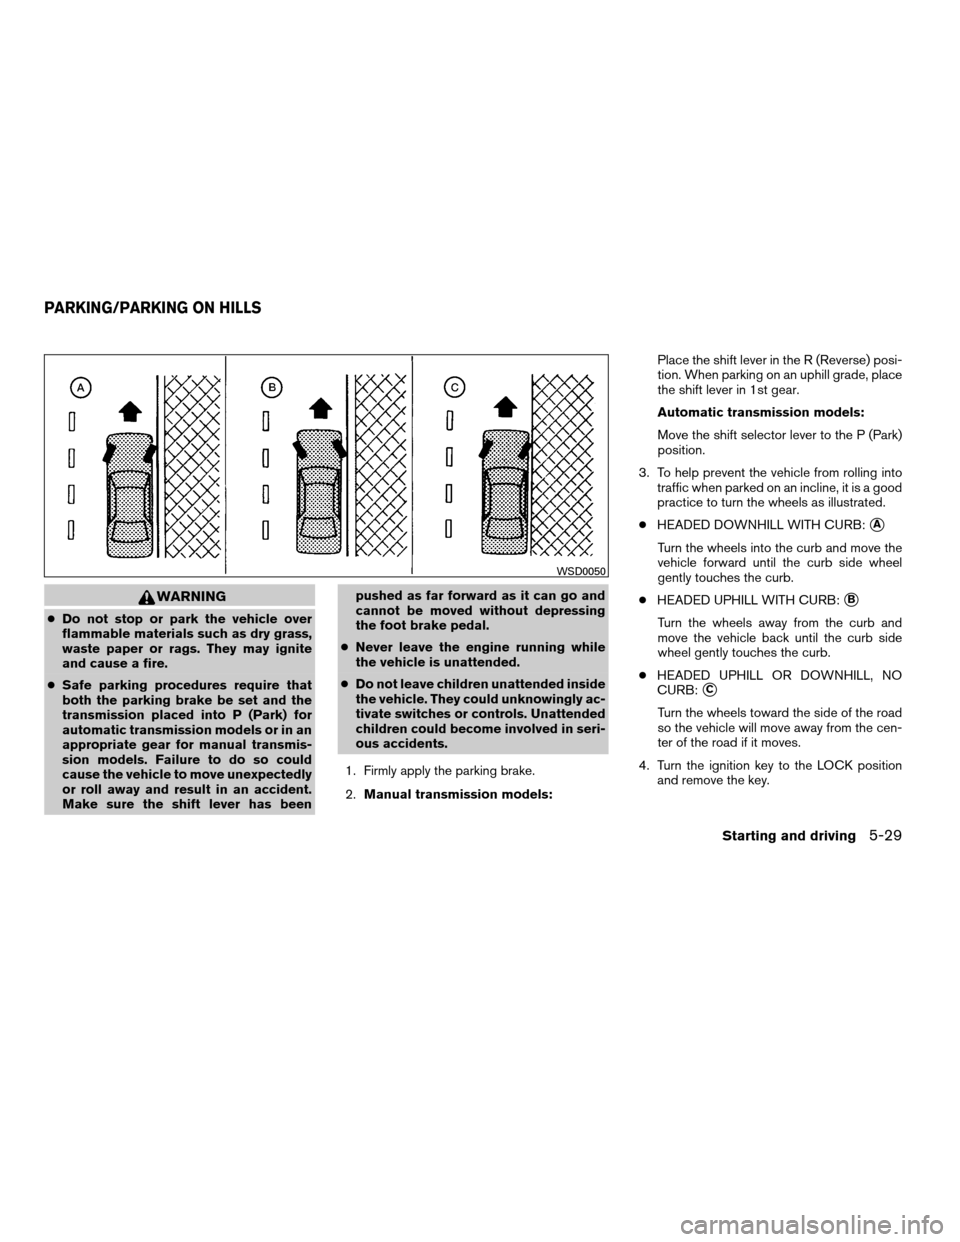
3. To help prevent the vehicle from rolling into
traffic when parked on an incline, it is a good
practice to turn the wheels as illustrated.
cHEADED DOWNHILL WITH CURB:
sA
Turn the wheels into the curb and move the
vehicle forward until the curb side wheel
gently touches the curb.
cHEADED UPHILL WITH CURB:
sB
Turn the wheels away from the curb and
move the vehicle back until the curb side
wheel gently touches the curb.
cHEADED UPHILL OR DOWNHILL, NO
CURB:
sC
Turn the wheels toward the side of the road
so the vehicle will move away from the cen-
ter of the road if it moves.
4. Turn the ignition key to the LOCK position
and remove the key.
WSD0050
PARKING/PARKING ON HILLS
Starting and driving5-29
ZREVIEW COPYÐ2008 Xterra(xtr)
Owners ManualÐUSA_English(nna)
06/26/07Ðdebbie
X
Page 247 of 320
CAUTION
Oil level should be checked regularly. Op-
erating the engine with an insufficient
amount of oil can damage the engine, and
such damage is not covered by warranty.
CHANGING ENGINE OIL
1. Park the vehicle on a level surface and apply
the parking brake.
2. Start the engine and let it idle until it reaches
operating temperature, then turn it off.
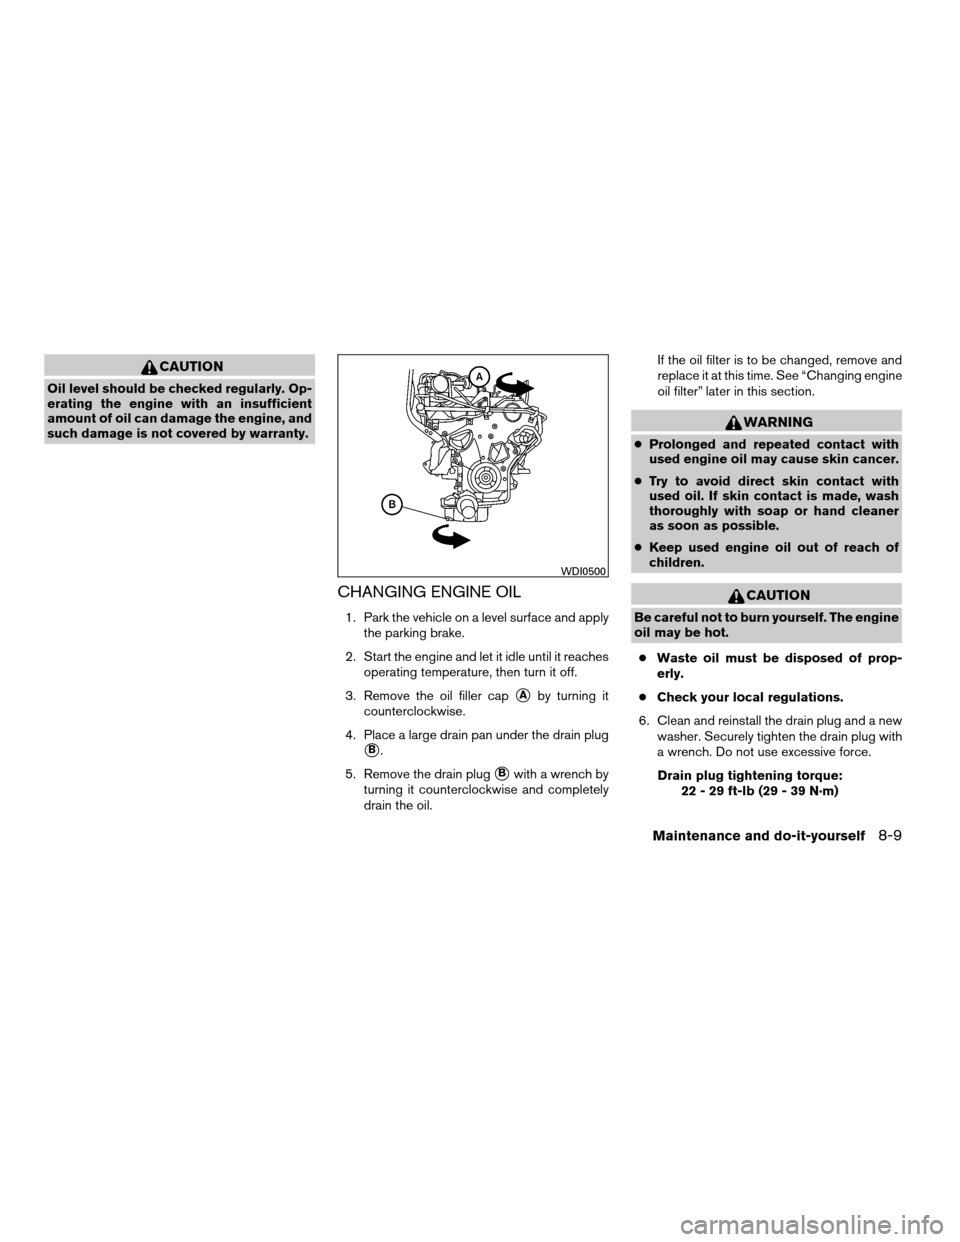
3. Remove the oil filler cap
sAby turning it
counterclockwise.
4. Place a large drain pan under the drain plug
sB.
5. Remove the drain plug
sBwith a wrench by
turning it counterclockwise and completely
drain the oil.If the oil filter is to be changed, remove and
replace it at this time. See “Changing engine
oil filter” later in this section.
WARNING
cProlonged and repeated contact with
used engine oil may cause skin cancer.
cTry to avoid direct skin contact with
used oil. If skin contact is made, wash
thoroughly with soap or hand cleaner
as soon as possible.
cKeep used engine oil out of reach of
children.
CAUTION
Be careful not to burn yourself. The engine
oil may be hot.
cWaste oil must be disposed of prop-
erly.
cCheck your local regulations.
6. Clean and reinstall the drain plug and a new
washer. Securely tighten the drain plug with
a wrench. Do not use excessive force.
Drain plug tightening torque:
22 - 29 ft-lb (29 - 39 N·m)
WDI0500
Maintenance and do-it-yourself8-9
ZREVIEW COPYÐ2008 Xterra(xtr)
Owners ManualÐUSA_English(nna)
06/26/07Ðdebbie
X