Page 36 of 217

Black plate (39,1)
Model "NAV2-N" EDITED: 2007/ 3/ 9
&5/Direction indicator:
Indicates the direction of the map.
Touch the icon to switch the direction of the
map.
&6Scale indicator:
Indicates the scale of the map.
Touch the icon to display the scale bar.
This allows the map scale to be adjusted.
&7Arrow:
Indicates the distance to the next guide
point and the turning direction at that guide
point.
&8Stored location:
Displays the locations that are stored in the
Address Book. You can change the icons
according to your preferences.
&9Avoid Area:
Displays the areas to avoid that are stored in
the Address Book with green or blue icons.
During the route search, the route guidance
is performed by searching for a route that
avoids those areas.
&10Street name:
Displays the name of the street that you are
currently driving on.
&11Traffic indicator:
Displays the reception condition of traffic
information transmitted from the provider.
Green: Reception condition is good.
Gray: Reception condition is not good.
No mark: Subscription to XM
®NavTrafficTM
service is not detected.
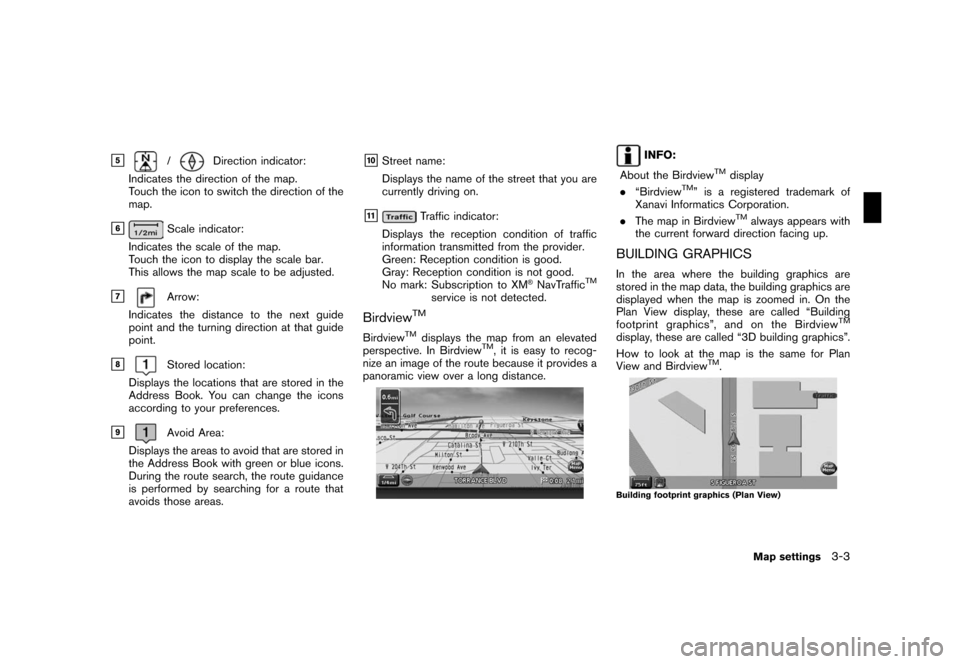
BirdviewTM
BirdviewTMdisplays the map from an elevated
perspective. In BirdviewTM, it is easy to recog-
nize an image of the route because it provides a
panoramic view over a long distance.
INFO:
About the Birdview
TMdisplay
.“BirdviewTM” is a registered trademark of
Xanavi Informatics Corporation.
.The map in Birdview
TMalways appears with
the current forward direction facing up.
BUILDING GRAPHICS
In the area where the building graphics are
stored in the map data, the building graphics are
displayed when the map is zoomed in. On the
Plan View display, these are called “Building
footprint graphics”, and on the Birdview
TM
display, these are called “3D building graphics”.
How to look at the map is the same for Plan
View and Birdview
TM.
Building footprint graphics (Plan View)
Map settings3-3
Page 84 of 217
Black plate (87,1)
Model "NAV2-N" EDITED: 2007/ 3/ 9
2. Highlight [POI Info.] and push.
3. Information about the location is displayed.
4. Push, or highlight [OK] and push
to return to the previous screen.
INFO:
.If [call] is displayed on the right side of the
screen, it is possible to call the location
indicated.
.The Bluetooth system is required to be
active and paired to the call location
indicated.
.Information about locations is not displayed
while driving.
Setting a destination4-27
Page 88 of 217

Black plate (91,1)
Model "NAV2-N" EDITED: 2007/ 3/ 9
3. Pushto return to the previous
screen.
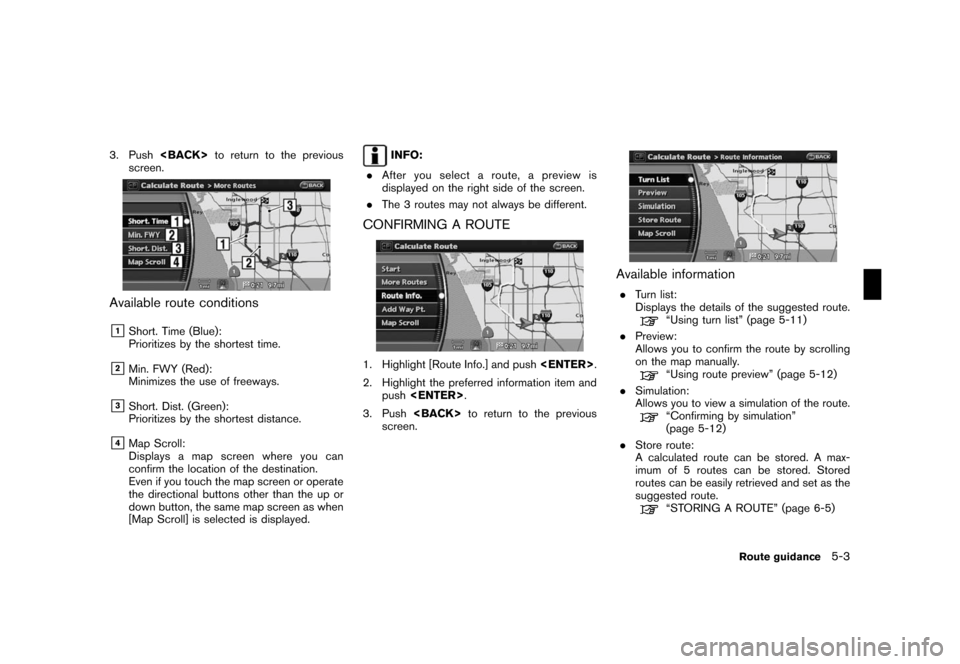
Available route conditions
&1Short. Time (Blue):
Prioritizes by the shortest time.
&2Min. FWY (Red):
Minimizes the use of freeways.
&3Short. Dist. (Green):
Prioritizes by the shortest distance.
&4Map Scroll:
Displays a map screen where you can
confirm the location of the destination.
Even if you touch the map screen or operate
the directional buttons other than the up or
down button, the same map screen as when
[Map Scroll] is selected is displayed.
INFO:
.After you select a route, a preview is
displayed on the right side of the screen.
.The 3 routes may not always be different.
CONFIRMING A ROUTE
1. Highlight [Route Info.] and push.
2. Highlight the preferred information item and
push.
3. Pushto return to the previous
screen.
Available information
.Turn list:
Displays the details of the suggested route.
“Using turn list” (page 5-11)
.Preview:
Allows you to confirm the route by scrolling
on the map manually.
“Using route preview” (page 5-12)
.Simulation:
Allows you to view a simulation of the route.
“Confirming by simulation”
(page 5-12)
.Store route:
A calculated route can be stored. A max-
imum of 5 routes can be stored. Stored
routes can be easily retrieved and set as the
suggested route.
“STORING A ROUTE” (page 6-5)
Route guidance5-3
Page 131 of 217

Black plate (134,1)
Model "NAV2-N" EDITED: 2007/ 3/ 9
2. Using the main directional or additional
directional buttons, adjust the location of
the Avoid Area.
3. After adjusting the location, push
.
Resize Area
Adjusts the range of the Avoid Area.
1. Highlight [Resize Area] and push
.
2. Select the range from 5 available levels.
After selecting the range, push.
INFO:
Pushorto
change the scale of the map.
FWY
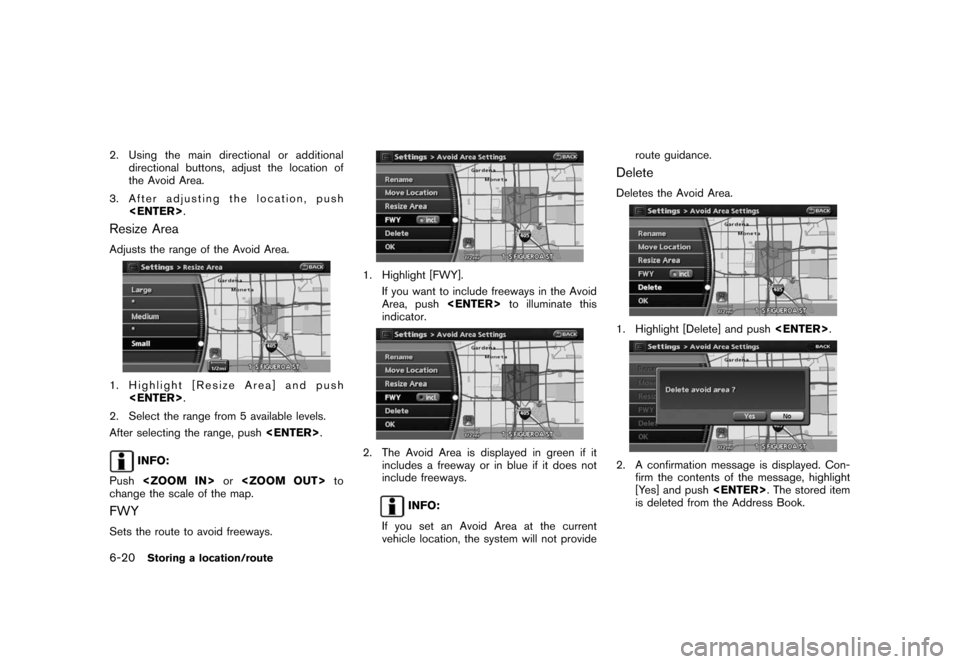
Sets the route to avoid freeways.
1. Highlight [FWY].
If you want to include freeways in the Avoid
Area, pushto illuminate this
indicator.
2. The Avoid Area is displayed in green if it
includes a freeway or in blue if it does not
include freeways.
INFO:
If you set an Avoid Area at the current
vehicle location, the system will not provideroute guidance.
Delete
Deletes the Avoid Area.
1. Highlight [Delete] and push.
2. A confirmation message is displayed. Con-
firm the contents of the message, highlight
[Yes] and push. The stored item
is deleted from the Address Book.
6-20Storing a location/route