2008 NISSAN TITAN reset
[x] Cancel search: resetPage 225 of 408

If you have the Type B switch, with the ignition key
turned to the ACC or ON position push the
MODE switch to turn the audio system on.
MODE select switch
Push the mode select switch to change the mode
in the following sequence: PRESET A!PRE-
SET B!PRESET C!CD*!DVD** (if so
equipped)!AUX***.
*This mode is only available when a CD is loaded.
**This mode is only available when a DVD is
loaded into the DVD player.
***This mode is only available when a compatible
auxiliary device is plugged into the AUX jack.
Volume control switch
Push the volume control switch up or down to
increase or decrease the volume.
Tuning
Memory change (radio):
While in one of the preset radio station banks (A,
B or C) , push the tuning switch
orfor less than 1.5 seconds to change to the next
preset station in memory.Seek tuning (radio):
Push the tuning switch
orfor more
than 1.5 seconds to seek the next or previous
radio station.
Next/Previous track (CD):
Push the tuning switch
orfor less
than 1.5 seconds to return to the beginning of the
present track or skip to the next track. Push
several times to skip back or skip through tracks.
This system searches for the blank intervals be-
tween selections. If there is a blank interval within
1 program or there is no interval between pro-
grams, the system may not stop in the desired or
expected location.
Change disc (CD) (if so equipped):
Push the tuning switch
orfor more
than 1.5 seconds to change the playing disc up
or down.
Display screen, heater, air conditioner, audio and phone systems4-59
ZREVIEW COPYÐ2008 Titan(tzw)
Owners ManualÐUSA_English(nna)
03/06/07Ðtbrooks
X
Page 227 of 408
VOL (volume) button:
The VOL button allows the rear passengers to
adjust the headphone volume level. The vehicle
volume can also be changed if the REAR CTRL is
enabled and the rear audio mode is the same as
the front.
(SPEAKER CONTROL) button:
Press this
button to turn the rear speakers
off and headphones on. Press thisbutton
again to turn rear seat speakers back on and
headphones off.
MODE button:
The MODE button allows the rear passengers to
change between AM, FM, CD, DVD and AUX.
The media options are listed on the face plate of
the rear audio controls. When a source of media
is selected, the media label will be illuminated.
SEEK button:
In AM or FM mode, the SEEK button allows the
rear seat passengers to find the next radio station
up or down the station band frequency.
In CD mode, the SEEK button allows the rear
passengers to find the next or previous selection
on the CD.NEXT button:
When the NEXT button is pressed while in AM or
FM mode, the radio will change to the next preset.
The NEXT button does not function while in SAT
radio mode or when playing a DVD or CD.
ANTENNA
The antenna cannot be shortened, but can be
removed. When you need to remove the antenna,
turn the antenna rod counterclockwise.
To install the antenna rod, turn the antenna clock-
wise. Tighten the antenna rod to specification
using a suitable tool such as an open-end
wrench. The antenna rod tightening specification
is 3.4 – 3.6 N·m (30 – 32 in-lb) . Do not use pliers
to tighten the antenna as they can leave marks on
the antenna surface. The antenna rod cannot be
hand tightened to the proper specification.
CAUTION
Always properly tighten the antenna rod
during installation or the antenna rod may
break during vehicle operation.
WARNING
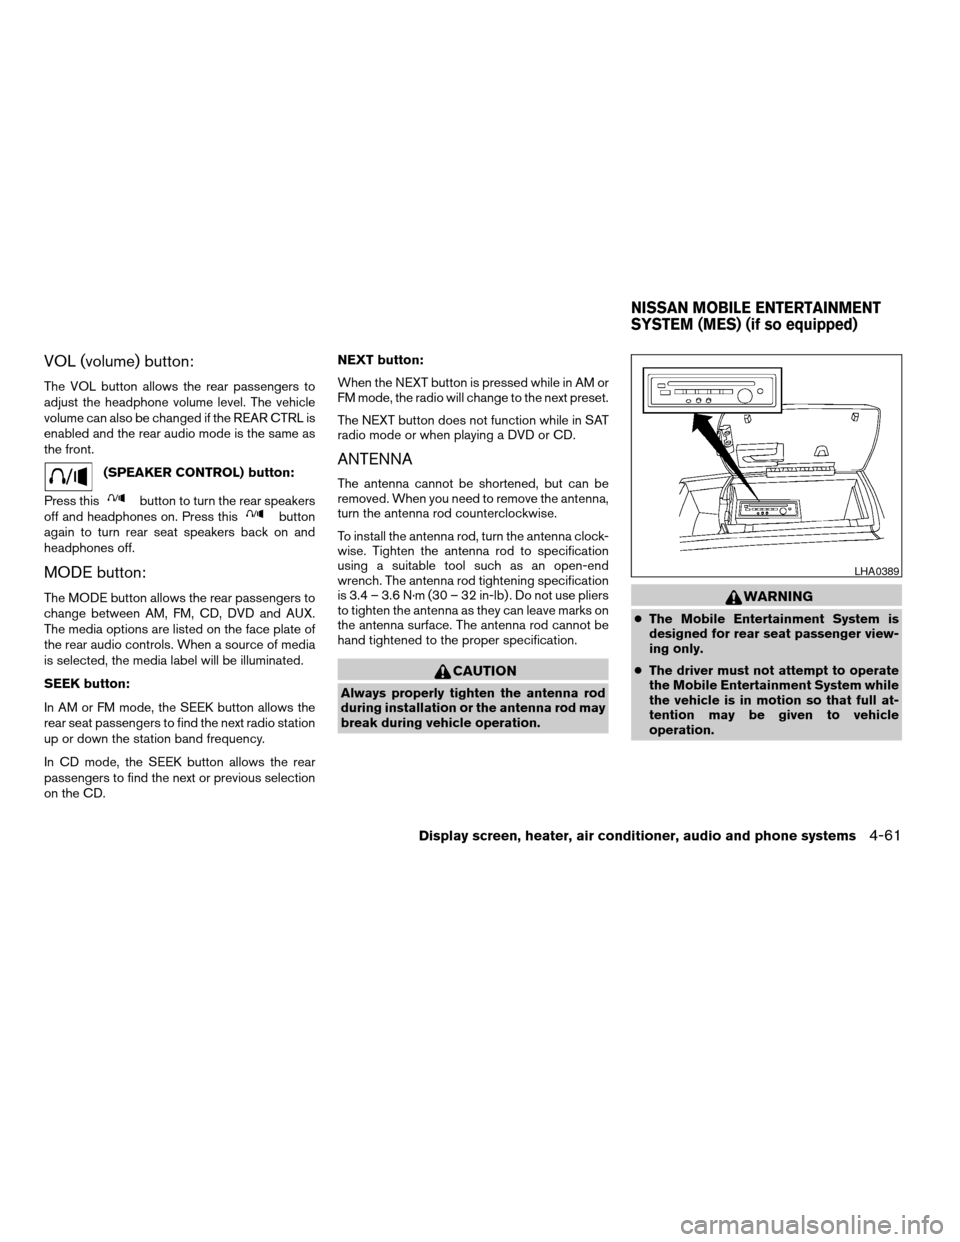
cThe Mobile Entertainment System is
designed for rear seat passenger view-
ing only.
cThe driver must not attempt to operate
the Mobile Entertainment System while
the vehicle is in motion so that full at-
tention may be given to vehicle
operation.
LHA0389
NISSAN MOBILE ENTERTAINMENT
SYSTEM (MES) (if so equipped)
Display screen, heater, air conditioner, audio and phone systems4-61
ZREVIEW COPYÐ2008 Titan(tzw)
Owners ManualÐUSA_English(nna)
03/06/07Ðtbrooks
X
Page 232 of 408

Press FAST FORWARD/FAST REVERSE but-
tons again or PLAY button to resume the normal
play speed.
NEXT CHAPTER/
PREVIOUS CHAPTER
(Remote control only):
When the
(NEXT CHAPTER) button is
pressed while the DVD is being played, the pro-
gram next to the present one will start to play from
its beginning. Press several times to skip through
programs. The DVD will advance the number of
times the button is pressed. When the
(PREVIOUS CHAPTER) button is pressed, the
program being played returns to its beginning.
Press several times to skip back through pro-
grams. The DVD will go back the number of times
the button is pressed.
orPAUSE:
When the PLAY/PAUSE button on the player or
the PAUSE button on the remote control is
pressed, the player will pause playing of the
media. In pause mode, the player will show
on the upper left corner of the display until the
player is changed to another mode.
STOP:
Press the STOP button once to stop playing the
media. The display will show
in the upperleft corner of the display for 4 seconds, and the
last disc position will be stored. When the PLAY
button is pressed again, it will resume at the
stored disc track and time position.
If the STOP button is pressed again when the
player is already in Stop mode, it will reinitialize
the pointer to the beginning of the disc. In effect it
will ignore the last stored disc position and upon
receipt of the next play message it will begin at
the Title Menu, or at “the beginning of the disc”.
EJECT:
When the EJECT button is pressed with the DVD
loaded, it will be ejected.
The display will show the EJECT symbol
in
the upper left corner of the display for 4 seconds
once the EJECT button is pressed.
If the DVD is not loaded, the display will show
“NO DISC”.
If the DVD comes out and is not removed within
25 seconds, it will be pulled back into the slot to
protect it.
DISPLAY:
If the DISPLAY control is pressed for less than 2
seconds, the display menu will appear on the
screen.cThe display menu will remain on the screen
for 10 seconds if no subsequent control
activations occur.
cUse NAVIGATION KEYS to navigate within
the display menu, and use ENTER to select
the item.
cHolding the DISPLAY control on the face-
plate for longer than approximately 2 sec-
onds while in the display menu will reset the
display characteristics to their nominal val-
ues. (Faceplate feature only)
If the DISPLAY control button on the faceplate is
pressed for more than 2 seconds, the media
track/time information will be displayed along the
bottom of the display. Pressing the DISPLAY
control for more than 2 seconds will remove the
media track/time information from the display.
(Faceplate feature only)
NAVIGATION KEYS:
If media is in PLAY mode, activation of the NAVI-
GATION KEYS (Up, Down, Left, and Right) will
perform the following functions: next
chapter/track, previous chapter/track, fast re-
verse and fast forward, and the display will
show
,,andrespec-
tively in the upper left corner of the display for 4
seconds. (Faceplate feature only)
4-66Display screen, heater, air conditioner, audio and phone systems
ZREVIEW COPYÐ2008 Titan(tzw)
Owners ManualÐUSA_English(nna)
03/06/07Ðtbrooks
X
Page 235 of 408
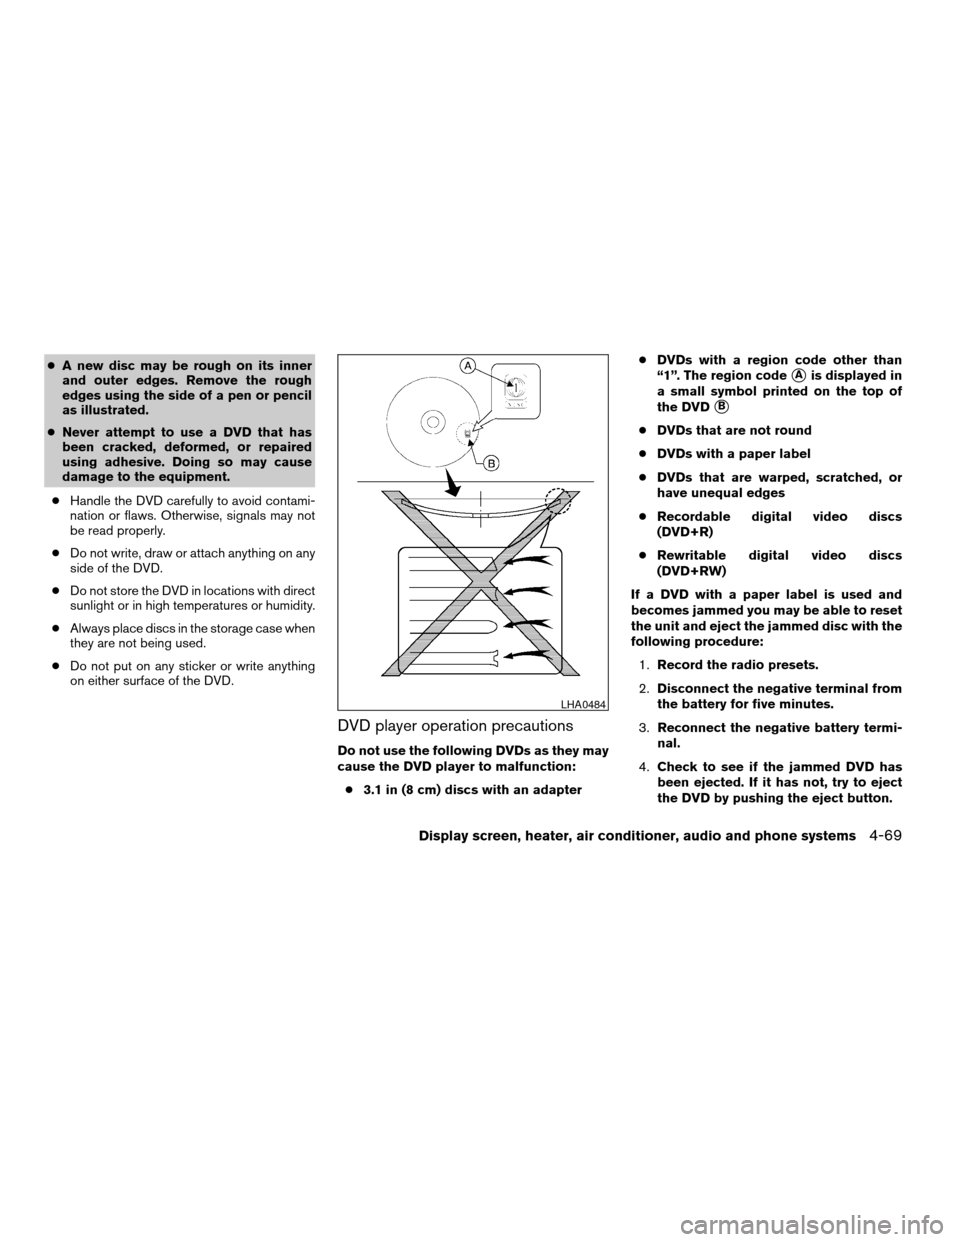
cA new disc may be rough on its inner
and outer edges. Remove the rough
edges using the side of a pen or pencil
as illustrated.
cNever attempt to use a DVD that has
been cracked, deformed, or repaired
using adhesive. Doing so may cause
damage to the equipment.
cHandle the DVD carefully to avoid contami-
nation or flaws. Otherwise, signals may not
be read properly.
cDo not write, draw or attach anything on any
side of the DVD.
cDo not store the DVD in locations with direct
sunlight or in high temperatures or humidity.
cAlways place discs in the storage case when
they are not being used.
cDo not put on any sticker or write anything
on either surface of the DVD.
DVD player operation precautions
Do not use the following DVDs as they may
cause the DVD player to malfunction:
c3.1 in (8 cm) discs with an adaptercDVDs with a region code other than
“1”. The region code
sAis displayed in
a small symbol printed on the top of
the DVD
sB
cDVDs that are not round
cDVDs with a paper label
cDVDs that are warped, scratched, or
have unequal edges
cRecordable digital video discs
(DVD+R)
cRewritable digital video discs
(DVD+RW)
If a DVD with a paper label is used and
becomes jammed you may be able to reset
the unit and eject the jammed disc with the
following procedure:
1.Record the radio presets.
2.Disconnect the negative terminal from
the battery for five minutes.
3.Reconnect the negative battery termi-
nal.
4.Check to see if the jammed DVD has
been ejected. If it has not, try to eject
the DVD by pushing the eject button.
LHA0484
Display screen, heater, air conditioner, audio and phone systems4-69
ZREVIEW COPYÐ2008 Titan(tzw)
Owners ManualÐUSA_English(nna)
03/06/07Ðtbrooks
X
Page 236 of 408

5.If the disc cannot be ejected see your
NISSAN dealer for further assistance.
6.Re-program the radio presets.
Remote control and headphones
battery replacement
Replace the battery as follows:
1. Open the lid.
2. Replace batteries with new ones.
cSize AA (remote control)
cSize AAA (headphones)
Make sure that the
andends on
the batteries match the markings inside the
compartment.
3. Close the lid securely.If the battery is removed for any reason
other than replacement, close the lid se-
curely.
cIf you will not be using the remote control for
long periods of time, remove the batteries.
cReplacement of the batteries is needed
when the remote control only functions at
extremely close distances to the DVD player
or not at all.
cBe careful not to touch the battery terminal.
cAn improperly disposed battery can harm
the environment. Always confirm local regu-
lations for battery disposal.
LHA0318SAA0723
4-70Display screen, heater, air conditioner, audio and phone systems
ZREVIEW COPYÐ2008 Titan(tzw)
Owners ManualÐUSA_English(nna)
03/06/07Ðtbrooks
X
Page 245 of 408

The system announces, “Transfer call. Call
transferred to privacy mode.” The system
then ends the VR session.
You can also issue the Transfer Call com-
mand again to return to a hands-free call
through the vehicle.
c“Mute” — Use the Mute command to mute
your voice so the other party cannot hear it.
Use the mute command again to unmute
your voice.
NOTE:
If a call is ended or the cellular phone
network connection is lost while the Mute
feature is on, the Mute feature will be reset
to “off” for the next call so the other party
can hear your voice.
“Phone book”
NOTE:
Phone book commands are not available
when the vehicle is moving.
Main Menu
“Phone Book”
“New Entry”
sA“Edit”sB“Delete”sC9List Names”sD
The Phone Book stores up to 40 names for each
phone paired with the system. Each name can
have up to 4 locations/phone numbers associ-
ated with it.
NOTE:
Each phone has its own separate phone
book. You cannot access Phone A’s phone
book if you are currently connected with
Phone B.
“New entry”
sA
Use the New Entry command to store a new
name in the system.
When prompted by the system, say the name you
would like to give the new entry.
For example, say: “Mary.”
If the name is too long or too short, the system
tells you, then prompts you for a name again.
Also, if the name sounds too much like a name
already stored, the system tells you, then prompts
you for a name again.
Once the system accepts the name and you
confirm it is correct, the system asks for a location
(Home, Office, Mobile or Other) .
For example, say: “Home.”
The system acknowledges the location.The system will ask you to say a phone number or
to transfer a phone number stored in the cellular
phone’s memory.
Enter a phone number by voice command:
For example, say: “five five five one two one two.
” See “How to say numbers” earlier in this section
for more information.
To transfer a phone number stored in the cellular
phone’s memory:
Say9Transfer entry.9The system acknowledges
the command and asks you to initiate the transfer
from the phone handset. The new contact phone
number will be transferred from the cellular
phone via the BluetoothTcommunication link.
The transfer procedure varies according to each
cellular phone. See the cellular phone Owner’s
Manual for details. You can also visit
www.nissanusa.com/bluetooth for instructions
on transferring phone numbers from NISSAN
recommended cellular phones.
The system repeats the number and prompts you
for the next command. When you have finished
entering numbers or transferring an entry, choose
“Store.”
The system confirms the name, location and
number. The system then asks if you would like to
Display screen, heater, air conditioner, audio and phone systems4-79
ZREVIEW COPYÐ2008 Titan(tzw)
Owners ManualÐUSA_English(nna)
03/06/07Ðtbrooks
X
Page 257 of 408
cWhen a spare tire is mounted or a wheel
is replaced, tire pressure will not be
indicated, the TPMS will not function
and the low tire pressure warning light
will flash for approximately 1 minute.
The light will remain on after 1 minute.
Contact your NISSAN dealer as soon as
possible for tire replacement and/or
system resetting.
cReplacing tires with those not originally
specified by NISSAN could affect the
proper operation of the TPMS.
cDo not inject any tire liquid or aerosol
tire sealant into the tires, as this may
cause a malfunction of the tire pressure
sensors.
CAUTION
Do not place metalized film or any metal
parts (antenna, etc.) on the windows. This
may cause poor reception of the signals
from the tire pressure sensors, and the
TPMS will not function properly.
Some devices and transmitters may temporarily
interfere with the operation of the TPMS and
cause the low tire pressure warning light to illu-
minate.Some examples are:
– Facilities or electric devices using similar radio
frequencies are near the vehicle.
– If a transmitter set to similar frequencies is
being used in or near the vehicle.
– If a computer (or similar equipment) or a
DC/AC converter is being used in or near the
vehicle.
FCC Notice:
Changes or modifications not expressly ap-
proved by the party responsible for compli-
ance could void the user’s authority to op-
erate the equipment.
This device complies with Part 15 of the
FCC Rules and RSS-210 of Industry
Canada.
Operation is subject to the following two
conditions: (1) This device may not cause
harmful interference, and (2) this device
must accept any interference received, in-
cluding interference that may cause undes-
ired operation of the device.
AVOIDING COLLISION AND
ROLLOVER
WARNING
Failure to operate this vehicle in a safe
and prudent manner may result in loss of
control or an accident.
Be alert and drive defensively at all times. Obey
all traffic regulations. Avoid excessive speed,
high speed cornering, or sudden steering ma-
neuvers, because these driving practices could
cause you to lose control of your vehicle.As with
any vehicle, loss of control could result in a
collision with other vehicles or objects, or
cause the vehicle to roll over, particularly if
the loss of control causes the vehicle to
slide sideways.Be attentive at all times, and
avoid driving when tired. Never drive when under
the influence of alcohol or drugs (including pre-
scription or over-the-counter drugs which may
cause drowsiness) . Always wear your seat belt
as outlined in the “Safety – Seats, seat belts and
supplemental restraint system” section of this
manual, and also instruct your passengers to do
so.
Seat belts help reduce the risk of injury in colli-
sions and rollovers.In a rollover crash, an
unbelted or improperly belted person is
Starting and driving5-5
ZREVIEW COPYÐ2008 Titan(tzw)
Owners ManualÐUSA_English(nna)
03/06/07Ðtbrooks
X
Page 271 of 408
cIf the SET indicator light blinks, push the
cruise control ON·OFF switch off and have
the system checked by a NISSAN dealer.
cThe SET indicator light may blink when the
cruise control ON·OFF switch is pushed ON
while pushing the ACCEL/RES,
COAST/SET, or CANCEL switch. To prop-
erly set the cruise control system, use the
following procedures.
WARNING
Do not use the cruise control when driving
under the following conditions:
cWhen it is not possible to keep the
vehicle at a set speed.
cIn heavy traffic or in traffic that varies in
speed.
cOn winding or hilly roads.
cOn slippery roads (rain, snow, ice, etc.) .
cIn very windy areas.
Doing so could cause a loss of vehicle
control and result in an accident.
CRUISE CONTROL OPERATIONS
The cruise control allows driving at a speed be-
tween 25 - 89 MPH (40 - 144 km/h) without
keeping your foot on the accelerator pedal.
To turn on the cruise control,push the
ON·OFF switch on. The CRUISE indicator light in
the vehicle information display will illuminate.
To set cruising speed,accelerate the vehicle to
the desired speed, push the COAST/SET switch
and release it. The SET indicator light in the
vehicle information display will illuminate. Take
your foot off the accelerator pedal. Your vehicle
maintains the set speed.
cTo pass another vehicle,depress the ac-
celerator pedal. When you release the
pedal, the vehicle returns to the previously
set speed.
cThe vehicle may not maintain the set speed
when going up or down steep hills. If this
happens, drive without the cruise control.
To cancel the preset speed,use one of the
following three methods.
cPush the CANCEL button; the SET indicator
light in the vehicle information display goes
out.
cTap the brake pedal; the SET indicator light
goes out.cPush the ON·OFF switch off. Both the
CRUISE indicator light and SET indicator
light in the vehicle information display go out.
The cruise control is automatically canceled and
the SET light in the vehicle information display
goes out if:
cyou depress the brake pedal while pushing
the ACCEL/RES or SET/COAST switch.
The preset speed is deleted from memory.
cthe vehicle slows down more than 8 MPH
(13 km/h) below the set speed.
cyou move the shift selector lever to N (Neu-
tral) .
To reset at a faster cruising speed,use one
of the following three methods.
cDepress the accelerator pedal. When the
vehicle attains the desired speed, push and
release the COAST/SET switch.
cPush and hold the ACCEL/RES switch.
When the vehicle attains the speed you de-
sire, release the switch.
cPush and release the ACCEL/RES switch.
Each time you do this, the set speed in-
creases by about 1 MPH (1.6 km/h) .
Starting and driving5-19
ZREVIEW COPYÐ2008 Titan(tzw)
Owners ManualÐUSA_English(nna)
03/06/07Ðtbrooks
X