2008 NISSAN TITAN brake
[x] Cancel search: brakePage 105 of 408

Vehicle information display warnings
and indicators
1. Door open warning
2. Low fuel warning
3. Low windshield washer fluid warning4. Parking brake warning
5. Cruise main switch indicator
6. Cruise set switch indicator
7. 4LO indicator (
model)8. 4WD indicator (
model)
9. Automatic transmission position indicator
WIC1184
Instruments and controls2-25
ZREVIEW COPYÐ2008 Titan(tzw)
Owners ManualÐUSA_English(nna)
03/05/07Ðtbrooks
X
Page 106 of 408

Door and liftgate open warning
This warning illuminates when a door, the liftgate
or the liftgate glass has been opened when the
engine is running.
Low fuel warning
This warning illuminates when the fuel level in the
fuel tank is getting low. Refuel as soon as it is
convenient, preferably before the fuel gauge
reaches E (Empty) .There will be a small re-
serve of fuel in the tank when the fuel
gauge needle reaches E (Empty) .
Low windshield washer fluid warning
This warning illuminates when the windshield
washer fluid is at a low level. Add windshield
washer fluid as necessary. See “Window washer
fluid” in the “Maintenance and do-it-yourself”
section of this manual.
Parking brake warning
This warning illuminates when the parking brake
is set and the vehicle is driven.
Cruise main switch indicator
This indicator illuminates when the cruise control
main switch is pushed. The indicator turns off
when the main switch is pushed again. When the
cruise main switch indicator illuminates, the
cruise control system is operational.Cruise set switch indicator light
The light comes on while the vehicle speed is
controlled by the cruise control system. If the light
blinks while the engine is running, it may indicate
the cruise control system is not functioning prop-
erly. Have the system checked by a NISSAN
dealer.
4LO indicator (
model)
This indicator illuminates when the 4WD shift
switch is set in the 4LO position with the ignition
key in the ON position.
If the 4WD shift switch is set in the 4LO position
and the indicator blinks, stop the vehicle, drive
slowly forward and the indicator will turn on.
When you shift between 4H and 4LO, stop the
vehicle, move the automatic transmission selec-
tor lever to the N (Neutral) position, then depress
and turn the 4WD shift switch to 4LO or 4H.
The transfer case may be damaged if you shift the
switch while driving.
You cannot move the transfer 4WD shift switch
between 4H and 4LO unless you have first
stopped the vehicle and moved the automatic
transmission shift selector lever to N (Neutral) .
Make sure the transfer 4LO position indicator
illuminates when you shift the 4WD shift switch
to 4LO.The indicator may blink while shifting from
one drive mode to the other.
4WD indicator (
model)
While the engine is running, the 4WD shift indi-
cator will illuminate the position selected by the
4WD shift switch.
The 4WD shift indicator may blink while
shifting from one drive mode to the other.
Automatic transmission position indicator
When the ignition key is placed in the ON posi-
tion, this indicator shows the automatic transmis-
sion selector lever position. See “Driving the ve-
hicle” in the “Starting and driving” section of this
manual.
2-26Instruments and controls
ZREVIEW COPYÐ2008 Titan(tzw)
Owners ManualÐUSA_English(nna)
03/05/07Ðtbrooks
X
Page 113 of 408
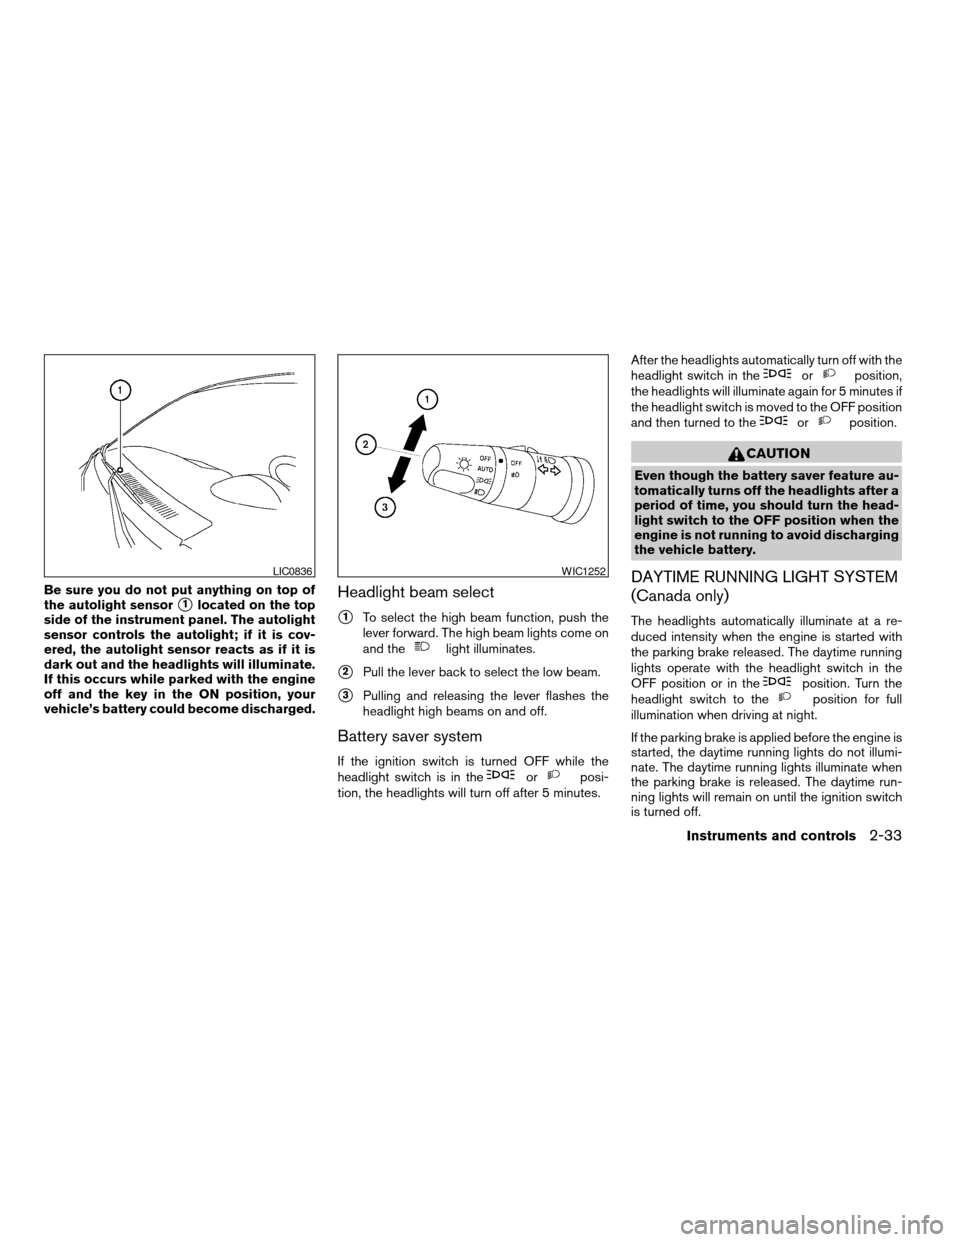
Be sure you do not put anything on top of
the autolight sensor
s1located on the top
side of the instrument panel. The autolight
sensor controls the autolight; if it is cov-
ered, the autolight sensor reacts as if it is
dark out and the headlights will illuminate.
If this occurs while parked with the engine
off and the key in the ON position, your
vehicle’s battery could become discharged.Headlight beam select
s1To select the high beam function, push the
lever forward. The high beam lights come on
and the
light illuminates.
s2Pull the lever back to select the low beam.
s3Pulling and releasing the lever flashes the
headlight high beams on and off.
Battery saver system
If the ignition switch is turned OFF while the
headlight switch is in theorposi-
tion, the headlights will turn off after 5 minutes.After the headlights automatically turn off with the
headlight switch in the
orposition,
the headlights will illuminate again for 5 minutes if
the headlight switch is moved to the OFF position
and then turned to the
orposition.
CAUTION
Even though the battery saver feature au-
tomatically turns off the headlights after a
period of time, you should turn the head-
light switch to the OFF position when the
engine is not running to avoid discharging
the vehicle battery.
DAYTIME RUNNING LIGHT SYSTEM
(Canada only)
The headlights automatically illuminate at a re-
duced intensity when the engine is started with
the parking brake released. The daytime running
lights operate with the headlight switch in the
OFF position or in the
position. Turn the
headlight switch to theposition for full
illumination when driving at night.
If the parking brake is applied before the engine is
started, the daytime running lights do not illumi-
nate. The daytime running lights illuminate when
the parking brake is released. The daytime run-
ning lights will remain on until the ignition switch
is turned off.
LIC0836WIC1252
Instruments and controls2-33
ZREVIEW COPYÐ2008 Titan(tzw)
Owners ManualÐUSA_English(nna)
03/05/07Ðtbrooks
X
Page 118 of 408
are not met or the system becomes disengaged,
the indicator light will continue to flash.
The Anti-Lock Brake (ABS) system is disabled
and the ABS light illuminates when the E-Lock
system is ON. Also, the Vehicle Dynamic Control
(VDC) system is disabled and the VDC light
illuminates when the E-Lock system is ON.
See “Electronic locking rear differential (E-Lock)
system” in the “Starting and Driving” section for
further explanation and system limitations.
WARNING
cNever leave the E-Lock system ON
when driving on paved or hard-surfaced
roads. Turning the vehicle may result in
the rear wheels slipping and result in an
accident and personal injury. After us-
ing the E-Lock system to free the ve-
hicle, turn the system OFF.cUse the E-Lock system only when free-
ing a stuck vehicle. Try the 4LO position
before using the E-Lock system. Never
use the E-Lock system on a slippery
road surface such as snow or ice sur-
face. Using the E-Lock system when
driving in these road conditions may
cause unexpected movement of the ve-
hicle during engine braking, accelerat-
ing or turning, which may result in an
accident and serious personal injury.
CAUTION
cAfter using the E-Lock system, turn the
switch OFF to prevent possible damage
to driveline components from extended
use.
cDo not drive over 12 MPH (20 km/h)
when the system is engaged. Doing so
could result in possible damage to the
driveline.
cDo not turn on the E-lock system while
the tires are spinning. Doing so could
damage drivetrain components.
WARNING
The rear sonar system is a convenience
but it is not a substitute for proper back-
ing. Always turn and check that it is safe to
do so before backing up. Always back up
slowly.
The rear sonar system is active when the ignition
is in the ON position and the shift selector lever is
in R (Reverse) .
When sensors detect obstacles within 6 ft (1.8
m) of the rear bumper, a beeping tone is emitted.
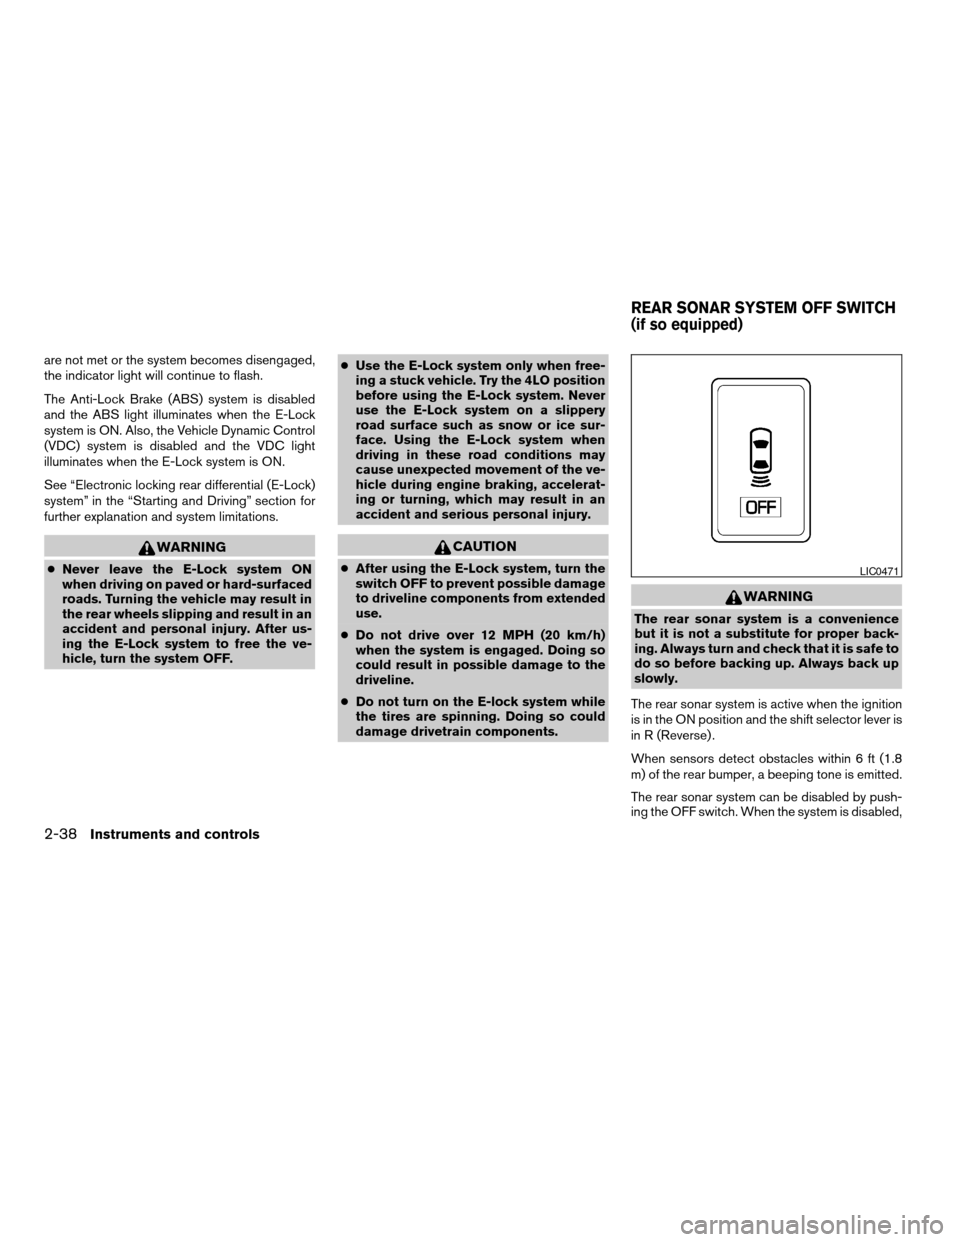
The rear sonar system can be disabled by push-
ing the OFF switch. When the system is disabled,
LIC0471
REAR SONAR SYSTEM OFF SWITCH
(if so equipped)
2-38Instruments and controls
ZREVIEW COPYÐ2008 Titan(tzw)
Owners ManualÐUSA_English(nna)
03/05/07Ðtbrooks
X
Page 154 of 408
TILT OPERATION
WARNING
Do not adjust the steering wheel while
driving. You could lose control of your
vehicle and cause an accident.
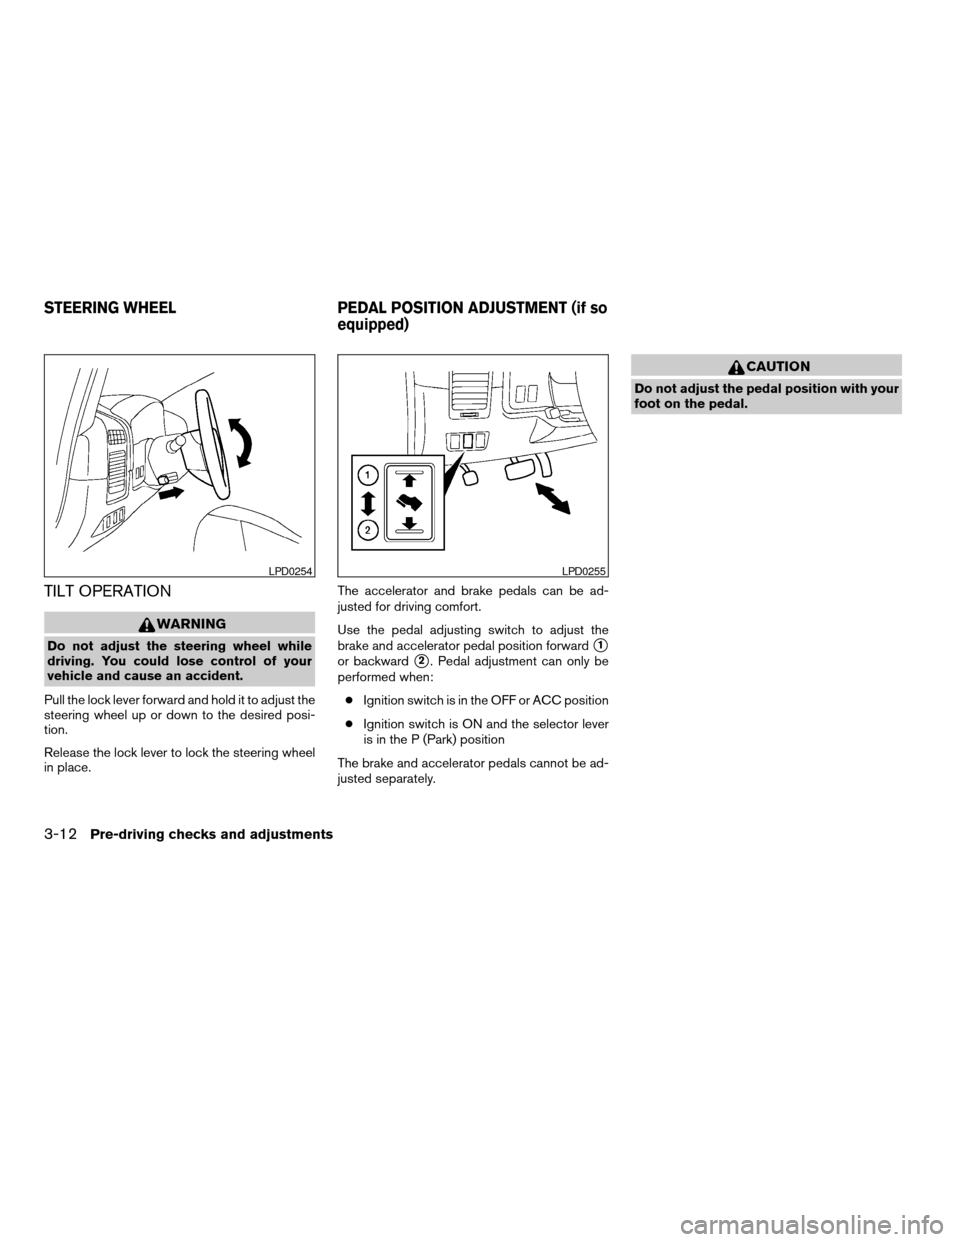
Pull the lock lever forward and hold it to adjust the
steering wheel up or down to the desired posi-
tion.
Release the lock lever to lock the steering wheel
in place.The accelerator and brake pedals can be ad-
justed for driving comfort.
Use the pedal adjusting switch to adjust the
brake and accelerator pedal position forwards1
or backwards2. Pedal adjustment can only be
performed when:
cIgnition switch is in the OFF or ACC position
cIgnition switch is ON and the selector lever
is in the P (Park) position
The brake and accelerator pedals cannot be ad-
justed separately.
CAUTION
Do not adjust the pedal position with your
foot on the pedal.
LPD0254LPD0255
STEERING WHEEL PEDAL POSITION ADJUSTMENT (if so
equipped)
3-12Pre-driving checks and adjustments
ZREVIEW COPYÐ2008 Titan(tzw)
Owners ManualÐUSA_English(nna)
03/05/07Ðtbrooks
X
Page 163 of 408

The automatic drive positioner system has two
features:
cMemory storage function
cEntry/exit function
MEMORY STORAGE FUNCTION
Two positions for the driver’s seat, accelerator
and brake pedals, and outside mirrors can be
stored in the automatic drive positioner memory.
Follow these procedures to use the memory sys-
tem.
1. Set the automatic transmission selector le-
ver to the P (Park) position.
2. Turn the ignition ON.3. Adjust the driver’s seat, accelerator and
brake pedals, and outside mirrors to the
desired positions by manually operating
each adjusting switch. For additional infor-
mation, see “Seats” in the “Safety—Seats,
seat belts and supplemental restraint sys-
tem” section and “Pedal position adjust-
ment” and “Outside mirrors” earlier in this
section.
During this step, do not turn the ignition to
any position other than ON.
4. Push the SET switch and, within 5 seconds,
push the memory switch (1 or 2) fully for at
least 1 second.
The indicator light for the pushed memory
switch will come on and stay on for approxi-
mately 5 seconds after pushing the switch.
After the indicator light goes off, the se-
lected positions are stored in the selected
memory (1 or 2) .
If a new memory is stored in the same memory
switch, the previous memory will be deleted.
Linking a keyfob to a stored memory
position
Each keyfob can be linked to a stored memory
position (memory switch 1 or 2) with the follow-
ing procedure.
LPD0260
AUTOMATIC DRIVE POSITIONER (if
so equipped)
Pre-driving checks and adjustments3-21
ZREVIEW COPYÐ2008 Titan(tzw)
Owners ManualÐUSA_English(nna)
03/05/07Ðtbrooks
X
Page 164 of 408

1. Follow the steps for storing a memory posi-
tion.
2. While the indicator light for the memory
switch being set is illuminated for 5 sec-
onds, press the
button on the keyfob.
The indicator light will blink. After the indica-
tor light goes off, the keyfob is linked to that
memory setting.
With the key removed from the ignition switch,
press the
button on the keyfob. The driv-
er’s seat, accelerator and brake pedals, and out-
side mirrors will move to the memorized position.
NOTE:
If a new memory position is saved to the
memory switch, the keyfob automatically
re-links.
Confirming memory storage
cTurn the ignition ON and push the SET
switch. If the main memory has not been
stored, the indicator light will come on for
approximately 0.5 seconds. When the
memory has stored the position, the indica-
tor light will stay on for approximately 5 sec-
onds.
cIf the battery cable is disconnected, or if the
fuse opens, the memory storage function will
be canceled and must be restarted before astored memory position can be set again.
Drive the vehicle over 25 MPH (40 km/h) to
restart the memory storage function. You
can also restart the memory storage function
using the following procedure.
1. Connect the battery cable or replace the
fuse.
2. Open and close the driver’s door more than
two times with the ignition key in the LOCK
position.
Once the memory storage function has been
restarted, you can store a memory position.
See “Memory storage function” earlier in this
section.
Selecting the memorized position
Set the automatic transmission selector lever to
the P (Park) position, then:
cWithin 45 seconds of opening the driver’s
door, push the memory switch (1 or 2) fully
for at least 1 second, or
cTurn the ignition switch to the ON position
and push the memory switch (1 or 2) fully for
at least 1 second.
The driver’s seat, accelerator and brake pedals,
and outside mirrors will move to the memorized
position with the indicator light blinking, and then
the light will stay on for approximately 5 seconds.
ENTRY/EXIT FUNCTION
This system is designed so that the driver’s seat
will automatically move when the automatic
transmission selector lever is in the P (Park)
position. This allows the driver to get into and out
of the driver’s seat more easily.
The driver’s seat will slide backward:
cWhen the key is removed from the ignition
switch and the driver’s door is opened.
cWhen the driver’s door is opened with the
ignition key turned to LOCK.
cWhen the ignition key is turned from ACC to
LOCK with the driver’s door open.
The driver’s seat will return to the previous posi-
tion:
cWhen the key is inserted into the ignition
switch and the driver’s door is closed.
cWhen the driver’s door is closed with the key
turned to LOCK.
cWhen the key is turned from ACC to ON
while the automatic transmission selector
lever is in the P (Park) position.
The entry/exit function can be adjusted or can-
celed. For vehicles with navigation system, see
“Comfort & convenience settings” in the “Display
screen, heater, air conditioner and audio sys-
3-22Pre-driving checks and adjustments
ZREVIEW COPYÐ2008 Titan(tzw)
Owners ManualÐUSA_English(nna)
03/06/07Ðtbrooks
X
Page 249 of 408

SPEAKER ADAPTATION (SA) MODE
Speaker Adaptation allows up to two out-of-
dialect users to train the system to improve rec-
ognition accuracy. By repeating a number of
commands, the users can create a voice model of
their own voice that is stored in the system. The
system is capable of storing a different speaker
adaptation model for memory A and memory B.
If memory A is available, the system will use
memory A to store the model. If memory A is in
use and memory B is available, the system will
use memory B to store the model. If both of the
memory locations are in use, the system will ask
the user to select which memory location should
be overwritten.
Training procedure
The procedure for training a voice is as follows.
1. Position the vehicle in a reasonably quiet
outdoor location.
2. Sit in the driver’s seat with the engine run-
ning, the parking brake on, and the transmis-
sion in P (Park) .
3. Press and hold the
button for more
than 5 seconds.4. The system announces: “Press the
PHONE/SEND (
) button for the
hands-free phone system to enter the
speaker adaptation mode or press the
PHONE/END (
) button to select a dif-
ferent language.”
5. Press the
button.
For information on selecting a different lan-
guage, see “Choosing a language” earlier in
this section.
6. Voice memory A or memory B is selected
automatically. If both memory locations are
already in use, the system will prompt you to
overwrite one. Follow the instructions pro-
vided by the system.
7. When preparation is complete and you are
ready to begin, the press the
button.
8. The SA mode will be explained. Follow the
instructions provided by the system.
9. When training is finished, the system will tell
you an adequate number of phrases have
been recorded.
10. The system will ask you to say your name.
Follow the instructions to register your
name.11. The system will announce that speaker ad-
aptation has been completed and the sys-
tem is ready.
The SA mode will stop if:
cThe
button is pressed for more than 5
seconds in SA mode.
cThe vehicle begins moving during SA mode.
cThe ignition switch is turned to the OFF or
LOCK position.
Training phrases
During the SA mode, the system instructs the
trainer to say the following phrases. (The system
will prompt you for each phrase.)
cphone book new entry
cdial three oh four two nine
cdelete call back number
csetup pair phone
cmemo pad play
ceight pause nine three two pause seven
cdelete all entries
ccall seven two four zero nine
cphone book delete entry
Display screen, heater, air conditioner, audio and phone systems4-83
ZREVIEW COPYÐ2008 Titan(tzw)
Owners ManualÐUSA_English(nna)
03/06/07Ðtbrooks
X