2008 NISSAN QUEST steering wheel
[x] Cancel search: steering wheelPage 242 of 376

Pairing procedure
NOTE:
The pairing procedure must be performed
when the vehicle is stationary. If the vehicle
starts moving during the procedure, the
procedure will be cancelled.
Main Menu
“Setup”
sA
“Pair phone”sB
“New phone”sC
Initiate from handsetsD
Name phonesE
Assign prioritysF
Choose ringtonesG
1. Press thebutton on the steering
wheel. The system announces the available
commands.
2. Say: “Setup”
sA. The system acknowledges
the command and announces the next set of
available commands.
3. Say: “Pair phone”
sB. The system acknowl-
edges the command and announces the
next set of available commands.4. Say: “New phone”
sC. The system acknowl-
edges the command and asks you to initiate
pairing from the phone handset
sD.
The pairing procedure of the cellular phone
varies according to each cellular phone
model. See the cellular phone Owner’s
Manual for details. You can also visit
www.nissanusa.com/bluetooth for instruc-
tions on pairing NISSAN recommended cel-
lular phones.
When prompted for a Passkey code, enter
“1234” from the handset. The Passkey code
“1234” has been assigned by NISSAN and
cannot be changed.
5. The system asks you to say a name for the
phone
sE.
If the name is too long or too short, the
system tells you, then prompts you for a
name again.
Also, if more than one phone is paired and
the name sounds too much like a name
already used, the system tells you, then
prompts you for a name again.6. The system asks you to assign a priority level
sF. The priority level determines which
phone is active when more than one paired
BluetoothTphone is in the vehicle. Follow
the instructions provided by the system or
refer to “Setup” later in this section for more
information on changing priorities.
7. The system will ask if you would like to select
a custom ring tone
sG. Follow the instruc-
tions provided by the system or refer to
“Setup” later in this section for more infor-
mation on selecting ringtones.
Making a call by entering a phone
number
Main Menu
“Call”
sA
Number (speak digits)sB
“Dial”sC
1. Press thebutton on steering wheel. A
tone will sound.
2. Say: “Call”
sA. The system acknowledges
the command and announces the next set of
available commands.
4-80Display screen, heater, air conditioner, audio and phone systems
ZREVIEW COPYÐ2008 Quest(van)
Owners ManualÐUSA_English(nna)
06/29/07Ðdebbie
X
Page 243 of 376

3. Say the number you wish to callsB. For
example, 555-1212 can be said as “five five
five one two one two.” See “How to say
numbers” earlier in this section for more
information.
4. When you have finished speaking the phone
number, the system repeats it back and an-
nounces the available commands.
5. Say: “Dial”
sC. The system acknowledges
the command and makes the call.
For additional command options, see “List of
voice commands” later in this section.
Receiving a call
When you hear the ring tone, press thebutton on the steering wheel.
Once the call has ended, press the
button
on the steering wheel.
NOTE:
If you do not wish to take the call when you
hear the ring tone, press the
button
on the steering wheel.
For additional command options, see “List of
voice commands” later in this section.
LIST OF VOICE COMMANDS
Main Menu
“Call”
“Phone Book”
“Memo Pad”
“Setup”
When you press and release thebutton on
the steering wheel, you can choose from the
commands on the Main Menu. The following
pages describe these commands and the com-
mands in each sub-menu.
Remember to wait for the tone before
speaking.
You can say “Help” to hear the list of commands
currently available any time the system is waiting
for a response.
If you want to end an action without completing it,
you can say “Cancel” or “Quit” at any time the
system is waiting for a response. The system will
end the VR session. Whenever the VR session is
cancelled, a double beep is played to indicate
you have exited the system.
If you want to go back to the previous command,
you can say “Go back” or “Correction” any time
the system is waiting for a response.When you get used to the menus in the system,
you can talk ahead by saying more than one
command at a time. For example, say, “Call five
five five one two one two” or “Memo pad record.”
Also, when you get used to the system re-
sponses, you can skip ahead to the tone by
pressing the
button on the steering wheel.
However, if you press thebutton when the
system is waiting for a response from you it will
end the VR session.
“Call”
Main Menu
“Call”
Name (speak name)
sA
Number (speak digits)sB
“Redial”sC
“Call Back”sD
Name (speak name)sA
If you have stored entries in the Phone Book, you
can dial a number associated with a name and
location.
See “Phone book” later in this section to learn
how to store entries.
Display screen, heater, air conditioner, audio and phone systems4-81
ZREVIEW COPYÐ2008 Quest(van)
Owners ManualÐUSA_English(nna)
06/29/07Ðdebbie
X
Page 244 of 376

When prompted by the system, say the name of
the phone book entry you wish to call. The system
acknowledges the name.
If there are multiple locations associated with the
name, the system asks you to choose the loca-
tion.
Once you have confirmed the name and location,
the system begins the call.
Number (speak digits)
sB
When prompted by the system, say the number
you wish to call. Refer to “How to say numbers”
and “Making a call by entering a phone number”
earlier in this section for more details.
“Redial”
sC
Use the Redial command to call the last number
that was dialed within the vehicle.
NOTE:
The system will not redial the last number
dialed by the handset keypad.
The system acknowledges the command, re-
peats the number and begins dialing.
If a redial number does not exist, the system
announces, “There is no number to redial” and
ends the VR session.“Call back”
sD
Use the Call Back command to dial the number of
the last incoming call within the vehicle.
The system acknowledges the command, re-
peats the number and begins dialing.
If a call back number does not exist, the system
announces, “There is no number to call back” and
ends the VR session.
During a call
During a call there are several command options
available. Press the
button on the steering
wheel to mute the receiving voice and enter com-
mands.
c“Help” — The system announces the avail-
able commands.
c“Go back/Correction” — The system an-
nounces “Go back,” ends the VR session
and returns to the call.
c“Cancel/Quit” — The system announces
“Cancel,” ends the VR session and returns
to the call.
c“Send/Enter/Call/Dial” — Use the Send
command to enter numbers during a call. For
example, if you were directed to dial an ex-
tension by an automated system:
Say: “Send one two three four.”The system acknowledges the command
and sends the tones associated with the
numbers. The system then ends the VR ses-
sion and returns to the call.
c“Transfer call” — Use the Transfer Call com-
mand to transfer the call from the BluetoothT
Hands-Free Phone System to the cellular
phone when privacy is desired.
The system announces, “Transfer call. Call
transferred to privacy mode.” The system
then ends the VR session.
You can also issue the Transfer Call com-
mand again to return to a hands-free call
through the vehicle.
c“Mute” — Use the Mute command to mute
your voice so the other party cannot hear it.
Use the mute command again to unmute
your voice.
NOTE:
If a call is ended or the cellular phone
network connection is lost while the Mute
feature is on, the Mute feature will be reset
to “off” for the next call so the other party
can hear your voice.
4-82Display screen, heater, air conditioner, audio and phone systems
ZREVIEW COPYÐ2008 Quest(van)
Owners ManualÐUSA_English(nna)
06/29/07Ðdebbie
X
Page 246 of 376

The system acknowledges the location.
The system will ask you to say a phone number or
to transfer a phone number stored in the cellular
phone’s memory.
Enter a phone number by voice command:
For example, say: “five five five one two one two.
” See “How to say numbers” earlier in this section
for more information.
To transfer a phone number stored in the cellular
phone’s memory:
Say9Transfer entry.9The system acknowledges
the command and asks you to initiate the transfer
from the phone handset. The new contact phone
number will be transferred from the cellular
phone via the BluetoothTcommunication link.
The transfer procedure varies according to each
cellular phone. See the cellular phone Owner’s
Manual for details. You can also visit
www.nissanusa.com/bluetooth for instructions
on transferring phone numbers from NISSAN
recommended cellular phones.
The system repeats the number and prompts you
for the next command. When you have finished
entering numbers, choose “Store.”
The system confirms the name, location and
number, then announces that the entry has been
stored. The system then ends the VR session.“Delete”sC
Use the Delete command to erase one entry from
the phone book, all entries from the phone book,
the current redial number or the current call back
number.
To delete entries from the phone book, say a
name or “All entries” when prompted by the sys-
tem.
The system acknowledges the command and
asks you to confirm the deletion.
To delete the current redial number or call back
number, say “redial number” or “call back num-
ber” when prompted by the system.
If a redial number or a call back number exists, the
system deletes them without asking for confirma-
tion.
If there is no number for the entry you are trying to
delete, the system says so and ends the VR
session.
“List names”
sD
Use the List Names command to hear all the
names and locations in the phone book.
The system recites the phone book entries but
does not include the actual phone numbers.
When the playback of the list is complete, the
system goes back to the main menu.You can stop the playback of the list at any time
by pressing the
button on the steering
wheel. The system ends the VR session.
“Memo pad”
Main Menu
“Memo Pad”
“Record”
sA
“Play”sB
“Delete”sC
The Memo Pad records a maximum of 6 voice
memos, each up to 20 seconds long.
“Record”
sA
The system announces “Recording” and a tone
sounds, signaling you to begin.
Speak the information you wish to record clearly.
When you are done, press the
orbutton on the steering wheel.
A tone sounds and the system announces
“Memo recorded.” Another tone sounds to end
the VR session.
If the memo pad is full, the system asks if you wish
to record over the oldest memo.
4-84Display screen, heater, air conditioner, audio and phone systems
ZREVIEW COPYÐ2008 Quest(van)
Owners ManualÐUSA_English(nna)
06/29/07Ðdebbie
X
Page 256 of 376

cThe low tire pressure warning light does not
automatically turn off when the tire pressure
is adjusted. After the tire is inflated to the
recommended pressure, the vehicle must be
driven at speeds above 16 MPH (25 km/h)
to activate the TPMS and turn off the low tire
pressure warning light. Use a tire pressure
gauge to check the tire pressure.
cTire pressure rises and falls depending on
the heat caused by the vehicle’s operation
and the outside temperature. Low outside
temperature can lower the temperature of
the air inside the tire which can cause a
lower tire inflation pressure. This may cause
the low tire pressure warning light to illumi-
nate. If the warning light illuminates in low
ambient temperature, check the tire pres-
sure for all four tires.
cYou can also check the pressure of all tires
(except the spare tire) on the display screen.
The order of the tire pressure figures dis-
played on the screen does not correspond
with the actual order of the tire position. See
“Tire pressure information” in the “Display
screen, heater, air conditioner and audio and
phone systems” section.For additional information, see “Low tire pressure
warning light” in the “Instruments and controls”
section and “Tire Pressure Monitoring System
(TPMS)” in the “In case of emergency” section.
WARNING
cIf the low tire pressure warning light
illuminates while driving, avoid sudden
steering maneuvers or abrupt braking,
reduce vehicle speed, pull off the road
to a safe location and stop the vehicle
as soon as possible. Driving with under-
inflated tires may permanently damage
the tires and increase the likelihood of
tire failure. Serious vehicle damage
could occur and may lead to an acci-
dent and could result in serious per-
sonal injury. Check the tire pressure for
all four tires. Adjust the tire pressure to
the recommended COLD tire pressure
shown on the Tire and Loading Informa-
tion label to turn the low tire pressure
warning light OFF. If you have a flat tire,
replace it with a spare tire as soon as
possible. (See “Flat tire” in the “In case
of emergency” section for changing a
flat tire.)cWhen a spare tire is mounted or a wheel
is replaced, tire pressure will not be
indicated, the TPMS will not function
and the low tire pressure warning light
will flash for approximately 1 minute.
The light will remain on after 1 minute.
Contact your NISSAN dealer as soon as
possible for tire replacement and/or
system resetting.
cReplacing tires with those not originally
specified by NISSAN could affect the
proper operation of the TPMS.
cDo not inject any tire liquid or aerosol
tire sealant into the tires, as this may
cause a malfunction of the tire pressure
sensors.
CAUTION
Do not place metalized film or any metal
parts (antenna, etc.) on the windows. This
may cause poor reception of the signals
from the tire pressure sensors, and the
TPMS will not function properly.
Some devices and transmitters may temporarily
interfere with the operation of the TPMS and
cause the low tire pressure warning light to illu-
minate.
5-4Starting and driving
ZREVIEW COPYÐ2008 Quest(van)
Owners ManualÐUSA_English(nna)
06/29/07Ðdebbie
X
Page 258 of 376

WARNING
Never remove or turn the key to the LOCK
position while driving. The steering wheel
will lock. This may cause the driver to lose
control of the vehicle and could result in
serious vehicle damage or personal injury.
AUTOMATIC TRANSMISSION
The ignition lock is designed so the key cannot be
turned to the LOCK position and removed until
the shift selector lever is moved to the P (Park)
position.
When removing the key from the ignition, make
sure the shift selector lever is in the P (Park)
position.
If the selector lever is not returned to P (Park)
position, the key cannot be moved to the LOCK
position.
When the key cannot be turned to the LOCK
position, proceed as follows to remove the key.1. Move the shift selector lever into the P (Park)
position.
2. Turn the ignition key slightly toward the ON
position.
3. Turn the key to the LOCK position.
4. Remove the key.
The shift selector lever is designed so it cannot
be moved out of P (Park) and into any of the other
gear positions if the ignition key is turned to OFF
position or if the key is removed from the switch.
The shift selector lever can be moved if the
ignition switch is in the ON position and the
foot brake pedal is depressed.
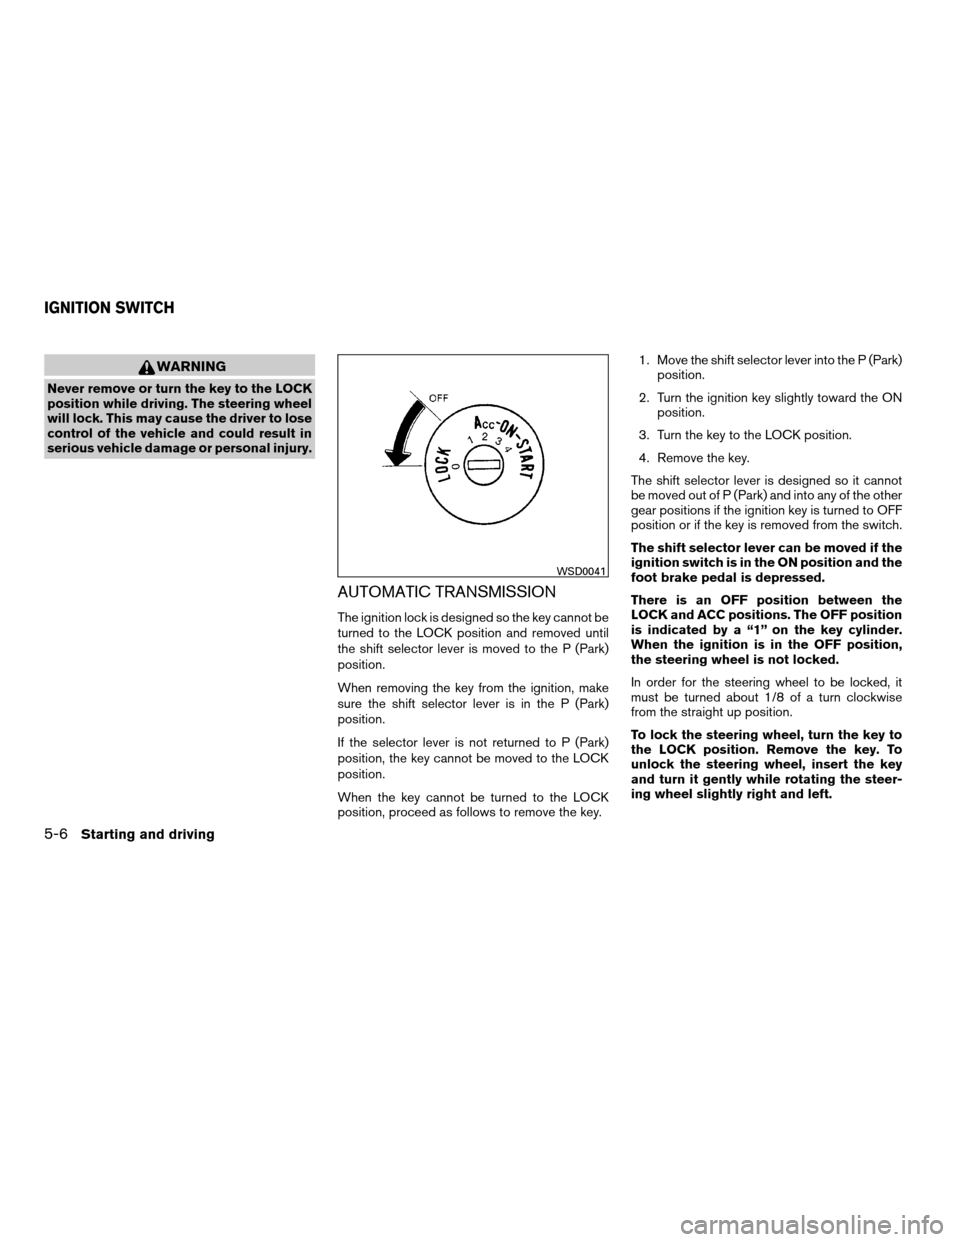
There is an OFF position between the
LOCK and ACC positions. The OFF position
is indicated by a “1” on the key cylinder.
When the ignition is in the OFF position,
the steering wheel is not locked.
In order for the steering wheel to be locked, it
must be turned about 1/8 of a turn clockwise
from the straight up position.
To lock the steering wheel, turn the key to
the LOCK position. Remove the key. To
unlock the steering wheel, insert the key
and turn it gently while rotating the steer-
ing wheel slightly right and left.
WSD0041
IGNITION SWITCH
5-6Starting and driving
ZREVIEW COPYÐ2008 Quest(van)
Owners ManualÐUSA_English(nna)
06/29/07Ðdebbie
X
Page 262 of 376

4. Move the shift selector lever to P (Park) or N
(Neutral) to restart the vehicle (P is pre-
ferred) . Move the shift selector lever to P
(Park) to park the vehicle and turn the igni-
tion key to the LOCK position to remove the
key.
P (Park):
CAUTION
Use the P (Park) position only when the
vehicle is completely stopped.
Use the P (Park) selector position when the ve-
hicle is parked or when starting the engine. Make
sure the vehicle is completely stopped.The
brake pedal should be depressed to move
the selector lever from N (Neutral) or any
drive position to P (Park) .Apply the parking
brake. When parking on a hill, apply the parking
brake first, then shift the selector lever into the P
(Park) position.
R (Reverse):
CAUTION
Use the R (Reverse) position only when
the vehicle is completely stopped.Use the R (Reverse) position to back up. Make
sure the vehicle is completely stopped before
selecting the R (Reverse) position.The brake
pedal must be depressed to move the se-
lector lever from P (Park) , N (Neutral) or
any drive position to R (Reverse) .
N (Neutral):
Neither forward nor reverse gear is engaged. The
engine can be started in this position. You may
shift to N (Neutral) and restart a stalled engine
while the vehicle is moving.
D (Drive):
Use this position for all normal forward driving.
L (Low gear):
Use this position when climbing steep hills slowly
or slow driving through deep snow, sand or mud,
or for maximum engine braking on steep downhill
grades.
Do not shift into the L position at speeds above
65 MPH (105 km/h) . Do not exceed 65 MPH
(105 km/h) in the L position.
Shift lock release
If the battery is discharged, the shift selector lever
may not be moved from the P (Park) position even
with the brake pedal depressed.
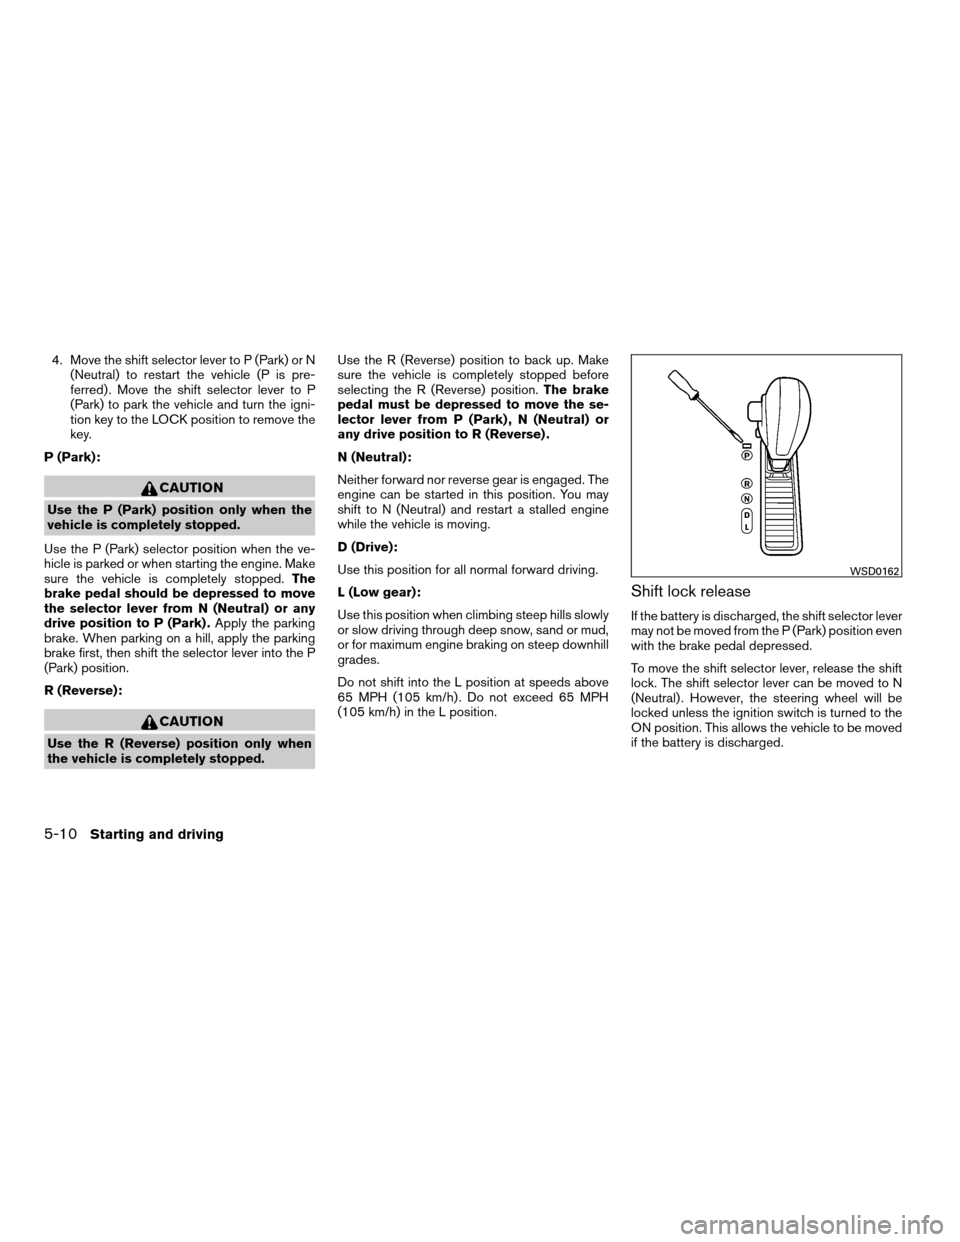
To move the shift selector lever, release the shift
lock. The shift selector lever can be moved to N
(Neutral) . However, the steering wheel will be
locked unless the ignition switch is turned to the
ON position. This allows the vehicle to be moved
if the battery is discharged.
WSD0162
5-10Starting and driving
ZREVIEW COPYÐ2008 Quest(van)
Owners ManualÐUSA_English(nna)
06/29/07Ðdebbie
X
Page 263 of 376

To push the shift lock release, complete the fol-
lowing procedure:
1. Turn the ignition key to the LOCK position
and remove the key
2. Apply the parking brake.
3. Remove the shift lock release cover as
shown.
4. Insert a small screwdriver in the shift lock
release slot and push down.
5. Move the shift selector lever to the N (Neu-
tral) position while holding down the shift
lock release.
6. Turn the key to the ON position to unlock the
steering wheel. Now the vehicle may be
moved to the desired location.
If the shift selector lever cannot be moved out of
P (Park) , have a NISSAN dealer check the auto-
matic transmission system as soon as possible.
WARNING
If the selector lever cannot be moved from
the P (Park) position while the engine is
running and the brake pedal is depressed,
the stop lights may not work. Malfunction-
ing stop lights could cause an accident
injuring yourself and others.
Accelerator downshift
— in D position —
For passing or hill climbing, depress the accel-
erator pedal to the floor. This shifts the transmis-
sion down into a lower gear, depending on the
vehicle speed.
Fail-safe
When the fail-safe operation occurs, please note
that the transmission will be locked in any of the
forward gears according to the condition.
If the vehicle is driven under extreme con-
ditions, such as excessive wheel spinning
and subsequent hard braking, the fail-safe
system may be activated. This will occur
even if all electrical circuits are functioning
properly. In this case, turn the ignition key
OFF and wait for 3 seconds. Then turn the
key back to the ON position. The vehicle
should return to its normal operating con-
dition. If it does not return to its normal
operating condition, have a NISSAN dealer
check the transmission and repair it if nec-
essary.
Overdrive switch
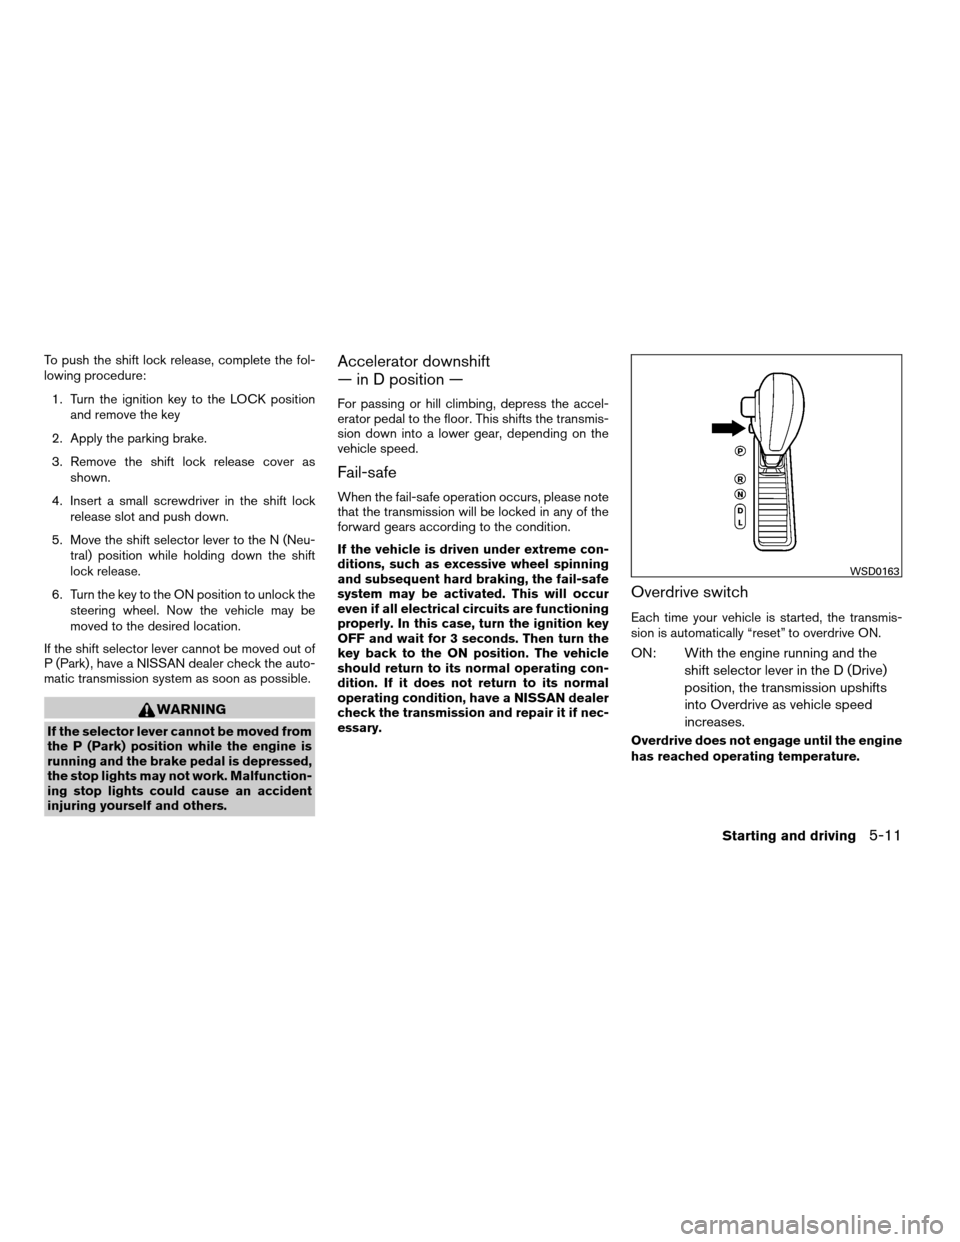
Each time your vehicle is started, the transmis-
sion is automatically “reset” to overdrive ON.
ON: With the engine running and the
shift selector lever in the D (Drive)
position, the transmission upshifts
into Overdrive as vehicle speed
increases.
Overdrive does not engage until the engine
has reached operating temperature.
WSD0163
Starting and driving5-11
ZREVIEW COPYÐ2008 Quest(van)
Owners ManualÐUSA_English(nna)
06/29/07Ðdebbie
X