2008 NISSAN QUEST maintenance reset
[x] Cancel search: maintenance resetPage 183 of 376

cThe ignition key is turned ON the next time
the vehicle will be driven.
To return to the previous display after the MAIN-
TENANCE NOTICE screen is displayed, press
the BACK button.
The MAINTENANCE NOTICE screen displays
each time the key is turned ON until one of the
following conditions are met:
c“Reset” key is selected.
c“Display Maintenance Notification” is set to
OFF.
cThe maintenance interval is set again.
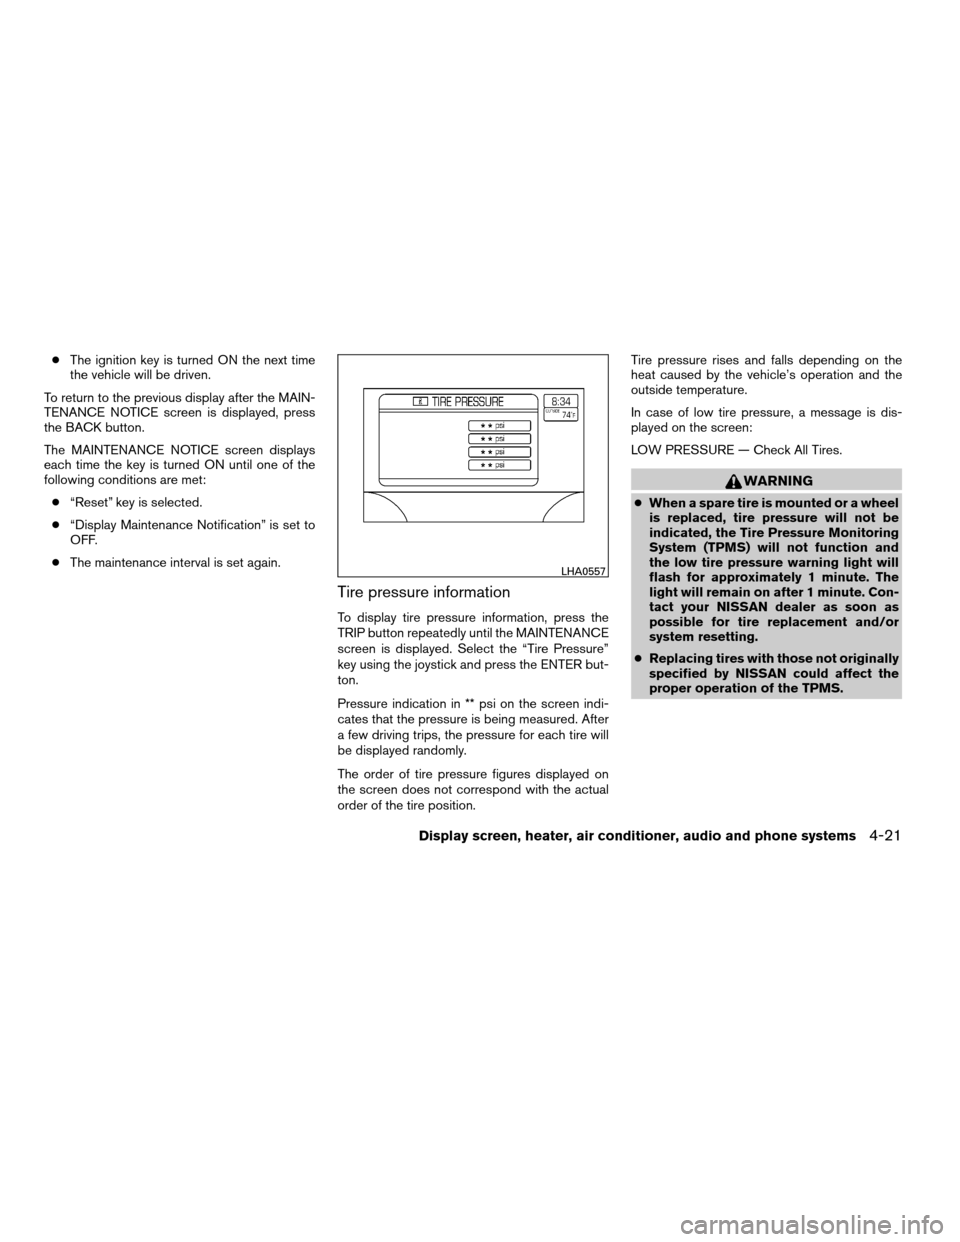
Tire pressure information
To display tire pressure information, press the
TRIP button repeatedly until the MAINTENANCE
screen is displayed. Select the “Tire Pressure”
key using the joystick and press the ENTER but-
ton.
Pressure indication in ** psi on the screen indi-
cates that the pressure is being measured. After
a few driving trips, the pressure for each tire will
be displayed randomly.
The order of tire pressure figures displayed on
the screen does not correspond with the actual
order of the tire position.Tire pressure rises and falls depending on the
heat caused by the vehicle’s operation and the
outside temperature.
In case of low tire pressure, a message is dis-
played on the screen:
LOW PRESSURE — Check All Tires.
WARNING
cWhen a spare tire is mounted or a wheel
is replaced, tire pressure will not be
indicated, the Tire Pressure Monitoring
System (TPMS) will not function and
the low tire pressure warning light will
flash for approximately 1 minute. The
light will remain on after 1 minute. Con-
tact your NISSAN dealer as soon as
possible for tire replacement and/or
system resetting.
cReplacing tires with those not originally
specified by NISSAN could affect the
proper operation of the TPMS.
LHA0557
Display screen, heater, air conditioner, audio and phone systems4-21
ZREVIEW COPYÐ2008 Quest(van)
Owners ManualÐUSA_English(nna)
06/29/07Ðdebbie
X
Page 333 of 376

Replacing wheels and tires
When replacing a tire, use the same size, tread
design, speed rating and load carrying capacity
as originally equipped. Recommended types and
sizes are shown in “Wheels and tires” in the
“Technical and consumer information” section of
this manual.
WARNING
cThe use of tires other than those recom-
mended or the mixed use of tires of
different brands, construction (bias,
bias-belted or radial) , or tread patterns
can adversely affect the ride, braking,
handling, ground clearance, body-to-
tire clearance, tire chain clearance,
speedometer calibration, headlight aim
and bumper height. Some of these ef-
fects may lead to accidents and could
result in serious personal injury.cIf the wheels are changed for any rea-
son, always replace with wheels which
have the same off-set dimension.
Wheels of a different off-set could
cause premature tire wear, degrade ve-
hicle handling characteristics and/or
interference with the brake
discs/drums. Such interference can
lead to decreased braking efficiency
and/or early brake pad/shoe wear. Re-
fer to “Wheels and tires” in the “Techni-
cal and consumer information” section
of this manual for wheel off-set
dimensions.
cWhen a spare tire is mounted or a wheel
is replaced, tire pressure will not be
indicated, the TPMS will not function
and the low tire pressure warning light
will flash for approximately 1 minute.
The light will remain on after 1 minute.
Contact your NISSAN dealer as soon as
possible for tire replacement and/or
system resetting.
cReplacing tires with those not originally
specified by NISSAN could affect the
proper operation of the TPMS.cDo not install a damaged or deformed
wheel or tire even if it has been re-
paired. Such wheels or tires could have
structural damage and could fail with-
out warning.
cThe use of retread tires is not
recommended.
cFor additional information regarding
tires, refer to “Important Tire Safety In-
formation” (US) or “Tire Safety Informa-
tion” (Canada) in the Warranty Informa-
tion Booklet.
Wheel balance
Unbalanced wheels may affect vehicle handling
and tire life. Even with regular use, wheels can get
out of balance. Therefore, they should be bal-
anced as required.
Wheel balance service should be per-
formed with the wheels off the vehicle.
Spin balancing the wheels on the vehicle
could lead to mechanical damage.
cFor additional information regarding
tires, refer to “Important Tire Safety
Information” (US) or “Tire Safety Infor-
mation” (Canada) in the Warranty In-
formation Booklet .
Maintenance and do-it-yourself8-39
ZREVIEW COPYÐ2008 Quest(van)
Owners ManualÐUSA_English(nna)
06/29/07Ðdebbie
X
Page 359 of 376

If you believe that your vehicle has a de-
fect which could cause a crash or could
cause injury or death, you should immedi-
ately inform the National Highway Traffic
Safety Administration (NHTSA) in addi-
tion to notifying NISSAN.
If NHTSA receives similar complaints, it
may open an investigation, and if it finds
that a safety defect exists in a group of
vehicles, it may order a recall and remedy
campaign. However, NHTSA cannot be-
come involved in individual problems be-
tween you, your dealer, or NISSAN.
To contact NHTSA, you may call the Ve-
hicle Safety Hotline toll-free at 1-888-
327-4236 (TTY: 1-800-424-9153); go
to http://www.safercar.gov; or write to:
Administrator, NHTSA, 400 Seventh
Street, SW., Washington, D.C. 20590.
You can also obtain other information
about motor vehicle safety from
http://www.safercar.gov.
You may notify NISSAN by contacting our
Consumer Affairs Department, toll-free, at
1-800-NISSAN-1.Due to legal requirements in some states and
Canadian Provinces, your vehicle may be re-
quired to be in what is called the “ready condi-
tion” for an Inspection/Maintenance (I/M) test of
the emission control system.
The vehicle is set to the “ready condition” when it
is driven through certain driving patterns. Usually,
the ready condition can be obtained by ordinary
usage of the vehicle.
If a powertrain system component is repaired or
the battery is disconnected, the vehicle may be
reset to a “not ready” condition. Before taking the
I/M test, check the vehicle’s
inspection/maintenance test readiness condi-
tion. Turn the ignition switch ON without starting
the engine. If the Malfunction Indicator Light
(MIL) comes on steady for 20 seconds and then
blinks for 10 seconds , the I/M test condition is
9not ready9. If the MIL does not blink after 20
seconds, the I/M test condition is9ready.9If the
MIL indicates the vehicle is in a9not ready9con-
dition, drive the vehicle through the following
pattern to set the vehicle to the ready condition. If
you cannot or do not want to perform the driving
pattern, a NISSAN dealer can conduct it for you.WARNING
Always drive the vehicle in a safe and
prudent manner according to traffic con-
ditions and obey all traffic laws.
1. Start the engine when the engine coolant
temperature gauge needle points to C. Al-
low the engine to idle until the gauge needle
points between the C and H (normal oper-
ating temperature) .
2. Accelerate the vehicle to 55 MPH (88
km/h) , then quickly release the accelerator
pedal completely and keep it released for at
least 10 seconds.
3. Quickly depress the accelerator pedal for a
moment, then drive the vehicle at a speed of
53 - 60 MPH (86 - 96 km/h) for at least 9
minutes.
4. Stop the vehicle.
5. Accelerate the vehicle to 35 MPH (55 km/h)
and maintain the speed for 20 seconds.
6. Repeat steps 4 through 5 at least 10 times.
7. Accelerate the vehicle to 55 MPH (88 km/h)
and maintain the speed for at least 3 min-
utes.
REPORTING SAFETY DEFECTS (US
only)READINESS FOR INSPECTION/
MAINTENANCE (I/M) TEST
Technical and consumer information9-25
ZREVIEW COPYÐ2008 Quest(van)
Owners ManualÐUSA_English(nna)
06/29/07Ðdebbie
X
Page 366 of 376

Keyless entry system
(See remote keyless entry system).......3-9
L
Labels
Air conditioner specification label.....9-11
C.M.V.S.S. certification label........9-10
Emission control information label.....9-10
Engine serial number............9-10
F.M.V.S.S. certification label........9-10
Vehicle identification number (VIN) plate . .9-9
Warning labels (for SRS)..........1-66
Language setting..........4-6, 4-15, 4-25
LATCH (Lower Anchors and Tethers for CHildren)
System......................1-28
License plate
Installing the license plate.........9-11
Lift gate.....................3-14
Lift gate release.................3-18
Light
Air bag warning light.........1-66, 2-10
Brake light (See stop light).........8-26
Bulb check/instrument panel........2-7
Bulb replacement..............8-26
Charge warning light.............2-8
Cornering light...............2-23
Fog light switch...............2-22
Headlight and turn signal switch......2-18
Headlight control switch..........2-18
Headlights..................8-24
Light bulbs..................8-24
Low tire pressure warning light.......2-9
Low washer fluid warning light.......2-10
Passenger air bag and status light.....1-60Personal lights...............2-42
Security indicator light...........2-12
Warning/indicator lights and audible
reminders...................2-7
Lights
Map lights..................2-43
Lights on demand switch............2-41
Lock
Child safety sliding door lock........3-9
Door locks..................3-3
Fuel-filler door lock opener lever......3-19
Glove box lock...............2-30
Lift gate release...............3-18
Power door locks...............3-5
Low fuel warning light..............2-9
Low tire pressure warning light.........2-9
Low washer fluid warning light.........2-10
Luggage (See vehicle loading information) . .9-12
M
Main ON/OFF switch
(for power doors).............3-6, 3-15
Maintenance
Changing the maintenance
interval.................4-9, 4-20
Displaying the maintenance notice
reminder...............4-10, 4-20
General maintenance............8-2
Inside the vehicle...............8-3
Maintenance precautions..........8-5
Outside the vehicle..............8-2
Resetting the maintenance
interval................4-10, 4-20
Seat belt maintenance...........1-25Setting.................4-9, 4-19
Under the hood and vehicle.........8-4
Malfunction indicator light...........2-11
Manual front seat adjustment..........1-2
Manual vent windows..............2-39
Map lights....................2-43
Map pocket...................2-30
Meters and gauges................2-3
Instrument brightness control.......2-21
Mirror
Automatic anti-glare inside mirror.....3-23
Inside mirror.................3-23
Vanity mirror.................3-22
Moonroof....................2-40
N
NISSAN vehicle immobilizer
system................2-15, 3-2, 5-7
O
Octane rating (See fuel octane rating).....9-4
Odometer.....................2-4
Oil
Capacities and recommended
fuel/lubricants.................9-2
Changing engine oil.............8-9
Changing engine oil filter..........8-10
Checking engine oil level..........8-8
Engine oil...................8-8
Engine oil and oil filter recommendation . .9-5
Engine oil viscosity..............9-5
Overdrive switch................5-11
10-4
ZREVIEW COPYÐ2008 Quest(van)
Owners ManualÐUSA_English(nna)
06/29/07Ðdebbie
X
Page 367 of 376

Overheat
If your vehicle overheats...........6-9
Owner’s manual order form..........9-27
Owner’s manual/service manual order
information....................9-27
P
Parking
Parking brake operation..........5-12
Parking/parking on hills...........5-16
Pedal position adjustment...........3-21
Personal lights.................2-42
Phone, BluetoothThands-free system. . . .4-75
Power
Front seat adjustment............1-4
Power door locks...............3-5
Power outlet.................2-26
Power steering fluid.............8-11
Power steering system...........5-17
Power vent windows............2-38
Power windows...............2-36
Precautions
Maintenance precautions..........8-5
Precautions on child
restraints............1-26, 1-41, 1-47
Precautions on seat belt usage......1-15
Precautions on supplemental restraint
system....................1-52
Precautions when starting and driving . . .5-2
Pre-tensioner seat belt system.........1-64
Programmable features......4-5, 4-11, 4-22
Push starting...................6-9R
Radio
Car phone or CB radio...........4-75
Compact Disc (CD) changer.......4-59
FM/AM/SAT radio with compact disc (CD)
changer...................4-56
FM/AM/SAT radio with compact disc (CD)
player....................4-50
Rear audio controls.............4-64
Steering wheel audio control switch. . . .4-62
Readiness for inspection maintenance (I/M)
test........................9-25
Rear audio controls...............4-64
Rear center seat belt..............1-22
Rear seat air conditioner............4-42
Rear sonar system...............5-21
Rear sonar system off switch.........2-25
Rear view monitor................4-28
Rear window and outside mirror defroster
switch......................2-18
Rear window wiper and washer switches . . .2-17
Recorders
Event data..................9-26
Refrigerant recommendation..........9-6
Registering your vehicle in another country. . .9-9
Remote controller (See DVD entertainment
system).....................4-67
Remote keyless entry system..........3-9
Reporting safety defects (US only)......9-25
Resetting average speed............4-4
Resetting the fuel economy.....4-4, 4-9, 4-19
Resetting trip 1 and trip 2.........4-8, 4-18S
Safety
Child safety sliding door lock........3-9
Child seat belts........1-26, 1-41, 1-47
Reporting safety defects (US only). . . .9-25
Screen (See DVD entertainment system) . . .4-67
Seat adjustment
Front manual seat adjustment........1-2
Front power seat adjustment........1-4
Second row captain’s chair.........1-6
Third row bench seat.........1-7, 1-12
Seat belt
Child safety.................1-17
Infants and small children.........1-18
Injured Person................1-19
Larger children...............1-18
Precautions on seat belt usage......1-15
Pregnant women..............1-19
Pre-tensioner seat belt system.......1-64
Rear center seat belt............1-22
Seat belt extenders.............1-25
Seat belt maintenance...........1-25
Seat belts..................1-15
Shoulder belt height adjustment......1-24
Three-point type with retractor.......1-19
Seat belt warning light.............2-10
Seatback pockets................2-31
Seats
Adjustment..................1-2
Automatic drive positioner.........3-25
Front seats..................1-2
Heated seats................2-24
Manual front seat adjustment........1-2
Second row captain’s chair adjustment.....1-6
10-5
ZREVIEW COPYÐ2008 Quest(van)
Owners ManualÐUSA_English(nna)
06/29/07Ðdebbie
X