2008 NISSAN QASHQAI Ignition
[x] Cancel search: IgnitionPage 196 of 297
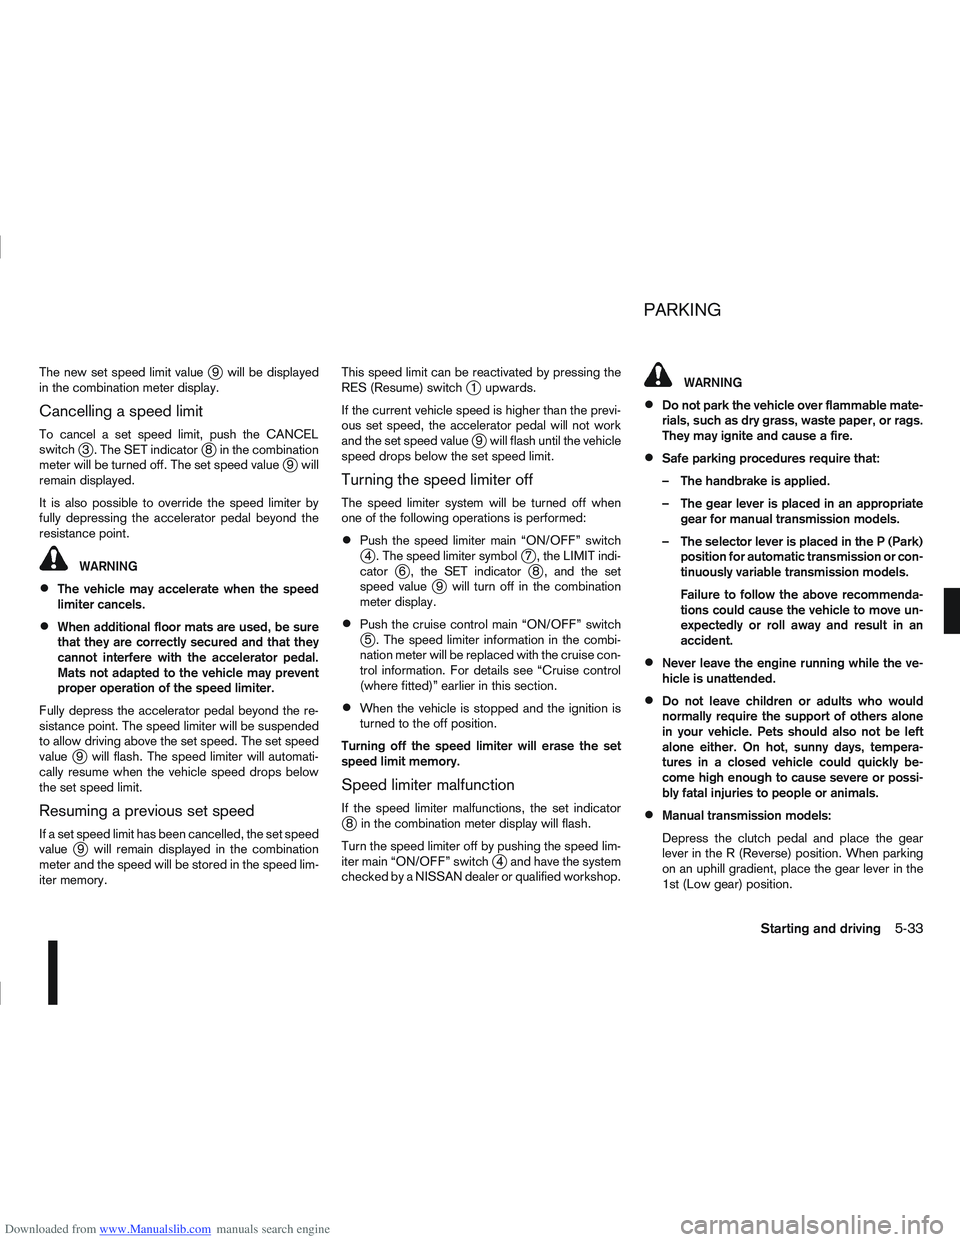
Downloaded from www.Manualslib.com manuals search engine The new set speed limit valuej9 will be displayed
in the combination meter display.
Cancelling a speed limit
To cancel a set speed limit, push the CANCEL
switchj3 . The SET indicatorj8 in the combination
meter will be turned off. The set speed valuej9 will
remain displayed.
It is also possible to override the speed limiter by
fully depressing the accelerator pedal beyond the
resistance point.
WARNING
The vehicle may accelerate when the speed
limiter cancels.
When additional floor mats are used, be sure
that they are correctly secured and that they
cannot interfere with the accelerator pedal.
Mats not adapted to the vehicle may prevent
proper operation of the speed limiter.
Fully depress the accelerator pedal beyond the re-
sistance point. The speed limiter will be suspended
to allow driving above the set speed. The set speed
value
j9 will flash. The speed limiter will automati-
cally resume when the vehicle speed drops below
the set speed limit.
Resuming a previous set speed
If a set speed limit has been cancelled, the set speed
valuej9 will remain displayed in the combination
meter and the speed will be stored in the speed lim-
iter memory. This speed limit can be reactivated by pressing the
RES (Resume) switch
j1 upwards.
If the current vehicle speed is higher than the previ-
ous set speed, the accelerator pedal will not work
and the set speed value
j9 will flash until the vehicle
speed drops below the set speed limit.
Turning the speed limiter off
The speed limiter system will be turned off when
one of the following operations is performed:
Push the speed limiter main “ON/OFF” switchj4 . The speed limiter symbolj7 , the LIMIT indi-
catorj6 , the SET indicatorj8 , and the set
speed valuej9 will turn off in the combination
meter display.
Push the cruise control main “ON/OFF” switchj5 . The speed limiter information in the combi-
nation meter will be replaced with the cruise con-
trol information. For details see “Cruise control
(where fitted)” earlier in this section.
When the vehicle is stopped and the ignition is
turned to the off position.
Turning off the speed limiter will erase the set
speed limit memory.
Speed limiter malfunction
If the speed limiter malfunctions, the set indicatorj8 in the combination meter display will flash.
Turn the speed limiter off by pushing the speed lim-
iter main “ON/OFF” switch
j4 and have the system
checked by a NISSAN dealer or qualified workshop.
WARNING
Do not park the vehicle over flammable mate-
rials, such as dry grass, waste paper, or rags.
They may ignite and cause a fire.
Safe parking procedures require that:
– The handbrake is applied.
– The gear lever is placed in an appropriate gear for manual transmission models.
– The selector lever is placed in the P (Park) position for automatic transmission or con-
tinuously variable transmission models.
Failure to follow the above recommenda-
tions could cause the vehicle to move un-
expectedly or roll away and result in an
accident.
Never leave the engine running while the ve-
hicle is unattended.
Do not leave children or adults who would
normally require the support of others alone
in your vehicle. Pets should also not be left
alone either. On hot, sunny days, tempera-
tures in a closed vehicle could quickly be-
come high enough to cause severe or possi-
bly fatal injuries to people or animals.
Manual transmission models:
Depress the clutch pedal and place the gear
lever in the R (Reverse) position. When parking
on an uphill gradient, place the gear lever in the
1st (Low gear) position.
PARKING
Starting and driving5-33
Page 198 of 297
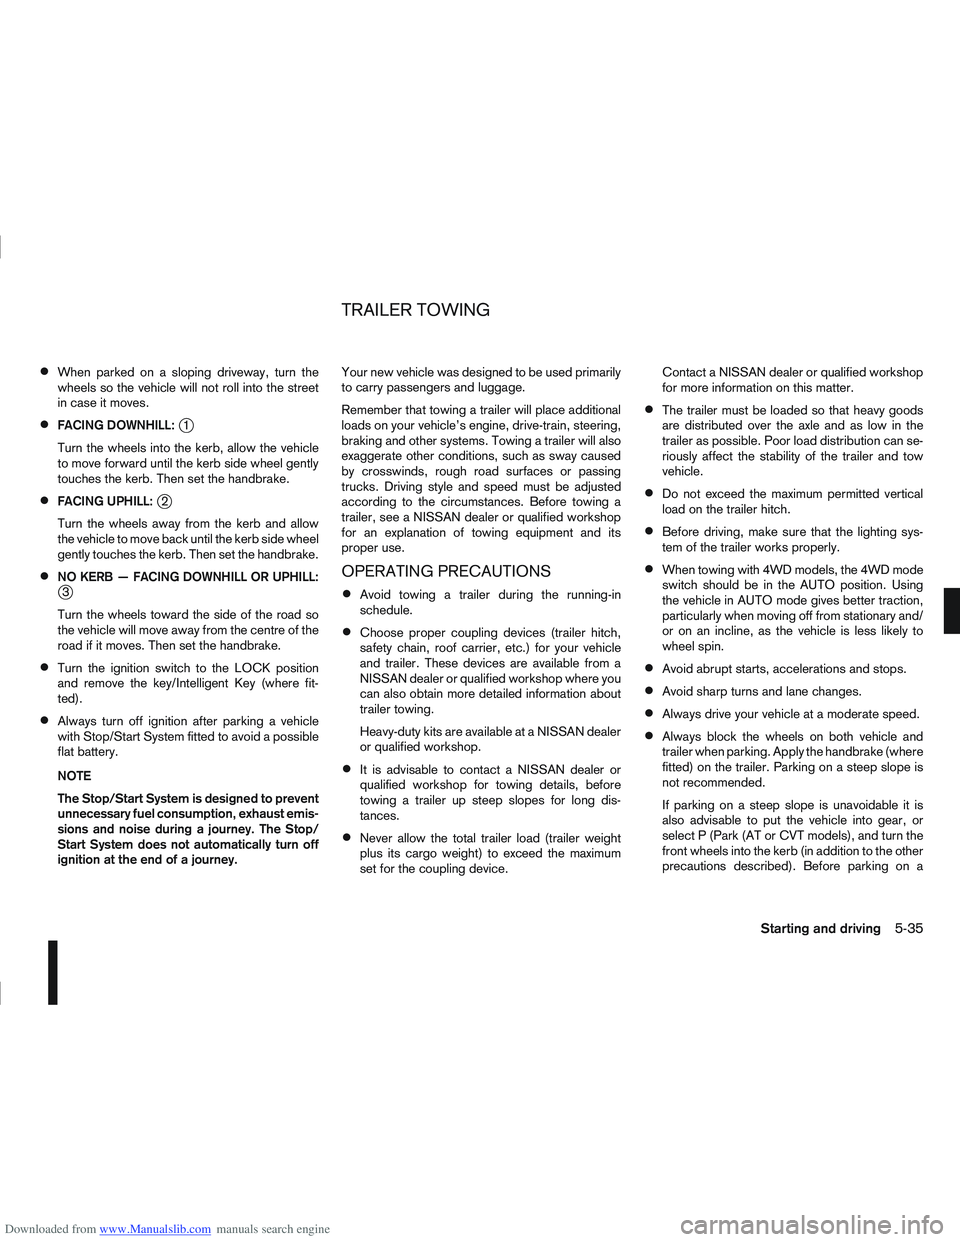
Downloaded from www.Manualslib.com manuals search engine When parked on a sloping driveway, turn the
wheels so the vehicle will not roll into the street
in case it moves.
FACING DOWNHILL:j1
Turn the wheels into the kerb, allow the vehicle
to move forward until the kerb side wheel gently
touches the kerb. Then set the handbrake.
FACING UPHILL:j2
Turn the wheels away from the kerb and allow
the vehicle to move back until the kerb side wheel
gently touches the kerb. Then set the handbrake.
NO KERB — FACING DOWNHILL OR UPHILL:j3
Turn the wheels toward the side of the road so
the vehicle will move away from the centre of the
road if it moves. Then set the handbrake.
Turn the ignition switch to the LOCK position
and remove the key/Intelligent Key (where fit-
ted).
Always turn off ignition after parking a vehicle
with Stop/Start System fitted to avoid a possible
flat battery.
NOTE
The Stop/Start System is designed to prevent
unnecessary fuel consumption, exhaust emis-
sions and noise during a journey. The Stop/
Start System does not automatically turn off
ignition at the end of a journey. Your new vehicle was designed to be used primarily
to carry passengers and luggage.
Remember that towing a trailer will place additional
loads on your vehicle’s engine, drive-train, steering,
braking and other systems. Towing a trailer will also
exaggerate other conditions, such as sway caused
by crosswinds, rough road surfaces or passing
trucks. Driving style and speed must be adjusted
according to the circumstances. Before towing a
trailer, see a NISSAN dealer or qualified workshop
for an explanation of towing equipment and its
proper use.
OPERATING PRECAUTIONS
Avoid towing a trailer during the running-in
schedule.
Choose proper coupling devices (trailer hitch,
safety chain, roof carrier, etc.) for your vehicle
and trailer. These devices are available from a
NISSAN dealer or qualified workshop where you
can also obtain more detailed information about
trailer towing.
Heavy-duty kits are available at a NISSAN dealer
or qualified workshop.
It is advisable to contact a NISSAN dealer or
qualified workshop for towing details, before
towing a trailer up steep slopes for long dis-
tances.
Never allow the total trailer load (trailer weight
plus its cargo weight) to exceed the maximum
set for the coupling device. Contact a NISSAN dealer or qualified workshop
for more information on this matter.
The trailer must be loaded so that heavy goods
are distributed over the axle and as low in the
trailer as possible. Poor load distribution can se-
riously affect the stability of the trailer and tow
vehicle.
Do not exceed the maximum permitted vertical
load on the trailer hitch.
Before driving, make sure that the lighting sys-
tem of the trailer works properly.
When towing with 4WD models, the 4WD mode
switch should be in the AUTO position. Using
the vehicle in AUTO mode gives better traction,
particularly when moving off from stationary and/
or on an incline, as the vehicle is less likely to
wheel spin.
Avoid abrupt starts, accelerations and stops.
Avoid sharp turns and lane changes.
Always drive your vehicle at a moderate speed.
Always block the wheels on both vehicle and
trailer when parking. Apply the handbrake (where
fitted) on the trailer. Parking on a steep slope is
not recommended.
If parking on a steep slope is unavoidable it is
also advisable to put the vehicle into gear, or
select P (Park (AT or CVT models), and turn the
front wheels into the kerb (in addition to the other
precautions described). Before parking on a
TRAILER TOWING
Starting and driving5-35
Page 201 of 297
Downloaded from www.Manualslib.com manuals search engine When leaving your vehicle unoccupied:
Always remove the ignition key or Intelligent Key
(where fitted) and take it with you – even in your
own garage.
Close all windows completely and lock all doors.
Always park your vehicle where it can be seen.
At night, park in a well lit area.
If the vehicle is equipped with an alarm or immo-
bilization device, use it – even for short periods.
Do not leave children and pets in the vehicle
unattended.
Do not leave valuables on view to tempt a thief.
Always take your valuables with you. If you must
leave something in your vehicle, lock it in the lug-
gage compartment or hide it out of sight.
Do not leave the vehicle documents in your ve-
hicle. In the unfortunate event of your vehicle
being stolen, the documents will only help a thief
to sell the vehicle.
Do not leave articles on a roof rack as they are
particularly vulnerable. If possible, remove them
from the rack and lock them inside the vehicle.
Do not leave the spare key or Intelligent Key in
the vehicle – keep it in a safe place at home.
Do not leave a note of your vehicle’s key number
in the vehicle. A thief may break into the vehicle,
note the key number and return with a new key
and drive the vehicle.
WARNING
If the Electrically Power Assisted Steering
warning light (EPAS) illuminates while driv-
ing, the power assist for steering will be dis-
abled. Greater steering efforts are required to
operate the steering wheel, especially in
sharp turns and at low speed. Stop the ve-
hicle as soon as safely possible and contact a
NISSAN dealer or qualified workshop for fur-
ther assistance.
In certain circumstances, factors external to
the EPAS system may contribute to the illumi-
nation of the warning light. If the warning light
illuminates, stop the vehicle as soon as safely
possible if driving. Turn the ignition switch to
the “OFF” position and wait for approximately
20 seconds, then turn the ignition switch to
the ON position again. If the light remains illu-
minated, we recommend you to contact a
NISSAN dealer or qualified workshop. See
“Warning/indicator lights and audible
reminders” in the “2. Instruments and
controls” section for further details regarding
the EPAS warning light.
The EPAS (Electrically Power Assisted Steering)
system is designed to assist steering.
The steering may appear to feel slightly stiff follow-
ing parking manoeuvres including a great deal of
steering. This is not a malfunction; it is caused by a
control system designed to prevent the motor from overheating. No servicing is required. The EPAS
system will return to normal operation the next time
the vehicle is driven.
Similarly, the EPAS system may not provide full as-
sistance during periods of reduced battery voltage
but will recover once normal battery voltage is re-
stored.
If the EPAS warning light comes on while the engine
is running, it may indicate that the EPAS system is
not working properly. As result greater steering ef-
forts are required to steer the steering wheel, espe-
cially in sharp turns and at low speeds. Have the
system checked by a NISSAN dealer or qualified
workshop as soon as possible.
NOTE
Incorrectly inflated tyres can lead to poor steer-
ing ability and make the driver suspect a steering
problem: keep the vehicle’s tyres inflated to the
correct pressure at all times.
CAUTION
Any malfunction or accident that could have dam-
aged the steering components (including actual
or attempted theft damage) should be reported
to a NISSAN dealer or qualified workshop.
VEHICLE SECURITY
POWER STEERING SYSTEM
5-38Starting and driving
Page 216 of 297
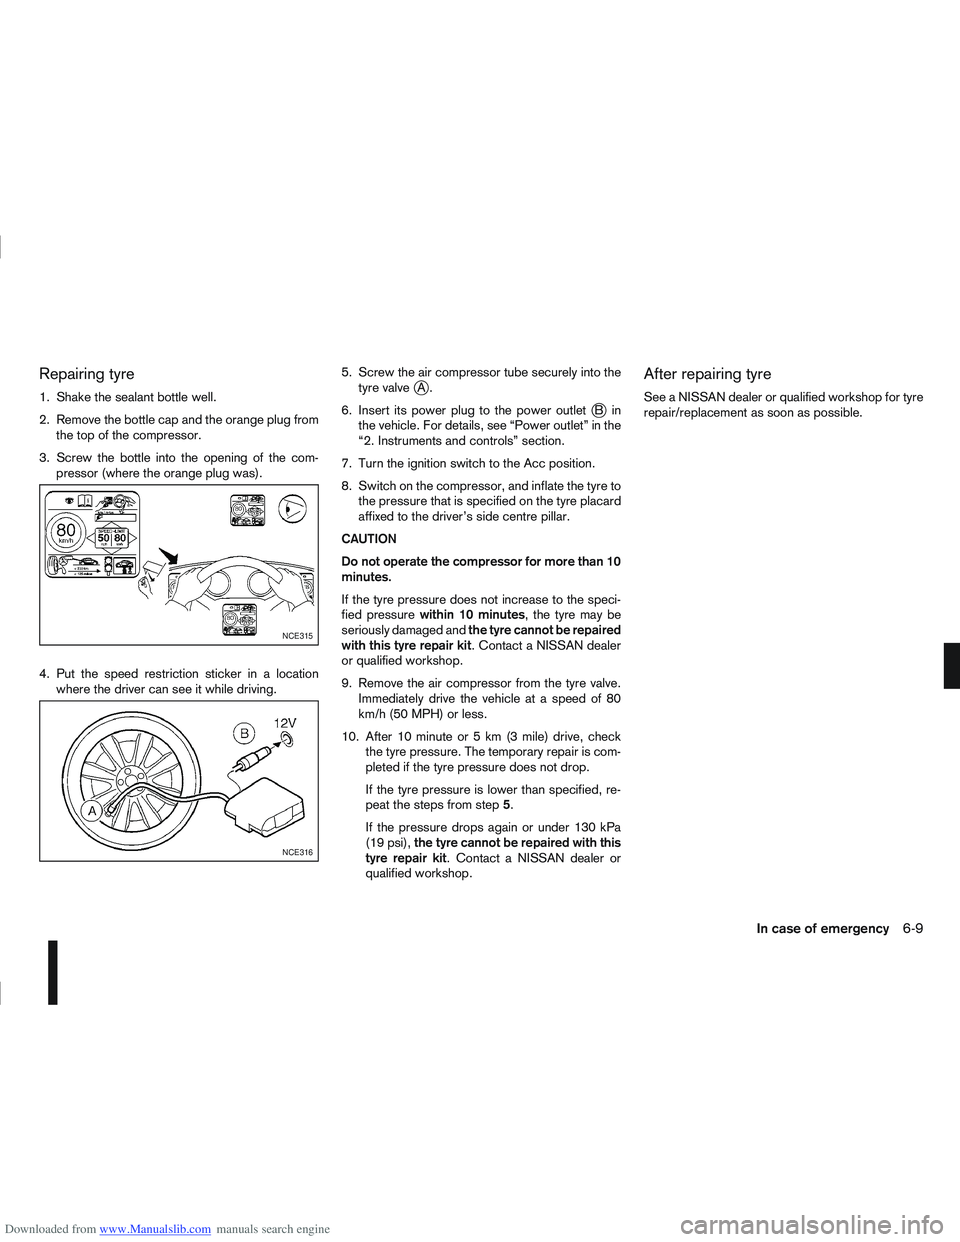
Downloaded from www.Manualslib.com manuals search engine Repairing tyre
1. Shake the sealant bottle well.
2. Remove the bottle cap and the orange plug fromthe top of the compressor.
3. Screw the bottle into the opening of the com- pressor (where the orange plug was).
4. Put the speed restriction sticker in a location where the driver can see it while driving. 5. Screw the air compressor tube securely into the
tyre valvejA.
6. Insert its power plug to the power outlet
jBin
the vehicle. For details, see “Power outlet” in the
“2. Instruments and controls” section.
7. Turn the ignition switch to the Acc position.
8. Switch on the compressor, and inflate the tyre to the pressure that is specified on the tyre placard
affixed to the driver’s side centre pillar.
CAUTION
Do not operate the compressor for more than 10
minutes.
If the tyre pressure does not increase to the speci-
fied pressure within 10 minutes , the tyre may be
seriously damaged and the tyre cannot be repaired
with this tyre repair kit . Contact a NISSAN dealer
or qualified workshop.
9. Remove the air compressor from the tyre valve. Immediately drive the vehicle at a speed of 80
km/h (50 MPH) or less.
10. After 10 minute or 5 km (3 mile) drive, check the tyre pressure. The temporary repair is com-
pleted if the tyre pressure does not drop.
If the tyre pressure is lower than specified, re-
peat the steps from step 5.
If the pressure drops again or under 130 kPa
(19 psi), the tyre cannot be repaired with this
tyre repair kit. Contact a NISSAN dealer or
qualified workshop.
After repairing tyre
See a NISSAN dealer or qualified workshop for tyre
repair/replacement as soon as possible.
NCE315
NCE316
In case of emergency6-9
Page 217 of 297
Downloaded from www.Manualslib.com manuals search engine WARNING
Incorrect jump-starting can lead to a battery
explosion. The battery explosion may result in
severe injury or death. It may also result in
damage to the vehicle. Be sure to follow the
instructions in this section.
Explosive hydrogen gas is always present in
the vicinity of the battery. Keep all sparks and
flames away from the battery.
Always wear suitable eye protection glasses
and remove rings, bracelets, and any other
jewellery whenever working on or near a bat-
tery.
Never lean over the battery while jump-start-
ing.
Never allow battery fluid to come into contact
with eyes, skin, clothes or the vehicle’s
painted surfaces. Battery fluid is a corrosive
sulphuric acid which can cause severe burns.
If the fluid comes into contact with anything,
immediately flush the contacted area with
plenty of water.
Keep the battery out of the reach of children.
The booster battery must be rated at 12 volts.
Use of an incorrectly rated battery will dam-
age your vehicle.
Never attempt to jump-start a frozen battery.
It could explode and cause serious injury.
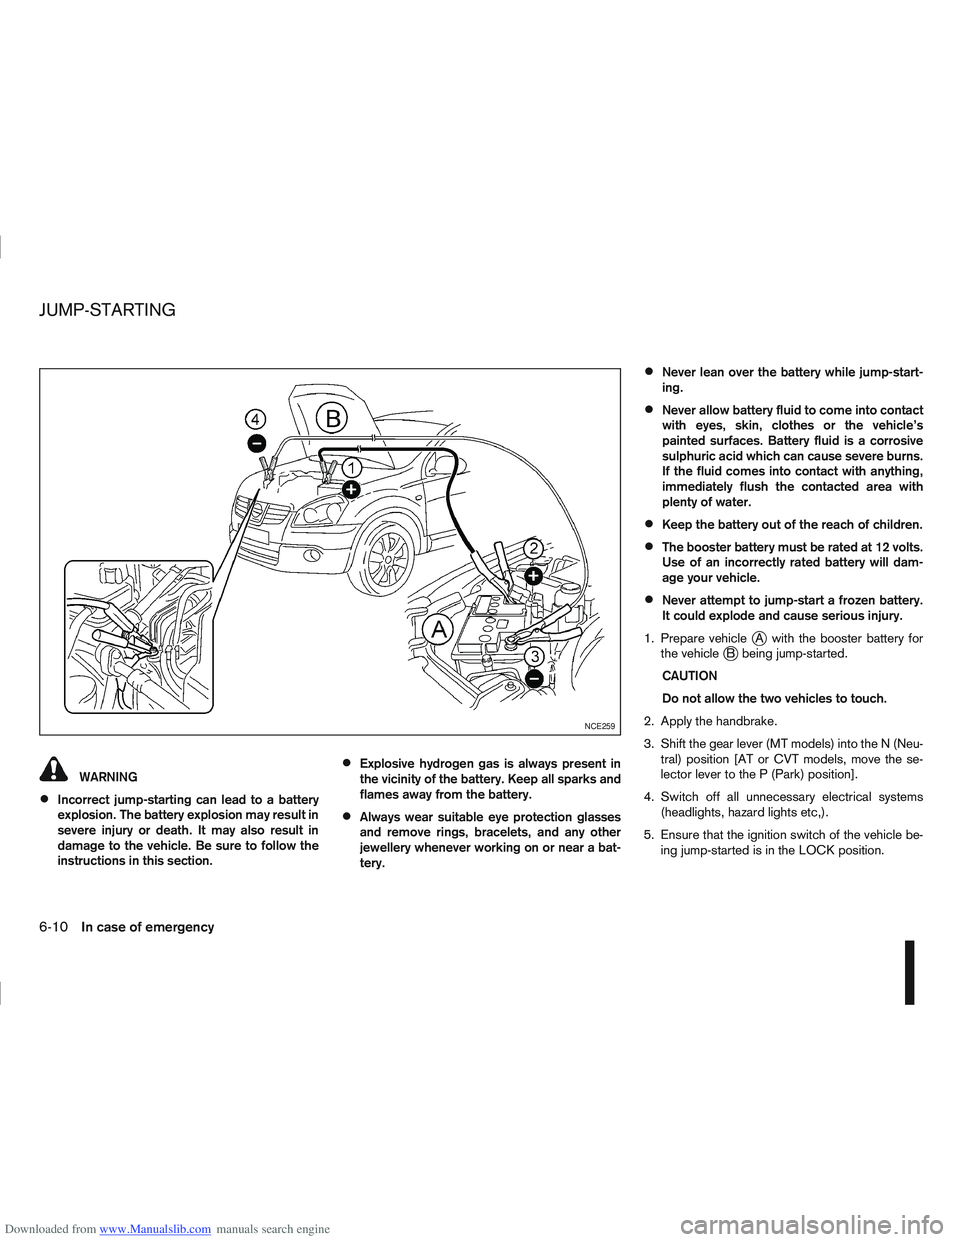
1. Prepare vehicle
jA with the booster battery for
the vehiclejB being jump-started.
CAUTION
Do not allow the two vehicles to touch.
2. Apply the handbrake.
3. Shift the gear lever (MT models) into the N (Neu- tral) position [AT or CVT models, move the se-
lector lever to the P (Park) position].
4. Switch off all unnecessary electrical systems (headlights, hazard lights etc,).
5. Ensure that the ignition switch of the vehicle be- ing jump-started is in the LOCK position.
NCE259
JUMP-STARTING
6-10In case of emergency
Page 218 of 297
Downloaded from www.Manualslib.com manuals search engine 6. Open the bonnet. For details, see “Bonnetrelease” in the “3. Pre-driving checks and
adjustments” section.
7. Remove the vent caps (where fitted) on the bat- tery and cover the battery with an old cloth.
8. Connect the jump leads in the sequence (
j1 →j2→j3→j4 ) as illustrated.
CAUTION
Always connect positivej+ to positivej+
and negativej- to body ground (for ex-
ample, engine lift bracket, etc.) – not to
the battery’s negative
j-.
An incorrect connection could damage the
charging system.
Be sure that the jumper cables do not
touch moving parts in the engine compart-
ment.
Be careful not to allow contact between
the positive jump lead connector and the
vehicle or the negative lead during con-
nection and disconnection.
9. Start the engine of the other vehicle
jA and let it
run for a few minutes. Keep the engine speed at
about 2,000 rpm.
10. Start the engine of your vehicle
jB in the nor-
mal way. CAUTION
Do not keep the starter motor engaged for
more than 10 seconds. If the engine does not
start immediately, turn the ignition switch to
“OFF” and wait 10 seconds before trying
again.
11. After starting the engine of your vehicle, care- fully disconnect the negative lead and then the
positive lead (
j4→j3→j2→j1).
12. Remove and dispose of the cloth that was used to cover the vent holes as it may be contami-
nated with corrosive acid.
13. Install the vent caps (where fitted).
14. Close the bonnet.
NOTE
For models which incorporate the Stop/Start
System:
Ensure that the battery fitted is the special
battery that is enhanced with regard to the
charge-discharge capacity and life perfor-
mance. Avoid using any other battery for the
Stop/Start System, as this may cause early
deterioration of the battery or a malfunction
of the Stop/Start System. It is recommended
that a Genuine NISSAN battery is fitted. For
more information, contact a NISSAN dealer or
qualified workshop
If the battery terminal is disconnected (for bat-
tery replacement, etc.) and then reconnected,
there may be some delay before the Stop/
Start System reactivates.
In case of emergency6-11
Page 221 of 297
Downloaded from www.Manualslib.com manuals search engine RECOMMENDED TOWING FOR
TWO-WHEEL DRIVE (2WD) MODELS
CAUTION
NEVER tow automatic transmission (AT) or con-
tinuously variable transmission (CVT) models
with the front wheels on the ground or with all
four wheels on the ground (forwards or back-
wards), this may cause serious and expensive
damage to the transmission. If it is necessary to
tow the vehicle with the rear wheels raised, al-
ways use towing dollies under the front wheels.
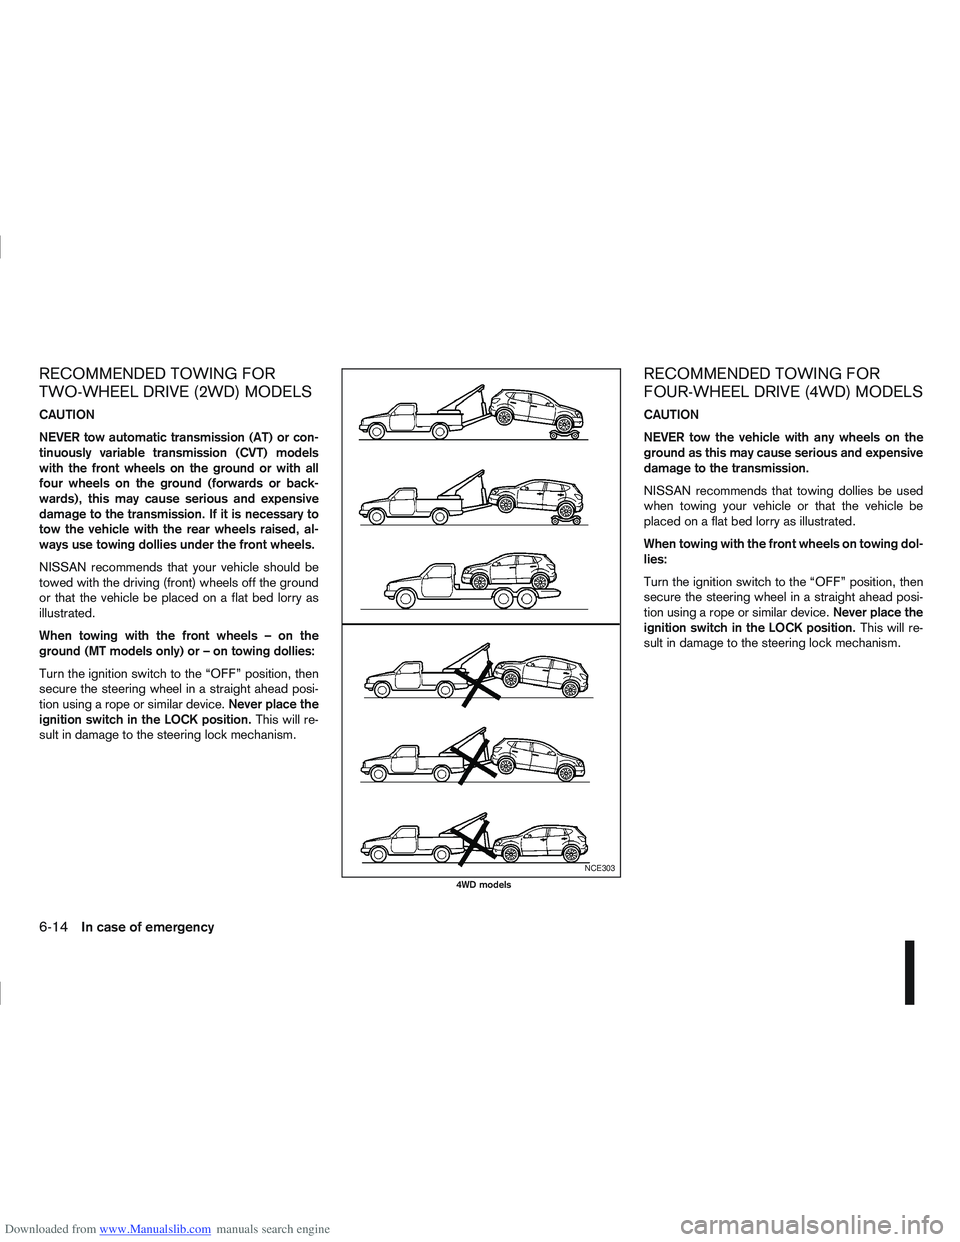
NISSAN recommends that your vehicle should be
towed with the driving (front) wheels off the ground
or that the vehicle be placed on a flat bed lorry as
illustrated.
When towing with the front wheels – on the
ground (MT models only) or – on towing dollies:
Turn the ignition switch to the “OFF” position, then
secure the steering wheel in a straight ahead posi-
tion using a rope or similar device.Never place the
ignition switch in the LOCK position. This will re-
sult in damage to the steering lock mechanism.
RECOMMENDED TOWING FOR
FOUR-WHEEL DRIVE (4WD) MODELS
CAUTION
NEVER tow the vehicle with any wheels on the
ground as this may cause serious and expensive
damage to the transmission.
NISSAN recommends that towing dollies be used
when towing your vehicle or that the vehicle be
placed on a flat bed lorry as illustrated.
When towing with the front wheels on towing dol-
lies:
Turn the ignition switch to the “OFF” position, then
secure the steering wheel in a straight ahead posi-
tion using a rope or similar device. Never place the
ignition switch in the LOCK position. This will re-
sult in damage to the steering lock mechanism.
NCE303
4WD models
6-14In case of emergency
Page 227 of 297
Downloaded from www.Manualslib.com manuals search engine Occasionally remove loose dust from the interior
trim, plastic parts and seats using a vacuum cleaner
or soft bristled brush. Wipe the vinyl and leather sur-
faces with a clean, soft cloth dampened in mild soap
solution, then wipe clean with a dry, soft cloth.
Regular care and cleaning is required in order to
maintain the appearance of the leather.
Before using any fabric protector, read the manu-
facturer’s recommendations. Some fabric protec-
tors contain chemicals that may stain or bleach the
seat material.
Use a soft cloth dampened only with water to clean
the meter and gauge lens covers.
CAUTION
Never use benzine, thinner or any similar ma-
terial.
Small dirt particles can be abrasive and dam-
aging to leather surfaces and should be re-
moved promptly. Do not use saddle soap, car
waxes, polishes, oils cleaning fluids, solvents,
detergents or ammonia based cleaners as
they may damage the leather’s natural finish.
Never use fabric protectors unless recom-
mended by the manufacturer.
Do not use glass or plastic cleaner on meter
or gauge lens covers. It may damage the lens
covers.
MONITOR DISPLAY’S MAINTENANCE
(where fitted)
To clean the display screen, first turn the ignition
off and wipe it with a dry soft cloth.
Never use a rough cloth, alcohol, benzine, thin-
ner, any kind of solvent, or paper tissues with
chemical cleaning agent. They would scratch or
deteriorate the panel.
Do not splash any liquid such as water or car fra-
grance on the display. Contact with liquid will
cause the system to malfunction and damage
the hardware.
In case of extreme stain, use a small amount of
neutral detergent with a soft cloth. Never soak
the screen display with water detergent.
FLOOR MATS
The use of NISSAN floor mats can extend the life of
your vehicle carpet and make it easier to clean the
interior. Regardless of what mats are used, be sure
they are fitted for your vehicle and are properly posi-
tioned in the foot well to prevent interference with
pedal operation. Mats should be maintained with
regular cleaning and replaced if they become exces-
sively worn.
CLEANING GLASS
Use glass cleaner to remove smoke and dust film
from the glass surfaces. It is normal for glass to
become coated with a film after the vehicle is parked
in the hot sun. Glass cleaner and a soft cloth will
easily remove this film.CAUTION
When cleaning the inside of the windows, do not
use sharp-edged tools, abrasive cleaners or chlo-
rine-based disinfectant cleaners. They could
damage elements in the rear windows (such as
the window defogger).
Inside rear-view mirror (Automatic
anti-dazzling, where fitted)
Use a soft cloth dampened only with water to clean
the automatic anti-dazzling inside rear view mirror
(where fitted).
CAUTION
Do not use glass cleaner. Doing so will reduce
the sensitivity of the sensor, resulting in improper
operation.
PLASTIC PARTS
Plastic parts can be cleaned with a mild soap solu-
tion. If the dirt cannot be easily removed, use a plas-
tic cleaner. Do not use any solvents.
SEAT BELTS
WARNING
Do not allow wet seat belts to roll up in the
retractor.
Never use bleach, dye or chemical solvents to
clean the seat belts, since these materials
may severely weaken the seat belt webbing.
CLEANING INTERIOR
7-4Appearance and care