2008 NISSAN PATHFINDER ignition
[x] Cancel search: ignitionPage 4 of 36
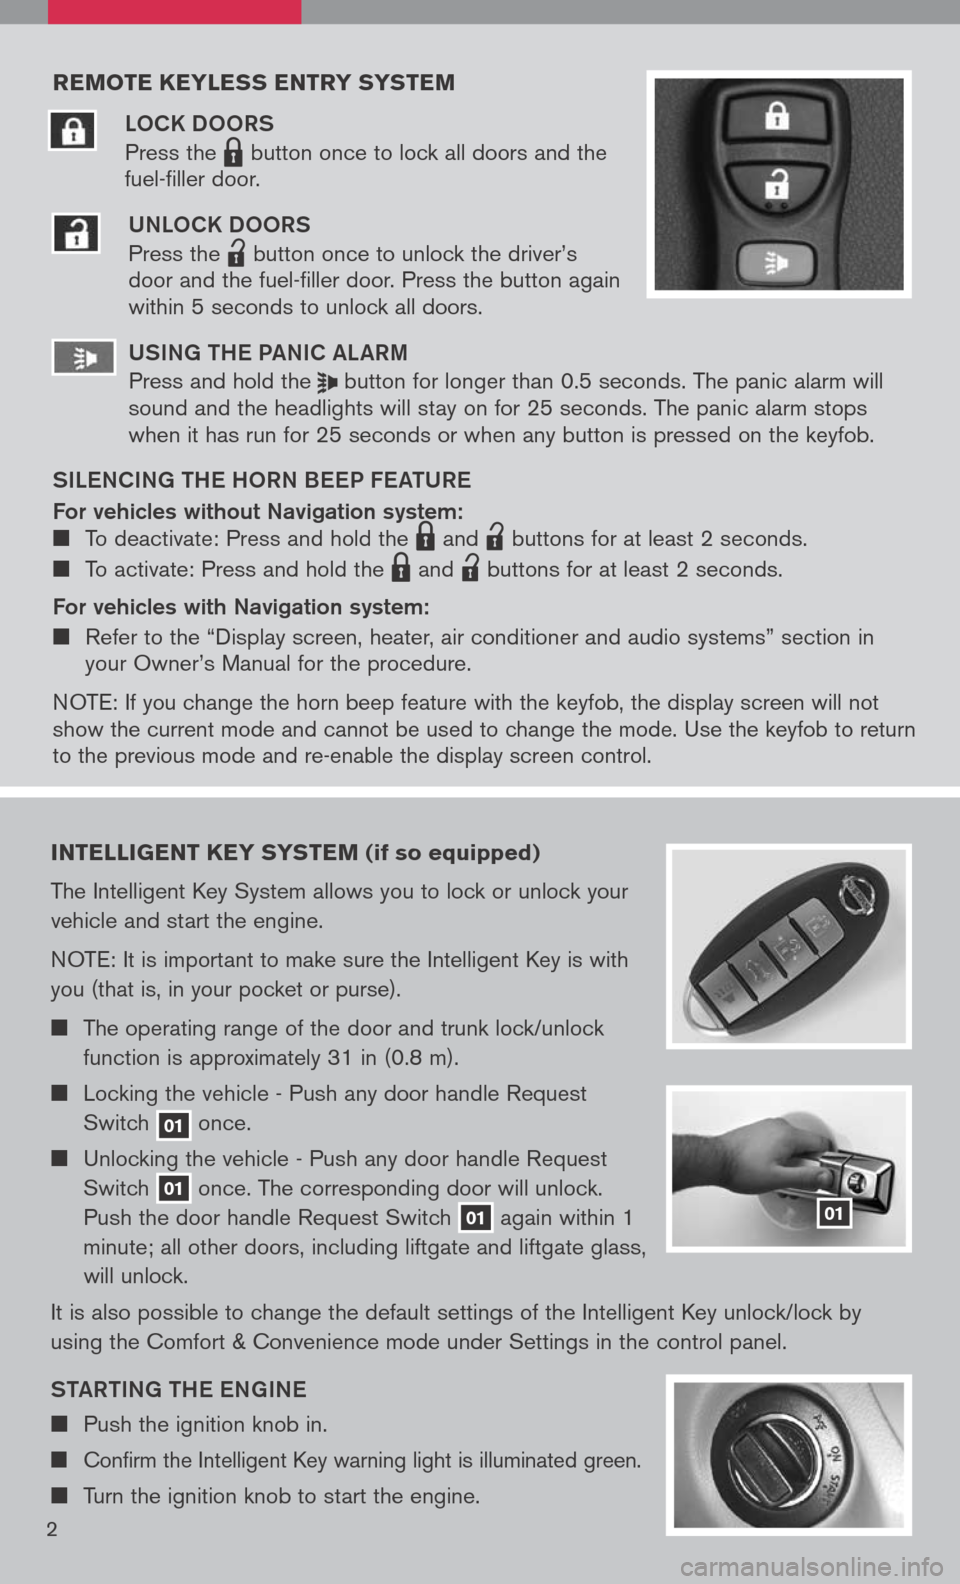
reMote keyless entry systeM
LOCK DOORS
Press the LPD0150 button once to lock all doors and the
fuel-filler door.
UNLOCK DOORS
Press the
lpd0151
button once to unlock the driver’s door and the fuel-filler door. Press the button again within 5 seconds to unlock all doors.
U SiN g the Pa NiC aL aR m
Press and hold the button for longer than 0.5 seconds. The panic alarm will sound and the headlights will stay on for 25 seconds. The panic alarm stops when it has run for 25 seconds or when any button is pressed on the keyfob.
S iL e NC iN g the h ORN B eeP F eat URe
For vehicles without Navigation system: To deactivate: Press and hold the LPD0150 and
lpd0151
buttons for at least 2 seconds.
To activate: Press and hold the LPD0150 and
lpd0151
buttons for at least 2 seconds.
For vehicles with Navigation system:
Refer to the “Display screen, heater, air conditioner and audio systems” section in your Owner’s Manual for the procedure.
N OTE: If you change the horn beep feature with the keyfob, the display screen will not show the current mode and cannot be used to change the mode. Use the keyfob to return to the previous mode and re-enable the display screen control.
intelligent key syste M (if so equipped)
The Intelligent Key System allows you to lock or unlock your
vehicle and start the engine.
NOTE: It is important to make sure the Intelligent Key is with
you (that is, in your pocket or purse).
The operating range of the door and trunk lock/unlock
function is approximately 31 in (0.8 m).
Locking the vehicle - Push any door handle Request
Switch 01 once.
Unlocking the vehicle - Push any door handle Request
Switch 01 once. The corresponding door will unlock.
Push the door handle Request Switch 01 again within 1
minute; all other doors, including liftgate and liftgate glass,
will unlock.
It is also possible to change the default settings of the Intelligent Key unlock/lock by
using the Comfort & Convenience mode under Settings in the control panel.
Sta Rti Ng the eN gi Ne
Push the ignition knob in.
Confirm the Intelligent Key warning light is illuminated green.
Turn the ignition knob to start the engine.
01
2
Page 5 of 36
tURN iN g the eN gi Ne OFF
Shift the transmission into P (Park).
Turn the ignition knob to the LOCK position.
An audible warning chime will sound when exiting the vehicle if the ignition knob is
not completely turned to the OFF position.
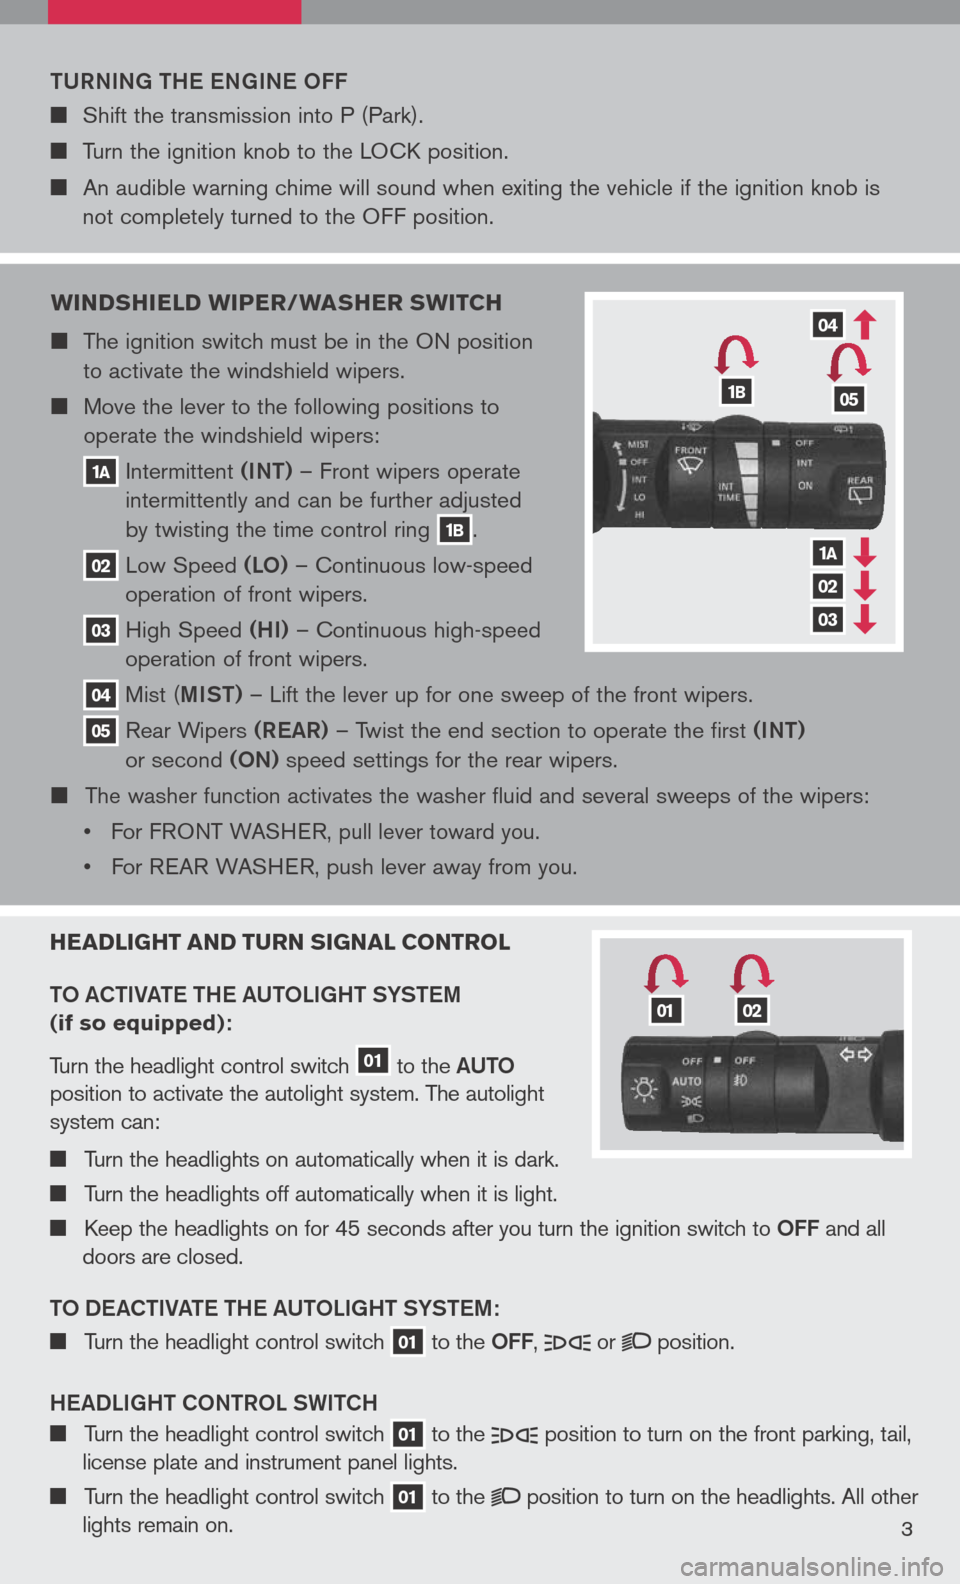
W indshield W iper/Washer sW itch
The ignition switch must be in the ON position
to activate the windshield wipers.
Move the lever to the following positions to
operate the windshield wipers:
1a Intermittent (iNt) – Front wipers operate
intermittently and can be further adjusted
by twisting the time control ring 1b.
02 Low Speed (LO) – Continuous low-speed
operation of front wipers.
03 High Speed (hi) – Continuous high-speed
operation of front wipers.
04 Mist ( miSt) – Lift the lever up for one sweep of the front wipers.
05 Rear Wipers (ReaR) – Twist the end section to operate the first (iNt)
or second (ON) speed settings for the rear wipers.
The washer function activates the washer fluid and several sweeps of the wipers:
• For F
RONT WASHER, pull lever toward you.
• For REAR WASHER, push lever away from you.
headlight and turn signal control
t O aC ti Vate the a U tOL ight SYStem
(if so equipped):
Turn the headlight control switch 01 to the aU tO
position to activate the autolight system. The autolight
system can:
Turn the headlights on automatically when it is dark.
Turn the headlights off automatically when it is light.
Keep the headlights on for 45 seconds after you turn the ignition switch to OFF and all
doors are closed.
t O D eaCti Vate the a U tOL ight SYStem:
Turn the headlight control switch 01 to the OFF, or position.
hea DLight CON tROL SW itCh
Turn the headlight control switch 01 to the position to turn on the front parking, tail,
license plate and instrument panel lights.
Turn the headlight control switch 01 to the position to turn on the headlights. All other
lights remain on.3
1b05
04
03
02
1a
0102
Page 11 of 36
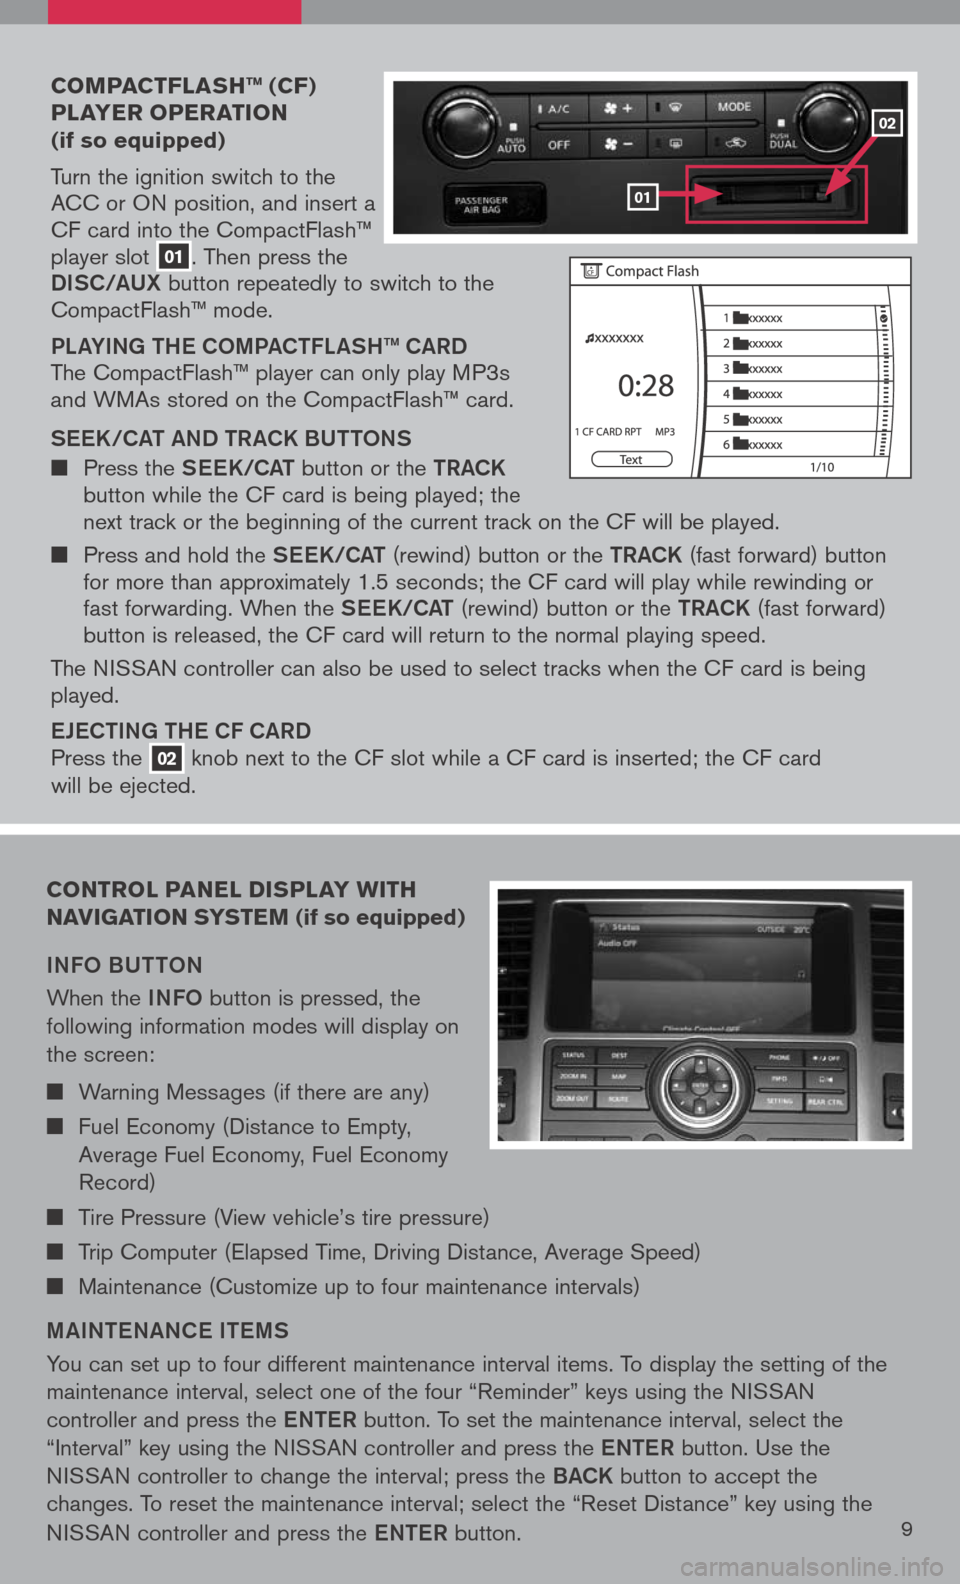
coMpact Flash ™ (cF)
player operation
(if so equipped)
Turn the ignition switch to the ACC or ON position, and insert a CF card into the CompactFlash™ player slot 01. Then press the
Di SC/a UX button repeatedly to switch to the CompactFlash™ mode.
PLaY iN g the COmPa C tFL aS h ™ C aRD
The CompactFlash™ player can only play MP3s and WMAs stored on the CompactFlash™ card.
S ee K/C at a ND tR aCK BU ttONS
Press the See K/C at button or the tRaCK button while the CF card is being played; the next track or the beginning of the current track on the CF will be played.
Press and hold the See K/C at (rewind) button or the tRaCK (fast forward) button for more than approximately 1.5 seconds; the CF card will play while rewinding or fast forwarding. When the See K/C at (rewind) button or the tRaCK (fast forward) button is released, the CF card will return to the normal playing speed.
The NISSAN controller can also be used to select tracks when the CF card is being played.
eJe C ti Ng the CF C aRD
Press the 02 knob next to the CF slot while a CF card is inserted; the CF card
will be ejected.
control panel display W ith
navigation syste M (if so equipped)
iNFO BU ttON
When the iNFO button is pressed, the
following information modes will display on
the screen:
Warning Messages (if there are any)
Fuel Economy (Distance to Empty,
Average Fuel Economy, Fuel Economy
Record)
Tire Pressure (View vehicle’s tire pressure)
Trip Computer (Elapsed Time, Driving Distance, Average Speed)
Maintenance (Customize up to four maintenance intervals)
mai Nte NaNC e item S
You can set up to four different maintenance interval items. To display the setting of the
maintenance interval, select one of the four “Reminder” keys using the NISSAN
controller and press the eNte R button. To set the maintenance interval, select the
“Interval” key using the NISSAN controller and press the eNte R button. Use the
NISSAN controller to change the interval; press the BaCK button to accept the
changes. To reset the maintenance interval; select the “Reset Distance” key using the
NISSAN controller and press the eNte R button.9
01
02
Page 13 of 36
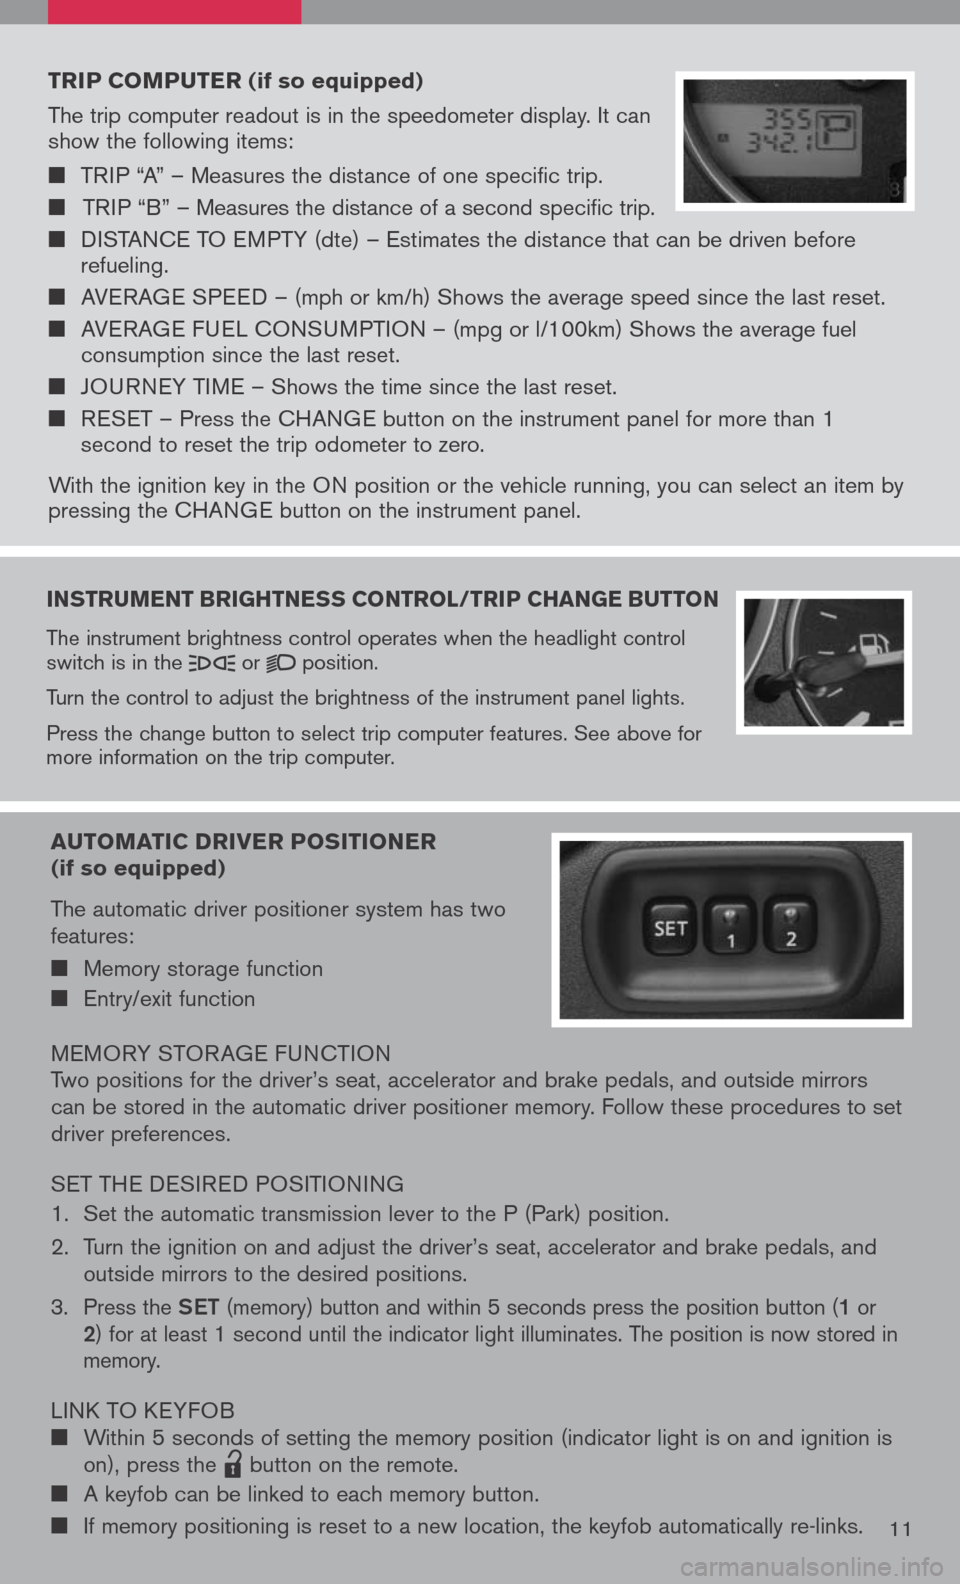
instruMent brightness control /trip change button
The instrument brightness control operates when the headlight control switch is in the or position.
Turn the control to adjust the brightness of the instrument panel lights.
Press the change button to select trip computer features. See above for more information on the trip computer.
trip coMputer (if so equipped)
The trip computer readout is in the speedometer display. It can show the following items:
TRIP “A” – Measures the distance of one specific trip.
TRIP “B” – Measures the distance of a second specific trip.
DISTANCE TO EMPTY (dte) – Estimates the distance that can be driven before refueling.
AVERAGE SPEED – (mph or km/h) Shows the average speed since the last reset.
AVERAGE FUEL CONSUMPTION – (mpg or l/100km) Shows the average fuel consumption since the last reset.
JOURNEY TIME – Shows the time since the last reset.
RESET – Press the CHANGE button on the instrument panel for more than 1 second to reset the trip odometer to zero.
With the ignition key in the ON position or the vehicle running, you can select an item by pressing the CHANGE button on the instrument panel.
auto Matic driver positioner (if so equipped)
The automatic driver positioner system has two features:
Memory storage function
Entry/exit function
MEMORY STOR AGE FUNCTIONTwo positions for the driver’s seat, accelerator and brake pedals, and outside mirrors can be stored in the automatic driver positioner memory. Follow these procedures to set driver preferences.
SET THE DESIRED POSITIONING
1. Set the automatic transmission lever to the P (Park) position.
2. Turn the ignition on and adjust the driver’s seat, accelerator and brake pedals, and
outside mirrors to the desired positions.
3. Press the Set (memory) button and within 5 seconds press the position button (1 or 2) for at least 1 second until the indicator light illuminates. The position is now stored in memory.
LINK TO KEYFOB Within 5 seconds of setting the memory position (indicator light is on and ignition is on), press the
lpd0151
button on the remote.
A keyfob can be linked to each memory button.
If memory positioning is reset to a new location, the keyfob automatically re-links.11
Page 14 of 36
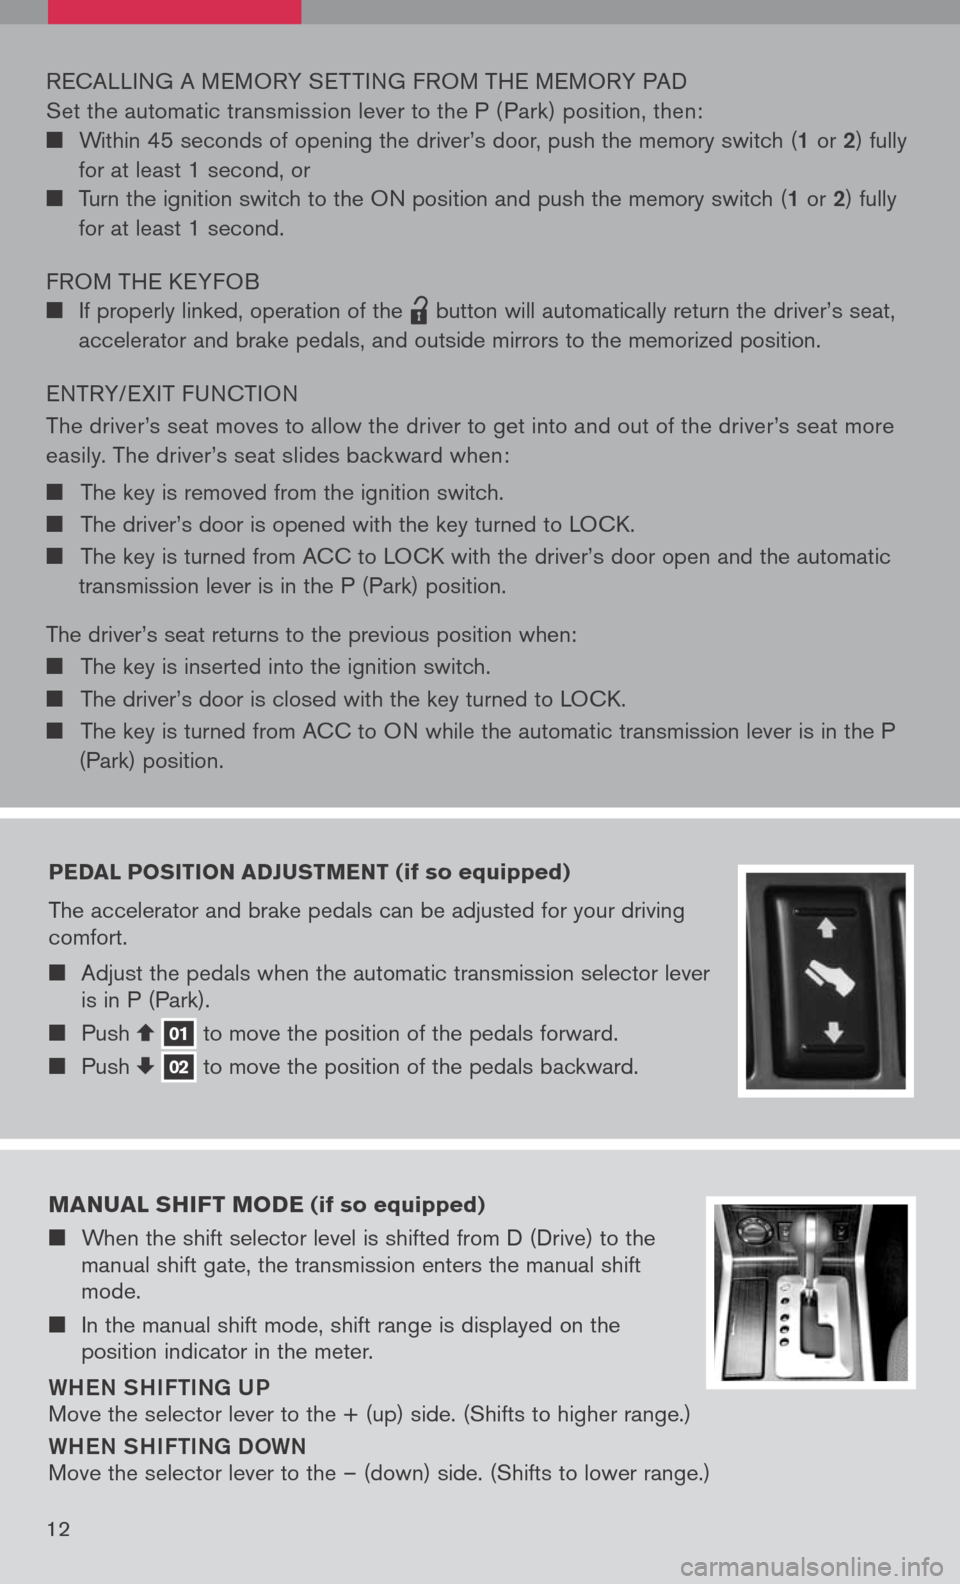
pedal position adJust Ment (if so equipped)
The accelerator and brake pedals can be adjusted for your driving comfort.
Adjust the pedals when the automatic transmission selector lever is in P (Park).
Push 01 to move the position of the pedals forward. Push 02 to move the position of the pedals backward.
RECALLING A MEMORY SET TING FROM THE MEMORY PAD
Set the automatic transmission lever to the P ( Park) position, then:
Within 45 seconds of opening the driver’s door, push the memory switch (1 or 2) fully
for at least 1 second, or
Turn the ignition switch to the ON position and push the memory switch (1 or 2) fully
for at least 1 second.
FROM THE KEYFOB
If properly linked, operation of the
lpd0151
button will automatically return the driver’s seat,
accelerator and brake pedals, and outside mirrors to the memorized position.
ENTRY/ EXIT FUNCTION
The driver’s seat moves to allow the driver to get into and out of the driver’s seat more
easily. The driver’s seat slides backward when:
The key is removed from the ignition switch.
The driver’s door is opened with the key turned to LOCK.
The key is turned from ACC to LOCK with the driver’s door open and the automatic
transmission lever is in the P (Park) position.
The driver’s seat returns to the previous position when:
The key is inserted into the ignition switch.
The driver’s door is closed with the key turned to LOCK.
The key is turned from ACC to ON while the automatic transmission lever is in the P
(Park) position.
M anual shiFt M ode (if so equipped)
When the shift selector level is shifted from D (Drive) to the manual shift gate, the transmission enters the manual shift mode.
In the manual shift mode, shift range is displayed on the position indicator in the meter.
Whe N Shi Fti Ng U P
Move the selector lever to the + (up) side. (Shifts to higher range.)
WheN Shi Fti Ng D OWN
Move the selector lever to the – (down) side. (Shifts to lower range.)
12
Page 16 of 36
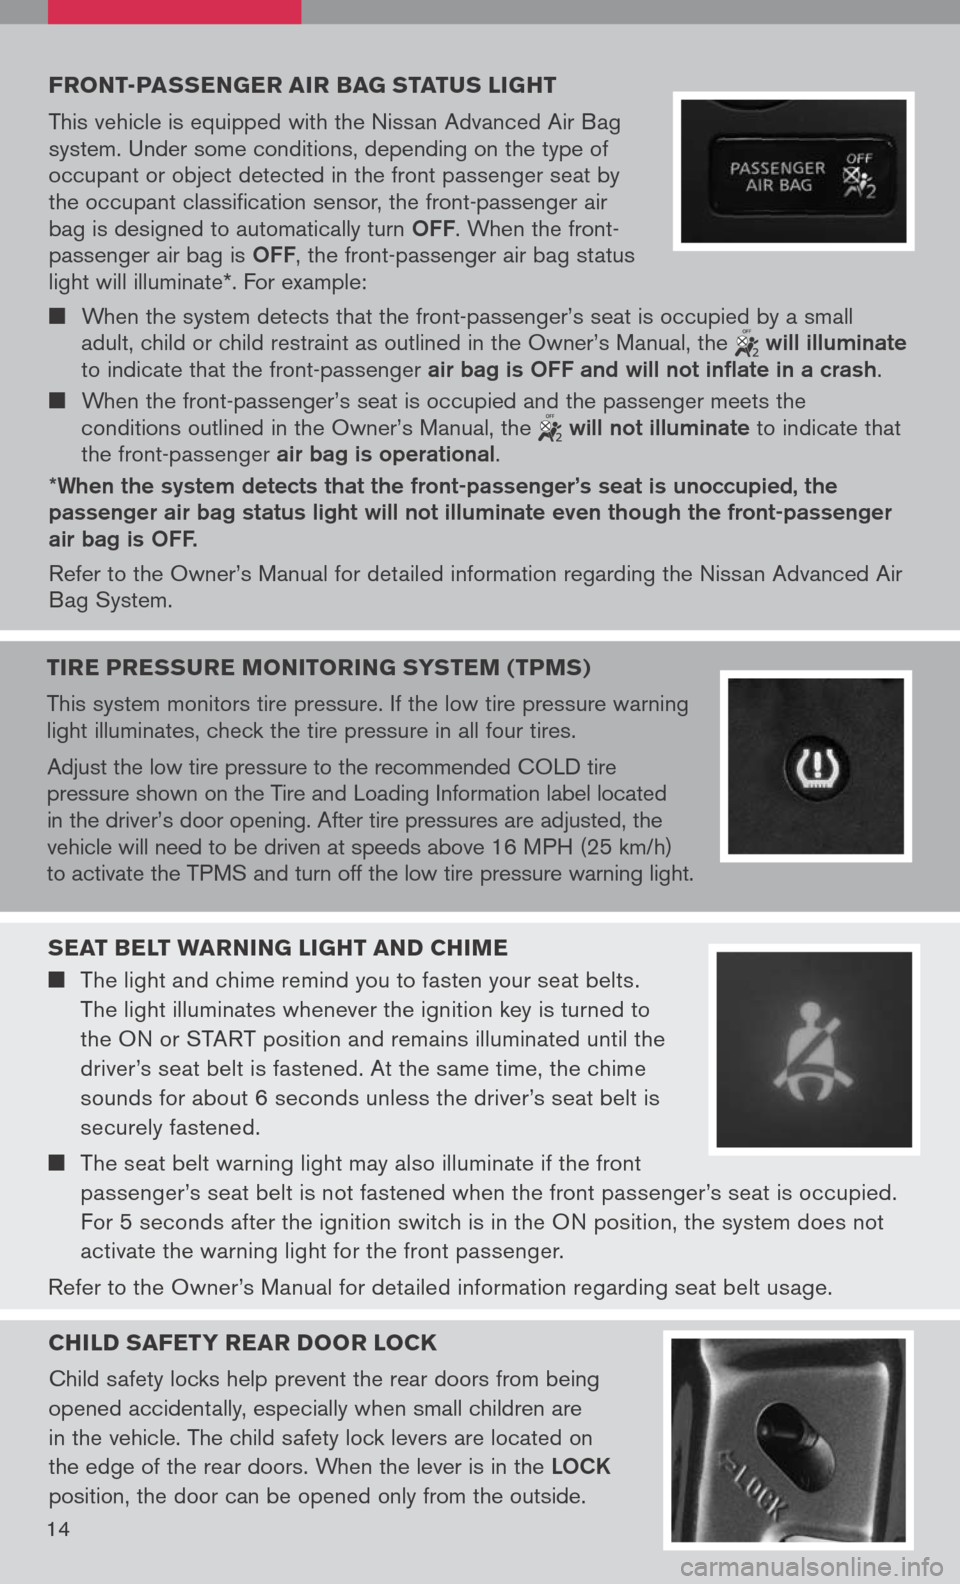
Front -passenger air bag status light
This vehicle is equipped with the Nissan Advanced Air Bag system. Under some conditions, depending on the type of occupant or object detected in the front passenger seat by the occupant classification sensor, the front-passenger air bag is designed to automatically turn OFF. When the front-passenger air bag is OFF, the front-passenger air bag status light will illuminate*. For example:
When the system detects that the front-passenger’s seat is occupied by a small adult, child or child restraint as outlined in the Owner’s Manual, the will illuminate to indicate that the front-passenger air bag is OFF and will not inflate in a crash.
When the front-passenger’s seat is occupied and the passenger meets the conditions outlined in the Owner’s Manual, the will not illuminate to indicate that the front-passenger air bag is operational.
*When the system detects that the front-passenger’s seat is unoccupied, the passenger air bag status light will not illuminate even though the front-passenger air bag is OFF.
Refer to the Owner’s Manual for detailed information regarding the Nissan Advanced Air Bag System.
seat belt W arning light and chiMe
The light and chime remind you to fasten your seat belts.
The light illuminates whenever the ignition key is turned to
the ON or START position and remains illuminated until the
driver’s seat belt is fastened. At the same time, the chime
sounds for about 6 seconds unless the driver’s seat belt is
securely fastened.
The seat belt warning light may also illuminate if the front
passenger’s seat belt is not fastened when the front passenger’s seat is occupied.
For 5 seconds after the ignition switch is in the ON position, the system does not
activate the warning light for the front passenger.
Refer to the Owner’s Manual for detailed information regarding seat belt usage.
child saFety rear door lock
Child safety locks help prevent the rear doors from being
opened accidentally, especially when small children are
in the vehicle. The child safety lock levers are located on
the edge of the rear doors. When the lever is in the LOCK
position, the door can be opened only from the outside.
14
tire pressure M onitoring systeM (tpMs)
This system monitors tire pressure. If the low tire pressure warning light illuminates, check the tire pressure in all four tires.
Adjust the low tire pressure to the recommended COLD tire pressure shown on the Tire and Loading Information label located in the driver’s door opening. After tire pressures are adjusted, the vehicle will need to be driven at speeds above 16 MPH (25 km/h) to activate the TPMS and turn off the low tire pressure warning light.
Page 17 of 36
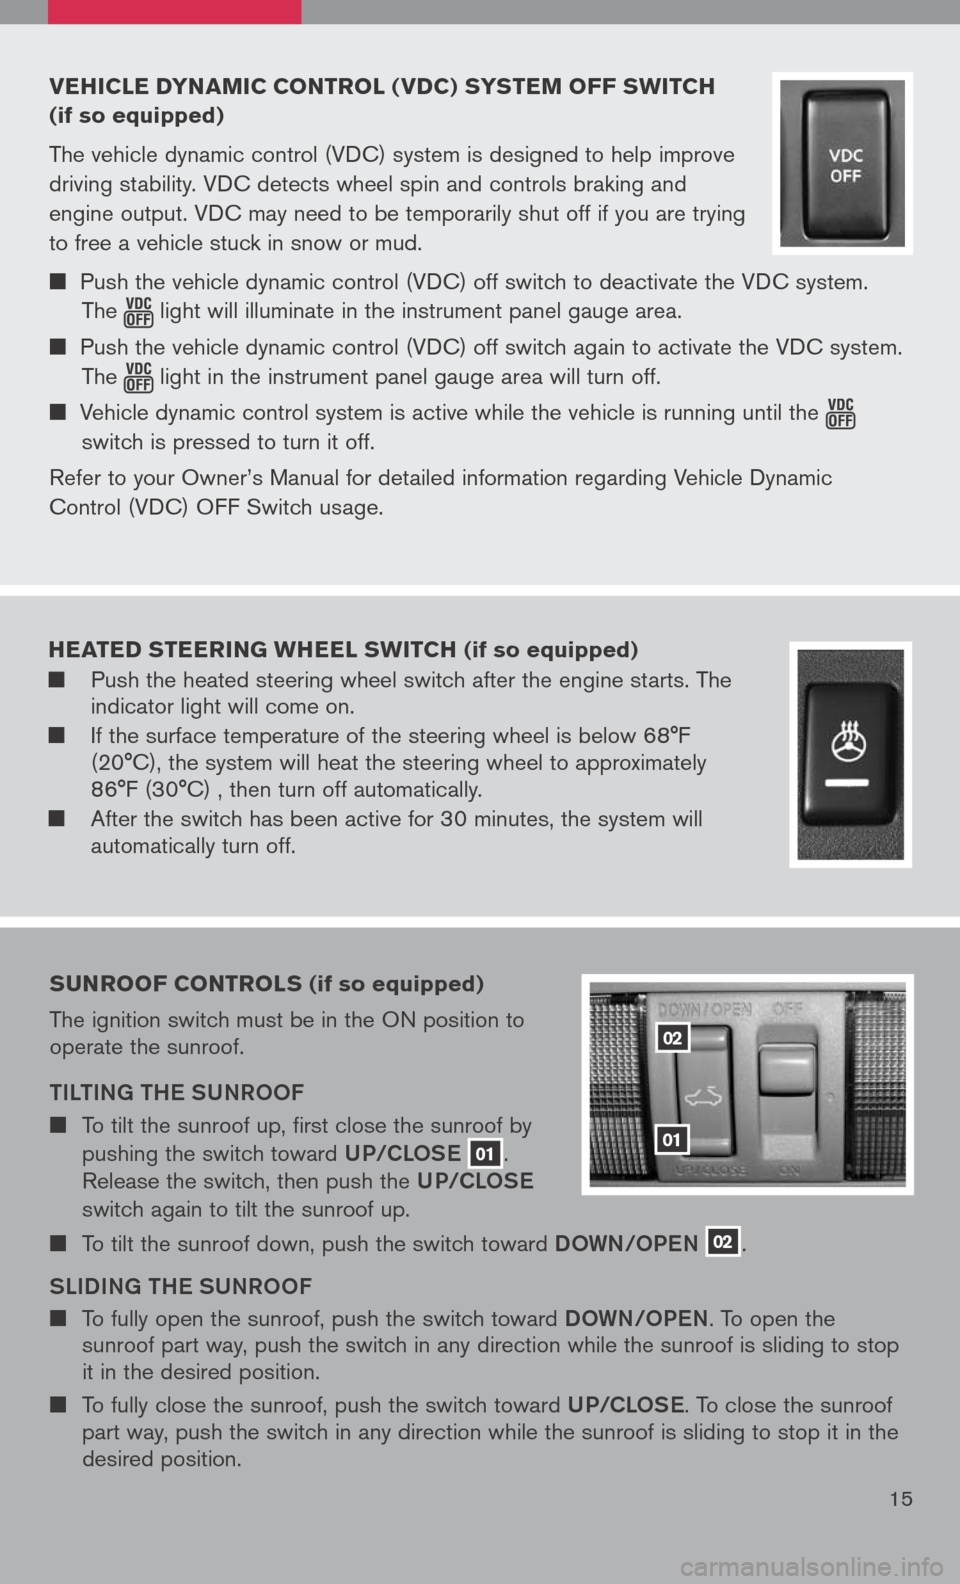
vehicle dyna Mic control ( vdc) s yste M oFF sWitch
(if so equipped)
The vehicle dynamic control (VDC) system is designed to help improve
driving stability. VDC detects wheel spin and controls braking and
engine output. VDC may need to be temporarily shut off if you are trying
to free a vehicle stuck in snow or mud.
Push the vehicle dynamic control (VDC) off switch to deactivate the VDC system.
The light will illuminate in the instrument panel gauge area.
Push the vehicle dynamic control (VDC) off switch again to activate the VDC system.
The light in the instrument panel gauge area will turn off.
Vehicle dynamic control system is active while the vehicle is running until the
switch is pressed to turn it off.
Refer to your Owner’s Manual for detailed information regarding Vehicle Dynamic
Control (VDC) OFF Switch usage.
15
02
01
sunroo F controls (if so equipped)
The ignition switch must be in the ON position to operate the sunroof.
tiLti Ng the SUNROOF
To tilt the sunroof up, first close the sunroof by
pushing the switch toward UP/CLOSe 01.
Release the switch, then push the UP/CLOSe
switch again to tilt the sunroof up.
To tilt the sunroof down, push the switch toward DOWN/OPeN 02.
SL iD iN g the SUNROOF
To fully open the sunroof, push the switch toward DOWN/OPeN. To open the sunroof part way, push the switch in any direction while the sunroof is sliding to stop it in the desired position.
To fully close the sunroof, push the switch toward UP/CLOSe. To close the sunroof part way, push the switch in any direction while the sunroof is sliding to stop it in the desired position.
heated steering Wheel sWitch (if so equipped)
Push the heated steering wheel switch after the engine starts. The indicator light will come on.
If the surface temperature of the steering wheel is below 68°F (20°C), the system will heat the steering wheel to approximately 86°F (30°C) , then turn off automatically.
After the switch has been active for 30 minutes, the system will automatically turn off.
Page 21 of 36
19
Pai RiN g YOUR P hON e
Before using the hands-free feature, you need to set-up, or pair, the system to recognize your cellular phone(s). Up to 5 Bluetooth®-enabled phones can be paired to this system. After the initial one-time set-up, the system automatically connects with a paired phone when the ignition switch is in the ACC or ON position, as long as the phone is in range and within the vehicle cabin.
Pai RiN g PROC eDUR e
NOTE: The vehicle must be stationary when pairing the phone.
iN itia L PaiRiN g
NOTE: This procedure can only be used to pair the first phone to the system.
1. Press the Ph ON e
button on the instrument panel.
2. A message is displayed. Press the Ph ON e
button again.
3. The system will direct you to SETTING
–> Phone –> Bluetooth Setup –> Pair Phone.
4. Touch one of the “None (Add New)” keys.
5. Initiate pairing from the phone.
The pairing procedure for cellular phones varies according to each cellular phone model. For detailed pairing instructions and compatible phones, please visit www.nissanusa.com/bluetooth.
The PIN code will appear on the screen; enter “1234” from the handset. (The PIN code is assigned by NISSAN and cannot be changed.)
6. When the pairing is complete, the screen will show the phone’s listed name on the paired
phone list screen.
P ai RiN g a DD itiON aL P hON eS/ iN itia L PaiRiN g
NOTE: This procedure can be used to pair the first phone and other additional phones to the system.
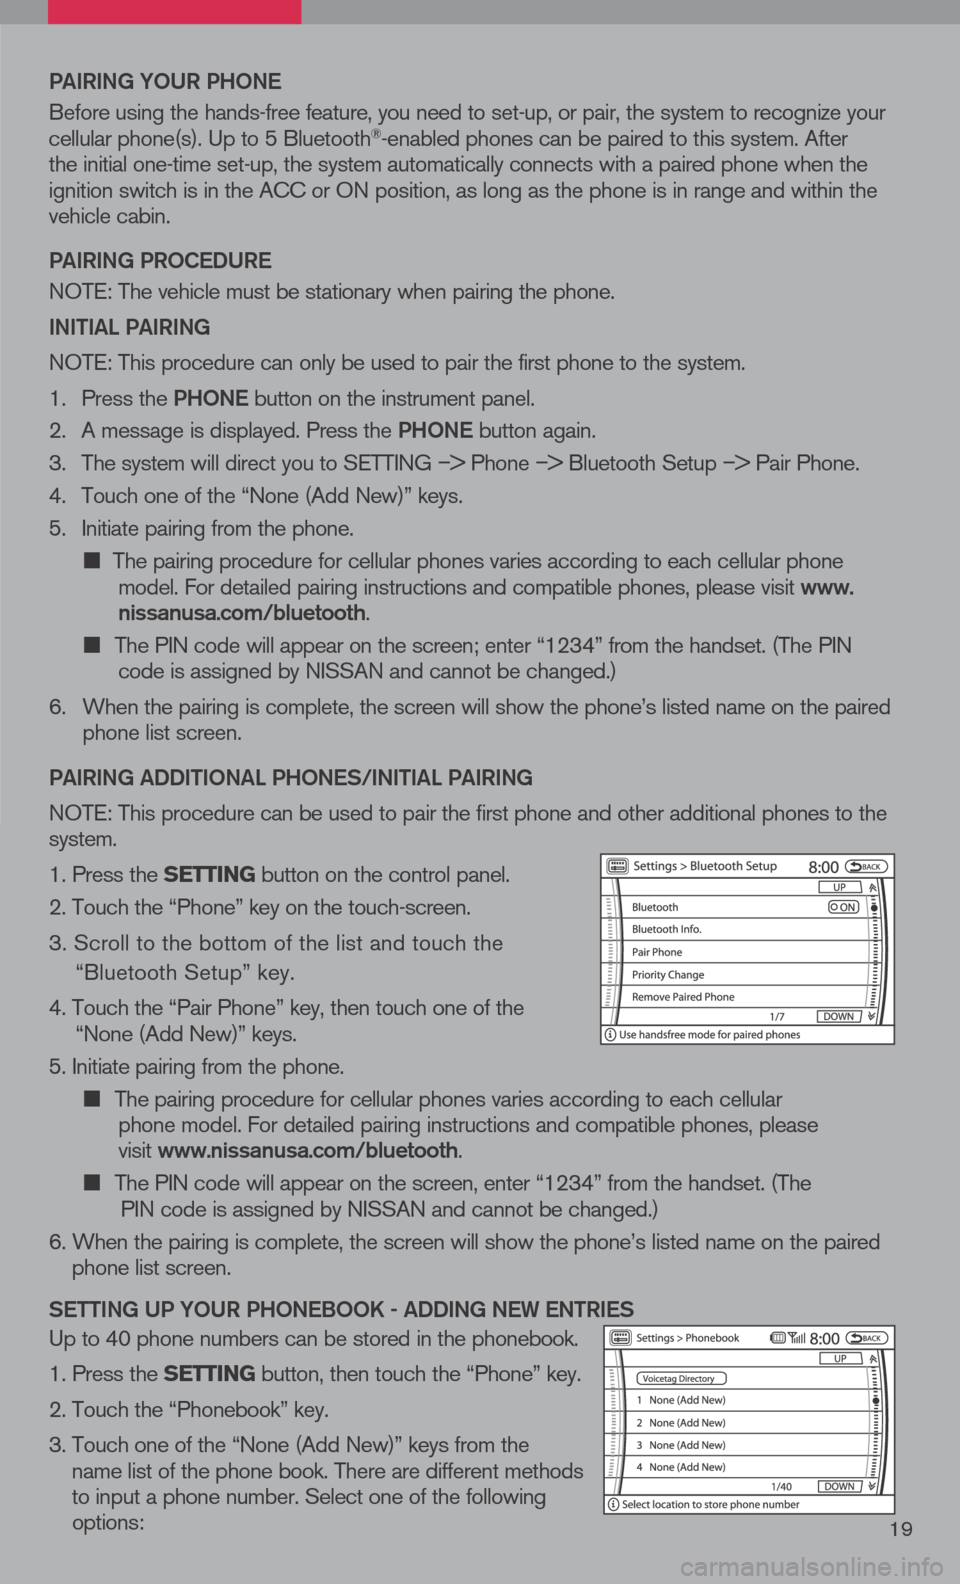
1. Press the setting button on the control panel.
2. Touch the “Phone” key on the touch-screen.
3. Scroll to the bottom of the list and touch the
“Bluetooth Setup” key.
4. Touch the “Pair Phone” key, then touch one of the “None (Add New)” keys.
5. Initiate pairing from the phone.
The pairing procedure for cellular phones varies according to each cellular
phone model. For detailed pairing instructions and compatible phones, please
visit www.nissanusa.com/bluetooth.
The PIN code will appear on the screen, enter “1234” from the handset. (The
PIN code is assigned by NISSAN and cannot be changed.)
6. When the pairing is complete, the screen will show the phone’s listed name on the paired
phone list screen.
S etti Ng UP YOUR P hON eBOOK - aDD iN g N eW eN tR ie S
Up to 40 phone numbers can be stored in the phonebook.
1. Press the setting button, then touch the “Phone” key.
2. Touch the “Phonebook” key.
3. Touch one of the “None (Add New)” keys from the
name list of the phone book. There are different methods to input a phone number. Select one of the following options: