2008 NISSAN PATHFINDER ignition
[x] Cancel search: ignitionPage 110 of 448
cThe hill descent control may not control
the vehicle speed on a hill under all load
or road conditions. Always be prepared
to depress the brake pedal to control
vehicle speed. Failure to do so may re-
sult in a collision or serious personal
injury.
CAUTION
When the hill descent control system op-
erates continuously for a long time, the
temperature of the brake pads may in-
crease and the hill descent control system
may be temporarily disabled (the indicator
light will blink) . If the indicator light does
not come on continuously after blinking,
stop using the system.
The hill descent control system is designed to
reduce driver workload when going down steep
hills. The hill descent control system helps to
control vehicle speed so the driver can concen-
trate on steering the vehicle.
To activate the hill descent control system:
cthe automatic transmission selector lever
must be in forward or reverse gear,
cthe 4WD switch must be in the 4L position
and the vehicle speed must be under 15
mph (25 km/h) orcthe 4WD switch must be in the 4H position
and the vehicle speed must be under 21
mph (35 km/h) , and
cthe hill descent control system switch must
be ON.
The hill descent control indicator light will come
on when the system is activated. Also, the
stop/tail lights illuminate while the hill descent
control system applies the brakes to control ve-
hicle speed.
If the accelerator or brake pedal is depressed
while the hill descent control system is on, the
system will stop operating temporarily. As soon
as the accelerator or brake pedal is released, the
hill descent control system begins to function
again if the hill descent control operating condi-
tions are fulfilled.
The hill descent control indicator light blinks if the
switch is on and all conditions for system activa-
tion are not met or if the system becomes disen-
gaged for any reason.
To turn off the hill descent control system, push
the switch to the OFF position.
For additional information, see “Hill descent con-
trol system on indicator light” earlier in this sec-
tion and “Hill descent control system” in the
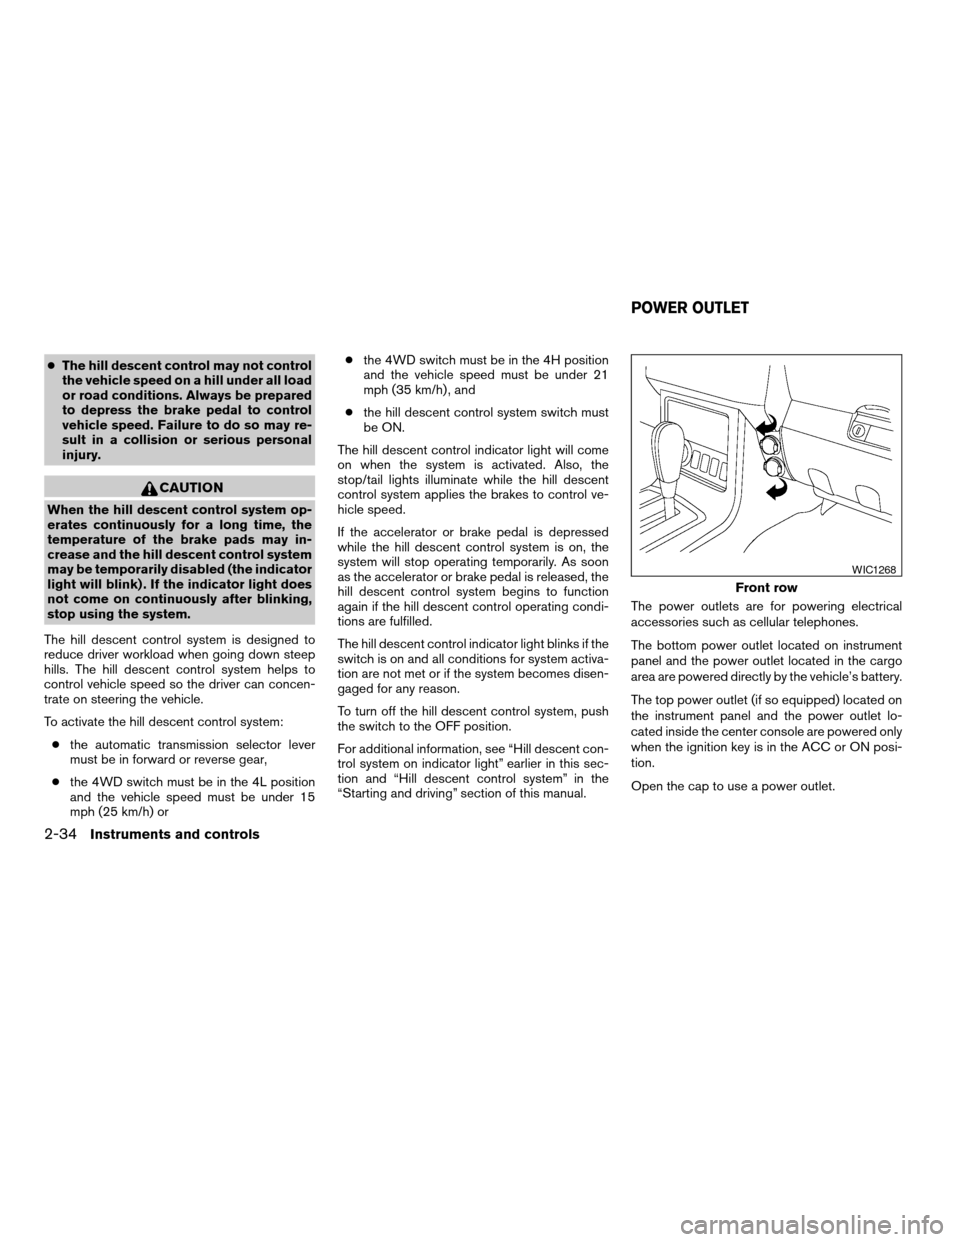
“Starting and driving” section of this manual.The power outlets are for powering electrical
accessories such as cellular telephones.
The bottom power outlet located on instrument
panel and the power outlet located in the cargo
area are powered directly by the vehicle’s battery.
The top power outlet (if so equipped) located on
the instrument panel and the power outlet lo-
cated inside the center console are powered only
when the ignition key is in the ACC or ON posi-
tion.
Open the cap to use a power outlet.
Front row
WIC1268
POWER OUTLET
2-34Instruments and controls
ZREVIEW COPYÐ2008 Pathfinder(pat)
Owners ManualÐUSA_English(nna)
03/23/07Ðdebbie
X
Page 123 of 448
Always distribute the luggage evenly on the roof
rack. Do not load more than 200 pounds (91 kg) .
Be careful that your vehicle does not exceed the
Gross Vehicle Weight Rating (GVWR) or its
Gross Axle Weight Rating (GAWR front and
rear) . The GVWR and GAWR are located on the
F.M.V.S.S. label (located on the driver’s door
pillar) . For more information regarding GVWR
and GAWR, refer to “Vehicle loading information”
in the “Technical and consumer information” sec-
tion later in this manual.
The front and rear cross bars (if so equipped) can
be adjusted or removed.
To adjust:
1. Loosen the 2 TorxThead fasteners
sAon
both ends of the crossbar.
2. Remove the plugs at the desired position
(
sC).
3. Slide the crossbar
sBto the desired position
(
sC) so that the holes in the crossbar line up
with the holes in the sidebar.
4. Tighten the 2 TorxThead fasteners on both
ends of the crossbar.
5. Reinstall the plugs at the previous position
sA.
6. Position your luggage on the crossbars and
secure the luggage with rope.7. Always check the tightness of the TorxT
head fasteners.
To remove:
1. Loosen the 2 TorxThead fasteners
sAon
both ends of the crossbar.
2. Remove the crossbar from the roof rack.
POWER WINDOWS
WARNING
cMake sure that all passengers have
their hands, etc. inside the vehicle while
it is in motion and before closing the
windows. Use the window lock switch
to prevent unexpected use of the power
windows.
cDo not leave children unattended inside
the vehicle. They could unknowingly ac-
tivate switches or controls and become
trapped in a window. Unattended chil-
dren could become involved in serious
accidents.
The power windows operate when the ignition
switch is in the ON position, or for about 45
seconds after the ignition switch is turned to the
OFF position. If the driver’s or passenger’s door
is opened during this period of about 45 sec-
onds, power to the windows is canceled.
WINDOWS
Instruments and controls2-47
ZREVIEW COPYÐ2008 Pathfinder(pat)
Owners ManualÐUSA_English(nna)
03/23/07Ðdebbie
X
Page 125 of 448
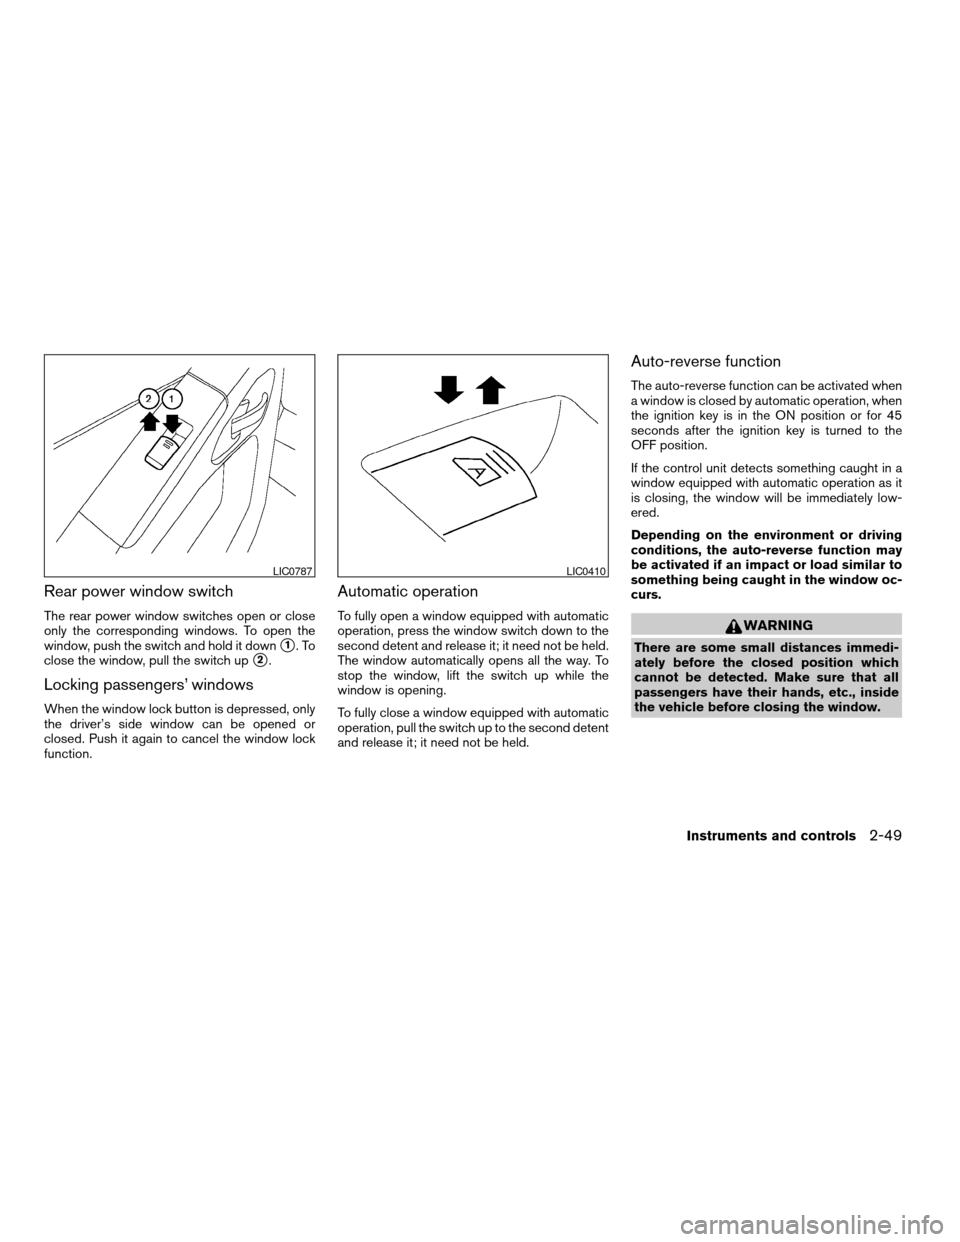
Rear power window switch
The rear power window switches open or close
only the corresponding windows. To open the
window, push the switch and hold it down
s1.To
close the window, pull the switch up
s2.
Locking passengers’ windows
When the window lock button is depressed, only
the driver’s side window can be opened or
closed. Push it again to cancel the window lock
function.
Automatic operation
To fully open a window equipped with automatic
operation, press the window switch down to the
second detent and release it; it need not be held.
The window automatically opens all the way. To
stop the window, lift the switch up while the
window is opening.
To fully close a window equipped with automatic
operation, pull the switch up to the second detent
and release it; it need not be held.
Auto-reverse function
The auto-reverse function can be activated when
a window is closed by automatic operation, when
the ignition key is in the ON position or for 45
seconds after the ignition key is turned to the
OFF position.
If the control unit detects something caught in a
window equipped with automatic operation as it
is closing, the window will be immediately low-
ered.
Depending on the environment or driving
conditions, the auto-reverse function may
be activated if an impact or load similar to
something being caught in the window oc-
curs.
WARNING
There are some small distances immedi-
ately before the closed position which
cannot be detected. Make sure that all
passengers have their hands, etc., inside
the vehicle before closing the window.
LIC0787LIC0410
Instruments and controls2-49
ZREVIEW COPYÐ2008 Pathfinder(pat)
Owners ManualÐUSA_English(nna)
03/23/07Ðdebbie
X
Page 126 of 448
AUTOMATIC SUNROOF
The sunroof will only operate when the ignition
switch is in the ON position. The automatic sun-
roof is operational for about 45 seconds, even if
the ignition switch is turned to the ACC or OFF
position. If the driver’s door or the front passen-
ger’s door is opened during this period of about
45 seconds, power to the sunroof is canceled.
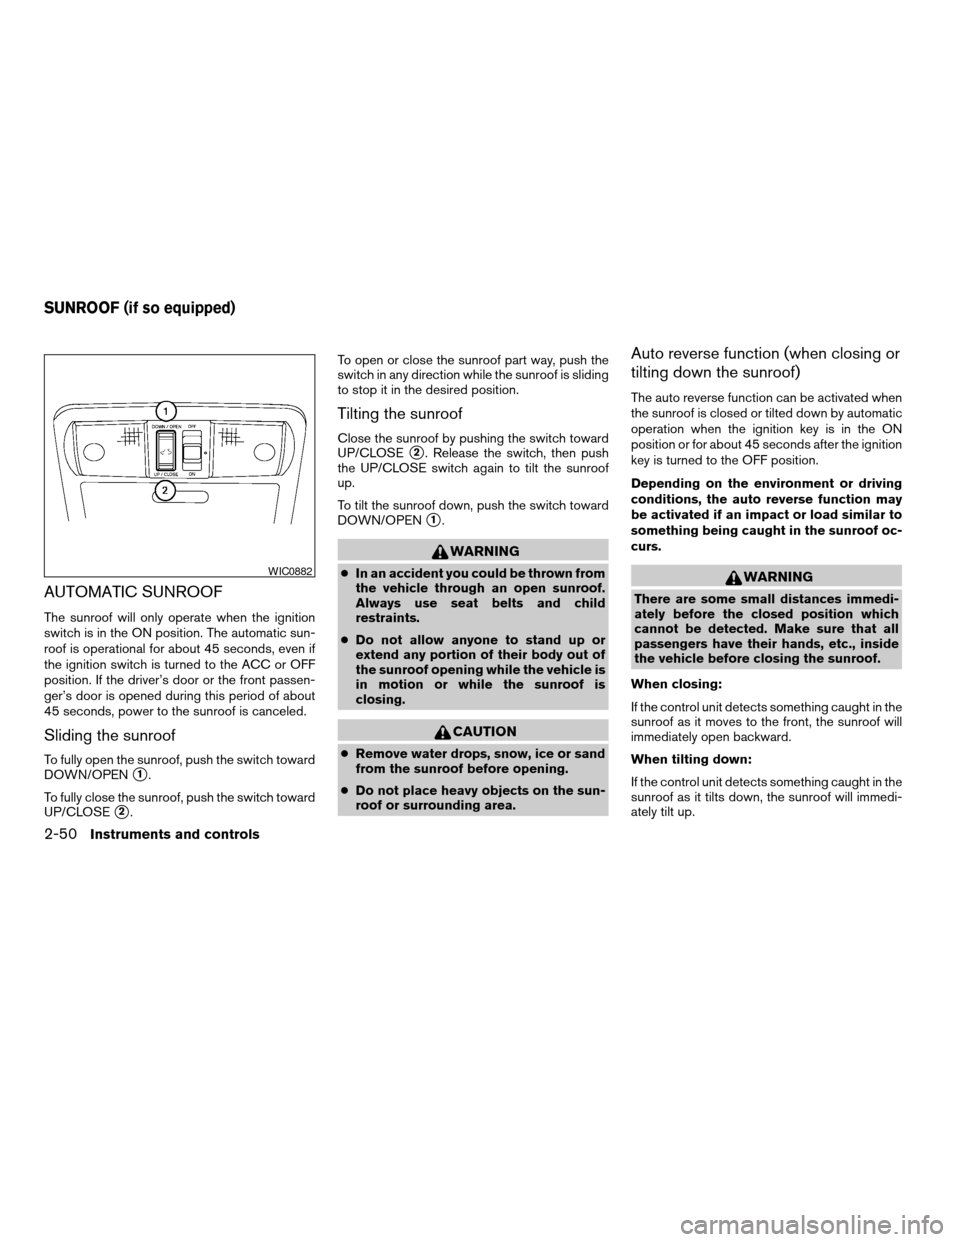
Sliding the sunroof
To fully open the sunroof, push the switch toward
DOWN/OPEN
s1.
To fully close the sunroof, push the switch toward
UP/CLOSE
s2.To open or close the sunroof part way, push the
switch in any direction while the sunroof is sliding
to stop it in the desired position.
Tilting the sunroof
Close the sunroof by pushing the switch toward
UP/CLOSE
s2. Release the switch, then push
the UP/CLOSE switch again to tilt the sunroof
up.
To tilt the sunroof down, push the switch toward
DOWN/OPEN
s1.
WARNING
cIn an accident you could be thrown from
the vehicle through an open sunroof.
Always use seat belts and child
restraints.
cDo not allow anyone to stand up or
extend any portion of their body out of
the sunroof opening while the vehicle is
in motion or while the sunroof is
closing.
CAUTION
cRemove water drops, snow, ice or sand
from the sunroof before opening.
cDo not place heavy objects on the sun-
roof or surrounding area.
Auto reverse function (when closing or
tilting down the sunroof)
The auto reverse function can be activated when
the sunroof is closed or tilted down by automatic
operation when the ignition key is in the ON
position or for about 45 seconds after the ignition
key is turned to the OFF position.
Depending on the environment or driving
conditions, the auto reverse function may
be activated if an impact or load similar to
something being caught in the sunroof oc-
curs.
WARNING
There are some small distances immedi-
ately before the closed position which
cannot be detected. Make sure that all
passengers have their hands, etc., inside
the vehicle before closing the sunroof.
When closing:
If the control unit detects something caught in the
sunroof as it moves to the front, the sunroof will
immediately open backward.
When tilting down:
If the control unit detects something caught in the
sunroof as it tilts down, the sunroof will immedi-
ately tilt up.
WIC0882
SUNROOF (if so equipped)
2-50Instruments and controls
ZREVIEW COPYÐ2008 Pathfinder(pat)
Owners ManualÐUSA_English(nna)
03/23/07Ðdebbie
X
Page 127 of 448
If the auto reverse function malfunctions and re-
peats opening or tilting up the sunroof, keep
pushing the tilt down switch within 5 seconds
after it happens; the sunroof will fully close gradu-
ally. Make sure nothing is caught in the sunroof.
WARNING
cIn an accident you could be thrown from
the vehicle through an open sunroof.
Always use seat belts and child
restraints.
cDo not allow anyone to stand up or
extend any portion of their body out of
the sunroof opening while the vehicle is
in motion or while the sunroof is
closing.
CAUTION
cRemove water drops, snow, ice or sand
from the sunroof before opening.
cDo not place heavy objects on the sun-
roof or surrounding area.
Sunshade
Open and close the sunshade by sliding it for-
ward or backward.
If the sunroof does not close
Have your NISSAN dealer check and repair the
sunroof.
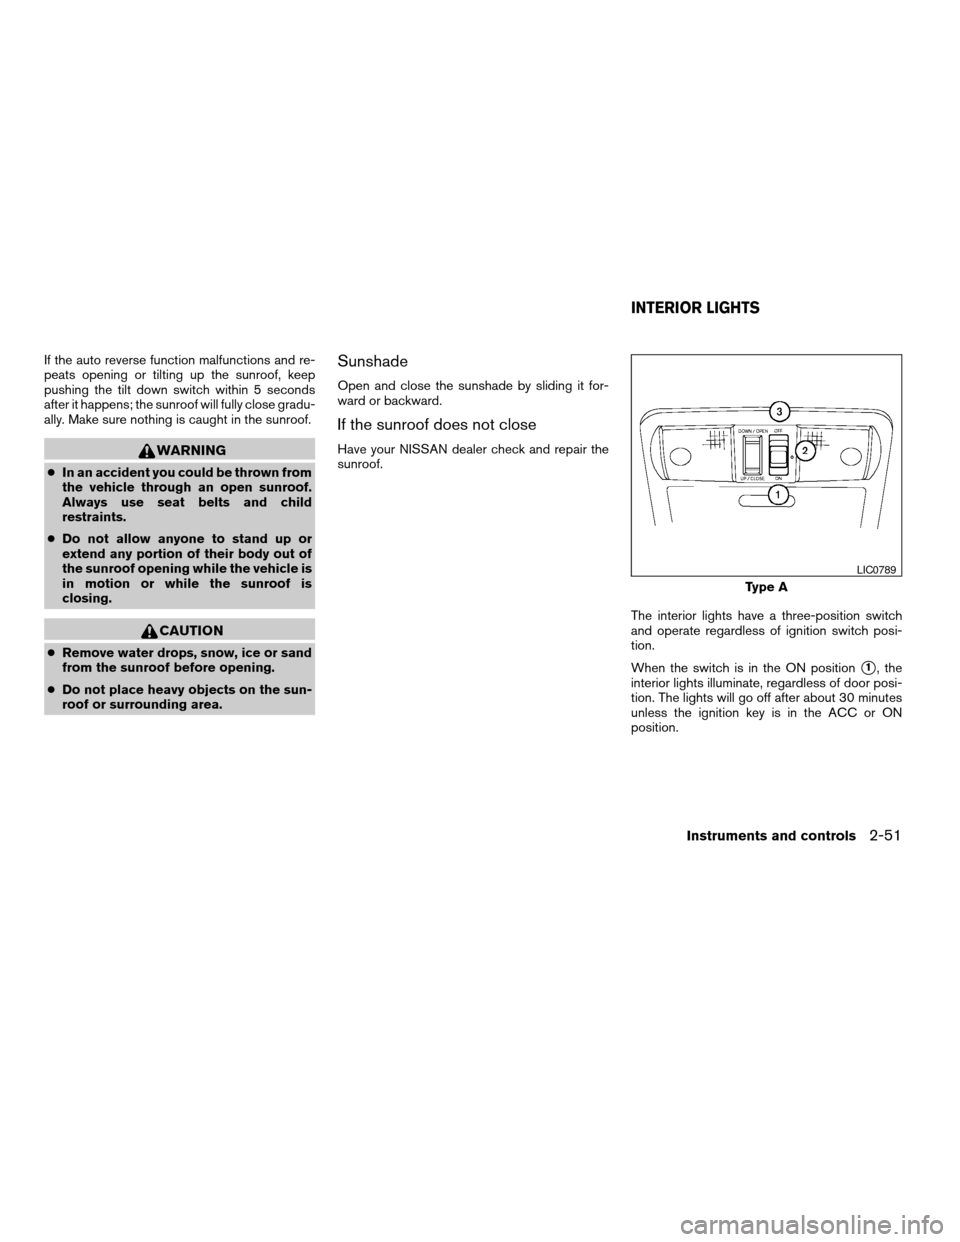
The interior lights have a three-position switch
and operate regardless of ignition switch posi-
tion.
When the switch is in the ON position
s1, the
interior lights illuminate, regardless of door posi-
tion. The lights will go off after about 30 minutes
unless the ignition key is in the ACC or ON
position.
Type A
LIC0789
INTERIOR LIGHTS
Instruments and controls2-51
ZREVIEW COPYÐ2008 Pathfinder(pat)
Owners ManualÐUSA_English(nna)
03/23/07Ðdebbie
X
Page 128 of 448
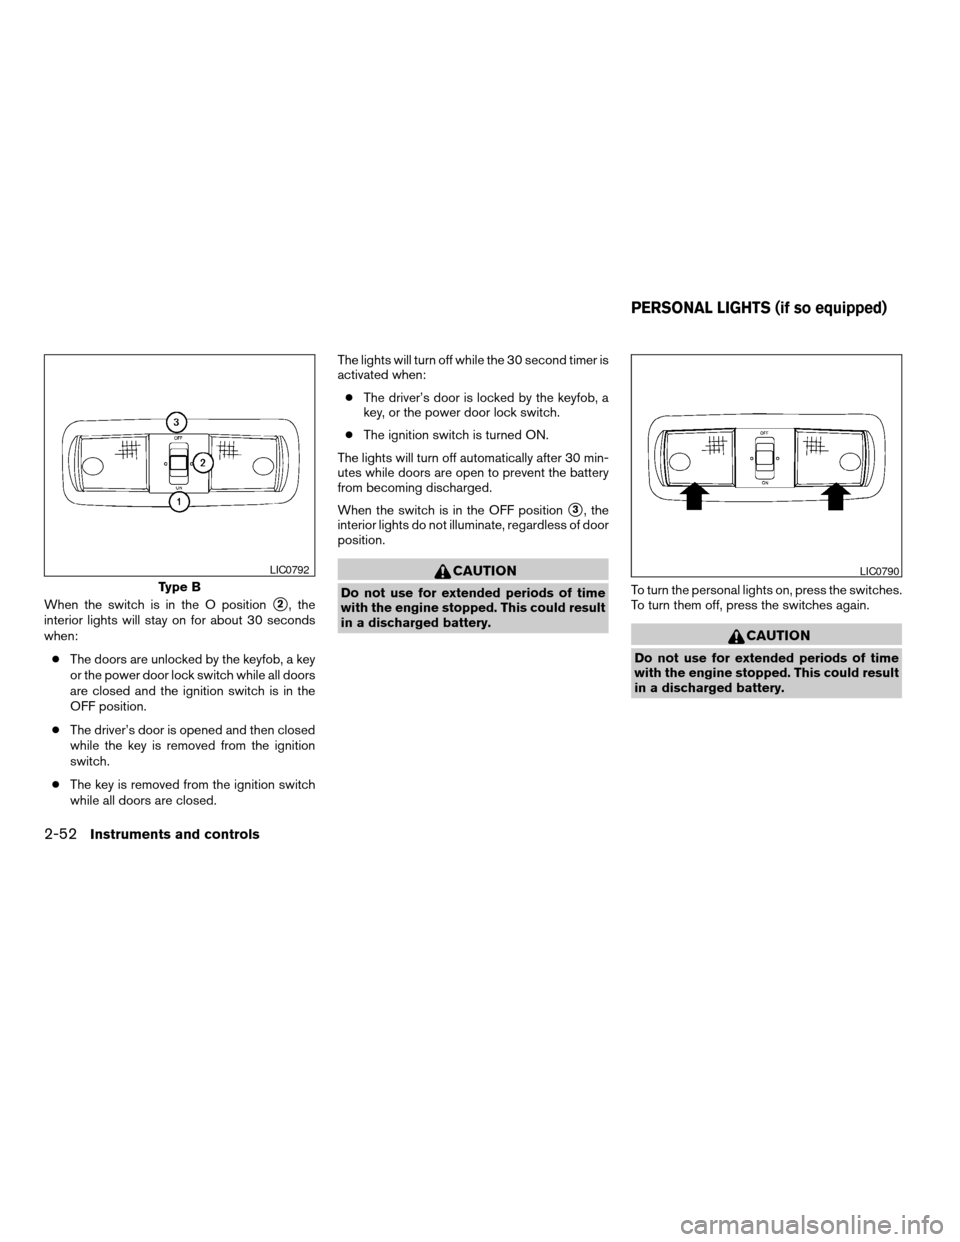
When the switch is in the O positions2, the
interior lights will stay on for about 30 seconds
when:
cThe doors are unlocked by the keyfob, a key
or the power door lock switch while all doors
are closed and the ignition switch is in the
OFF position.
cThe driver’s door is opened and then closed
while the key is removed from the ignition
switch.
cThe key is removed from the ignition switch
while all doors are closed.The lights will turn off while the 30 second timer is
activated when:
cThe driver’s door is locked by the keyfob, a
key, or the power door lock switch.
cThe ignition switch is turned ON.
The lights will turn off automatically after 30 min-
utes while doors are open to prevent the battery
from becoming discharged.
When the switch is in the OFF position
s3, the
interior lights do not illuminate, regardless of door
position.
CAUTION
Do not use for extended periods of time
with the engine stopped. This could result
in a discharged battery.To turn the personal lights on, press the switches.
To turn them off, press the switches again.
CAUTION
Do not use for extended periods of time
with the engine stopped. This could result
in a discharged battery.
Type B
LIC0792LIC0790
PERSONAL LIGHTS (if so equipped)
2-52Instruments and controls
ZREVIEW COPYÐ2008 Pathfinder(pat)
Owners ManualÐUSA_English(nna)
03/23/07Ðdebbie
X
Page 139 of 448

LOCKING WITH INSIDE LOCK
KNOB
To lock the door without the key, move the inside
lock knob to the lock position
s1, then close the
door.
To unlock the door without the key, move the
inside lock knob to the unlock position
s2.
LOCKING WITH POWER DOOR
LOCK SWITCH
To lock all the doors without a key, push the door
lock switch (driver’s or front passenger’s side) , to
the lock position
s1. When locking the door this
way, be certain not to leave the key inside the
vehicle.
To unlock all the doors without a key, push the
door lock switch (driver’s or front passenger’s
side) to the unlock position
s2.
Lockout protection
When the power door lock switch (driver’s or
front passenger’s side) is moved to the lock
position with the key in the ignition and any door
open, all doors will lock and then unlock auto-
matically. This helps to prevent the keys from
being accidently locked inside the vehicle.
Inside lock
LPD0298
Door lock switch
WPD0381
Pre-driving checks and adjustments3-5
ZREVIEW COPYÐ2008 Pathfinder(pat)
Owners ManualÐUSA_English(nna)
03/23/07Ðdebbie
X
Page 140 of 448
CHILD SAFETY REAR DOOR LOCK
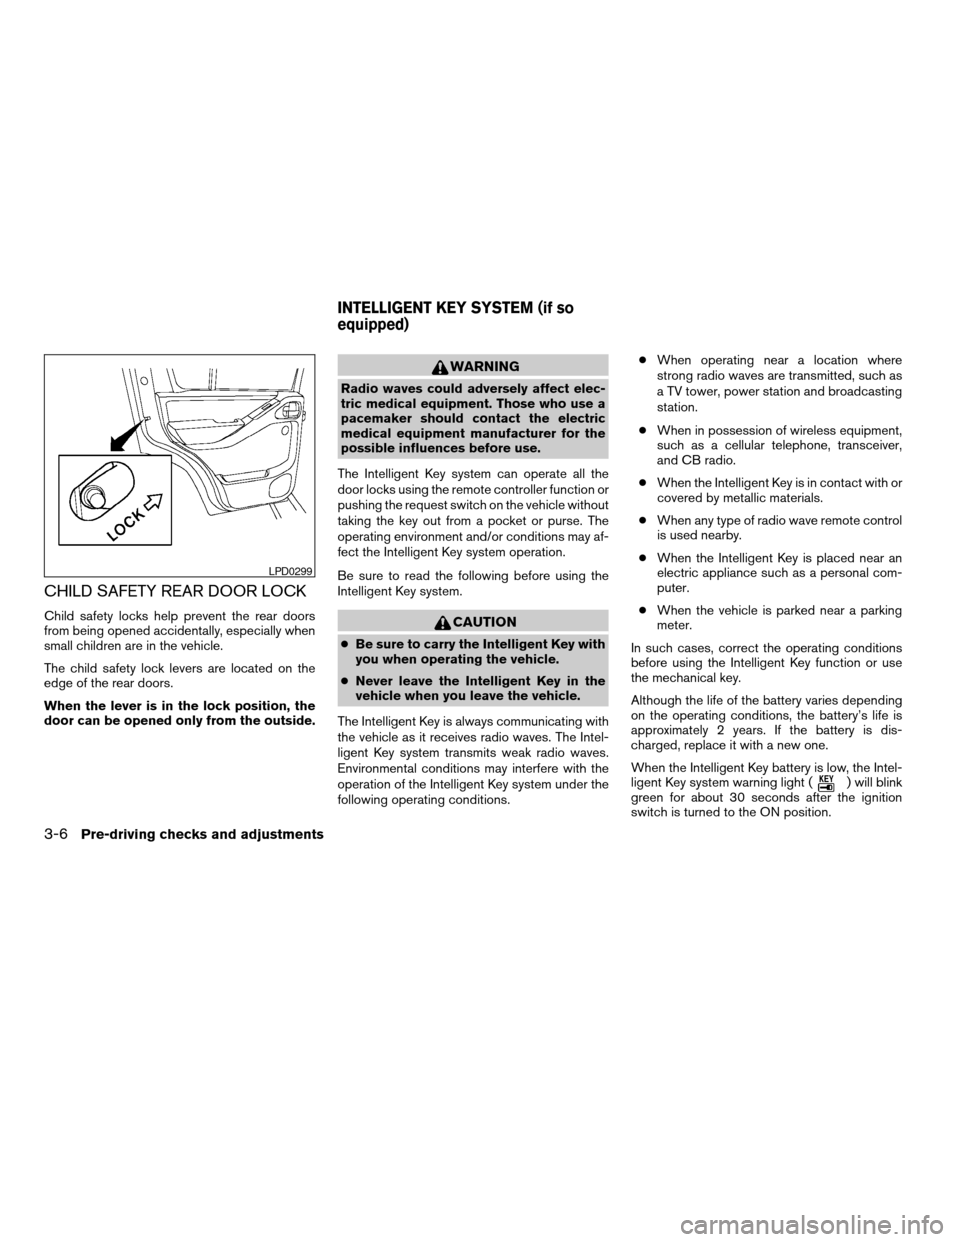
Child safety locks help prevent the rear doors
from being opened accidentally, especially when
small children are in the vehicle.
The child safety lock levers are located on the
edge of the rear doors.
When the lever is in the lock position, the
door can be opened only from the outside.
WARNING
Radio waves could adversely affect elec-
tric medical equipment. Those who use a
pacemaker should contact the electric
medical equipment manufacturer for the
possible influences before use.
The Intelligent Key system can operate all the
door locks using the remote controller function or
pushing the request switch on the vehicle without
taking the key out from a pocket or purse. The
operating environment and/or conditions may af-
fect the Intelligent Key system operation.
Be sure to read the following before using the
Intelligent Key system.
CAUTION
cBe sure to carry the Intelligent Key with
you when operating the vehicle.
cNever leave the Intelligent Key in the
vehicle when you leave the vehicle.
The Intelligent Key is always communicating with
the vehicle as it receives radio waves. The Intel-
ligent Key system transmits weak radio waves.
Environmental conditions may interfere with the
operation of the Intelligent Key system under the
following operating conditions.cWhen operating near a location where
strong radio waves are transmitted, such as
a TV tower, power station and broadcasting
station.
cWhen in possession of wireless equipment,
such as a cellular telephone, transceiver,
and CB radio.
cWhen the Intelligent Key is in contact with or
covered by metallic materials.
cWhen any type of radio wave remote control
is used nearby.
cWhen the Intelligent Key is placed near an
electric appliance such as a personal com-
puter.
cWhen the vehicle is parked near a parking
meter.
In such cases, correct the operating conditions
before using the Intelligent Key function or use
the mechanical key.
Although the life of the battery varies depending
on the operating conditions, the battery’s life is
approximately 2 years. If the battery is dis-
charged, replace it with a new one.
When the Intelligent Key battery is low, the Intel-
ligent Key system warning light (
) will blink
green for about 30 seconds after the ignition
switch is turned to the ON position.
LPD0299
INTELLIGENT KEY SYSTEM (if so
equipped)
3-6Pre-driving checks and adjustments
ZREVIEW COPYÐ2008 Pathfinder(pat)
Owners ManualÐUSA_English(nna)
03/23/07Ðdebbie
X