2008 NISSAN PATHFINDER child lock
[x] Cancel search: child lockPage 51 of 448

When installing a child restraint in the 2nd or 3rd
row, check to make sure that it is not contacting
the seat directly in front of it. If you are unable to
properly secure the child restraint, move it to
another seating position or try a different child
restraint.
2. Route the seat belt tongue through the child
restraint and insert it into the buckle until you
hear and feel the latch engage. Be sure to
follow the child restraint manufacturer’s in-
structions for belt routing.3. Pull the shoulder belt until the belt is fully
extended. At this time, the seat belt retractor
is in the Automatic Locking Retractor mode
(child restraint mode) . It reverts to emer-
gency locking retractor mode when the seat
belt is fully retracted.
Rear facing – step 2
WRS0682
Rear facing – step 3
LRS0669
Safety—Seats, seat belts and supplemental restraint system1-33
ZREVIEW COPYÐ2008 Pathfinder(pat)
Owners ManualÐUSA_English(nna)
03/22/07Ðdebbie
X
Page 53 of 448

7. Check that the retractor is in the Automatic
Locking Retractor mode by trying to pull
more seat belt out of the retractor. If you
cannot pull any more seat belt webbing out
of the retractor, the retractor is in the Auto-
matic Locking Retractor mode
8. Check to make sure that the child restraint is
properly secured prior to each use. If the belt
is not locked, repeat steps 3 through 7.
After the child restraint is removed and the seat
belt fully retracted, the Automatic Locking Re-
tractor mode (child restraint mode) is canceled.
PRECAUTIONS ON BOOSTER
SEATS
WARNING
cInfants and small children should al-
ways be placed in an appropriate child
restraint while riding in the vehicle.
Failure to use a child restraint or
booster seat can result in serious injury
or death.cInfants and small children should never
be carried on your lap. It is not possible
for even the strongest adult to resist the
forces of a severe accident. The child
could be crushed between the adult and
parts of the vehicle. Also, do not put the
same seat belt around both your child
and yourself.
cNISSAN recommends that the booster
seat be installed in the rear seat. Ac-
cording to accident statistics, children
are safer when properly restrained in
the rear seat than in the front seat. If
you must install a booster seat in the
front seat, see “Booster seat installa-
tion” in this section.
cA booster seat must only be installed in
a seating position that has a
lap/shoulder belt. Failure to use a
three-point type seat belt with a
booster seat can result in a serious in-
jury in sudden stop or collision.
cImproper use or improper installation
of a booster seat can increase the risk
or severity of injury for both the child
and other occupants of the vehicle and
can lead to serious injury or death in an
accident.
ARS1098
BOOSTER SEATS
Safety—Seats, seat belts and supplemental restraint system1-35
ZREVIEW COPYÐ2008 Pathfinder(pat)
Owners ManualÐUSA_English(nna)
03/22/07Ðdebbie
X
Page 55 of 448

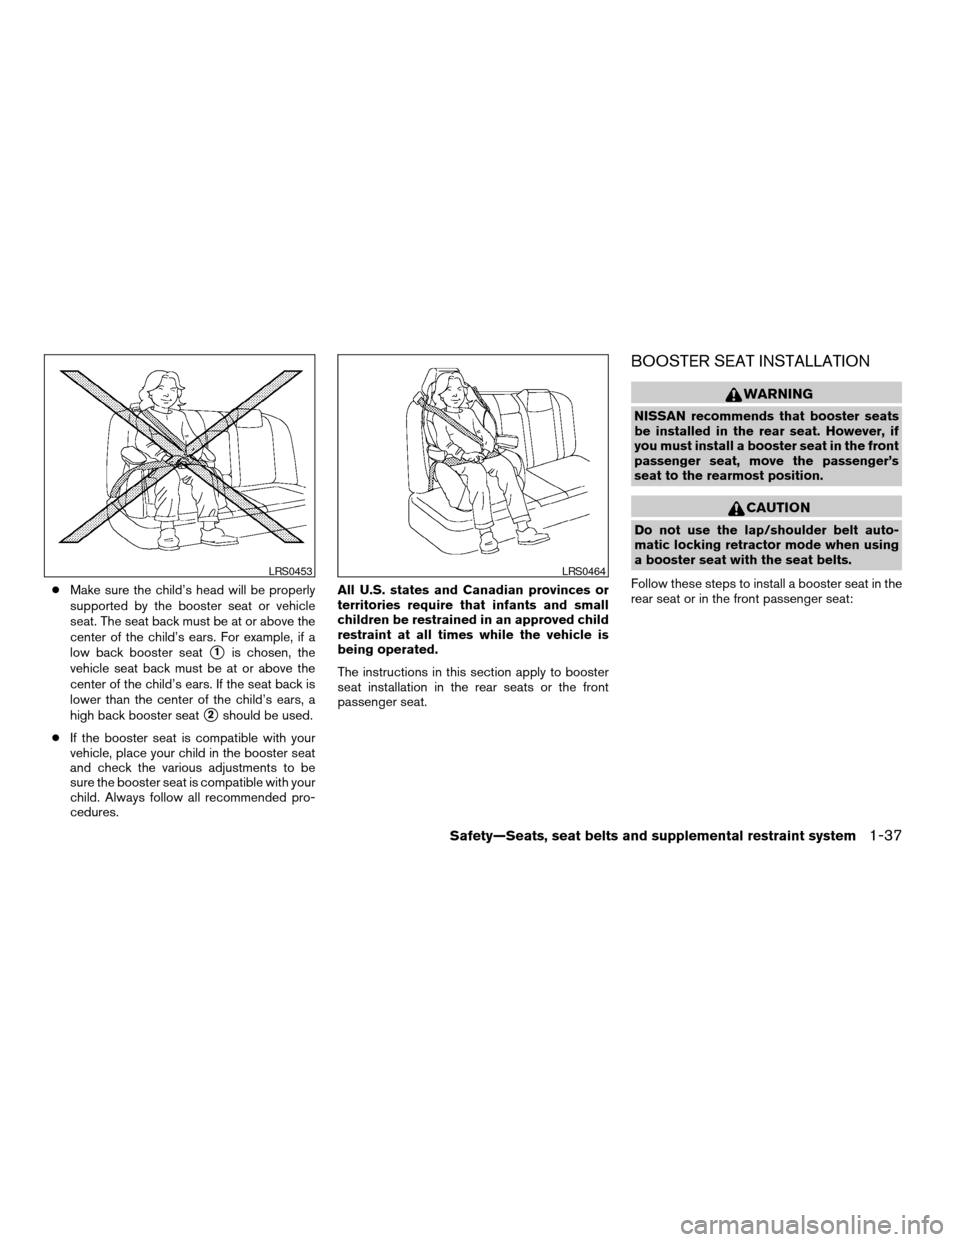
cMake sure the child’s head will be properly
supported by the booster seat or vehicle
seat. The seat back must be at or above the
center of the child’s ears. For example, if a
low back booster seat
s1is chosen, the
vehicle seat back must be at or above the
center of the child’s ears. If the seat back is
lower than the center of the child’s ears, a
high back booster seat
s2should be used.
cIf the booster seat is compatible with your
vehicle, place your child in the booster seat
and check the various adjustments to be
sure the booster seat is compatible with your
child. Always follow all recommended pro-
cedures.All U.S. states and Canadian provinces or
territories require that infants and small
children be restrained in an approved child
restraint at all times while the vehicle is
being operated.
The instructions in this section apply to booster
seat installation in the rear seats or the front
passenger seat.
BOOSTER SEAT INSTALLATION
WARNING
NISSAN recommends that booster seats
be installed in the rear seat. However, if
you must install a booster seat in the front
passenger seat, move the passenger’s
seat to the rearmost position.
CAUTION
Do not use the lap/shoulder belt auto-
matic locking retractor mode when using
a booster seat with the seat belts.
Follow these steps to install a booster seat in the
rear seat or in the front passenger seat:
LRS0453LRS0464
Safety—Seats, seat belts and supplemental restraint system1-37
ZREVIEW COPYÐ2008 Pathfinder(pat)
Owners ManualÐUSA_English(nna)
03/22/07Ðdebbie
X
Page 67 of 448

Front passenger air bag and status light
WARNING
The front passenger air bag is designed to
automatically turn OFF under some con-
ditions. Read this section carefully to
learn how it operates. Proper use of the
seat, seat belt and child restraints is nec-
essary for most effective protection. Fail-
ure to follow all instructions in this
manual concerning the use of seats, seat
belts and child restraints can increase the
risk or severity of injury in an accident.Status light
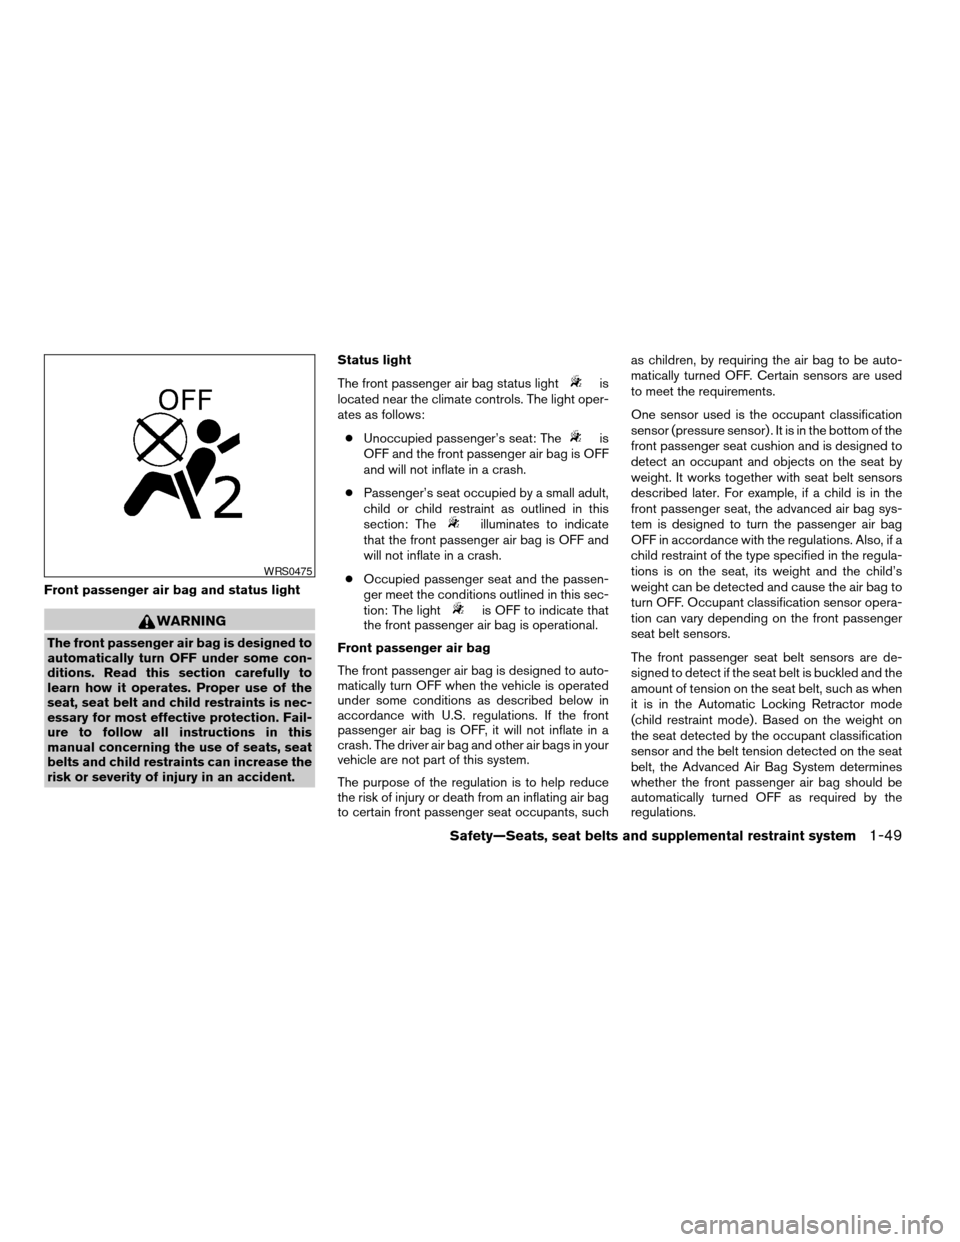
The front passenger air bag status light
is
located near the climate controls. The light oper-
ates as follows:
cUnoccupied passenger’s seat: The
is
OFF and the front passenger air bag is OFF
and will not inflate in a crash.
cPassenger’s seat occupied by a small adult,
child or child restraint as outlined in this
section: The
illuminates to indicate
that the front passenger air bag is OFF and
will not inflate in a crash.
cOccupied passenger seat and the passen-
ger meet the conditions outlined in this sec-
tion: The light
is OFF to indicate that
the front passenger air bag is operational.
Front passenger air bag
The front passenger air bag is designed to auto-
matically turn OFF when the vehicle is operated
under some conditions as described below in
accordance with U.S. regulations. If the front
passenger air bag is OFF, it will not inflate in a
crash. The driver air bag and other air bags in your
vehicle are not part of this system.
The purpose of the regulation is to help reduce
the risk of injury or death from an inflating air bag
to certain front passenger seat occupants, suchas children, by requiring the air bag to be auto-
matically turned OFF. Certain sensors are used
to meet the requirements.
One sensor used is the occupant classification
sensor (pressure sensor) . It is in the bottom of the
front passenger seat cushion and is designed to
detect an occupant and objects on the seat by
weight. It works together with seat belt sensors
described later. For example, if a child is in the
front passenger seat, the advanced air bag sys-
tem is designed to turn the passenger air bag
OFF in accordance with the regulations. Also, if a
child restraint of the type specified in the regula-
tions is on the seat, its weight and the child’s
weight can be detected and cause the air bag to
turn OFF. Occupant classification sensor opera-
tion can vary depending on the front passenger
seat belt sensors.
The front passenger seat belt sensors are de-
signed to detect if the seat belt is buckled and the
amount of tension on the seat belt, such as when
it is in the Automatic Locking Retractor mode
(child restraint mode) . Based on the weight on
the seat detected by the occupant classification
sensor and the belt tension detected on the seat
belt, the Advanced Air Bag System determines
whether the front passenger air bag should be
automatically turned OFF as required by the
regulations.
WRS0475
Safety—Seats, seat belts and supplemental restraint system1-49
ZREVIEW COPYÐ2008 Pathfinder(pat)
Owners ManualÐUSA_English(nna)
03/22/07Ðdebbie
X
Page 68 of 448

Front passenger seat adult occupants who are
properly seated and using the seat belt as out-
lined in this manual should not cause the passen-
ger air bag to be automatically turned OFF. For
small adults it may be turned OFF, however if the
occupant takes his/her weight off the seat cush-
ion (for example, by not sitting upright, by sitting
on an edge of the seat, or by otherwise being out
of position) , this could cause the sensor to turn
the air bag OFF. In addition, if the occupant
improperly uses the seat belt in the Automatic
Locking Retractor mode (child restraint mode) ,
this could cause the air bag to be turned OFF.
Always be sure to be seated and wearing the seat
belt properly for the most effective protection by
the seat belt and supplemental air bag.
NISSAN recommends that pre-teens and chil-
dren be properly restrained in a rear seat.
NISSAN also recommends that appropriate child
restraints and booster seats be properly installed
in a rear seat. If this is not possible, the occupant
classification sensor and seat belt sensors are
designed to operate as described above to turn
the front passenger air bag OFF for specified
child restraints as required by the regulations.
Failing to properly secure child restraints and to
use the Automatic Locking Retractor mode (child
restraint mode) may allow the restraint to tip or
move in an accident or sudden stop. This can
also result in the passenger air bag inflating in acrash instead of being OFF. See “Child re-
straints” earlier in this section for proper use and
installation.
If the front passenger seat is not occupied the
passenger air bag is designed not to inflate in a
crash. However, heavy objects placed on the
seat could result in air bag inflation, because of
the object’s weight detected by the occupant
classification sensor. Other conditions could also
result in air bag inflation, such as if a child is
standing on the seat, or if two children are on the
seat, contrary to the instructions in this manual.
Always be sure that you and all vehicle occupants
are seated and restrained properly.
Using the passenger air bag status light, you can
monitor when the front passenger air bag is au-
tomatically turned OFF with the seat occupied.
The light will not illuminate when the front pas-
senger seat is unoccupied.
If an adult occupant is in the seat but the passen-
ger air bag status light is illuminated (indicating
that the air bag is OFF) , it could be that the
person is a small adult, or is not sitting on the seat
properly or not using the seat belt properly.
If a child restraint must be used in the front seat,
the passenger air bag status light may or may not
be illuminated, depending on the size of the child
and the type of child restraint being used. If the air
bag status light is not illuminated (indicating thatthe air bag might inflate in a crash) , it could be
that the child restraint or seat belt is not being
used properly. Make sure that the child restraint is
installed properly, the seat belt is used properly
and the occupant is positioned properly. If the air
bag status light is not illuminated, reposition the
occupant or child restraint in a rear seat.
If the passenger air bag status light will not illu-
minate even though you believe that the child
restraint, the seat belts and the occupant are
properly positioned, the system may be sensing
an unoccupied seat (in which case the air bag is
OFF) . Your NISSAN dealer can check that the
system is OFF by using a special tool. However,
until you have confirmed with your dealer that
your air bag is working properly, reposition the
occupant or child restraint in a rear seat.
The air bag system and passenger air bag status
light will take a few seconds to register a change
in the passenger seat status. For example, if a
large adult who is sitting in the front passenger
seat exits the vehicle, the passenger air bag
status light will go from OFF to ON for a few
seconds and then to OFF. This is normal system
operation and does not indicate a malfunction.
If a malfunction occurs in the front passenger air
bag system, the supplemental air bag warning
light
, located in the meter and gauges area
1-50Safety—Seats, seat belts and supplemental restraint system
ZREVIEW COPYÐ2008 Pathfinder(pat)
Owners ManualÐUSA_English(nna)
03/22/07Ðdebbie
X
Page 123 of 448

Always distribute the luggage evenly on the roof
rack. Do not load more than 200 pounds (91 kg) .
Be careful that your vehicle does not exceed the
Gross Vehicle Weight Rating (GVWR) or its
Gross Axle Weight Rating (GAWR front and
rear) . The GVWR and GAWR are located on the
F.M.V.S.S. label (located on the driver’s door
pillar) . For more information regarding GVWR
and GAWR, refer to “Vehicle loading information”
in the “Technical and consumer information” sec-
tion later in this manual.
The front and rear cross bars (if so equipped) can
be adjusted or removed.
To adjust:
1. Loosen the 2 TorxThead fasteners
sAon
both ends of the crossbar.
2. Remove the plugs at the desired position
(
sC).
3. Slide the crossbar
sBto the desired position
(
sC) so that the holes in the crossbar line up
with the holes in the sidebar.
4. Tighten the 2 TorxThead fasteners on both
ends of the crossbar.
5. Reinstall the plugs at the previous position
sA.
6. Position your luggage on the crossbars and
secure the luggage with rope.7. Always check the tightness of the TorxT
head fasteners.
To remove:
1. Loosen the 2 TorxThead fasteners
sAon
both ends of the crossbar.
2. Remove the crossbar from the roof rack.
POWER WINDOWS
WARNING
cMake sure that all passengers have
their hands, etc. inside the vehicle while
it is in motion and before closing the
windows. Use the window lock switch
to prevent unexpected use of the power
windows.
cDo not leave children unattended inside
the vehicle. They could unknowingly ac-
tivate switches or controls and become
trapped in a window. Unattended chil-
dren could become involved in serious
accidents.
The power windows operate when the ignition
switch is in the ON position, or for about 45
seconds after the ignition switch is turned to the
OFF position. If the driver’s or passenger’s door
is opened during this period of about 45 sec-
onds, power to the windows is canceled.
WINDOWS
Instruments and controls2-47
ZREVIEW COPYÐ2008 Pathfinder(pat)
Owners ManualÐUSA_English(nna)
03/23/07Ðdebbie
X
Page 135 of 448

3 Pre-driving checks and adjustments
Keys .............................................3-2
Intelligent keys (if so equipped)..................3-2
NISSAN vehicle immobilizer system keys..........3-3
Doors............................................3-4
Locking with key................................3-4
Locking with inside lock knob....................3-5
Locking with power door lock switch.............3-5
Child safety rear door lock.......................3-6
Intelligent Key system (if so equipped)...............3-6
Operating range................................3-8
Door locks/unlocks precaution...................3-8
Intelligent Key operation.........................3-9
How to use the remote keyless entry
function......................................3-12
Warning signals...............................3-14
Troubleshooting guide.........................3-14
Remote keyless entry system......................3-16
How to use remote keyless entry system.........3-16
Hood...........................................3-20
Lift gate.........................................3-20Lift gate release...............................3-21
Glass hatch......................................3-21
Fuel-filler door...................................3-22
Opening the fuel-filler lid.......................3-22
Fuel-filler cap.................................3-22
Steering wheel...................................3-24
Tilt operation..................................3-24
Pedal position adjustment (if so equipped)..........3-24
Sun visors.......................................3-25
Vanity mirrors.................................3-25
Mirrors..........................................3-26
Rearview mirror (if so equipped).................3-26
Automatic anti-glare rearview mirror
(if so equipped)...............................3-26
Outside mirrors...............................3-28
Automatic drive positioner (if so equipped)..........3-29
Memory storage function.......................3-29
Entry/exit function.............................3-31
System operation..............................3-31
ZREVIEW COPYÐ2008 Pathfinder(pat)
Owners ManualÐUSA_English(nna)
03/23/07Ðdebbie
X
Page 138 of 448

The master key can be used for all the locks.
The valet key cannot be used for the glove box
lock.
To protect belongings when you leave a key with
someone, give them the valet key only.
Never leave these keys in the vehicle.
Additional or replacement keys:
If you still have a key, the key number is not
necessary when you need extra NISSAN Vehicle
Immobilizer System keys. Your dealer can dupli-
cate your existing key. As many as five NISSAN
Vehicle Immobilizer System keys can be used
with one vehicle. You should bring all NISSAN
Vehicle Immobilizer System keys that you have to
your NISSAN dealer for registration. This is be-
cause the registration process will erase the
memory of all key codes previously registered
into the NISSAN Vehicle Immobilizer System.
After the registration process, these components
will only recognize keys coded into the NISSAN
Vehicle Immobilizer System during registration.
Any key that is not given to your dealer at the time
of registration will no longer be able to start your
vehicle.
Do not allow the immobilizer system key, which
contains an electrical transponder, to come into
contact with salt water. This could affect system
function.WARNING
cAlways have the doors locked while
driving. Along with the use of seat belts,
this provides greater safety in the event
of an accident by helping to prevent
persons from being thrown from the
vehicle. This also helps keep children
and others from unintentionally open-
ing the doors, and will help keep out
intruders.
cBefore opening any door, always look
for and avoid oncoming traffic.
cDo not leave children unattended inside
the vehicle. They could unknowingly ac-
tivate switches or controls. Unattended
children could become involved in seri-
ous accidents.
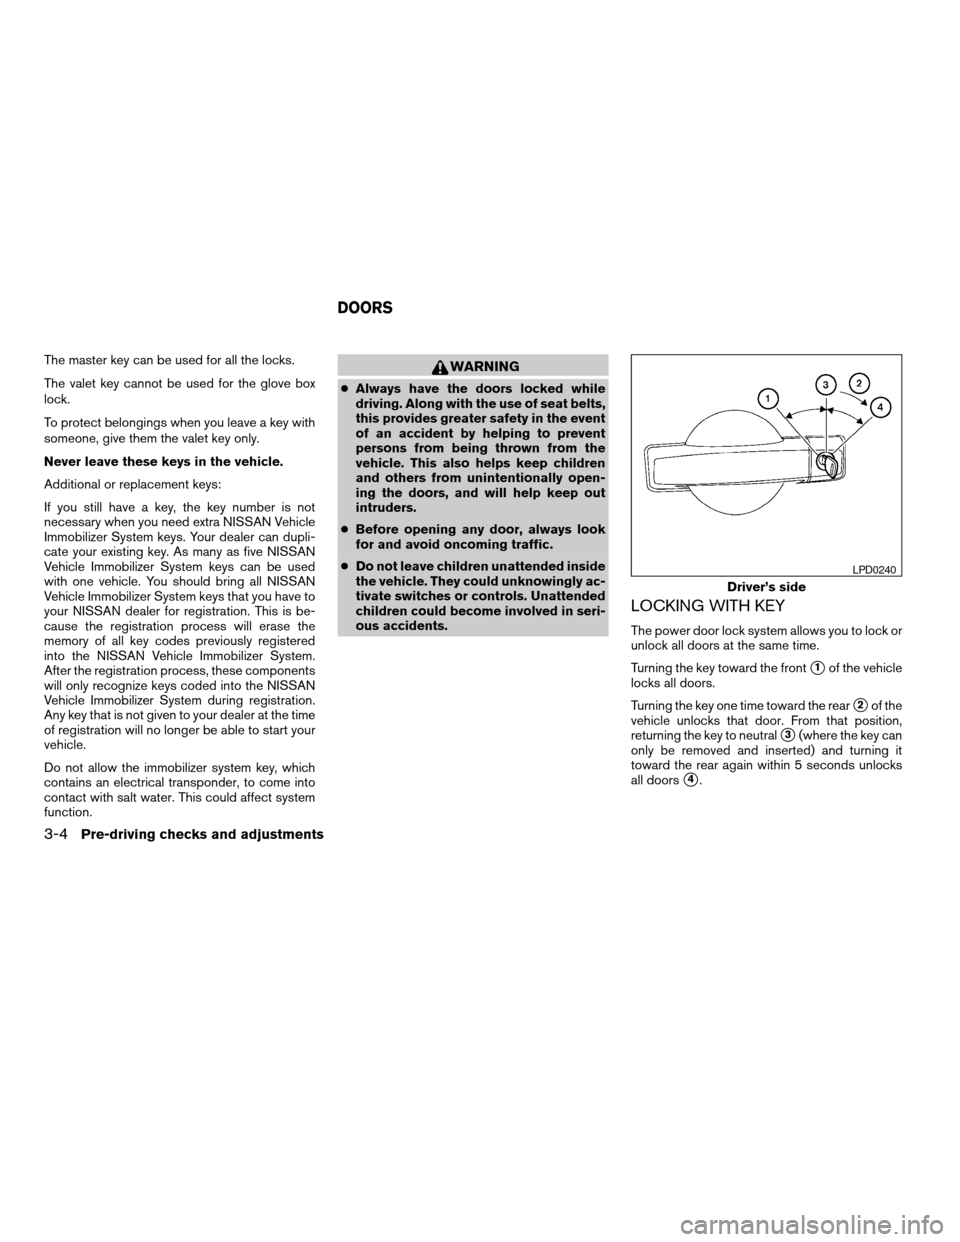
LOCKING WITH KEY
The power door lock system allows you to lock or
unlock all doors at the same time.
Turning the key toward the front
s1of the vehicle
locks all doors.
Turning the key one time toward the rear
s2of the
vehicle unlocks that door. From that position,
returning the key to neutral
s3(where the key can
only be removed and inserted) and turning it
toward the rear again within 5 seconds unlocks
all doors
s4.
Driver’s side
LPD0240
DOORS
3-4Pre-driving checks and adjustments
ZREVIEW COPYÐ2008 Pathfinder(pat)
Owners ManualÐUSA_English(nna)
03/23/07Ðdebbie
X