2008 NISSAN PATHFINDER light
[x] Cancel search: lightPage 250 of 448
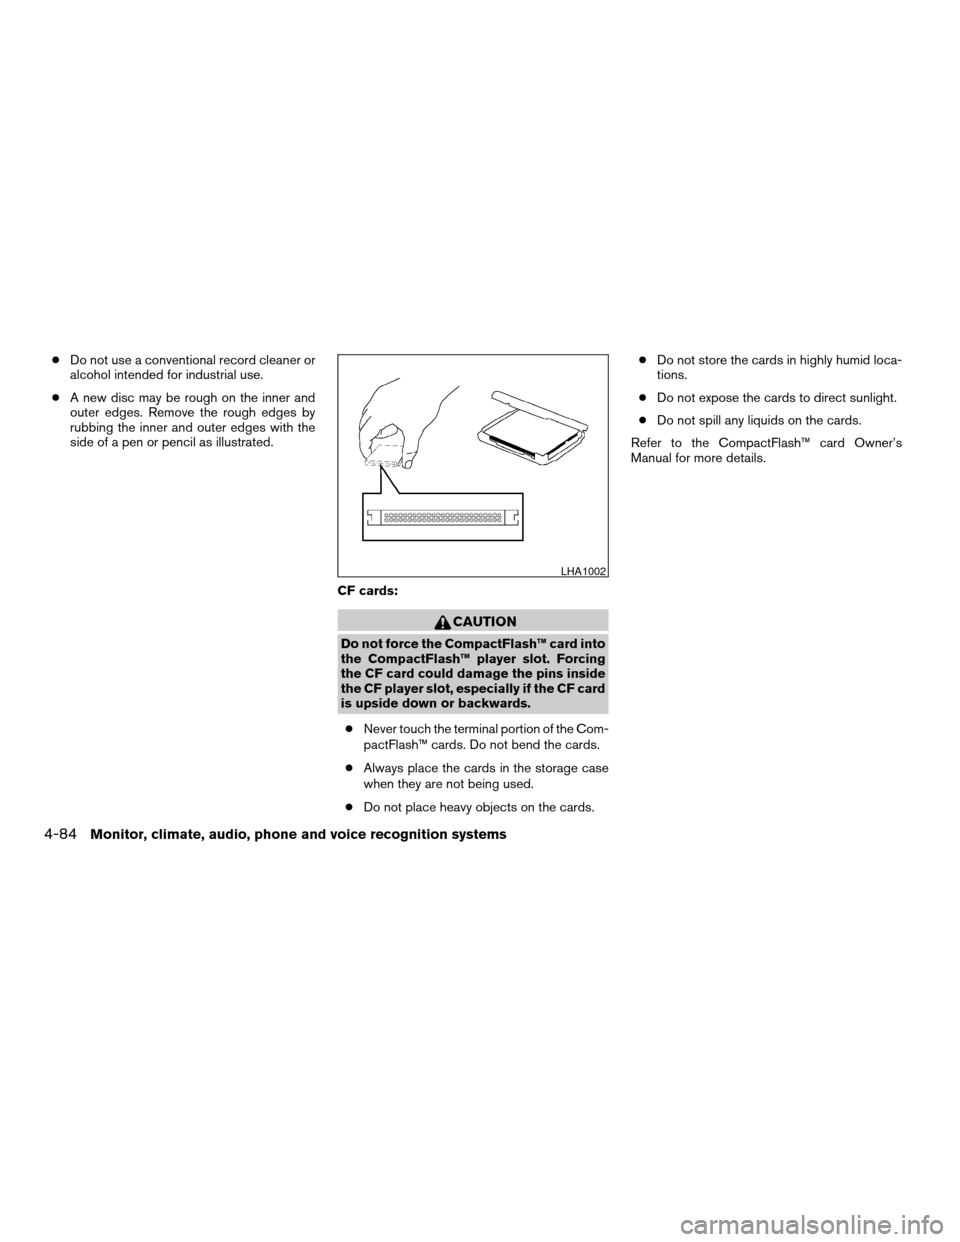
cDo not use a conventional record cleaner or
alcohol intended for industrial use.
cA new disc may be rough on the inner and
outer edges. Remove the rough edges by
rubbing the inner and outer edges with the
side of a pen or pencil as illustrated.
CF cards:
CAUTION
Do not force the CompactFlash™ card into
the CompactFlash™ player slot. Forcing
the CF card could damage the pins inside
the CF player slot, especially if the CF card
is upside down or backwards.
cNever touch the terminal portion of the Com-
pactFlash™ cards. Do not bend the cards.
cAlways place the cards in the storage case
when they are not being used.
cDo not place heavy objects on the cards.cDo not store the cards in highly humid loca-
tions.
cDo not expose the cards to direct sunlight.
cDo not spill any liquids on the cards.
Refer to the CompactFlash™ card Owner’s
Manual for more details.
LHA1002
4-84Monitor, climate, audio, phone and voice recognition systems
ZREVIEW COPYÐ2008 Pathfinder(pat)
Owners ManualÐUSA_English(nna)
03/23/07Ðdebbie
X
Page 253 of 448
“Headphones ON” illuminates on the front dis-
play when the headphones are on.
One or two infrared headphones and one remote
controller are included if the vehicle is equipped
with the DVD entertainment system.
For vehicles equipped with the FM/AM/SAT radio
with compact disc player, if the rear headphones
are turned on, the rear speakers will be disabled.
The rear passengers can use the wireless head-
phones to listen to a different media than the front
passengers. The rear passengers can listen to
the same media along with the front passengers
or they can listen to a different media.
For more information on the remote controller,
see “NISSAN Mobile Entertainment System
(MES)” later in this section.
VOL (volume) wireless headphones
dial:
The VOL dial on the wireless headphones allows
the rear passengers to adjust the headphone
volume level.
Speaker control (front panel)
button:
Press the
button on the front radio control
panel to turn the rear speakers off and the wire-less headphones on. Press the
button
again to turn rear speakers back on and wireless
headphones off.
MODE (remote control) button:
The MODE button on the remote controller al-
lows the rear passengers to change between
Preset A, Preset B, Preset C, Music Box**, CD*,
CompactFlash*, DVD* and AUX. When a source
of media is selected, the media type will be dis-
played on the rear screen.
*These modes are only available when compat-
ible media storage is inserted into the device.
**This mode is only available when music has
been downloaded into the Music Box hard-disk
drive audio system.
Seek (remote control)
buttons:
In AM or FM mode, the
or theseek
buttons on the remote controller allow the rear
seat passengers to find the next or previous
preset radio station.
In CD, Music Box hard-disk drive audio system
and CompactFlash™ mode, the
or
theseek buttons allow the rear passen-
gers to find the next or previous selection.
REW and FF (remote
control) buttons:
When the
(rewind) or the(fast for-
ward) button on the remote controller is pressed
while in AM or FM mode, the radio will tune to the
next frequency.
When the
(rewind) or the(fast for-
ward) button on the remote controller is pressed
while in CD, Music Box hard-disk audio system,
or CompactFlash™, the media will play while re-
winding or fast forwarding.
ANTENNA
Window antenna
The antenna pattern is printed inside the rear
passenger and driver side windows.
CAUTION
cDo not place metalized film near the
rear driver or passenger side window
glass or attach any metal parts to it. This
may cause poor reception or noise.
cWhen cleaning the inside of the rear
driver or passenger side window, be
careful not to scratch or damage the
window antenna. Lightly wipe along the
antenna with a dampened soft cloth.
Monitor, climate, audio, phone and voice recognition systems4-87
ZREVIEW COPYÐ2008 Pathfinder(pat)
Owners ManualÐUSA_English(nna)
03/23/07Ðdebbie
X
Page 262 of 448

Switch to DVD-AUX:
Switch the output source from the DVD drive to
another device connected to the auxiliary input
jacks located on the DVD player.
For more information, see “DVD auxiliary input
jacks” later in this section.
Menu:
Some menus specific to each DVD will be
shown. For details, see the instructions attached
to the DVD.
Top Menu:
Each title menu in the disc will be shown. For
details, see the instructions attached to the DVD.
Audio:
Some audio tracks specific to each DVD will be
shown. For details, see the instructions attached
to the DVD.
Subtitle:
Choose the preferred DVD subtitle language by
touching the “
” key or the “” key.
Display Mode:
Choose from the Full, Wide, Normal or the Cin-
ema mode by touching the “
” key or the
“” key.Angle:
If the DVD contains different angles (such as
moving images) , the current image angle can be
switched to another one.
Choose a different angle by touching the “–” key
or the “+” key; the angle will change if available.
Angle Mark:
When this item is turned on, an angle mark will be
shown on the bottom of the screen if the scene
can be seen from a different angle. Touch the
“ON” key to enable the angle mark; the indicator
light will illuminate.
10Key Search:
Touch the “10Key Search” key to open the num-
ber entry screen. Input the number you want to
search for and touch the “OK” key. The specified
Title/Chapter or Group/Track will be played.
Title Search:
The scene with the specified title will be dis-
played the number of times the “–” key or the “+”
key is touched.
Menu Skip:
DVD menus are automatically configured and the
contents will be played directly when the “Menu
LHA0971
4-96Monitor, climate, audio, phone and voice recognition systems
ZREVIEW COPYÐ2008 Pathfinder(pat)
Owners ManualÐUSA_English(nna)
03/23/07Ðdebbie
X
Page 266 of 448
AUDIO:
Press the AUDIO button to call up audio menu.
Repeatedly press the AUDIO button to cycle
through each available audio track.
ANGLE:
Press the ANGLE button to call up camera angle
menu.
Repeatedly press the ANGLE button to cycle
through each available angle.
CLEAR:
Press the CLEAR button to clear all numeric
inputs, if actuated prior to expiration of the
3-second timer.
NUMERIC KEYPAD (0–9 &¸10):
Press the NUMERIC KEYPAD to directly access
disc chapters, titles or tracks by inputting their
numeric value.
The “¸10” button input numbers greater than or
equal to 10, allowing up three digits to be input
for selecting chapter/title/track number.
The subsequent actuation of numeric buttons will
continuously shift the previously input number to
the “left”.The chapter/title/track number will be automati-
cally selected (if valid, based on media content) if
3 seconds expire without any keypad inputs.
The operator can cancel the input
chapter/title/track number by actuating the
CLEAR control prior to the expiration of the
3-second timer.
These functions can be used only for the DVD
discs which correspond to them.
CARE AND MAINTENANCE
Use a lightly dampened, lint free cloth to clean the
surfaces of your NISSAN Mobile Entertainment
System (DVD player face, screen, remote control,
etc.) .
Do not attempt to use the system in extreme
temperature conditions [below -4°F (-20°C) or
above 158°F (70°C)].
Do not attempt to operate the system in extreme
humidity conditions (less than 10% or more than
75%) .
CAUTION
cDo not use any solvents or cleaning
solutions when cleaning the video
system.
cDo not use excessive force on the moni-
tor screen.
cAvoid touching or scratching the moni-
tor screen as it may become dirty or
damaged.
4-100Monitor, climate, audio, phone and voice recognition systems
ZREVIEW COPYÐ2008 Pathfinder(pat)
Owners ManualÐUSA_English(nna)
03/23/07Ðdebbie
X
Page 267 of 448
HOW TO HANDLE THE DVD
CAUTION
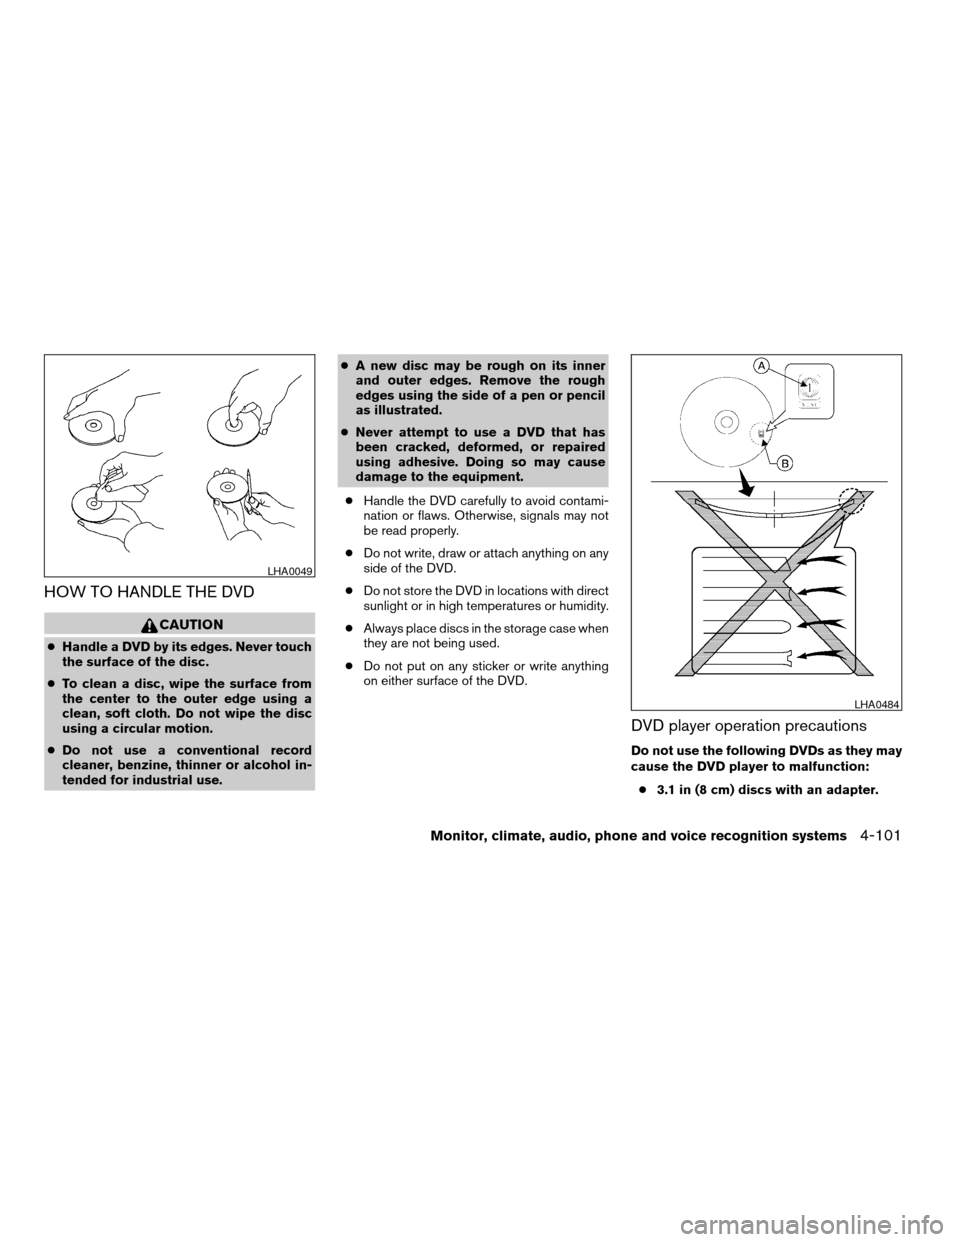
cHandle a DVD by its edges. Never touch
the surface of the disc.
cTo clean a disc, wipe the surface from
the center to the outer edge using a
clean, soft cloth. Do not wipe the disc
using a circular motion.
cDo not use a conventional record
cleaner, benzine, thinner or alcohol in-
tended for industrial use.cA new disc may be rough on its inner
and outer edges. Remove the rough
edges using the side of a pen or pencil
as illustrated.
cNever attempt to use a DVD that has
been cracked, deformed, or repaired
using adhesive. Doing so may cause
damage to the equipment.
cHandle the DVD carefully to avoid contami-
nation or flaws. Otherwise, signals may not
be read properly.
cDo not write, draw or attach anything on any
side of the DVD.
cDo not store the DVD in locations with direct
sunlight or in high temperatures or humidity.
cAlways place discs in the storage case when
they are not being used.
cDo not put on any sticker or write anything
on either surface of the DVD.
DVD player operation precautions
Do not use the following DVDs as they may
cause the DVD player to malfunction:
c3.1 in (8 cm) discs with an adapter.
LHA0049
LHA0484
Monitor, climate, audio, phone and voice recognition systems4-101
ZREVIEW COPYÐ2008 Pathfinder(pat)
Owners ManualÐUSA_English(nna)
03/23/07Ðdebbie
X
Page 302 of 448
cThe TPMS will activate only when the vehicle
is driven at speeds above 16 MPH (25
km/h) . Also, this system may not detect a
sudden drop in tire pressure (for example a
flat tire while driving) .
cThe low tire pressure warning light does not
automatically turn off when the tire pressure
is adjusted. After the tire is inflated to the
recommended pressure, the vehicle must be
driven at speeds above 16 MPH (25 km/h)
to activate the TPMS and turn off the low tire
pressure warning light. Use a tire pressure
gauge to check the tire pressure.
cTire pressure rises and falls depending on
the heat caused by the vehicle’s operation
and the outside temperature. Low outside
temperature can lower the temperature of
the air inside the tire which can cause a
lower tire inflation pressure. This may cause
the low tire pressure warning light to illumi-
nate. If the warning light illuminates in low
ambient temperature, check the tire pres-
sure for all four tires.
cYou can also check the pressure of all tires
(except the spare tire) on the display screen.
The order of the tire pressure figures dis-
played on the screen does not correspond
with the actual order of the tire position. See
“Tire pressure information” in the “Displayscreen, heater, air conditioner and audio
systems” section.
For additional information, see “Low tire pressure
warning light” in the “Instruments and controls”
section, “Tire Pressure Monitoring System
(TPMS)” in the “In case of emergency” section.
WARNING
cIf the low tire pressure warning light
illuminates while driving, avoid sudden
steering maneuvers or abrupt braking,
reduce vehicle speed, pull off the road
to a safe location and stop the vehicle
as soon as possible. Driving with under-
inflated tires may permanently damage
the tires and increase the likelihood of
tire failure. Serious vehicle damage
could occur and may lead to an acci-
dent and could result in serious per-
sonal injury. Check the tire pressure for
all four tires. Adjust the tire pressure to
the recommended COLD tire pressure
shown on the Tire and Loading Informa-
tion label to turn the low tire pressure
warning light OFF. If you have a flat tire,
replace it with a spare tire as soon as
possible. (See “Flat tire” in the “In case
of emergency” section for changing a
flat tire.)cWhen a spare tire is mounted or a wheel
is replaced, tire pressure will not be
indicated, the TPMS will not function
and the low tire pressure warning light
will flash for approximately 1 minute.
The light will remain on after 1 minute.
Contact your NISSAN dealer as soon as
possible for tire replacement and/or
system resetting.
cReplacing tires with those not originally
specified by NISSAN could affect the
proper operation of the TPMS.
cDo not inject any tire liquid or aerosol
tire sealant into the tires, as this may
cause a malfunction of the tire pressure
sensors.
CAUTION
Do not place metalized film or any metal
parts (antenna, etc.) on the windows. This
may cause poor reception of the signals
from the tire pressure sensors, and the
TPMS will not function properly.
Some devices and transmitters may temporarily
interfere with the operation of the TPMS and
cause the low tire pressure warning light to illu-
minate.
5-4Starting and driving
ZREVIEW COPYÐ2008 Pathfinder(pat)
Owners ManualÐUSA_English(nna)
03/23/07Ðdebbie
X
Page 304 of 448
significantly more likely to be injured or
killed than a person properly wearing a
seat belt.
DRINKING ALCOHOL/DRUGS AND
DRIVING
WARNING
Never drive under the influence of alcohol
or drugs. Alcohol in the bloodstream re-
duces coordination, delays reaction time
and impairs judgement. Driving after
drinking alcohol increases the likelihood
of being involved in an accident injuring
yourself and others. Additionally, if you
are injured in an accident, alcohol can
increase the severity of the injury.
NISSAN is committed to safe driving. However,
you must choose not to drive under the influence
of alcohol. Every year thousands of people are
injured or killed in alcohol-related accidents. Al-
though the local laws vary on what is considered
to be legally intoxicated, the fact is that alcohol
affects all people differently and most people
underestimate the effects of alcohol.
Remember, drinking and driving don’t mix! And
that is true for drugs, too (over-the-counter, pre-
scription, and illegal drugs) . Don’t drive if yourability to operate your vehicle is impaired by alco-
hol, drugs, or some other physical condition.
DRIVING SAFETY PRECAUTIONS
Your NISSAN is designed for both normal and
off-road use. However, avoid driving in deep wa-
ter or mud as your NISSAN is mainly designed for
leisure use, unlike a conventional off-road ve-
hicle.
Remember that two-wheel drive models are less
capable than four-wheel drive models for rough
road driving and extrication when stuck in deep
snow or mud, or the like.
Please observe the following precautions:
WARNING
cDrive carefully when off the road and
avoid dangerous areas. Every person
who drives or rides in this vehicle
should be seated with their seat belt
fastened. This will keep you and your
passengers in position when driving
over rough terrain.
cDo not drive across steep slopes. In-
stead drive either straight up or straight
down the slopes. Off-road vehicles can
tip over sideways much more easily
than they can forward or backward.cMany hills are too steep for any vehicle.
If you drive up them, you may stall. If
you drive down them, you may not be
able to control your speed. If you drive
across them, you may roll over.
cDo not shift gears while driving on
downhill grades as this could cause
loss of control of the vehicle.
cStay alert when driving to the top of a
hill. At the top there could be a drop-off
or other hazard that could cause an
accident.
cIf your engine stalls or you cannot make
it to the top of a steep hill, never at-
tempt to turn around. Your vehicle
could tip or roll over. Always back
straight down in R (Reverse) gear. Never
back down in N (Neutral) or with the
clutch depressed (manual transmission
vehicles) , using only the brake, as this
could cause loss of control.
cHeavy braking going down a hill could
cause your brakes to overheat and fade,
resulting in loss of control and an acci-
dent. Apply brakes lightly and use a low
gear to control your speed. Use the Hill
Descent Control feature (if so
equipped) .
5-6Starting and driving
ZREVIEW COPYÐ2008 Pathfinder(pat)
Owners ManualÐUSA_English(nna)
03/23/07Ðdebbie
X
Page 307 of 448

1. Move the selector lever into the P (Park)
position.
2. Turn the ignition switch slightly in the ON
direction.
3. Turn the key toward the LOCK position.
The selector lever can be moved from the P
(Park) position if the ignition switch is in
the ON position and the foot brake pedal is
depressed.
There is an OFF position in between LOCK and
ACC, although it does not show on the lock
cylinder. When the ignition is in OFF the steering
wheel is not locked.
In order for the steering wheel to be locked, it
must be turned about 1/6 of a turn counterclock-
wise from the straight up position.
To lock the steering wheel, turn the ignition
switch to the LOCK position. To unlock the
steering wheel, push the ignition switch in
and turn it gently while rotating the steer-
ing wheel slightly right and left.
If the battery of the vehicle equipped with
the Intelligent Key system is discharged,
the ignition switch cannot be turned from
the LOCK position, even using the me-
chanical key.IGNITION SWITCH POSITIONS
Push in the ignition switch to thesBposition
when you turn it.
LOCK (Normal parking position)
sA:
The ignition switch can only be locked in the
LOCK position.
The ignition switch will be unlocked when it is
pushed in, and turned to the ACC position
sC
while carrying the Intelligent Key.
ACC (Accessories)
sC:
This position activates electrical accessories
such as the radio, when the engine is not running.
ON (Normal operating position)
sD:
This position turns on the ignition system and the
electrical accessories.
START
sE:
This position starts the engine. As soon as the
engine has started, release the knob immediately.
It will automatically return to the ON position.
The ignition switch cannot be turned back to the
LOCK position unless the selector lever is in the
P (Park) position. (It can be turned only to the
sB
position.)
CAUTION
Do not leave the vehicle with the ignition
switch in ACC or ON positions when the
engine is not running for an extended pe-
riod. This can discharge the battery.
Starting and driving5-9
ZREVIEW COPYÐ2008 Pathfinder(pat)
Owners ManualÐUSA_English(nna)
03/23/07Ðdebbie
X