2008 NISSAN MURANO running lights
[x] Cancel search: running lightsPage 87 of 444
Black plate (83,1)
Model "Z51-D" EDITED: 2008/ 6/ 26
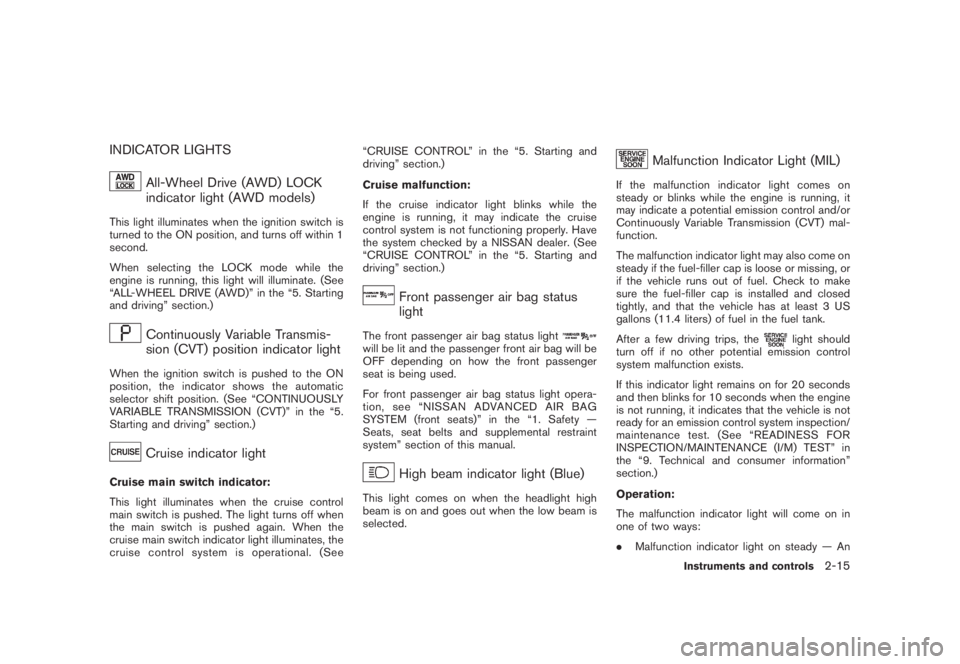
INDICATOR LIGHTS
All-Wheel Drive (AWD) LOCK
indicator light (AWD models)
This light illuminates when the ignition switch is
turned to the ON position, and turns off within 1
second.
When selecting the LOCK mode while the
engine is running, this light will illuminate. (See
“ALL-WHEEL DRIVE (AWD)” in the “5. Starting
and driving” section.)
Continuously Variable Transmis-
sion (CVT) position indicator light
When the ignition switch is pushed to the ON
position, the indicator shows the automatic
selector shift position. (See “CONTINUOUSLY
VARIABLE TRANSMISSION (CVT)” in the “5.
Starting and driving” section.)
Cruise indicator light
Cruise main switch indicator:
This light illuminates when the cruise control
main switch is pushed. The light turns off when
the main switch is pushed again. When the
cruise main switch indicator light illuminates, the
cruise control system is operational. (See“CRUISE CONTROL” in the “5. Starting and
driving” section.)
Cruise malfunction:
If the cruise indicator light blinks while the
engine is running, it may indicate the cruise
control system is not functioning properly. Have
the system checked by a NISSAN dealer. (See
“CRUISE CONTROL” in the “5. Starting and
driving” section.)
Front passenger air bag status
light
The front passenger air bag status lightwill be lit and the passenger front air bag will be
OFF depending on how the front passenger
seat is being used.
For front passenger air bag status light opera-
tion,see“NISSANADVANCEDAIRBAG
SYSTEM (front seats)” in the “1. Safety —
Seats, seat belts and supplemental restraint
system” section of this manual.
High beam indicator light (Blue)
This light comes on when the headlight high
beam is on and goes out when the low beam is
selected.
Malfunction Indicator Light (MIL)
If the malfunction indicator light comes on
steady or blinks while the engine is running, it
may indicate a potential emission control and/or
Continuously Variable Transmission (CVT) mal-
function.
The malfunction indicator light may also come on
steady if the fuel-filler cap is loose or missing, or
if the vehicle runs out of fuel. Check to make
sure the fuel-filler cap is installed and closed
tightly, and that the vehicle has at least 3 US
gallons (11.4 liters) of fuel in the fuel tank.
After a few driving trips, the
light should
turn off if no other potential emission control
system malfunction exists.
If this indicator light remains on for 20 seconds
and then blinks for 10 seconds when the engine
is not running, it indicates that the vehicle is not
ready for an emission control system inspection/
maintenance test. (See “READINESS FOR
INSPECTION/MAINTENANCE (I/M) TEST” in
the “9. Technical and consumer information”
section.)
Operation:
The malfunction indicator light will come on in
one of two ways:
.Malfunction indicator light on steady — An
Instruments and controls
2-15
Page 104 of 444
Black plate (100,1)
Model "Z51-D" EDITED: 2008/ 6/ 26
XENON HEADLIGHTS (if so equipped)
WARNINGHIGH VOLTAGE
.When xenon headlights are on, they
produce a high voltage. To prevent
an electric shock, never attempt to
modify or disassemble. Always have
your xenon headlights replaced at a
NISSAN dealer.
.Xenon headlights provide consider-
ably more light than conventional
headlights. If they are not correctly
aimed, they might temporarily blind
an oncoming driver or the driver
ahead of you and cause a serious
accident. If headlights are not aimed
correctly, immediately take your ve-
hicle to a NISSAN dealer and have
the headlights adjusted correctly.
When the xenon headlight is initially turned on,
its brightness or color varies slightly. However,
the color and brightness will soon stabilize.
.The life of xenon headlights will be
shortened by frequent on-off opera-
tion. It is generally desirable not to turnoff the headlights for short intervals
(for example, when the vehicle stops at
a traffic signal) . Even when the daytime
running lights are active (Canada only) ,
the xenon headlights do not turn on.
This way the life of the xenon head-
lights is not reduced.
.If the xenon headlight bulb is close to
burning out, the brightness will drasti-
cally decrease, the light will start
blinking, or the color of the light will
become reddish. If one or more of the
above signs appear, contact a NISSAN
dealer.
See “Headlight aiming control” later in this
section for information about adjusting the light
axis.
SIC3668
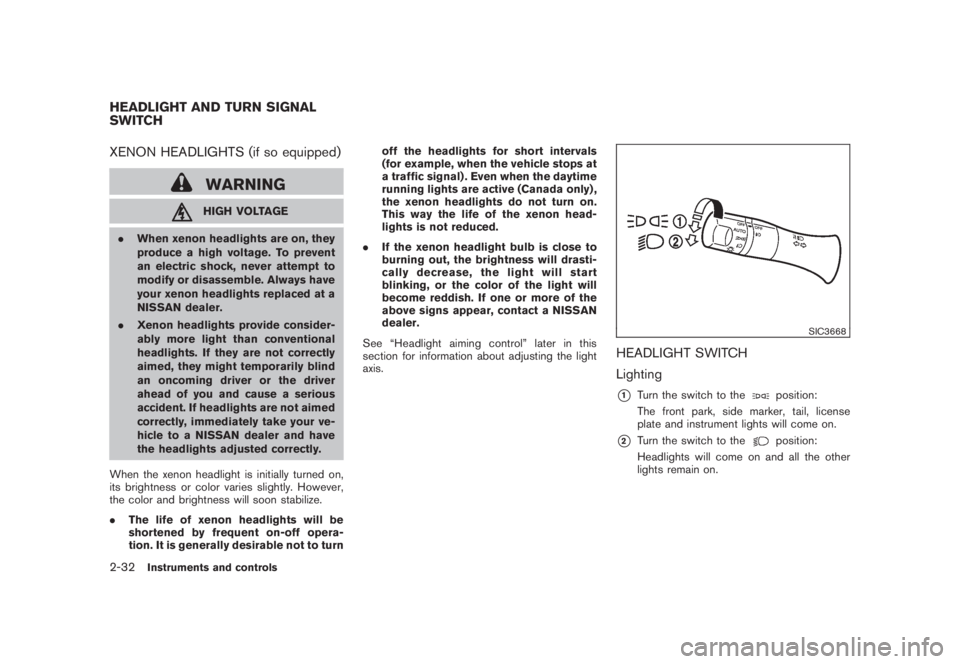
HEADLIGHT SWITCH
Lighting*1
Turn the switch to the
position:
The front park, side marker, tail, license
plate and instrument lights will come on.
*2
Turn the switch to the
position:
Headlights will come on and all the other
lights remain on.
HEADLIGHT AND TURN SIGNAL
SWITCH2-32
Instruments and controls
Page 106 of 444
Black plate (102,1)
Model "Z51-D" EDITED: 2008/ 6/ 26
SIC3670
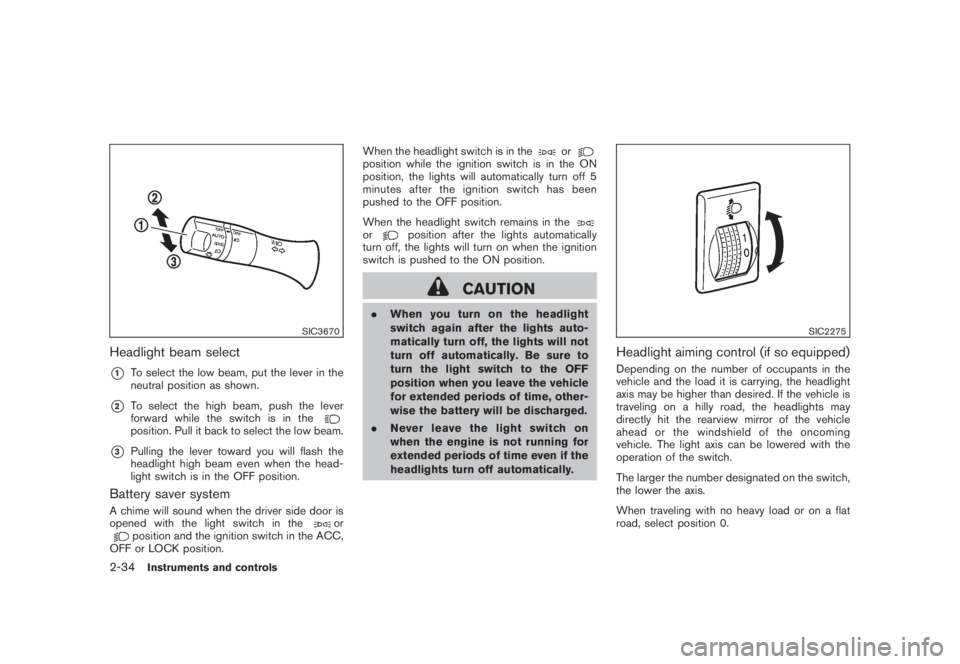
Headlight beam select*1
To select the low beam, put the lever in the
neutral position as shown.
*2
To select the high beam, push the lever
forward while the switch is in theposition. Pull it back to select the low beam.
*3
Pulling the lever toward you will flash the
headlight high beam even when the head-
light switch is in the OFF position.
Battery saver systemA chime will sound when the driver side door is
opened with the light switch in the
or
position and the ignition switch in the ACC,
OFF or LOCK position.When the headlight switch is in the
or
position while the ignition switch is in the ON
position, the lights will automatically turn off 5
minutesaftertheignitionswitchhasbeen
pushed to the OFF position.
When the headlight switch remains in theor
position after the lights automatically
turn off, the lights will turn on when the ignition
switch is pushed to the ON position.
CAUTION
.When you turn on the headlight
switch again after the lights auto-
matically turn off, the lights will not
turn off automatically. Be sure to
turn the light switch to the OFF
position when you leave the vehicle
for extended periods of time, other-
wise the battery will be discharged.
.Never leave the light switch on
when the engine is not running for
extended periods of time even if the
headlights turn off automatically.
SIC2275
Headlight aiming control (if so equipped)Depending on the number of occupants in the
vehicle and the load it is carrying, the headlight
axis may be higher than desired. If the vehicle is
traveling on a hilly road, the headlights may
directly hit the rearview mirror of the vehicle
ahead or the windshield of the oncoming
vehicle. The light axis can be lowered with the
operation of the switch.
The larger the number designated on the switch,
the lower the axis.
When traveling with no heavy load or on a flat
road, select position 0.
2-34
Instruments and controls
Page 107 of 444
Black plate (103,1)
Model "Z51-D" EDITED: 2008/ 6/ 26
WARNING
Xenon headlights are extremely bright
compared to conventional headlights. If
the xenon headlights hit the rearview
mirror of the vehicle ahead or the
windshield of oncoming vehicle, the
driver of these vehicles may have
difficulty driving because of the bright-
ness. Use the headlight aiming control
switch to lower the light axis. See
“XENON HEADLIGHTS” earlier in this
section for additional information.Daytime running light system (Canada
only)The daytime running lights automatically illumi-
nate when the engine is started with the parking
brake released. The daytime running lights
operate with the headlight switch in the OFF
position or in the
position. Turn the
headlight switch to the
position for full
illumination when driving at night.
If the parking brake is applied before the engine
is started, the daytime running lights do not
illuminate. The daytime running lights illuminate
once the parking brake is released. The daytime
running lights will remain on until the ignition
switch is pushed to the OFF position.
WARNING
When the daytime running light system
is active, tail lights on your vehicle are
not on. It is necessary at dusk to turn on
your headlights. Failure to do so could
cause an accident injuring yourself and
others.
SIC3585
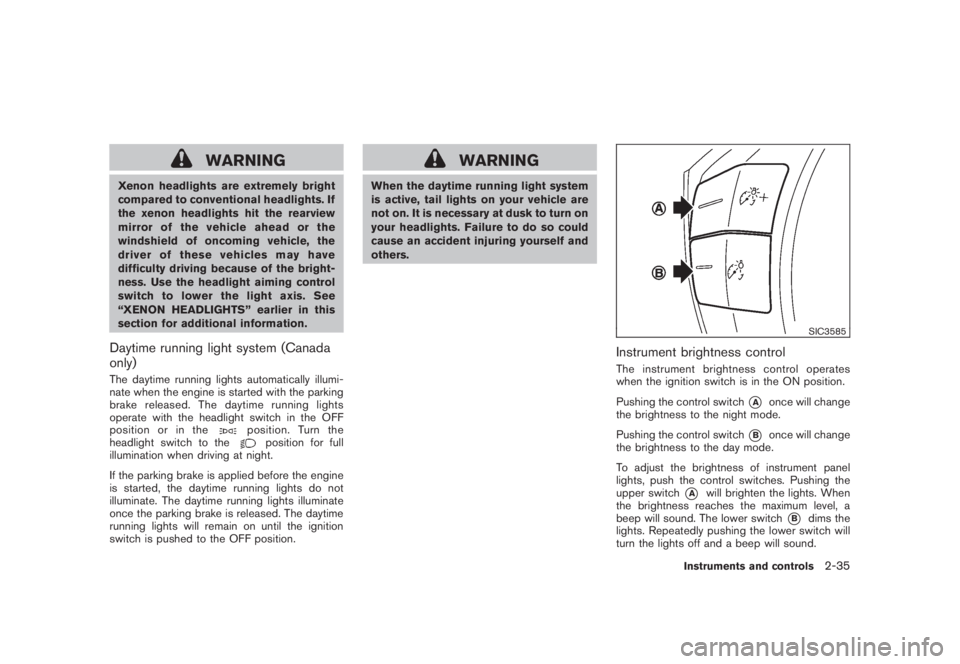
Instrument brightness controlThe instrument brightness control operates
when the ignition switch is in the ON position.
Pushing the control switch
*A
once will change
the brightness to the night mode.
Pushing the control switch
*B
once will change
the brightness to the day mode.
To adjust the brightness of instrument panel
lights, push the control switches. Pushing the
upper switch
*A
will brighten the lights. When
the brightness reaches the maximum level, a
beep will sound. The lower switch
*B
dims the
lights. Repeatedly pushing the lower switch will
turn the lights off and a beep will sound.
Instruments and controls
2-35
Page 109 of 444
Black plate (105,1)
Model "Z51-D" EDITED: 2008/ 6/ 26
.Turn signals do not work when the
hazard warning flasher lights are
on.
The flasher can be actuated with the ignition
switch in any position.
Some state laws may prohibit the use of
the hazard warning flasher switch while
driving.
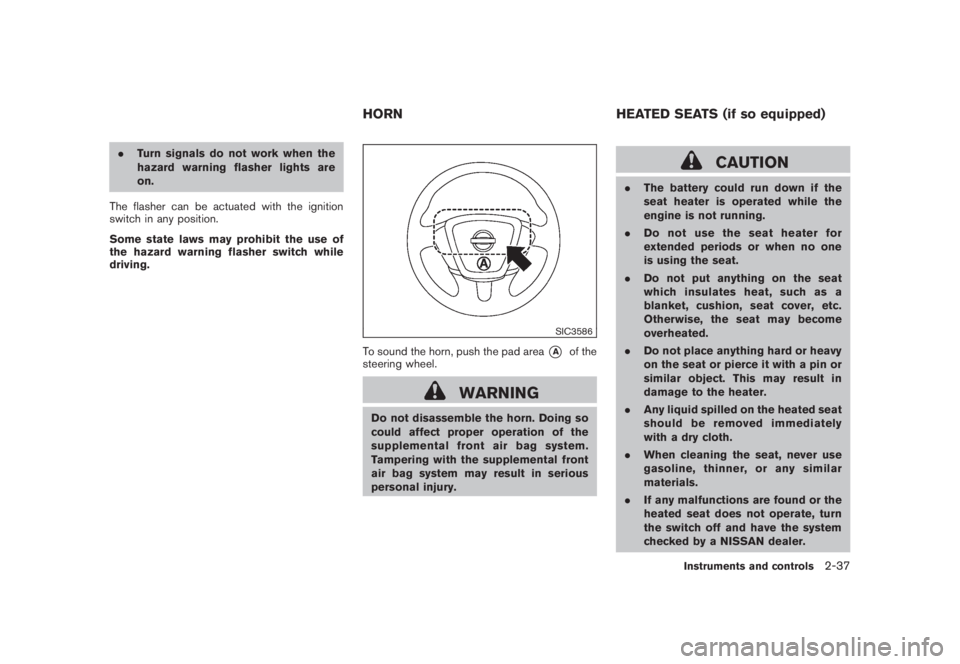
SIC3586
To sound the horn, push the pad area
*A
of the
steering wheel.
WARNING
Do not disassemble the horn. Doing so
could affect proper operation of the
supplemental front air bag system.
Tampering with the supplemental front
air bag system may result in serious
personal injury.
CAUTION
.The battery could run down if the
seat heater is operated while the
engine is not running.
.Do not use the seat heater for
extended periods or when no one
is using the seat.
.Do not put anything on the seat
which insulates heat, such as a
blanket, cushion, seat cover, etc.
Otherwise, the seat may become
overheated.
.Do not place anything hard or heavy
on the seat or pierce it with a pin or
similar object. This may result in
damage to the heater.
.Any liquid spilled on the heated seat
should be removed immediately
with a dry cloth.
.When cleaning the seat, never use
gasoline, thinner, or any similar
materials.
.If any malfunctions are found or the
heated seat does not operate, turn
the switch off and have the system
checked by a NISSAN dealer.
HORN HEATED SEATS (if so equipped)
Instruments and controls
2-37
Page 112 of 444

Black plate (108,1)
Model "Z51-D" EDITED: 2008/ 6/ 26
SIC3652
Console box — Type A
SIC3653
Console box — Type B
To use the power outlet, pull the cover as
illustrated.
CAUTION
.The outlet and plug may be hot
during or immediately after use.
.Do not use with accessories that
exceed a 12 volt, 120W (10A) power
draw. Do not use double adapters or
more than one electrical accessory.
.Use power outlet with the engine
running to avoid discharging the
vehicle battery.
.Avoid using power outlet when the
air conditioner, headlights or rear
window defroster is on.
.This power outlet is not designed
for use with a cigarette lighter unit.
.Push the plug in as far as it will go.
If good contact is not made, the plug
may overheat or the internal tem-
perature fuse may open.
.Before inserting or disconnecting a
plug, be sure the electrical acces-
sory being used is turned OFF.
.When not in use, be sure to close
the cap. Do not allow water tocontact the outlet.
2-40
Instruments and controls
Page 332 of 444
Black plate (330,1)
Model "Z51-D" EDITED: 2008/ 6/ 26
suitable tool.
5. Push the selector lever button
*C
and move
the selector lever to the N (Neutral) position
*D
while holding down the shift lock
release.
Push the ignition switch to the ON position to
unlock the steering wheel. The vehicle may be
moved to the desired location.
If the battery is discharged completely, the
steering wheel cannot be unlocked. Do not
move the vehicle with the steering wheel locked.
Replace the removed shift lock release cover
after the operation.
If the selector lever cannot be moved out of the
P (Park) position, have a NISSAN dealer check
the CVT system as soon as possible.
WARNING
If the selector lever cannot be moved
from the P (Park) position while the
engine is running and the brake pedal
is depressed, the stop lights may not
work. Malfunctioning stop lights could
cause an accident injuring yourself and
others.
WARNING
.Be sure the parking brake is fully
released before driving. Failure to
do so can cause brake failure and
lead to an accident.
.Do not release the parking brake
from outside the vehicle.
.Do not use the gear shift in place of
the parking brake. When parking, be
sure the parking brake is fully
engaged.
.Do not leave children unattended in
a vehicle. They could release the
parking brake and cause an acci-
dent.
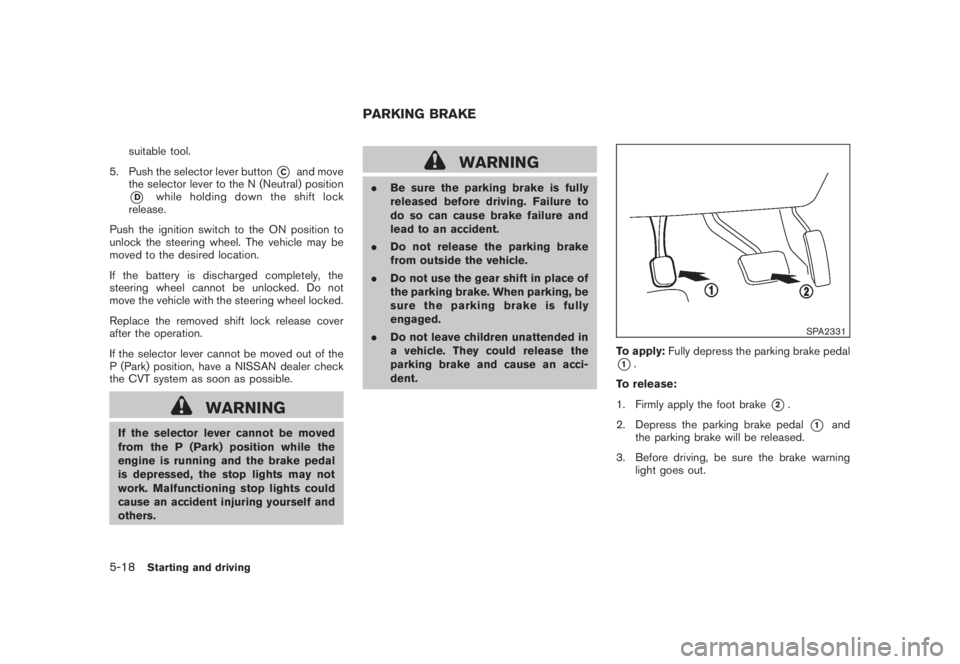
SPA2331
To apply:Fully depress the parking brake pedal*1.
To release:
1. Firmly apply the foot brake
*2.
2. Depress the parking brake pedal
*1
and
the parking brake will be released.
3. Before driving, be sure the brake warning
light goes out.
PARKING BRAKE
5-18
Starting and driving